
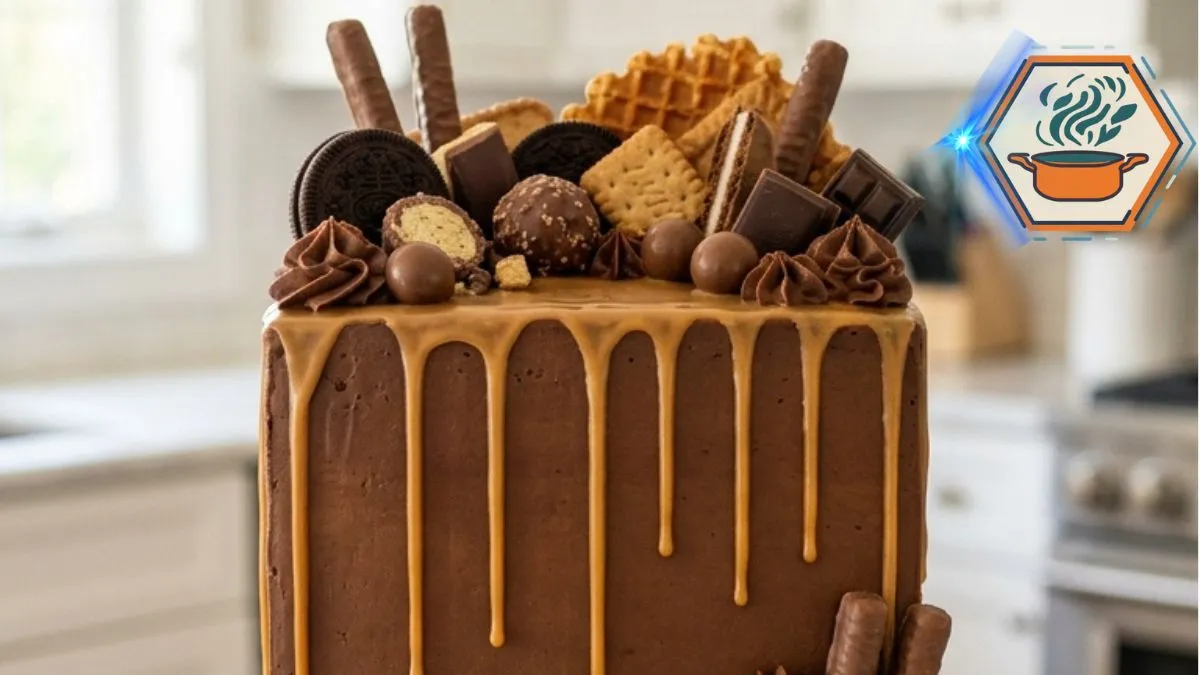
The first thing people notice about a Golden Ganache Chocolate Crunch Celebration Cake is its height. Then they see the golden drips. A second later, their eyes reach the crown: chocolate sandwich cookies, crisp waffle biscuits, wafer fingers, truffle-style bites, chocolate balls, and generous swirls of chocolate frosting.
Then you cut it.
The decorative crunch gives way to soft chocolate cake and creamy frosting. That contrast is the reason this cake works so well. It is not simply a chocolate cake covered with candy. Every layer adds a different texture. If you enjoy learning the little details that make homemade desserts better, the RecipesMind kitchen has more baking guides and recipes to try.
Chocolate cake can also be harder to judge in the oven because browning is difficult to see against cocoa. King Arthur Baking recommends looking at several signs together, including the edges, surface, tester, and spring-back of the center. Their cake-baking guide also covers useful layer-cake techniques such as even baking, frosting, and crumb coating.
The dramatic appearance may suggest a difficult bakery project. It does require patience, but not professional pastry skills. The real secrets are simpler: level layers, fully cooled cake, stable frosting, chilled buttercream before the drip, and ganache at the correct consistency.
Affiliate disclosure: As an Amazon Associate I earn from qualifying purchases. This article may contain affiliate links to kitchen tools I find useful for preparing this recipe.
jump to
Why This Chocolate Celebration Cake Works
Imagine bringing this cake to the table at a birthday dinner.
From a distance, it looks polished. Up close, however, it has the warmth of a homemade cake. One ganache drip is longer than another. A cookie leans slightly sideways. Chocolate balls fill the gaps between tall wafer pieces.
That slight irregularity is intentional.
The goal is not geometric perfection. The goal is controlled abundance.
The cake itself provides a soft foundation. Vegetable oil helps the crumb stay tender. Cocoa gives it depth, while hot coffee strengthens the perception of chocolate without turning the cake into a coffee dessert.
The frosting has another job. Besides adding flavor, it must support the decorations.
Then there is the golden ganache. Caramelized white chocolate gives the cake its warm golden contrast. Finally, crisp cookies and wafers prevent every bite from having the same soft texture.
Ingredients for Golden Ganache Chocolate Crunch Celebration Cake
Chocolate Cake
- 2 cups (240 g) all-purpose flour
- 3/4 cup (about 65–75 g) natural unsweetened cocoa powder
- 1 3/4 cups (350 g) granulated sugar
- 2 teaspoons baking powder
- 1 1/2 teaspoons baking soda
- 1/2 teaspoon fine salt
- 2 large eggs, room temperature
- 1 cup (240 ml) whole milk, room temperature
- 1/2 cup (120 ml) neutral vegetable oil
- 2 teaspoons vanilla extract
- 1 cup (240 ml) hot coffee or hot water
For this formula, natural cocoa is the most predictable starting point. Natural and Dutch-process cocoa have different acidity, which can matter when baking soda is part of a recipe’s leavening system.
Chocolate Frosting
- 1 cup (226 g) unsalted butter, softened
- 3 1/2 cups (395 g) powdered sugar, sifted
- 3/4 cup (about 65–75 g) unsweetened cocoa powder, sifted
- 1/3 cup (80 ml) heavy whipping cream
- 2 teaspoons vanilla extract
- 1/4 teaspoon fine salt
Golden Ganache
- 8 oz (225 g) caramelized white chocolate, finely chopped
- 1/2 cup (120 ml) heavy whipping cream
- 1 teaspoon vanilla extract
Chocolate Swirls
- 1/2 cup (113 g) unsalted butter, softened
- 1 1/2 cups (170 g) powdered sugar
- 1/3 cup (about 30 g) unsweetened cocoa powder
- 2–3 tablespoons heavy whipping cream
Crunchy Chocolate Crown
Have more decorations ready than you expect to use:
- Chocolate sandwich cookies
- Chocolate-coated wafer fingers
- Crisp waffle cookies
- Chocolate-covered biscuit pieces
- Truffle-style chocolate bites
- Milk chocolate balls
- Broken milk chocolate pieces
You can change the brands without changing the design. What matters most is having different heights, shapes, and textures.
Equipment That Makes a Real Difference
You can make this cake with basic equipment. Still, this particular recipe involves several long mixing stages.
A powerful stand mixer becomes useful when buttercream is something you make regularly. It keeps your hands free while the frosting whips and is also useful for bread dough, cookie dough, whipped cream, and many other recipes. For frequent home bakers, that makes it a more versatile investment than buying another cake-specific gadget.
See KitchenAid Artisan 5-Quart stand mixers on Amazon
You will also need:
- Two 8-inch square cake pans
- Parchment paper
- Cooling racks
- Mixing bowls
- Whisk
- Serrated knife
- Offset spatula
- Cake scraper
- Piping bag and large star tip
- Sturdy cake board
A digital scale is strongly recommended. Equal quantities of batter give you more even layers, and weighing flour is more repeatable than packing it into measuring cups.
Bake Moist, Even Chocolate Layers
Heat the oven to 350°F (175°C).
Place a rack near the center.
Grease two 8-inch square cake pans. Cut parchment squares to cover the bottoms, place them inside, then lightly grease the parchment.
Do not dismiss this little step.
Chocolate cake is tender. Square corners can stick and tear when you turn the layers out. Parchment makes release much safer.
Whisk together the flour, cocoa, sugar, baking powder, baking soda, and salt. Break up every visible cocoa lump.
In another bowl, combine the eggs, milk, oil, and vanilla.
Pour the wet mixture into the dry ingredients. Mix only until combined.
Slowly stir in the hot coffee.
At this stage, first-time bakers sometimes panic because the batter looks thin. Do not add extra flour. The loose consistency is expected.
Coffee is optional. Hot water works too.
Divide the batter evenly between the pans. If you own a kitchen scale, place each prepared pan on it and divide by weight rather than judging by eye.
Bake for approximately 28–34 minutes.
Start checking early.
Chocolate cake does not give you the same obvious color cues as vanilla cake. Look for edges beginning to pull slightly away, a matte surface, a center that springs back after a gentle touch, and a tester without wet batter. King Arthur Baking similarly recommends combining several signs rather than trusting one test alone.
A thermometer can be useful elsewhere in baking, but don’t depend on one exact internal temperature here. King Arthur notes that cake temperature varies with the formula.
Leave the layers in their pans for about 10–15 minutes.
Carefully turn them onto cooling racks and remove the parchment.
Then wait until they are completely cool.
That wait matters.
Frosting even a slightly warm cake can soften buttercream and cause the layers to move.
Make Fluffy Chocolate Frosting
Put the softened butter into a large mixing bowl.
Beat for about 2–3 minutes until creamy and lighter.
Sift the powdered sugar and cocoa.
Add them gradually with the mixer running on low speed. Scrape the bowl when needed.
Pour in the cream, vanilla, and salt.
Continue beating until the frosting becomes smooth and fluffy.
This is one of the places where a stand mixer earns its space in a kitchen. You can let the frosting whip while preparing your cooled layers instead of holding a hand mixer through several batches. That is particularly useful if celebration cakes are something you make often rather than once a year.
Test the finished frosting with your spatula.
It should hold its shape but spread without dragging cake crumbs.
Too stiff? Add cream one teaspoon at a time.
Too loose? Add a small amount of sifted powdered sugar.
Do not make large corrections at once.
Build a Tall Square Cake That Doesn’t Lean
Look at each cooled layer from eye level.
If one has a noticeable dome, trim it with a serrated knife. The heavy chocolate decorations added later make a level foundation particularly important.
Put a small dab of frosting on your cake board.
Place the first layer on top. The frosting underneath acts like glue.
Spread an even layer of chocolate frosting over the cake. Avoid piling most of it in the center.
Place the second cake layer on top.
Now look from all four sides. Correct the alignment before chilling.
Next comes the crumb coat.
Spread a very thin layer of frosting over the top and sides. You may still see cake through it. That is fine.
King Arthur Baking recommends a thin crumb coat followed by about a 20-minute chill, which traps loose crumbs and creates a firmer surface for the final frosting.
Refrigerate the cake for about 20 minutes.
Apply the final chocolate frosting.
Use a scraper to straighten each side. Keep the square corners visible, but don’t obsess over perfectly sharp edges. A lightly handmade surface suits this cake.
Return the cake to the refrigerator for another 20–30 minutes.
The frosting should feel firm before the golden drip goes on.
Make the Golden Ganache at the Right Consistency
This is the stage that can transform the cake—or ruin the finish in a few seconds.
Finely chop the caramelized white chocolate.
Put it in a heatproof bowl.
Heat the cream until steaming but not aggressively boiling.
Pour it over the chopped chocolate. Leave it untouched for about 2 minutes.
Then stir slowly, starting in the center.
Continue until glossy.
Standard ganache is fundamentally an emulsion of chocolate and liquid, and its final thickness changes with the ratio of chocolate to liquid. For this cake, however, consistency at the moment of application matters just as much as the formula.
Do not immediately pour warm ganache onto your chilled buttercream.
Let it cool.
The correct drip should move slowly from a spoon rather than running like water.
Before touching the visible sides, test a single drip on the back of the cake.
If it races to the cake board, stop. The ganache is too warm or thin.
If it barely moves, it has become too thick.
This temperature-sensitive stage is where a good instant-read thermometer can become useful beyond this recipe. It can also serve you for bread, caramel, meat, candy, frying, and other temperature-sensitive cooking rather than being a single-purpose cake purchase.
See Thermapen ONE instant-read thermometers on Amazon
For this drip, however, always combine temperature awareness with the spoon-flow test. Chocolate composition varies, so visual consistency remains important.
Create Natural Golden Drips
Once the ganache moves slowly, spoon a small amount onto the upper edge.
Let gravity make the first drip.
Move a little farther along the edge and make another.
Vary the amount.
One drip can be short. The next can travel farther. Another can stop somewhere between them.
That variation recreates the natural look of the reference cake.
When the perimeter is finished, add a thin layer of golden ganache over the top.
Don’t flood it.
You want a smooth golden surface that still leaves enough room for frosting swirls and decorations.
If caramel techniques interest you, our guide to caramelizing sugar explains another important skill for caramel-flavored desserts.
Create the Chocolate Crunch Crown
Now the quiet chocolate cake becomes a celebration cake.
Prepare the chocolate swirl frosting. Beat the butter, powdered sugar, cocoa, and enough cream to create a firm piping consistency.
Fit a piping bag with a large star tip.
Pipe irregular chocolate swirls around portions of the upper edge.
Then stop thinking about symmetry.
Begin with the tallest decorations.
Insert two or three chocolate-coated wafer fingers near the center and back. Add large waffle-cookie pieces vertically, with slightly different angles.
Next come the sandwich cookies.
Face some forward. Turn others slightly. Partially hide one behind a taller wafer.
Add chocolate-covered biscuit pieces.
Place truffle-style bites around their bases.
Fill the remaining gaps with milk chocolate balls and broken chocolate.
The trick is to decorate large to small.
If you scatter small chocolates first, you will struggle to find secure places for tall wafers later.
Keep taller pieces toward the center and rear. Let smaller pieces move toward the front. This creates depth when the cake is viewed straight on.
The decorations are heavy, so avoid pushing everything into soft ganache alone. Anchor taller pieces into firm frosting wherever possible.
Protect the Crunch
There is another detail that many decorative cake recipes forget.
Cookies absorb moisture.
A crisp waffle cookie pushed into buttercream and left overnight will not have exactly the same crunch the next day.
If texture matters, prepare the cake and ganache earlier, but add the most moisture-sensitive wafers and cookies closer to serving.
Use the frosting primarily as an anchor. Do not unnecessarily cover entire biscuits.
For another recipe where controlling moisture is important, read our guide on how to keep madeleines moist.
Finish the Bottom Like the Reference Cake
Don’t stop after decorating the top.
Pipe several small chocolate swirls along one bottom corner.
Lean one or two wafer fingers against the cake.
Add a few chocolate balls and a flat chocolate piece.
Keep this cluster smaller than the crown.
This detail creates visual balance and helps reproduce the abundant look without covering the beautiful golden drips.
A Smarter Way to Transport This Cake
Imagine spending hours getting those tall wafers exactly where you want them, only to discover that your regular cake container is too short.
For a heavily decorated celebration cake, transport is often the forgotten problem.
If you regularly make birthday cakes for family, school events, parties, or friends, a tall reusable cake carrier can be more useful than another decorating accessory. Check the internal height and width carefully before ordering; the finished decoration must fit without touching the lid.
See tall cake carriers on Amazon
For this particular design, you can also transport the chilled cake before inserting the tallest vertical wafers, then finish those decorations at the destination.
An Oven Upgrade for Frequent Bakers
One uneven cake is frustrating. Repeatedly uneven cakes can point to something bigger: oven behavior.
Home ovens cycle above and below their set temperature, and some have stronger hot spots than others. Rotating pans can help in certain ovens, but understanding your own equipment matters more.
If baking is becoming a regular hobby and you also want an appliance useful for roasting, reheating, toast, pizza, and other everyday cooking, a premium countertop oven is a broader purchase than another cake-only tool.
See Breville Smart Oven Air Fryer Pro models on Amazon
This cake does not require one. Your normal oven is perfectly suitable. It is simply the kind of higher-use kitchen appliance that can make more sense for a frequent baker than accumulating many inexpensive single-purpose gadgets.
Common Mistakes to Avoid
Pouring hot ganache over buttercream: Warm ganache can melt the outer frosting and create uncontrolled drips.
Frosting warm cake: Even slight warmth can soften the filling and make layers slide.
Skipping the crumb coat: Dark chocolate crumbs can easily contaminate the final frosting.
Making every drip identical: Different lengths look more natural.
Using decorations of one height: You lose the dramatic layered crown.
Adding wafers too early: They gradually absorb moisture.
Overbaking the layers: Begin checking at the early end of the stated baking window.
Adding flour because the batter looks thin: The batter is supposed to be fluid.
Trying to level warm layers: Wait until the cake has cooled completely.
Make-Ahead Plan
This cake becomes much easier when you don’t try to do everything at once.
One day before serving:
- Bake the chocolate layers.
- Cool completely.
- Wrap well.
- Prepare the frosting if desired.
Morning of serving:
- Level and stack the layers.
- Apply the crumb coat.
- Chill.
- Apply the final frosting.
- Chill again.
- Prepare and apply the golden ganache.
Closer to serving:
- Pipe the chocolate swirls.
- Add crisp cookies and wafers.
- Add chocolates and truffle-style bites.
- Build the small bottom decoration.
- Chill briefly to stabilize the cake.
This schedule also reduces the risk of soft cookies.
How to Store and Serve It
Keep the decorated cake covered and refrigerated when necessary, especially if your room is warm.
Butter-based frosting becomes firm in the refrigerator. For a softer eating texture, allow the cake to lose some of that refrigerator chill before serving.
Remove any very tall decorations directly in the path of your knife.
Use a long, sharp knife for clean portions. Wipe the blade between cuts if presentation matters.
For a cake this rich, modest slices are usually enough.
Frequently Asked Questions
Can I make Golden Ganache Chocolate Crunch Celebration Cake the day before?
Yes. In fact, splitting the work across two days makes assembly easier. For maximum crunch, wait to add the crisp wafers and cookies until closer to serving.
Can I use hot water instead of coffee?
Yes. Replace the coffee with the same amount of hot water. The cake will still work.
Why did my golden ganache run all the way down?
It was probably too warm or too fluid when applied. Let it thicken and always test one drip at the back of a chilled cake first.
What if the ganache becomes too thick?
Warm it very gently and stir. Small changes are better than overheating the whole batch.
Why does my layer cake lean?
Uneven layers and uneven filling are common causes. Level the cakes, spread filling evenly, align the layers from all four sides, and chill before final frosting.
Is a crumb coat really necessary?
It isn’t mandatory, but it is particularly useful on chocolate layer cakes because dark crumbs are easy to see in the final finish. A thin coat followed by chilling creates a cleaner base.
Can I replace caramelized white chocolate with regular white chocolate?
You can make a white-chocolate drip, but the flavor and color will change. Caramelized white chocolate provides the warm caramel tone that gives this cake its signature contrast.
How do I keep the cookies crunchy?
Add them relatively close to serving. Minimize contact with moist frosting or ganache and keep the finished cake covered during storage.
How do I make the cake look as abundant as the reference design?
Use more decorations than you think you need, but vary their size. Start with tall wafers and waffle cookies. Add medium cookies and truffles next. Fill small spaces with chocolate balls and broken pieces.
Print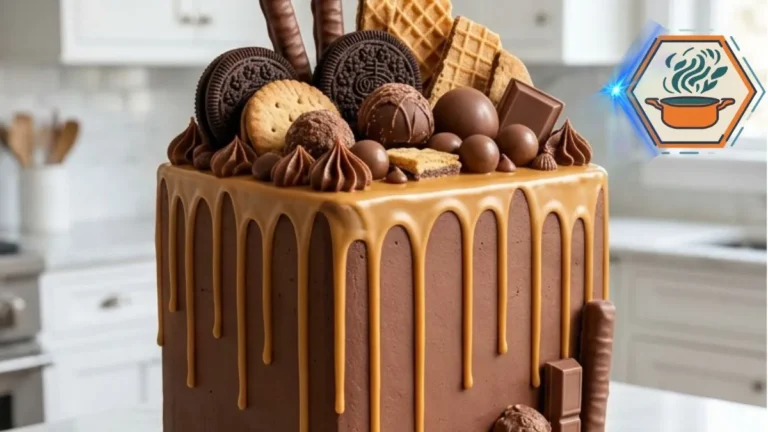
Golden Ganache Chocolate Crunch Celebration Cake
A tall, moist chocolate layer cake covered with silky chocolate frosting, golden caramelized white chocolate ganache, crisp cookies, chocolate-coated wafers, truffle-style bites, and chocolate swirls. A rich celebration cake with creamy, soft, and crunchy textures in every slice.
- Total Time: About 3 hours
- Yield: 16 servings
Ingredients
Chocolate Cake
- 2 cups (240 g) all-purpose flour
- 3/4 cup (70 g) natural unsweetened cocoa powder
- 1 3/4 cups (350 g) granulated sugar
- 2 teaspoons baking powder
- 1 1/2 teaspoons baking soda
- 1/2 teaspoon fine salt
- 2 large eggs, room temperature
- 1 cup (240 ml) whole milk, room temperature
- 1/2 cup (120 ml) neutral vegetable oil
- 2 teaspoons vanilla extract
- 1 cup (240 ml) hot strong coffee or hot water
Chocolate Frosting
- 1 cup (226 g) unsalted butter, softened
- 3 1/2 cups (395 g) powdered sugar, sifted
- 3/4 cup (70 g) natural unsweetened cocoa powder, sifted
- 1/3 cup (80 ml) heavy whipping cream
- 2 teaspoons vanilla extract
- 1/4 teaspoon fine salt
Golden Chocolate Ganache
- 8 oz (225 g) caramelized white chocolate, finely chopped
- 1/2 cup (120 ml) heavy whipping cream
- 1 teaspoon vanilla extract
Chocolate Swirls
- 1/2 cup (113 g) unsalted butter, softened
- 1 1/2 cups (170 g) powdered sugar
- 1/3 cup (30 g) natural unsweetened cocoa powder
- 2–3 tablespoons heavy whipping cream
Crunch Topping
- 6 chocolate sandwich cookies
- 6 chocolate-coated wafer fingers
- 4 crisp waffle-cookie pieces
- 4 chocolate-covered biscuit pieces
- 6 small truffle-style chocolate bites
- 1/2 cup milk chocolate balls
- 2 oz (55 g) milk chocolate, broken into pieces
I’ve quantified the topping here rather than writing simply “cookies as needed.” That’s important if you want the recipe to be genuinely repeatable and the nutrition estimate to have some meaning.
Instructions
- Preheat the oven to 350°F (175°C). Position a rack in the center. Grease two 8-inch square cake pans. Line the bottoms with parchment and lightly grease the parchment.
- Whisk flour, cocoa powder, sugar, baking powder, baking soda, and salt in a large bowl.
- In a second bowl, whisk eggs, milk, vegetable oil, and vanilla. Add to the dry ingredients and mix just until combined.
- Slowly stir in the hot coffee or water. The batter will be thin. This is normal; do not add additional flour.
- Divide the batter evenly between the two pans. Bake for 28–34 minutes, or until the centers spring back lightly and a tester comes out without wet batter.
- Cool in the pans for 10–15 minutes. Turn onto wire racks, remove the parchment, and cool completely before frosting.
- Make the frosting. Beat softened butter for 2–3 minutes. Gradually add sifted powdered sugar and cocoa. Add cream, vanilla, and salt. Beat until smooth and fluffy.
- Level the cooled layers if necessary. Place the first layer on a sturdy cake board and cover it evenly with frosting. Add the second layer.
- Apply a thin crumb coat over the entire cake. Refrigerate for about 20 minutes, until firm.
- Cover the top and sides with the remaining chocolate frosting. Smooth the sides while keeping a slightly handmade finish. Chill for another 20–30 minutes.
- For the golden ganache, place finely chopped caramelized white chocolate in a heatproof bowl. Heat 1/2 cup cream until steaming but not vigorously boiling. Pour it over the chocolate and leave for 2 minutes.
- Stir slowly from the center until smooth. Add vanilla. Allow the ganache to cool until it flows slowly from a spoon.
- Test one drip on the back of the chilled cake. If it runs quickly to the bottom, wait longer. Once the consistency is right, create drips of different lengths around the upper edge.
- Spread a thin layer of golden ganache over the top.
- Make the chocolate swirl frosting by beating butter, powdered sugar, cocoa, and enough cream to create a firm piping consistency. Pipe irregular swirls around the upper perimeter.
- Build the crown with the tallest wafers and waffle pieces first. Add sandwich cookies and biscuit pieces, followed by truffle-style chocolates. Fill smaller gaps with chocolate balls and broken chocolate.
- Add a smaller cluster of frosting swirls, wafers, and chocolates around one bottom corner to recreate the decorated look.
- Chill for 20–30 minutes to stabilize. For the crunchiest texture, add the most moisture-sensitive cookies and wafers as close to serving time as practical.
Notes
- Never apply hot ganache directly to buttercream.
- Test the ganache on the back of the cake first.
- Completely cool the cake before frosting.
- Weighing the batter helps create layers of equal height.
- Add crisp cookies and wafers near serving time to limit moisture absorption.
- Coffee deepens the chocolate flavor but can be replaced 1:1 with hot water.
- Anchor tall decorations in firm frosting rather than relying only on soft ganache.
- Topping brands and sizes vary, so buy slightly more decorations than the measured quantities if you want the same abundant visual effect.
- Nutrition information is an estimate and will vary substantially according to the chocolates, cookies, wafers, and portion size used.
- Prep Time: 1 hour
- Additional Time: 1 hour 30 minutes cooling/chilling
- Cook Time: 28–34 minutes
- Category: Dessert
- Method: Baking
- Cuisine: American
The Moment You Finally Cut the Cake
After all the mixing, chilling, smoothing, waiting, dripping, and decorating, there is a moment when this cake stops being a project.
Someone asks for the first slice.
The knife breaks through a crisp cookie. It passes the golden ganache, then the chocolate frosting. Underneath are the soft chocolate layers you carefully kept from overbaking.
On the plate, you finally see why all those textures mattered.
The Golden Ganache Chocolate Crunch Celebration Cake isn’t meant to look restrained. It should feel generous. Tall wafers, tilted cookies, glossy golden drips, soft cake, creamy chocolate frosting, and little chocolates filling every available space are part of its personality.
Don’t chase perfect symmetry.
Get the cake structure right. Let the layers cool. Give the crumb coat time to set. Wait until the ganache moves slowly. Build your decorations from tall to small.
Then allow the final cake to look just a little bit wild.
That’s exactly what makes it feel like a celebration.