
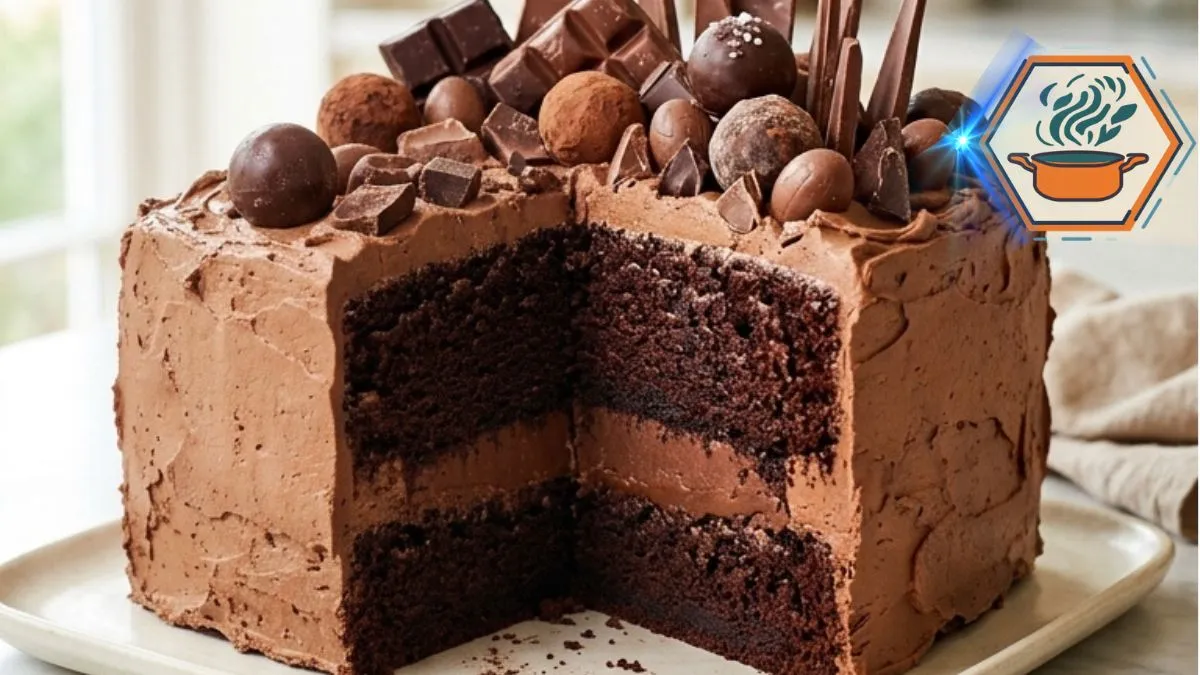
There is something special about carrying a cake to the table and watching everyone look at it before anyone even reaches for a knife. That is exactly what this Chocolate Treasure Cake is made for. Beneath its dramatic pile of chocolate pieces are two soft chocolate cake layers, a thick fudge-style filling, and creamy chocolate buttercream. Cut the first square slice and you reveal the part that matters most: a dark, moist crumb wrapped around a generous band of chocolate filling.
The cake looks extravagant, but the method is surprisingly approachable. The secret is not simply adding more chocolate. Good chocolate cake depends on moisture, correct mixing, pan preparation, and knowing when to stop baking. The baking resources at King Arthur Baking are particularly useful for understanding ingredient measurement and cake technique. Their chocolate cake recipes also use coffee or water alongside cocoa, a combination that works well in rich chocolate cakes.
Buttermilk is another important part of this recipe. Its acidity works naturally with baking soda while adding tenderness and a mild tang that balances all that chocolate. If you are interested in the science behind substitutions, King Arthur Baking’s buttermilk guide explains why replacing buttermilk with plain milk is not always a straight swap in recipes containing baking soda.
The result here is a celebration cake that looks almost like a box of chocolate treasures has been opened over the top. Yet every decoration has a purpose and a place.
Affiliate disclosure: As an Amazon Associate I earn from qualifying purchases. This article may contain affiliate links to kitchen tools I find useful for preparing this recipe.
jump to
Why This Chocolate Treasure Cake Works
A beautiful chocolate cake is disappointing if the inside is dry. That was the first problem to solve with this recipe.
The combination of buttermilk, vegetable oil, cocoa, eggs, and hot coffee creates a soft crumb with enough structure to support the filling. Oil is particularly useful because it remains liquid at room temperature. That helps the cake feel tender even after chilling.
The hot coffee has another job. It brings out the cocoa flavor without making the finished cake taste like a cup of coffee. Coffee is also used in other established chocolate cake formulas, including chocolate cakes from King Arthur Baking.
Then there is the filling.
Instead of putting a thin swipe of frosting between the layers, this cake gets a clearly visible chocolate center. That creates the striking cross-section seen when a slice is removed.
Finally, the decoration is intentionally imperfect.
Chocolate bars, rounded chocolates, eggs, and shards are arranged at different heights. You do not need advanced piping skills. In fact, perfectly symmetrical decoration would take away some of this cake’s charm.
Ingredients You’ll Need
This recipe makes one two-layer 9-inch square cake, about 12 to 16 servings.
For the chocolate cake
- 2¼ cups (270 g) all-purpose flour
- 1¾ cups (350 g) granulated sugar
- ¾ cup (64 g) unsweetened cocoa powder
- 2 teaspoons baking powder
- 1½ teaspoons baking soda
- ½ teaspoon fine salt
- 3 large eggs, preferably room temperature
- 1 cup (240 ml) buttermilk, room temperature
- ½ cup (120 ml) neutral vegetable oil
- 2 teaspoons vanilla extract
- ¾ cup (180 ml) freshly brewed hot coffee
Use regular unsweetened cocoa rather than sweetened drinking chocolate.
The batter will look thinner after the coffee goes in. That is normal. Do not add extra flour to thicken it.
For the fudge-style chocolate filling and frosting
- 1½ cups (340 g) unsalted butter, softened
- 5 cups (600 g) powdered sugar, sifted if lumpy
- ¾ cup (64 g) unsweetened cocoa powder
- 6 oz (170 g) semisweet chocolate, melted and cooled
- ½ cup (120 ml) heavy cream
- 2 teaspoons vanilla extract
- ¼ teaspoon fine salt
The original ingredient list called for a pinch of salt. I prefer giving you an actual measurement. ¼ teaspoon is enough to cut the sweetness without making the buttercream salty.
For the chocolate treasure topping
Use about 8 to 10 oz (225 to 285 g) total.
Choose a mixture of:
- Broken milk chocolate bars
- Dark chocolate bars
- Small chocolate eggs
- Round chocolate truffles
- Thin chocolate shards
- Small chocolate squares
Using different shapes matters more than buying many varieties.
Equipment That Makes a Real Difference
You can make this cake with basic baking equipment. Still, a few tools make the result much more predictable.
For regular bakers, a stand mixer is one purchase that can earn its counter space. It makes whipping a large batch of buttercream much easier and can handle many other doughs and batters. You can check KitchenAid stand mixers on Amazon before deciding whether the investment makes sense for your kitchen.
Square cakes also reveal uneven layers quickly. A quality digital kitchen scale lets you divide batter by weight instead of guessing. OXO digital kitchen scales on Amazon are worth comparing if you bake often.
For decorating, I would spend money on a good rotating cake stand before buying dozens of piping tips. A sturdy turntable makes coating the four sides much easier. You can compare Ateco cake decorating turntables on Amazon.
Finally, serious home bakers may appreciate a reliable instant-read thermometer. Beyond cake, it is useful for caramel, bread, meat, chocolate work, and many everyday recipes. ThermoWorks instant-read thermometers on Amazon are one higher-end option to compare.
How to Make Chocolate Treasure Cake
1. Prepare the pans properly
Preheat the oven to 350°F (175°C).
Grease two 9-inch square cake pans lightly. Cut parchment paper to fit the bottoms, place it inside, then lightly grease the parchment.
Do not skip this step. A square cake has four corners that can catch when you turn it out.
If you only own one square pan, bake the layers separately. Do not leave half of a fully mixed batter sitting for a long period while the first layer bakes, though. Because the leaveners begin reacting after mixing, two pans are strongly preferred.
2. Combine the dry ingredients
Into a large bowl, sift or thoroughly whisk:
- Flour
- Sugar
- Cocoa
- Baking powder
- Baking soda
- Salt
Break up every visible cocoa lump.
This small detail matters because dry cocoa pockets can remain surprisingly stubborn once liquid is added.
3. Add the wet ingredients
Add the eggs, buttermilk, oil, and vanilla.
Mix on low speed until the dry ingredients are mostly moistened. Scrape the bottom and sides of the bowl.
Mix briefly again.
Do not beat the batter for several minutes. Once flour becomes hydrated, unnecessary mixing can work against the tender texture we want.
4. Add the hot coffee
With the mixer on its lowest setting, slowly pour in ¾ cup hot coffee.
The coffee should be hot but does not need to be violently boiling.
Continue mixing just until the batter looks smooth and even.
At this point, it will be fluid. That loose consistency is expected.
If you love baking with chocolate and fruit together, our strawberry-filled chocolate cake guide is another useful idea for your dessert collection.
5. Divide the batter
For the most even layers, place each prepared pan on a digital scale and divide the batter by weight.
Otherwise, alternate scoops between the pans until they look equal.
Tap each pan gently on the counter once or twice to release large trapped air bubbles.
6. Bake
Bake for approximately 28 to 34 minutes.
Start checking around minute 28.
Insert a toothpick into the center. You are looking for a few moist crumbs, not wet batter.
Do not wait for the cake to become completely dry around the tester. Chocolate cake can move from moist to overbaked surprisingly quickly.
Cool the layers in their pans for about 10 to 15 minutes. Carefully turn them onto wire racks and remove the parchment.
Let them cool completely before frosting.
Warm cake and buttercream are bad partners.
How to Make Thick Chocolate Fudge Buttercream
First, melt the semisweet chocolate gently. Let it cool until it is no longer warm but remains fluid.
Meanwhile, beat the softened butter for about 2 to 3 minutes until creamy.
Add the powdered sugar and cocoa gradually. Begin on low speed unless you want your kitchen covered in cocoa dust.
Once incorporated, add:
- Melted chocolate
- Heavy cream
- Vanilla
- Salt
Beat until thick, creamy, and spreadable.
The frosting should hold soft ridges when lifted with a spatula.
If it feels too stiff, add heavy cream 1 tablespoon at a time.
If it becomes too loose, chill it for 10 to 15 minutes before adding more sugar. Adding cups of extra powdered sugar can make buttercream unpleasantly sweet.
For more cake techniques, see our guide to caramelizing sugar and our tips for keeping madeleines moist.
How to Build the Square Chocolate Cake
Place the first completely cooled layer on your serving board.
If it has a pronounced dome, trim only enough to create a reasonably flat surface. Do not remove half the cake chasing perfect geometry.
Spread a generous layer of chocolate frosting over it. Aim for approximately ½ inch of filling.
Place the second cake layer on top.
Look at the cake from every side. Correct its position before you start covering it.
Apply a thin crumb coat over the top and sides. Refrigerate for about 20 minutes.
Then apply the final coat.
For the appearance shown in the reference cake, do not polish the buttercream until perfectly smooth. Use an offset spatula to create soft strokes and visible swirls. The finish should look handmade and rich.
Our guide to the secret of a great cake texture can also help when comparing different cake styles.
The Secret to the Chocolate Treasure Topping
This is where the personality of the cake appears.
A common mistake is covering every inch with candy.
Don’t.
The frosting needs breathing room.
Start with two or three larger pieces of chocolate toward the rear-center area. Insert them at slightly different angles.
Next, add medium pieces around them.
Finish with small truffles, chocolate eggs, and broken squares near the front and sides of the cluster.
Think in terms of height:
- Tall shards at the back
- Medium pieces through the center
- Small rounded chocolates toward the front
- Open spaces between some pieces
The result should look abundant without resembling a random pile of candy.
Most importantly, decorate with unwrapped chocolate only. No foil, paper, plastic, branded wrappers, or inedible supports should remain on a cake being served.
Small Details That Can Save This Recipe
A few seemingly minor choices can decide whether your Chocolate Treasure Cake looks bakery-ready or becomes difficult to assemble.
Use room-temperature eggs and buttermilk. They incorporate more readily into the batter.
Weigh the flour when possible. Packing flour into a measuring cup can give you more than the recipe needs and lead to a heavier cake.
Cool every layer fully. Even slightly warm cake can soften buttercream.
Cool the melted chocolate before adding it to butter. Hot chocolate can melt the butter and produce a loose frosting.
Chill before final decorating. Twenty to thirty minutes gives the assembled cake more stability.
Do not overbake. A tester with a few moist crumbs is preferable to waiting for an extremely dry tester.
King Arthur similarly uses the moist-crumb test in its layer-cake recipes and recommends cooling cake before assembly.
Can You Make Chocolate Treasure Cake Ahead of Time?
Yes, and doing some work ahead can actually make assembly easier.
Bake the cake layers one day before decorating. Once completely cool, wrap them well so they do not dry out.
You can then prepare and assemble the cake the following day.
For a celebration, I prefer adding the decorative chocolates closer to serving time. Refrigeration can sometimes affect the surface appearance of chocolate, particularly when temperature and humidity change.
Before serving, allow a refrigerated buttercream cake some time to lose its refrigerator chill. Butter-based frosting becomes much firmer when cold, so its texture is usually more pleasant once it has softened somewhat.
For another make-ahead baking project, try our 3-ingredient banana bread guide.
How to Cut It Without Destroying the Decoration
The dramatic topping creates one practical problem: cutting.
Remove any large chocolate shards that sit directly over your planned cut.
Use a long, sharp knife. Cut straight down rather than sawing aggressively through the cake.
Wipe the blade between cuts if you want neat layers in photographs.
A square cake makes portioning easy. For a rich dessert like this, smaller pieces are often enough. About 12 generous portions or up to 16 smaller portions is a practical range.
Frequently Asked Questions
Is coffee necessary in Chocolate Treasure Cake?
Coffee is strongly recommended, but it does not make the finished cake taste strongly of coffee. It supports the deep cocoa flavor. If you cannot use coffee, hot water is the simplest substitute. Coffee or water is used in established chocolate cake formulas as well.
Can I make Chocolate Treasure Cake without buttermilk?
Yes, but do not casually replace it with the same amount of plain milk. The acidity of buttermilk matters when baking soda is present. A thinned plain yogurt can be a more suitable substitute in many cake recipes.
Why is my chocolate cake dry?
The most common causes are too much flour and excessive baking. Measure flour carefully and begin checking the cake before the maximum baking time.
Why did my cake sink in the middle?
Possible reasons include opening the oven too early, inaccurate oven temperature, underbaking the center, or incorrect leavener measurements. Measure the baking soda and baking powder carefully.
Can I use Dutch-process cocoa?
For this exact formula, I recommend regular natural unsweetened cocoa unless you have tested the recipe with your particular Dutch cocoa. Cocoa acidity varies, and this recipe uses baking soda as part of its leavening system.
How do I stop the chocolate buttercream from melting?
Never frost warm cake. The butter should be softened, not melted, and the melted chocolate should be cooled before it enters the frosting. If your kitchen is warm, chill the frosting briefly before assembly.
What chocolates are best for decorating the top?
Use a mix of milk and dark chocolate with different shapes. Broken bars, truffles, small eggs, squares, and thin shards create the treasure effect. Avoid pieces with liquid centers if the cake will sit out for an extended period.
Can I make this as a round cake?
Yes. The recipe can be adapted to suitable round pans, but the square silhouette is a major part of the original Chocolate Treasure Cake presentation.
Print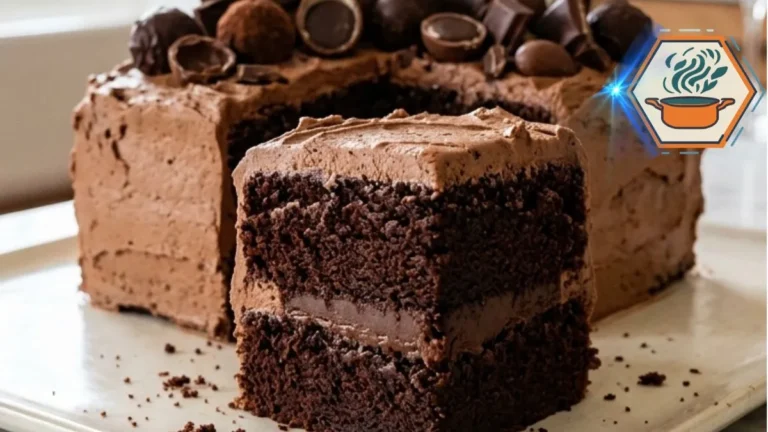
Chocolate Treasure Cake
A rich two-layer square chocolate cake with a moist cocoa crumb, thick chocolate fudge buttercream, and a dramatic topping of chocolate bars, truffles, eggs, and shards.
- Total Time: About 2 hours 30 minutes, including cooling/chilling
- Yield: 1 9-inch square layer cake; 16 servings
Ingredients
For the Chocolate Cake
- 2¼ cups (270 g) all-purpose flour
- 1¾ cups (350 g) granulated sugar
- ¾ cup (64 g) natural unsweetened cocoa powder
- 2 teaspoons baking powder
- 1½ teaspoons baking soda
- ½ teaspoon fine salt
- 3 large eggs, room temperature
- 1 cup (240 ml) buttermilk, room temperature
- ½ cup (120 ml) neutral vegetable oil
- 2 teaspoons vanilla extract
- ¾ cup (180 ml) hot brewed coffee
For the Chocolate Filling and Frosting
- 1½ cups (340 g) unsalted butter, softened
- 5 cups (600 g) powdered sugar
- ¾ cup (64 g) unsweetened cocoa powder
- 6 oz (170 g) semisweet chocolate, melted and cooled
- ½ cup (120 ml) heavy cream
- 2 teaspoons vanilla extract
- ¼ teaspoon fine salt
For the Chocolate Treasure Topping
- 8–10 oz (225–285 g) assorted milk and dark chocolates
- Broken chocolate bar pieces
- Small chocolate eggs
- Round chocolate truffles
- Thin chocolate shards
Instructions
1. Prepare the oven and pans.
Preheat the oven to 350°F (175°C). Lightly grease two 9-inch square cake pans. Line the bottoms with parchment paper and lightly grease the parchment.2. Mix the dry ingredients.
Whisk the flour, sugar, cocoa powder, baking powder, baking soda, and salt in a large mixing bowl. Break up any cocoa lumps.3. Add the wet ingredients.
Add the eggs, buttermilk, vegetable oil, and vanilla. Mix on low speed just until combined. Scrape the bottom and sides of the bowl.4. Add the coffee.
Slowly pour in the hot coffee while mixing on low. Continue only until the batter is smooth. The batter should be fairly thin.5. Fill the pans.
Divide the batter evenly between the two prepared pans. For matching layers, weigh the filled pans or divide the batter by weight.6. Bake.
Bake for 28–34 minutes, or until a toothpick inserted near the center comes out with a few moist crumbs but no liquid batter.7. Cool completely.
Leave the cakes in their pans for 10–15 minutes. Turn them onto wire racks, remove the parchment, and allow them to cool completely.8. Make the chocolate buttercream.
Beat the softened butter for 2–3 minutes until creamy. Gradually add powdered sugar and cocoa powder on low speed.9. Finish the frosting.
Add the cooled melted semisweet chocolate, heavy cream, vanilla, and salt. Beat until thick and fluffy. If necessary, add heavy cream 1 tablespoon at a time to reach a spreadable consistency.10. Fill the cake.
Level the cakes only if they have pronounced domes. Place the first layer on a cake board or serving plate. Spread approximately ½ inch of chocolate frosting over it.11. Stack and crumb-coat.
Place the second layer on top. Cover the cake with a thin crumb coat. Refrigerate for approximately 20 minutes.12. Apply the final frosting.
Cover the top and four sides with the remaining chocolate buttercream. Use an offset spatula to create the rustic swirled texture shown in the finished cake.13. Create the treasure topping.
Position the tallest chocolate shards and broken bars toward the back-center. Add medium pieces through the middle. Place truffles and small chocolate eggs toward the front. Leave areas of frosting visible.14. Set before serving.
Chill for another 20–30 minutes if the frosting feels soft. For the best buttercream texture, let a refrigerated cake lose some of its chill before serving.
Notes
- Do not add extra flour because the batter looks thin. The loose consistency after adding coffee is intentional.
- Room-temperature eggs and buttermilk mix into the batter more readily.
- Do not frost warm cake layers.
- Melted chocolate must cool before being added to the buttercream.
- Start checking the cake at 28 minutes rather than automatically baking for 34 minutes.
- A few moist crumbs on the tester are fine. Wet batter means it needs more time.
- If the buttercream becomes too soft, chill it briefly rather than adding large amounts of powdered sugar.
- For the reference appearance, don’t cover the entire top with chocolate. Visible buttercream keeps the decoration from looking overcrowded.
- Remove very tall chocolate pieces before cutting if they interfere with the knife.
- Actual baking time varies with the oven, pan material, and calibration.
- Prep Time: 40 minutes
- Additional/Chilling Time: 50 minutes
- Cook Time: 28–34 minutes
- Category: Dessert
- Method: Baking
- Cuisine: American
A Cake Made for the First Slice
The best moment with this cake is not when the final chocolate shard goes on top.
It is the first cut.
The knife passes through the rustic buttercream and soft cake. Then the slice pulls away and reveals those dark chocolate layers with a thick stripe of creamy filling through the center. Suddenly, the dramatic decoration makes sense.
That contrast is what makes Chocolate Treasure Cake memorable. It has the playful look of a chocolate-loaded celebration cake, but underneath is a carefully balanced homemade dessert.
You do not need perfect piping. You do not need dozens of decorations. And you certainly do not need to hide every patch of frosting beneath chocolate.
Bake the layers carefully. Keep them moist. Make the filling thick enough to hold its shape. Give the cake time to cool and chill. Then build the chocolate topping with different heights rather than sheer quantity.
The finished cake should look generous, slightly rustic, and unmistakably chocolate.
And when that first square slice comes out, there is your treasure.