
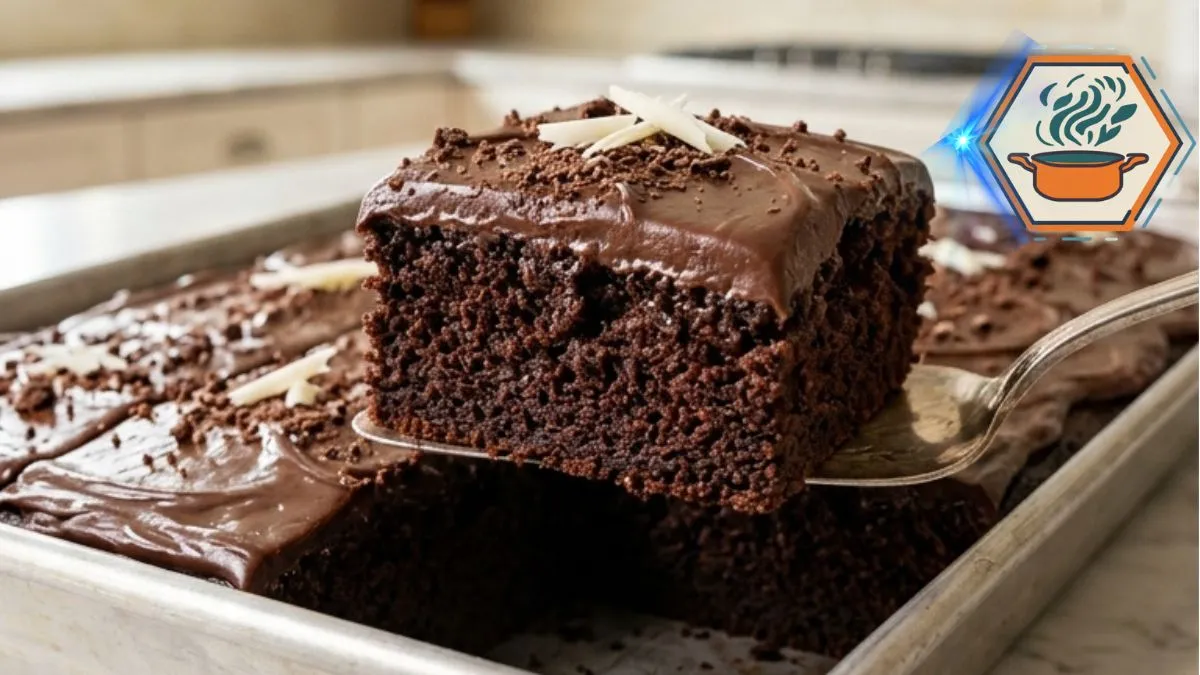
There is something special about setting a pan of warm chocolate cake on the kitchen counter. Before anyone even sees it, the smell gives it away. Deep cocoa, vanilla, and warm chocolate fill the room. Then comes the hardest part: waiting.
This Fudgy Chocolate Poke Sheet Cake takes that familiar moment and makes it even better. The cake is baked in a 9×13-inch pan, pierced while still warm, and covered with a silky chocolate soak. That warm chocolate slips into the small openings and creates rich pockets inside the soft crumb. A glossy chocolate topping finishes the cake.
The technique is simple, but small details matter. Choosing the right cocoa is one of them. Natural cocoa is acidic and works well in recipes where baking soda plays a major role in leavening. King Arthur Baking has a useful guide to natural and Dutch-process cocoa that explains why they can behave differently in cake batter.
The topping also depends on technique rather than complicated ingredients. Chocolate and hot cream form a ganache whose texture changes according to the proportions and temperature. This ganache technique guide from the Institute of Culinary Education explains how changing the cream-to-chocolate ratio creates anything from a pourable sauce to a much firmer ganache.
Affiliate disclosure: As an Amazon Associate I earn from qualifying purchases. This article may contain affiliate links to kitchen tools I find useful for preparing this recipe.
JUMP TO

Fudgy Chocolate Poke Sheet Cake
A rich and moist chocolate sheet cake filled with small pockets of warm chocolate ganache and finished with a silky, glossy chocolate topping, chocolate cookie crumbs, and delicate white chocolate shavings.
- Total Time: About 1 hour 50 minutes
- Yield: 12 generous squares
Ingredients
Chocolate Sheet Cake
- 1 3/4 cups (210 g) all-purpose flour
- 1 3/4 cups (350 g) granulated sugar
- 3/4 cup (about 64 g) natural unsweetened cocoa powder
- 1 1/2 teaspoons baking soda
- 1 teaspoon baking powder
- 1/2 teaspoon fine salt
- 2 large eggs, room temperature
- 1 cup (240 ml) whole milk, room temperature
- 1/2 cup (120 ml) neutral vegetable oil
- 2 teaspoons vanilla extract
- 3/4 cup (180 ml) hot brewed coffee or hot water
Chocolate Soak
- 6 oz (170 g) semisweet chocolate, finely chopped
- 3/4 cup (180 ml) heavy cream
- 1 tablespoon (14 g) unsalted butter
Glossy Chocolate Topping
- 8 oz (227 g) semisweet chocolate, finely chopped
- 3/4 cup (180 ml) heavy cream
- 1 tablespoon (14 g) unsalted butter
- 1/2 teaspoon vanilla extract
Finishing
- 2 tablespoons finely chopped semisweet chocolate
- 2 tablespoons crushed chocolate cookie crumbs
- 1 tablespoon white chocolate shavings
Instructions
- Preheat the oven to 350°F (175°C). Lightly grease a 9×13-inch metal baking pan. For easier removal, line the bottom with parchment paper while leaving some overhang on two sides.
- In a large bowl, whisk together the flour, sugar, natural cocoa powder, baking soda, baking powder, and salt. Break up any visible cocoa lumps.
- In a separate bowl, whisk the eggs, whole milk, vegetable oil, and vanilla extract until evenly combined.
- Pour the wet mixture into the dry ingredients. Mix just until most dry streaks disappear. Do not overmix.
- Gradually pour in the hot coffee or hot water while stirring. The batter will become quite thin. This is normal. Do not add additional flour.
- Pour the batter into the prepared pan. Bake for 28–34 minutes. Begin checking at 28 minutes. The cake is ready when the center is set and a toothpick inserted near the center comes out with a few moist crumbs but no raw batter.
- Place the pan on a wire rack and allow the cake to rest for 5–10 minutes. Keep the cake inside the pan.
- While the cake is still warm, use a wooden skewer, chopstick, or narrow handle of a wooden spoon to make small holes roughly 1 to 1 1/2 inches apart. Push them most of the way through the cake without scraping the bottom of the pan.
- To make the chocolate soak, place 6 oz finely chopped semisweet chocolate in a heat-safe bowl. Heat 3/4 cup heavy cream until steaming with tiny bubbles appearing around the edge. Do not aggressively boil it.
- Pour the hot cream over the chocolate. Leave undisturbed for 2 minutes. Add 1 tablespoon butter, then gently stir from the center outward until smooth.
- Slowly spoon the warm chocolate mixture across the warm cake. Direct some of it into the holes while distributing the rest evenly over the surface.
- Let the soaked cake rest for 20–30 minutes.
- For the topping, place 8 oz chopped semisweet chocolate in a clean heat-safe bowl. Heat the remaining 3/4 cup heavy cream until steaming, then pour it over the chocolate.
- Wait 2 minutes. Add 1 tablespoon butter and 1/2 teaspoon vanilla. Stir gently until smooth and glossy.
- Let the topping cool only until it is thick enough to spread but still fluid. Spread it across the cake with an offset spatula or the back of a spoon. Make broad, loose swirls like those visible in the reference cake.
- While the topping is still soft, lightly scatter chopped chocolate, chocolate cookie crumbs, and white chocolate shavings across the surface.
- Let the cake set for about 30 minutes before slicing. Use a sharp knife and wipe the blade between cuts for cleaner squares.
Notes
- Cocoa: Use natural unsweetened cocoa powder for this exact formula rather than automatically substituting Dutch-process cocoa.
- Coffee: Hot coffee adds roasted depth to the chocolate flavor. Hot water can be used instead.
- Thin batter: A relatively thin batter is expected after adding the hot liquid.
- Do not overbake: Begin checking at 28 minutes. A few moist crumbs on the tester are desirable.
- Hole spacing: More holes are not better. Small openings about 1–1 1/2 inches apart provide chocolate pockets without weakening the cake excessively.
- Ganache texture: Finely chop the chocolate so the hot cream can melt it evenly.
- Glossy appearance: Spread the final ganache while it remains soft and fluid. Waiting too long will produce a thicker, less glossy finish.
- Visual finish: Use only a light scattering of cookie crumbs, chopped dark chocolate, and white chocolate shavings. The glossy chocolate surface should remain clearly visible.
- Serving: For the soft, fudgy appearance in the reference image, serve at cool room temperature rather than refrigerator-cold.
- Prep Time: 25 minutes
- Additional/Rest Time: About 55–70 minutes
- Cook Time: 28–34 minutes
- Category: Dessert
- Method: Baking
- Cuisine: American
Why This Chocolate Poke Cake Works
A good poke cake needs balance.
Too little liquid and the holes do not serve much purpose. Too much liquid and a tender cake can become heavy or soggy. Huge holes can also weaken a thin sheet cake.
This recipe uses a loose pattern of small holes instead.
The warm chocolate soak settles into those openings while leaving enough cake between them to maintain a soft structure. When you cut a square, you get moist chocolate cake with darker, fudgier areas rather than a uniformly wet crumb.
Coffee is another useful detail. The recipe calls for hot coffee or hot water, so coffee is optional. It brings another roasted note to the cocoa without turning the dessert into a coffee cake.
The final layer is intentionally different from the soak. It remains on top and creates the smooth, shiny chocolate surface that makes the finished cake so tempting.
If you enjoy learning why small baking choices matter, our guide to the difference between butter cake styles offers more useful baking context.
Ingredients You Will Need
For the Chocolate Sheet Cake
- 1 3/4 cups (210 g) all-purpose flour
- 1 3/4 cups (350 g) granulated sugar
- 3/4 cup (about 64 g) natural unsweetened cocoa powder
- 1 1/2 teaspoons baking soda
- 1 teaspoon baking powder
- 1/2 teaspoon fine salt
- 2 large eggs, preferably at room temperature
- 1 cup (240 ml) whole milk, preferably at room temperature
- 1/2 cup (120 ml) neutral vegetable oil
- 2 teaspoons vanilla extract
- 3/4 cup (180 ml) hot brewed coffee or hot water
For the Chocolate Soak
- 6 ounces (170 g) semisweet chocolate, finely chopped
- 3/4 cup (180 ml) heavy cream
- 1 tablespoon (14 g) unsalted butter
For the Glossy Chocolate Topping
- 8 ounces (227 g) semisweet chocolate, finely chopped
- 3/4 cup (180 ml) heavy cream
- 1 tablespoon (14 g) unsalted butter
- 1/2 teaspoon vanilla extract
For the Finish
- 2 tablespoons finely chopped chocolate
- 2 tablespoons crushed chocolate cookie crumbs
- 1 tablespoon white chocolate shavings
Details That Make a Noticeable Difference
The original ingredient list looks straightforward. Still, several details can determine whether the finished cake resembles the intended result.
Use a 9×13-inch metal baking pan. Metal transfers heat efficiently and is the intended pan for this recipe. If you need one, this 9×13-inch metal baking pan is a practical choice for sheet cakes like this one.
Measure flour carefully. If you do not have a scale, fluff the flour, spoon it into the measuring cup, then level it. Scooping firmly from the bag can pack in excess flour and produce a drier cake.
Use natural unsweetened cocoa. This recipe contains both baking soda and baking powder, with considerably more soda. Natural cocoa provides acidity that can react with baking soda. Dutch-process cocoa has been alkalized and is less acidic.
Finely chop the chocolate. Small, even pieces melt much more readily when the hot cream is poured over them.
Use heavy cream for the soak and topping. Replacing it with ordinary milk changes the fat and water balance and can leave you with a much thinner result.
How to Make Fudgy Chocolate Poke Sheet Cake
Start by heating the oven to 350°F (175°C).
Lightly grease a 9×13-inch metal baking pan. For easier removal, you can line the bottom with parchment, leaving enough overhang on two sides to help lift the cake later. If you plan to serve it directly from the pan, greasing alone is fine.
In a large mixing bowl, whisk the flour, sugar, natural cocoa powder, baking soda, baking powder, and salt.
Do not rush this stage. Cocoa can form small lumps, and you want the leaveners spread evenly through the flour.
In another bowl or large measuring jug, whisk the eggs, whole milk, vegetable oil, and vanilla.
Pour the wet mixture into the dry ingredients. Mix just until most dry streaks disappear.
Now gradually add the hot coffee or hot water.
The batter will become noticeably thin. That is expected. Do not add extra flour to thicken it.
Stir only until the batter looks smooth and evenly chocolate-colored.
Pour it immediately into the prepared pan. Baking soda starts reacting once it meets acidic and wet ingredients, so a batter that relies on soda should not sit around unnecessarily before baking.
Baking the Cake Without Drying It Out
Bake for approximately 28 to 34 minutes.
Start checking around the 28-minute mark because ovens vary.
Insert a toothpick near the center. You are looking for a few moist crumbs, not loose raw batter. Do not wait for the cake to become dry before removing it from the oven.
The center should also look set rather than fluid.
Place the pan on a heat-safe surface or wire rack. Do not remove the cake from the pan.
Now comes the step that turns an ordinary chocolate sheet cake into a poke cake.
How to Make the Poke Holes Correctly
Wait about 5 to 10 minutes after the cake leaves the oven. It should still be distinctly warm.
Use a wooden skewer, chopstick, or the narrow handle of a small wooden spoon.
Make holes in a loose grid across the surface. Space them roughly 1 to 1 1/2 inches apart.
Do not turn the top into a field of holes.
This matters because every opening removes or compresses some crumb. If the holes are huge or extremely close together, the cake has less structure available to support the chocolate soak.
Push each hole most of the way down without aggressively scraping the bottom of the pan.
The goal is a cake with pockets of chocolate, not a cake floating in sauce.
Make the Warm Chocolate Soak
Place 6 ounces of finely chopped semisweet chocolate in a heat-safe bowl.
Heat 3/4 cup heavy cream in a small saucepan over medium-low heat until it is steaming and small bubbles begin appearing near the edge. It does not need a hard boil.
Pour the hot cream over the chopped chocolate.
Leave it untouched for 2 minutes.
Add 1 tablespoon unsalted butter. Starting in the center, stir gently until the chocolate and cream come together into a smooth mixture.
Ganache becomes thicker as it cools, which is why using this mixture while warm helps it flow into the openings.
Slowly spoon the chocolate soak across the warm cake.
Give extra attention to the holes, but distribute the mixture across the entire surface too.
Let the cake rest for 20 to 30 minutes so the soak can settle into the crumb.
This waiting period is important. Pouring the final topping on immediately would merge the two layers before the first has had time to settle.
How to Get That Glossy Chocolate Top
Once the cake has absorbed the soak and is no longer hot, prepare the second chocolate mixture.
Place 8 ounces of finely chopped semisweet chocolate in a clean heat-safe bowl.
Heat 3/4 cup heavy cream until steaming.
Pour it over the chocolate and leave it for about 2 minutes.
Add the tablespoon of butter and 1/2 teaspoon vanilla. Stir gently from the center outward until smooth and glossy.
Temperature affects ganache texture. It is more fluid when warm and becomes firmer as it cools.
For the soft, swirled appearance shown in the reference cake, do not wait until the topping becomes firm.
Let it cool only enough that it is no longer extremely runny. Spread it over the cake while it remains soft and fluid.
Use a small offset spatula or the back of a spoon to create broad, loose swirls.
Avoid repeatedly scraping over the same spot. A few confident passes produce a more natural glossy finish.
Add the Chocolate Crumb Finish
While the topping is still soft, scatter over:
- finely chopped semisweet chocolate
- crushed chocolate cookie crumbs
- a small amount of white chocolate shavings
Keep the decoration light.
You still want to see most of that glossy chocolate surface. The contrasting crumbs and pale chocolate pieces should look casually scattered rather than forming a thick crust.
If you like chocolate-and-fruit desserts too, see our strawberry filled chocolate cake guide for another rich cake idea.
Allow the finished cake to stand for about 30 minutes before cutting.
How to Cut Clean, Generous Squares
A poke sheet cake should look generous.
For neat pieces, use a long sharp knife. Wipe the blade clean between cuts because the soft ganache will stick to it.
For a very soft, fudgy presentation, serve the cake at cool room temperature.
If you want sharper edges, briefly chill the cake first. Remember that refrigeration also firms the ganache. King Arthur notes that ganache changes considerably in consistency as its temperature drops.
Common Mistakes to Avoid
Making too many holes: More holes do not automatically mean more flavor. They can weaken the crumb and create an overly wet cake.
Pouring everything on at once: Give the chocolate soak time to settle before adding the topping.
Using large chocolate chunks: The cream may cool before large pieces melt completely, leaving small lumps.
Boiling the cream aggressively: You only need it hot enough to melt finely chopped chocolate.
Overbaking the cake: Remember that the cake remains in a hot metal pan after leaving the oven. Start checking early.
Trying to thicken the batter: The hot liquid makes this batter thin by design.
Spreading cold ganache: If the topping has already become stiff, you will lose the loose glossy swirls associated with this cake.
Storage and Make-Ahead Tips
Once the ganache has set, cover the cake well to protect it from drying out and absorbing refrigerator odors.
For longer storage, refrigerate it. The topping will become firmer when cold, so allow individual portions to sit at room temperature briefly before serving if you prefer a softer texture.
You can also bake the chocolate cake earlier in the day, add the soak, then finish it with ganache later.
For the best visual result, add the chocolate crumbs and white chocolate shavings while the final topping is still tacky enough to hold them.
What to Serve With Chocolate Poke Cake
This cake is rich enough to stand on its own.
A glass of cold milk works beautifully. Coffee is another natural pairing, especially because the cake itself can contain brewed coffee.
For a dessert plate, try serving a square with fresh strawberries or raspberries. Their tartness gives some contrast to the chocolate.
Vanilla ice cream is another simple option. Serve it alongside the cake rather than directly on top if you want to preserve the glossy finish.
Frequently Asked Questions
What is a poke cake?
A poke cake is baked first and then pierced with holes so another flavorful mixture can move below the surface. Depending on the recipe, that mixture might be pudding, syrup, condensed milk, fruit filling, or chocolate sauce.
Why is my chocolate poke cake soggy?
The most likely causes are too many holes, holes that are too large, or excess liquid. Space small holes apart and give the chocolate soak time to settle before adding the topping.
Can I use water instead of coffee?
Yes. Use the same amount of hot water. Coffee gives the chocolate another roasted flavor note, but it is not required for the recipe to work.
Can I use Dutch-process cocoa?
For this exact formula, natural unsweetened cocoa is the safer choice because baking soda is the dominant leavener. Natural cocoa retains acidity, whereas Dutch-process cocoa is alkalized. Changing cocoa types can affect leavening in recipes that depend heavily on baking soda.
Why did my chocolate topping become too thick?
It probably cooled too much. Ganache thickens as its temperature falls. Spread the topping while it remains soft enough to move easily across the cake.
Can I make Fudgy Chocolate Poke Sheet Cake ahead of time?
Yes. In fact, resting gives the chocolate soak time to settle into the cake. Cover the finished cake carefully and refrigerate it if storing it for an extended period.
How large should the holes be?
Keep them fairly small and space them about 1 to 1 1/2 inches apart. A wooden skewer, chopstick, or narrow spoon handle works well. Avoid carving wide openings throughout the cake.
How do I keep the cake moist?
Measure flour accurately, use the full amount of oil and milk, and avoid overbaking. Remove the cake once the center is set and a toothpick shows moist crumbs rather than raw batter.
A Chocolate Cake Worth Waiting For
The hardest moment comes after the final chocolate layer goes on.
The cake is sitting on the counter. The ganache is still shiny. Chocolate crumbs are scattered over the swirls. You know the soak has already found its way beneath the surface.
But it needs those last few minutes.
That short wait is what gives this Fudgy Chocolate Poke Sheet Cake its character. The base stays soft. The chocolate soak creates fudgy pockets. The topping settles into a silky layer instead of disappearing into the crumb.
Then you finally slide a spatula beneath the first big square.
The inside is dark and moist. The topping stays thick and glossy. Tiny pieces of chocolate and cookie crumb give the soft cake just enough contrast.
And that first missing square usually does not stay alone for long.