
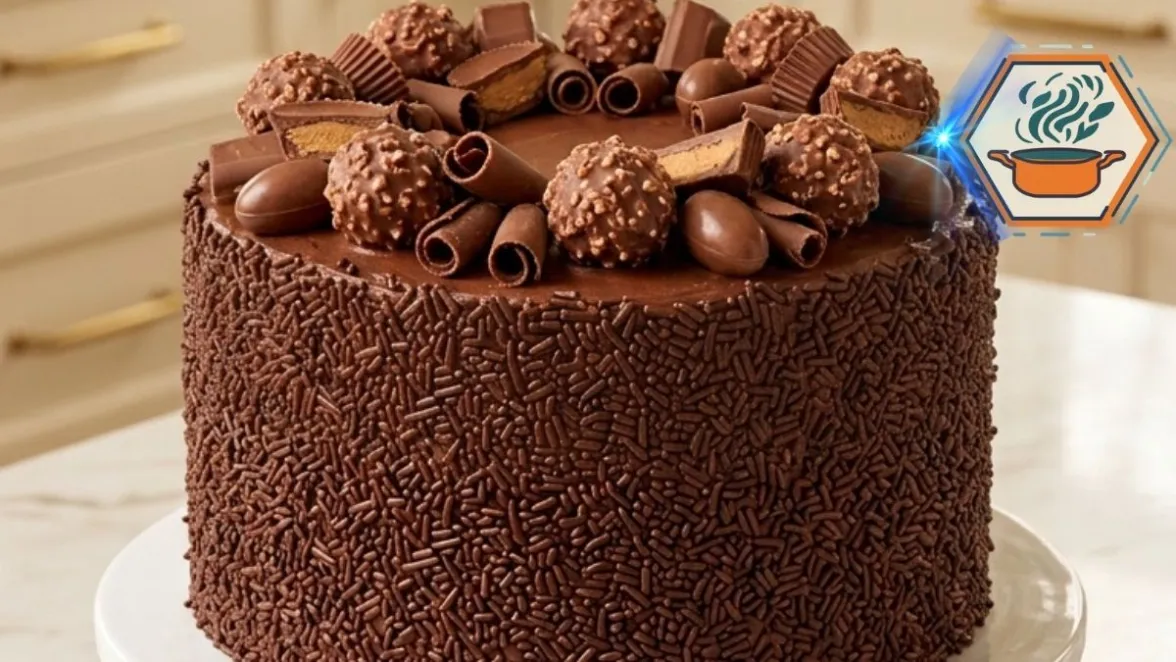
The first thing you notice about a Chocolate Treasure Crunch Cake is not one single piece of chocolate. It is the abundance. A tall, dark chocolate cake sits on the stand, wrapped in fudge frosting and hundreds of tiny chocolate sprinkles. The top looks almost like a chocolate treasure chest has spilled open. Truffles, peanut butter cups, chocolate curls, filled candies, and smooth chocolate pieces cover the surface.
Then you cut it. That is when this cake becomes even more interesting. Beneath the decorated top are soft chocolate layers separated by creamy chocolate frosting. The contrast is what makes the cake special: tender crumb, silky filling, crisp sprinkles, and crunchy chocolate candies. For general baking safety, remember that flour is a raw food and cake batter containing raw flour and eggs should not be tasted before baking, as explained by the U.S. Food and Drug Administration’s flour safety guidance.
This recipe is designed to make that dramatic appearance achievable in a home kitchen. You do not need professional pastry skills. You do, however, need to pay attention to temperature, pan preparation, cooling, and frosting consistency. The FDA also recommends keeping raw flour and eggs away from ready-to-eat foods and cleaning bowls, utensils, work surfaces, and hands after handling them.
Affiliate disclosure: As an Amazon Associate I earn from qualifying purchases. This article may contain affiliate links to kitchen tools I find useful for preparing this recipe.
jump to
Why This Chocolate Treasure Crunch Cake Works
There is a reason this cake looks impressive without requiring complicated pastry work.
The base is a cocoa-rich chocolate cake. Vegetable oil keeps the crumb soft, while whole milk adds richness. Hot coffee helps bring out the cocoa flavor without making the finished cake taste strongly of coffee.
The frosting has a different job. It needs to be creamy enough to spread between the layers but firm enough to hold the chocolates on top.
Finally comes the crunch. Chocolate sprinkles cover the sides. Truffles, cups, curls, and filled chocolates add different textures to the top.
That gives every forkful several contrasts:
- Moist chocolate cake
- Smooth fudge frosting
- Creamy filling
- Crisp chocolate sprinkles
- Crunchy hazelnut coating
- Soft chocolate candy centers
- Peanut butter and chocolate notes
If rich cakes are your favorite baking project, RecipesMind’s strawberry-filled chocolate cake guide is another useful idea for building a cake around a surprise center.
Ingredients You Will Need
For the chocolate cake
- 2 cups (about 240 g) all-purpose flour
- 1¾ cups (about 350 g) granulated sugar
- ¾ cup (about 65–75 g) unsweetened cocoa powder
- 2 teaspoons baking powder
- 1½ teaspoons baking soda
- ½ teaspoon fine salt
- 2 large eggs, at room temperature
- 1 cup whole milk, at room temperature
- ½ cup neutral vegetable oil
- 2 teaspoons pure vanilla extract
- 1 cup hot brewed coffee
For the chocolate fudge frosting
- 1 cup unsalted butter, softened
- ¾ cup unsweetened cocoa powder
- 4 cups powdered sugar, sifted if lumpy
- ½ cup heavy cream, plus a little extra if needed
- 2 teaspoons vanilla extract
- Pinch of fine salt
For the chocolate treasure topping
- 1 cup chocolate sprinkles
- 8–10 crispy hazelnut chocolate truffles
- 6 mini peanut butter cups, halved
- ½ cup assorted milk chocolate pieces
- ½ cup chocolate curls
- 3–4 filled chocolate eggs or oval candies
Choose chocolates that are similar in brown and milk-chocolate tones if you want the finished cake to stay close to the visual style shown in the reference photo.
Equipment That Makes the Recipe Easier
You do not need specialist equipment, but a few tools make a tall frosted cake much easier to control.
You will need two 9-inch round cake pans, parchment paper, mixing bowls, a whisk, an electric mixer, a cooling rack, and an offset spatula. A rotating cake stand is optional but particularly helpful when coating the sides.
Useful shopping options:
- Amazon – 9-inch round cake pans
- Amazon – offset cake spatula
- Amazon – wire cooling racks
- Amazon – rotating cake decorating stand
How to Make Chocolate Treasure Crunch Cake
1. Prepare the pans carefully
Heat the oven to 350°F (175°C).
Grease two 9-inch round cake pans. Place a circle of parchment paper in the bottom of each pan. Lightly grease the parchment too.
Do not skip this step. Chocolate cake can be delicate while warm. Parchment greatly reduces the chance of leaving part of the cake stuck inside the pan.
Position an oven rack near the center.
2. Combine the dry ingredients
In a large bowl, whisk together:
- Flour
- Sugar
- Cocoa powder
- Baking powder
- Baking soda
- Salt
Whisk for about 30 seconds.
This helps distribute the raising agents throughout the flour. Break up visible cocoa lumps before adding the liquid ingredients.
3. Add the wet ingredients
Add the eggs, milk, vegetable oil, and vanilla.
Mix on low speed at first. Once the flour is incorporated, mix only until the batter looks even.
Overmixing after adding flour can work against the tender texture we want.
4. Add the hot coffee
Slowly pour in 1 cup of hot coffee while mixing at low speed.
The batter will become quite thin.
Do not panic.
That fluid consistency is expected in this style of chocolate cake. Resist the temptation to add extra flour just because the batter looks thinner than a traditional butter cake batter.
Coffee deepens the cocoa character. If you enjoy understanding how small ingredient choices affect baked goods, see our guide to boosting banana flavor in banana bread for another example of ingredient balancing.
5. Divide and bake
Divide the batter evenly between the prepared pans.
For the most even layers, place the pans on a kitchen scale and distribute approximately the same weight of batter into each.
Bake for 28–33 minutes.
Start checking around 28 minutes because ovens vary.
A toothpick inserted near the center should emerge with a few moist crumbs rather than wet batter. The center should also spring back lightly when touched.
Avoid repeatedly opening the oven during the first part of baking. A sudden drop in heat can interfere with the rise.
The Detail That Makes the Cake Moist Instead of Soggy
The goal is a moist crumb, not a wet center.
Three ingredients matter here: oil, milk, and coffee. Oil remains liquid at room temperature, which helps the cake feel soft after cooling. Milk contributes richness. Coffee supplies additional liquid while supporting the chocolate flavor.
But no ingredient can rescue an overbaked cake.
Begin checking early.
Once baked, leave the cakes in their pans for about 10–15 minutes. Run a thin knife carefully around the edges if necessary. Turn them onto wire racks and remove the parchment.
Let them cool completely before frosting.
This is one of the details that should never be rushed.
Warm cake melts butter-based frosting. The layers can slide, crumbs can tear away, and the smooth chocolate finish becomes much harder to achieve.
How to Make Silky Chocolate Fudge Frosting
Beat the softened butter for about 2 minutes until smooth.
Add the cocoa powder and beat again at low speed. Scrape the bowl.
Gradually add the powdered sugar, alternating it with small amounts of heavy cream. Add the vanilla and salt.
Once incorporated, beat for another 2–3 minutes until lighter and fluffy.
Check the texture.
The frosting should form a soft peak on the spatula. It should spread without tearing the cake but should not run down the sides.
If it is too stiff, add heavy cream 1 tablespoon at a time.
If it is too soft, add a small amount of powdered sugar. You can also chill it briefly if your kitchen is warm.
For another lesson in getting moisture right in small cakes, read our guide to keeping madeleines moist.
How to Build the Creamy Chocolate Center
This step creates the beautiful interior that makes the first slice so satisfying.
If your cake layers have pronounced domes, trim only the tops with a long serrated knife. Keep the cuts level.
Place the first cake layer on your serving stand.
Spread a generous layer of chocolate frosting over it. Aim for an even layer rather than a mountain of frosting in the center.
Place the second cake layer on top.
Press down very gently.
Now spread a thin coat of frosting over the entire cake. This is your crumb coat. It catches loose crumbs before the final frosting layer is added.
Chill for about 15–20 minutes.
Then apply the remaining frosting more generously.
This extra chilling step is one of the practical details that makes the recipe easier to reproduce at home.
How to Create the Chocolate Sprinkle Crust
The photographed cake has a dense coat of chocolate sprinkles around its sides. This is important because the sprinkles are not just decoration. They provide the small crunchy texture promised by the recipe.
Place the cake stand over a large tray or sheet of parchment.
Take handfuls of chocolate sprinkles and gently press them against the freshly frosted sides. Rotate the cake and repeat.
Do not throw them at the cake. Press lightly with a cupped hand.
Any sprinkles that fall onto the tray can be collected and reused.
For the best coverage, apply the sprinkles before the frosting develops a firm surface.
How to Decorate the Top Like the Reference Cake
The key is controlled abundance.
Start with the largest chocolates.
Arrange the crispy hazelnut truffles around the outer portion of the cake. Leave some whole. Their rough nut-covered exterior contrasts beautifully with the smooth frosting.
Next, place the halved peanut butter cups between them.
Add assorted rectangular or irregular milk chocolate pieces.
Then add the filled chocolate eggs or oval chocolates near the center.
Finish with chocolate curls. Let some curls stand upright while others rest on their sides.
Do not create perfectly identical spacing.
The original visual works because the top feels abundant and slightly organic while still looking intentional.
Keep the center chocolates relatively low. If you stack everything into a tall mound, the finished cake will no longer have the broad, luxurious top seen in the reference image.
For more chocolate and caramel skills that can help with future decorations, our guide to caramelizing sugar covers another useful dessert technique.
The 20-Minute Trick for a Cleaner Slice
Here is the moment I would not skip.
Once the Chocolate Treasure Crunch Cake is completely assembled, place it in the refrigerator for around 20 minutes.
You are not trying to make the cake cold and hard.
You simply want the butter in the frosting to firm slightly.
When it is time to serve, use a long, sharp knife. Dip the blade in hot water and wipe it completely dry. Make the first cut.
Clean the blade before making the second cut.
That small routine produces a much cleaner wedge. You can see the dark cake and creamy chocolate filling instead of dragging frosting and crumbs through every layer.
Common Mistakes to Avoid
Using warm cake layers: Even slightly warm layers can soften the frosting. Cool them completely.
Adding extra flour because the batter looks thin: The coffee makes this batter fluid. That is intentional.
Overbaking: Start testing at the lower end of the baking range.
Making the frosting too soft: Soft frosting cannot support a heavy collection of chocolates.
Waiting too long before adding sprinkles: They stick best while the outer frosting is fresh.
Putting all decorations in the center: Spread them across the surface to recreate the abundant treasure-like appearance.
Cutting immediately after decorating: Give the finished cake its short chill first.
Eating raw batter: Raw flour and raw eggs can carry harmful bacteria. The FDA advises against eating or tasting uncooked dough or batter.
Can You Make This Cake Ahead of Time?
Yes.
You can bake the layers one day ahead. Once completely cool, wrap them well to keep them from drying out.
The frosting can also be prepared ahead and chilled. Bring it back toward a workable temperature and beat it briefly before decorating.
For the best-looking top, I prefer adding the truffles, peanut butter cups, chocolate curls, and other candies closer to serving time.
This reduces the chance of the decorations being damaged while the cake is covered or stored.
How to Store Chocolate Treasure Crunch Cake
Because this particular frosting contains heavy cream, I recommend keeping the finished cake covered in the refrigerator rather than treating it like a shelf-stable icing.
Take it out before serving so the cake and butter frosting have time to soften.
Keep in mind that refrigeration makes chocolate firmer. A cake served straight from a cold refrigerator will therefore have a different texture from one allowed to warm slightly before serving.
For general food handling, the USDA advises prompt refrigeration of perishable leftovers at 40°F or below.
Easy Variations
Once you have made the original version, the topping is easy to personalize.
You could try:
- Dark chocolate curls instead of milk chocolate
- Chocolate-covered wafer pieces
- Crisp chocolate pearls
- Chopped toasted hazelnuts
- Mini chocolate sandwich cookies
- Caramel-filled chocolates
- White and milk chocolate curls together
If your goal is to recreate the reference photo, however, stay with a mostly milk-chocolate and dark-brown palette. Avoid bright candy coatings, colorful sprinkles, fruit, white frosting, or oversized decorations.
They may taste good, but they change the visual identity of the cake.
Frequently Asked Questions
What makes Chocolate Treasure Crunch Cake crunchy?
Most of the crunch comes from the chocolate sprinkles and crispy hazelnut truffles. Peanut butter cups and assorted chocolates create additional changes in texture without making the cake itself hard.
Does the coffee make chocolate cake taste like coffee?
Not strongly in this recipe. Its main purpose is to complement the cocoa and contribute liquid to the batter. Use regular hot coffee rather than an intensely flavored specialty coffee if you want chocolate to remain dominant.
Can I make this chocolate cake without coffee?
Yes. Hot water can replace the coffee in the same quantity. The cake will still work, although the chocolate flavor may taste slightly different.
Why is my chocolate cake dry?
Overbaking is one of the first things to check. Measure flour carefully and begin testing the layers around 28 minutes. Leaving the cakes in the oven much longer than necessary can remove too much moisture.
Why did my cake fall apart when I frosted it?
It may still have been warm, or the frosting may have been too stiff. Allow the layers to cool fully. Apply a thin crumb coat first and chill it before adding the final frosting.
How do I get chocolate sprinkles to stick to the sides?
Apply them immediately after the final coat of frosting. Hold a small handful against the side with a cupped palm and press very gently. Work over parchment or a tray to catch excess sprinkles.
How do I get clean slices of chocolate layer cake?
Chill the finished cake for around 20 minutes. Use a sharp knife warmed in hot water and wiped dry. Clean and warm the knife again between cuts when presentation matters.
Print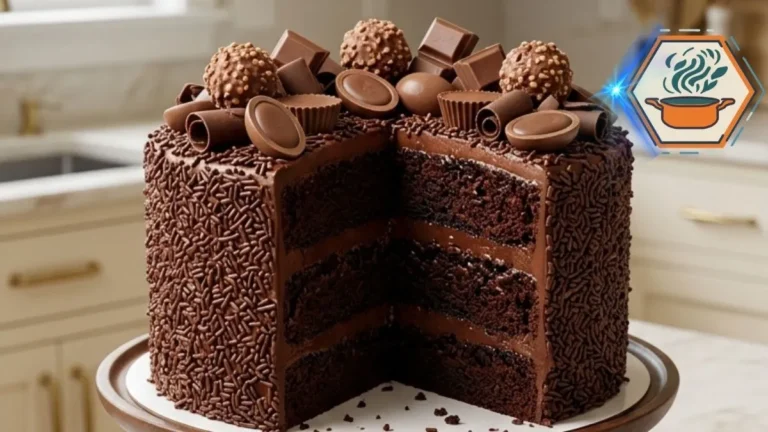
Chocolate Treasure Crunch Cake
A tall, moist chocolate layer cake filled and covered with creamy chocolate fudge frosting, coated with chocolate sprinkles, and topped with crispy hazelnut truffles, mini peanut butter cups, chocolate curls, and assorted chocolate candies.
- Total Time: About 1 hour 55 minutes
- Yield: 12 servings
Ingredients
Chocolate Cake
- 2 cups (240 g) all-purpose flour
- 1¾ cups (350 g) granulated sugar
- ¾ cup (65–75 g) unsweetened cocoa powder
- 2 teaspoons baking powder
- 1½ teaspoons baking soda
- ½ teaspoon fine salt
- 2 large eggs, room temperature
- 1 cup (240 ml) whole milk, room temperature
- ½ cup (120 ml) neutral vegetable oil
- 2 teaspoons vanilla extract
- 1 cup (240 ml) hot brewed coffee
Chocolate Fudge Frosting
- 1 cup (226 g) unsalted butter, softened
- ¾ cup unsweetened cocoa powder
- 4 cups powdered sugar
- ½ cup heavy cream, plus more only if needed
- 2 teaspoons vanilla extract
- 1 pinch fine salt
Chocolate Crunch and Treasure Topping
- 1 cup chocolate sprinkles
- 8–10 crispy hazelnut chocolate truffles
- 6 mini peanut butter cups, halved
- ½ cup assorted milk chocolate pieces
- ½ cup chocolate curls
- 3–4 filled chocolate eggs or oval chocolate candies
Instructions
- Prepare the oven and pans. Preheat the oven to 350°F (175°C). Grease two 9-inch round cake pans. Line the bottoms with parchment circles and lightly grease the parchment.
- Mix the dry ingredients. In a large bowl, whisk the flour, sugar, cocoa powder, baking powder, baking soda, and salt until evenly combined and free of large cocoa lumps.
- Add the wet ingredients. Add the eggs, whole milk, vegetable oil, and vanilla. Mix on low speed until combined. Avoid prolonged mixing once the flour is wet.
- Add the coffee. Slowly pour in the hot brewed coffee while mixing on low. The finished batter will be relatively thin. This is expected.
- Fill the pans. Divide the batter evenly between the prepared pans. Using a kitchen scale gives the most evenly sized layers.
- Bake. Bake for 28–33 minutes. Begin checking at 28 minutes. A toothpick inserted near the center should come out without liquid batter; a few moist crumbs are fine.
- Cool. Leave the cakes in their pans for about 10–15 minutes. Turn them onto wire cooling racks, remove the parchment, and allow them to cool completely before frosting.
- Prepare the frosting. Beat the softened butter until creamy. Beat in the cocoa. Gradually add the powdered sugar, alternating with small additions of heavy cream. Add vanilla and salt. Beat for another 2–3 minutes until fluffy. If necessary, adjust with a small amount of cream.
- Fill the cake. If necessary, level pronounced domes with a serrated knife. Place one cake layer on a cake board or serving stand. Spread a generous, even layer of chocolate frosting over it. Place the second layer on top.
- Crumb-coat the cake. Cover the top and sides with a thin layer of frosting. Refrigerate for 15–20 minutes to firm the crumb coat.
- Apply the final frosting. Cover the chilled cake with the remaining chocolate frosting. Smooth the top and sides while leaving enough frosting for the sprinkles to adhere.
- Create the crunchy exterior. Working over a tray or parchment, gently press chocolate sprinkles onto the freshly frosted sides until densely covered.
- Decorate the top. Arrange the hazelnut truffles, halved mini peanut butter cups, milk chocolate pieces, chocolate curls, and filled chocolate candies over the top. Keep the arrangement abundant but slightly irregular to reproduce the reference style.
- Chill before slicing. Refrigerate the completed cake for approximately 20 minutes. Cut with a sharp knife warmed in hot water and wiped completely dry. Clean the blade between slices.
Notes
- Do not add extra flour because the batter looks thin after adding the coffee.
- Cool both cake layers completely before frosting.
- Room-temperature eggs and milk combine more readily with the other ingredients.
- Do not overbake. Begin testing at 28 minutes.
- If the frosting becomes too soft to support the chocolates, chill it briefly before decorating.
- Apply sprinkles while the final frosting is still soft enough for them to stick.
- For the reference-photo appearance, use mostly brown and milk-chocolate decorations rather than colorful candy.
- A 20-minute final chill helps create cleaner slices.
- Do not taste raw batter containing uncooked flour and eggs.
- Prep Time: 45 minutes
- Additional/Chilling Time: 40 minutes
- Cook Time: 28–33 minutes
- Category: Dessert
- Method: Baking
- Cuisine: American-inspired
A Chocolate Cake Made for the First Slice
There is a small moment of suspense when this cake reaches the table.
From the outside, everyone sees the truffles, curls, chocolate cups, sprinkles, and glossy fudge frosting. But the best part remains hidden until the knife passes through the top.
Then the first wedge comes away.
You see the soft dark crumb. You see the creamy chocolate layers. A few sprinkles fall onto the plate. Maybe a hazelnut truffle rolls beside the slice.
That is exactly what a Chocolate Treasure Crunch Cake should be: generous, chocolate-packed, a little playful, and worth cutting into.
The decorations give it the drama, but good technique gives it the texture. Cool the layers fully. Keep the frosting thick enough to hold its shape. Build an even center. Add the sprinkles while the frosting is fresh. Chill briefly before cutting.
Do those small things well, and the impressive appearance becomes much easier to reproduce.
And when that first tall slice lands on the plate, the inside finally looks every bit as tempting as the treasure-covered top.