
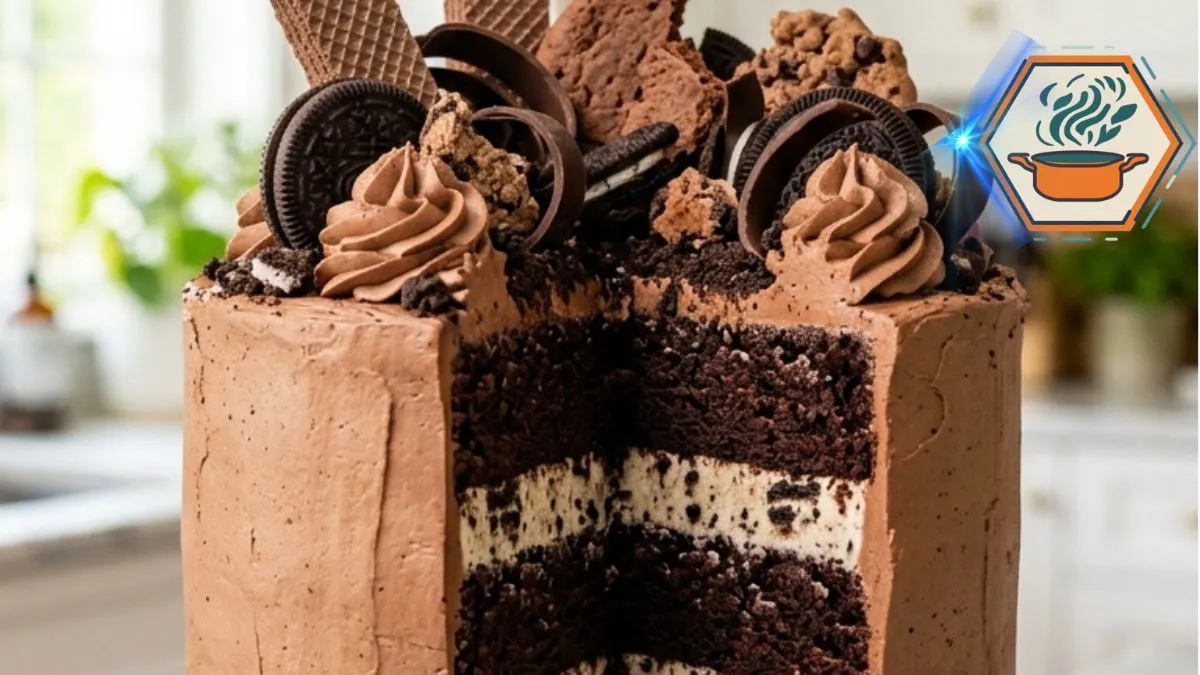
Some cakes are made for dessert. Others are made for the moment when you carry them into the room and everyone stops talking. This Velvet Cookie Stack Chocolate Celebration Cake belongs to the second group. It is tall, deeply chocolatey, packed with cookies, and finished with a dramatic crown of wafers, chocolate curls, and creamy swirls.
The first time you look at a cake like this, it can seem complicated. Yet its structure is surprisingly practical. Three moist chocolate layers provide the base. A pale vanilla cookie cream creates those striking bands inside. Silky cocoa frosting holds everything together. Then the top becomes the fun part: cookies, wafers, curls, crumbs, and piped chocolate cream arranged at different heights.
The key is not simply adding more chocolate. Each component needs a purpose. Accurate measurements matter, especially with cocoa, flour, and powdered sugar. A digital scale can make repeat batches much more consistent. If you bake often, a sturdy stand mixer also saves considerable work when whipping the filling and buttercream. For this cake, I would rather invest in equipment that gets used for bread, cookies, frosting, and other desserts instead of buying a single-purpose gadget.
For general baking technique, Food Network’s chocolate cake guidance also recommends cooling cake layers fully before frosting and trimming uneven tops when needed. That small detail makes a major difference here because warm layers can soften the cookie filling.
Useful equipment for this recipe
I would prioritize four pieces of equipment that have uses well beyond this one cake. These are also more natural affiliate opportunities than repeatedly recommending inexpensive spatulas or piping bags.
- A KitchenAid stand mixer on Amazon is useful for the cookie cream, cocoa buttercream, whipped frosting, cookie dough, and many other baking projects.
- A quality aluminum cake turntable on Amazon makes frosting a tall layer cake much easier because you can rotate the cake while keeping your spatula steady.
- A digital baking scale on Amazon is useful when you want repeatable cake layers and more accurate flour, sugar, and cocoa measurements.
- A three-piece 8-inch round cake pan set on Amazon lets you bake all three layers at once instead of holding part of the batter while waiting for a pan.
Affiliate disclosure: As an Amazon Associate I earn from qualifying purchases. This article may contain affiliate links to kitchen tools I find useful for preparing this recipe.
jump to
Why This Chocolate Celebration Cake Works
The biggest risk with a loaded cake is excess. Too many toppings can turn a beautiful cake into a dark, messy mound.
The solution is contrast.
Here, the cake layers are almost black-brown. The filling is pale and speckled with cookie crumbs. The outer frosting is a softer milk-chocolate shade. The decorations range from crisp wafers to dark cookies and curled chocolate.
Texture matters just as much.
Every slice gives you:
- Moist dark chocolate cake
- Cool vanilla cream
- Crunchy cookie pieces
- Silky cocoa frosting
- Crisp chocolate wafers
- Soft chocolate cream
- Thick chocolate curls
If you enjoy building dramatic desserts, our guide to mastering caramelized sugar covers another useful technique for creating texture and contrast in desserts.
Ingredients You Will Need
Dark Chocolate Cake
- 2¼ cups (270 g) all-purpose flour
- ¾ cup (65–75 g) unsweetened cocoa powder
- 1¾ cups (350 g) granulated sugar
- 2 teaspoons baking soda
- 1 teaspoon baking powder
- ½ teaspoon fine salt
- 3 large eggs, preferably at room temperature
- 1 cup (240 ml) buttermilk, at room temperature
- ½ cup (120 ml) neutral vegetable oil
- 2 teaspoons vanilla extract
- ¾ cup (180 ml) hot coffee or hot water
Important: Use hot coffee, not boiling coffee. Coffee can deepen the perception of cocoa flavor without making the finished cake taste strongly of coffee.
Vanilla Cookie Cream
- 8 oz (226 g) full-fat block cream cheese, softened but still cool
- 1¼ cups (300 ml) cold heavy whipping cream
- ½ cup (60 g) powdered sugar
- 2 teaspoons vanilla extract
- 1 cup roughly crushed cream-filled chocolate cookies
Use block cream cheese rather than a soft spread from a tub. The filling needs enough body to support three cake layers.
Silky Cocoa Frosting
- 1¼ cups (283 g) unsalted butter, softened
- 3½ cups (420 g) powdered sugar, sifted if lumpy
- ¾ cup (65–75 g) unsweetened cocoa powder
- ⅓ cup (80 ml) heavy whipping cream, plus a little extra if required
- 2 teaspoons vanilla extract
- Pinch of fine salt
Chocolate Cream Swirls
- ½ cup (113 g) unsalted butter, softened
- 1½ cups (180 g) powdered sugar
- ⅓ cup (30 g) cocoa powder
- 2–3 tablespoons heavy whipping cream
- Pinch of salt
Loaded Cookie Crown
You do not need exact quantities for the decoration. You do, however, need different shapes.
Prepare:
- Whole and halved cream-filled chocolate cookies
- Layered chocolate wafer squares
- Broken chocolate biscuits
- Thick dark or milk chocolate curls
- Chocolate cookie clusters
- Coarsely crushed chocolate cookies
Do not crush everything finely. Large pieces create the height seen in the finished cake.
How to Make Velvet Cookie Stack Chocolate Celebration Cake
Start by heating the oven to 350°F (175°C).
Grease three 8-inch round pans. Place a parchment circle in the bottom of each pan, then lightly grease the parchment.
Whisk the flour, cocoa powder, granulated sugar, baking soda, baking powder, and salt in a large bowl. Break up any cocoa lumps before adding the wet ingredients.
In another bowl, whisk the eggs, buttermilk, oil, and vanilla.
Pour the wet mixture into the dry ingredients. Mix only until most dry patches disappear.
Now slowly pour in the hot coffee while mixing on low speed.
Do not panic when the batter becomes thin. Chocolate cake batter containing hot liquid is often much looser than a traditional butter cake batter.
Divide the batter evenly among the three pans. A scale is very useful at this point because equal amounts of batter produce layers of similar height.
Bake for 25–30 minutes.
Begin checking around 25 minutes. Insert a toothpick near the center. You want a few moist crumbs rather than wet batter.
Cool the cakes in their pans for about 10 minutes. Turn them onto wire racks and remove the parchment.
Then wait.
The layers must be completely cool before filling. For an even easier assembly, wrap the cooled layers and refrigerate them for 30–60 minutes.
Cold cake is firmer and produces fewer crumbs.
Make a Cookie Cream That Can Actually Hold the Layers
This is one of the most important details in the entire recipe.
A loose cream filling may taste wonderful, but it can squeeze out when a heavy third cake layer is placed on top.
Beat the cream cheese, powdered sugar, and vanilla until smooth.
With the mixer running at low speed, slowly pour in the cold heavy cream. Once incorporated, increase to medium-high speed.
Whip until the mixture becomes thick and holds firm peaks.
Do not add the crushed cookies too early.
Fold them in gently at the end with a spatula. This keeps the filling pale while leaving visible dark cookie pieces.
If the cream seems soft, refrigerate it for 15–20 minutes before assembling.
Build Tall, Clean Chocolate Layers
Check your cakes before stacking them.
If the tops have large domes, trim them with a serrated knife or cake leveler. You can also read this cake-leveling guide from Food Network for the basic technique.
Place the first layer on a sturdy cake board.
Spread a generous layer of cookie cream over it, but stop about ½ inch from the edge.
Place the second cake on top and repeat.
Add the final layer upside down. The flat bottom of the cake becomes your top surface, making frosting easier.
At this stage, refrigerate the stacked cake for 20–30 minutes.
That short chilling period is worth the wait.
How to Get the Rustic Cocoa Finish in the Photo
This cake should not look like a perfectly polished wedding cake.
The frosting needs visible movement.
Beat the softened butter until pale and creamy. Add powdered sugar and cocoa gradually. Mixing slowly at first prevents a cocoa cloud from covering your kitchen.
Add the cream, vanilla, and salt.
Beat until fluffy and spreadable.
Apply a thin crumb coat to the chilled cake. Refrigerate for about 15 minutes.
Then add the final cocoa frosting.
Hold an offset spatula vertically against the side while turning the cake. Do not scrape it perfectly flat. Finish with gentle upward strokes.
Those subtle ridges give the cake its handmade chocolate finish.
For more cake and dessert techniques, visit RecipesMind.
Create the Loaded Cookie Stack on Top
This is where the cake gets its personality.
There is one rule worth remembering:
Decorate from largest to smallest.
Pipe large chocolate cream swirls around the top. Use a large open-star tip if you want clearly defined ridges.
Next, insert the largest wafer rectangles vertically or at slight angles. Do not place every wafer at the same angle.
Add whole and broken cream-filled cookies.
Then add medium chocolate biscuit pieces.
Finish with curls, clusters, and coarse crumbs.
Think in three heights:
- Tall wafer pieces form the background.
- Cookies and chocolate swirls create the middle level.
- Curls and crumbs fill selected low spaces.
Do not sprinkle crumbs over every inch. Empty areas help individual decorations remain visible.
The final crown should look abundant but intentional.
How to Make Thick Chocolate Curls
You can buy curls, but homemade ones give you more control over size.
Use a room-temperature chocolate bar and pull a vegetable peeler firmly along its edge. For wider curls, scrape along a broader side.
If the chocolate shatters, it is probably too cold.
If it becomes sticky, it is too warm.
The goal is to create substantial ribbons rather than tiny chocolate shavings.
The Final Chill Is Not Optional
Once decorated, refrigerate the cake for 20–30 minutes.
This helps the filling firm up again and gives the decorations time to settle.
Because the filling contains cream cheese and whipped cream, this is a cake that should be kept refrigerated rather than left on the counter for extended storage. Food Network similarly notes that cakes with frostings requiring refrigeration, including cream-cheese frosting, should be refrigerated.
For the best eating texture, take your portion of cake from the refrigerator shortly before serving so the butter-based frosting can lose some of its firmness.
How to Cut Clean Slices
That first slice is part of the experience.
Use a long, sharp knife. Dip the blade in hot water, then wipe it completely dry.
Cut downward without sawing excessively.
Clean and warm the knife again between slices.
You should see three dark cake layers separated by two thick, pale cookie-cream bands.
If the filling drags into the chocolate crumb, your knife probably needs cleaning.
Mistakes That Can Ruin This Cake
Using warm cake layers: Even slightly warm cake can soften the cream and buttercream.
Overmixing the batter: Once the flour is hydrated, excessive mixing can affect the cake’s texture.
Making the filling too soft: It must reach firm peaks before the cookies are folded in.
Pulverizing the cookies: You want pieces, not cookie dust.
Skipping the crumb coat: Dark chocolate crumbs easily show through the final frosting.
Adding every decoration at once: Large pieces should establish the structure before small decorations fill the spaces.
Making paper-thin chocolate curls: The reference style calls for thick, dramatic curls.
Cutting immediately after decorating: Give the assembled cake time to firm in the refrigerator.
If cake texture is something you struggle with, some of the same moisture principles discussed in our guide to keeping madeleines moist apply here too: careful baking time and proper storage matter.
Can You Make It Ahead?
Yes. In fact, breaking the work across two days can make this recipe much easier.
Day one: Bake the chocolate layers. Cool completely, wrap each layer well, and refrigerate.
Day two: Prepare the filling and frosting. Stack, chill, frost, and decorate.
For storage, keep the completed cake covered in the refrigerator. The cookie decorations will gradually soften as they absorb moisture, so the cake looks and tastes best when the top decorations are added relatively close to serving.
You can also prepare the chocolate frosting a day ahead. Refrigerate it in an airtight container, then allow it to soften before whipping it briefly again.
Serving Ideas
This is already an intense dessert, so it does not need a heavy sauce.
Serve modest slices with:
- Fresh strawberries or raspberries
- Unsweetened coffee
- Espresso
- Cold milk
- Lightly whipped cream
For another chocolate-and-fruit combination, our strawberry-filled chocolate cake guide offers more inspiration.
A tall cake like this can comfortably provide more servings than its diameter suggests. Thin celebration slices are usually enough because the filling and frosting are rich.
Frequently Asked Questions
Can I use hot water instead of coffee?
Yes. Use the same amount of hot water. The cake will still work. Coffee is mainly included because it pairs naturally with cocoa and can make the chocolate flavor seem deeper.
Why did my cookie filling squeeze out?
It was probably too warm, too softly whipped, or spread too close to the cake’s edge. Chill the filling until firm and leave a small margin around each layer.
Can I make this cake with only two pans?
Yes, but avoid leaving a portion of activated batter sitting for too long while batches bake. Three matching pans are the easiest approach for consistent layers.
Can I use Dutch-process cocoa?
Cocoa type can affect both flavor and how a recipe reacts with chemical leaveners. Since this batter contains baking soda, use the cocoa type specified by the recipe you have tested rather than switching types casually.
Why does my chocolate cake crumble when I frost it?
The cake may still be warm or very soft. Cool it fully, then refrigerate the layers before assembly. A thin crumb coat also traps loose crumbs before the final frosting is applied.
How do I stop the top decorations from falling?
Insert the larger pieces slightly into the piped buttercream rather than simply laying them on the surface. Place heavy decorations closer to the center and use frosting swirls as support.
Can I use different cookies?
Certainly. Choose crisp chocolate sandwich cookies and layered chocolate wafers with similar shapes and textures. Avoid very soft cookies because they can lose their structure quickly against moist frosting.
How long should I chill the finished cake?
About 20–30 minutes is enough to stabilize it before cutting. If it has been refrigerated for several hours, allow the portion being served a little time to lose its refrigerator chill for a softer frosting texture.
Print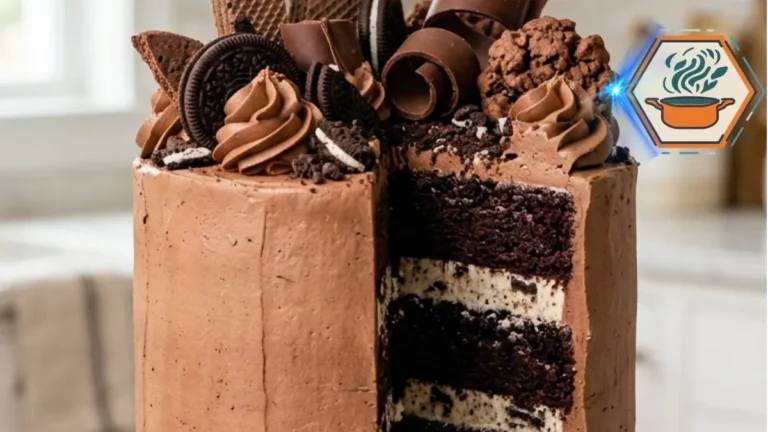
Velvet Cookie Stack Chocolate Celebration Cake
A tall, moist chocolate celebration cake layered with thick vanilla cookie cream, covered in silky cocoa frosting, and topped with chocolate swirls, cream-filled cookies, crisp wafer squares, chunky biscuits, and thick chocolate curls.
- Total Time: About 2 hours 45 minutes, including cooling/chilling
- Yield: 14 slices
Ingredients
Dark Chocolate Cake
- 2¼ cups (270 g) all-purpose flour
- ¾ cup (70 g) unsweetened cocoa powder
- 1¾ cups (350 g) granulated sugar
- 2 teaspoons baking soda
- 1 teaspoon baking powder
- ½ teaspoon fine salt
- 3 large eggs, room temperature
- 1 cup (240 ml) buttermilk, room temperature
- ½ cup (120 ml) neutral vegetable oil
- 2 teaspoons vanilla extract
- ¾ cup (180 ml) hot coffee or hot water
Vanilla Cookie Cream
- 8 oz (226 g) full-fat block cream cheese, softened but still cool
- 1¼ cups (300 ml) cold heavy whipping cream
- ½ cup (60 g) powdered sugar
- 2 teaspoons vanilla extract
- 1 cup roughly crushed cream-filled chocolate sandwich cookies
Silky Cocoa Frosting
- 1¼ cups (283 g) unsalted butter, softened
- 3½ cups (420 g) powdered sugar
- ¾ cup (70 g) unsweetened cocoa powder
- ⅓ cup (80 ml) heavy whipping cream, plus more only if needed
- 2 teaspoons vanilla extract
- Pinch of fine salt
Chocolate Cream Swirls
- ½ cup (113 g) unsalted butter, softened
- 1½ cups (180 g) powdered sugar
- ⅓ cup (30 g) unsweetened cocoa powder
- 2–3 tablespoons heavy whipping cream
- Pinch of salt
Loaded Cookie Stack
- 8–10 cream-filled chocolate sandwich cookies, whole, halved, or quartered
- 5–7 layered chocolate wafer squares
- 4–6 broken chocolate biscuit pieces
- 2 oz (55 g) dark or milk chocolate, made into thick curls
- ½ cup chocolate cookie clusters
- ¼ cup coarsely crushed chocolate cookies
Instructions
- Preheat the oven to 350°F (175°C). Grease three 8-inch round cake pans. Line the bottoms with parchment paper and lightly grease the parchment.
- In a large bowl, whisk the flour, cocoa powder, sugar, baking soda, baking powder, and salt. Break apart any lumps of cocoa.
- In a second bowl, whisk the eggs, buttermilk, vegetable oil, and vanilla.
- Add the wet mixture to the dry ingredients. Mix on low speed only until combined.
- Slowly pour in the hot coffee while mixing on low. The batter will become fairly thin. This is normal.
- Divide the batter evenly among the three prepared pans.
- Bake for 25–30 minutes, or until a toothpick inserted near the center comes out with a few moist crumbs but no wet batter.
- Let the cakes cool in their pans for 10 minutes. Turn them onto wire racks, remove the parchment, and cool completely. For easier stacking, chill the cooled layers for 30–60 minutes.
- Make the cookie cream. Beat the cream cheese, powdered sugar, and vanilla until smooth. Slowly add the cold heavy cream. Increase the mixer to medium-high and whip until the filling holds firm peaks.
- Gently fold the roughly crushed sandwich cookies into the filling. Do not overmix or the cream will become gray and lose its pale contrast.
- If necessary, level the cooled cake layers with a serrated knife. Place the first layer on a cake board. Spread a thick layer of cookie cream on top, stopping about ½ inch from the edge.
- Add the second cake layer and another generous layer of cookie cream. Finish with the third cake layer placed upside down for a flatter top.
- Refrigerate the stacked cake for 20–30 minutes before frosting.
- Make the cocoa frosting. Beat the softened butter until creamy. Gradually add powdered sugar and cocoa. Add the heavy cream, vanilla, and salt. Beat until light, silky, and spreadable.
- Cover the chilled cake with a thin crumb coat. Chill for about 15 minutes.
- Apply the remaining cocoa frosting. Use gentle upward spatula strokes around the sides to create the rustic chocolate finish shown in the finished cake.
- Make the chocolate cream swirls by beating butter until creamy. Gradually beat in powdered sugar and cocoa. Add 2 tablespoons of cream and the salt. Add the remaining cream only if needed for a pipeable consistency.
- Transfer the chocolate cream to a piping bag fitted with a large star tip. Pipe generous swirls over the top.
- Build the decoration from largest to smallest. Insert the tall wafer squares first. Add cream-filled cookies and broken chocolate biscuits next.
- Add thick chocolate curls and cookie clusters. Finish with coarse cookie crumbs only in selected gaps. Keep some frosting visible.
- Refrigerate the finished cake for 20–30 minutes before slicing. Use a sharp knife warmed in hot water and wiped dry for cleaner layers.
Notes
- Do not frost warm cake. Even slightly warm layers can soften the cookie filling.
- Use full-fat block cream cheese, not spreadable tub cream cheese.
- Heavy whipping cream should be cold when making the filling.
- Whip the filling to firm peaks before adding cookies.
- Fold the cookies gently to preserve the pale cream color visible in the reference slice.
- Do not turn the sandwich cookies into fine crumbs. Uneven pieces create better texture.
- Hot coffee deepens the chocolate character, but hot water works too.
- Chill the layers before assembly if they feel fragile.
- A crumb coat helps prevent dark chocolate crumbs from appearing in the final frosting.
- For the same visual style as the reference cake, use three decoration heights: tall wafers, medium cookies, then low curls and crumbs.
- Keep the decoration asymmetrical and abundant rather than perfectly uniform.
- Refrigerate leftovers because the filling contains cream cheese and whipped cream.
- For the crispest top decorations, add the wafers and cookies fairly close to serving.
- Prep Time: 1 hour 15 minutes
- Time: 1 hour 15 minutes
- Cook Time: 25–30 minutes
- Category: Dessert / Celebration Cake
- Method: Baking
- Cuisine: American-inspired
A Celebration Cake Worth the Extra Steps
The Velvet Cookie Stack Chocolate Celebration Cake looks extravagant, but the method becomes manageable when you treat it as several small jobs rather than one giant project.
Bake three even chocolate layers. Cool them completely. Whip a stable vanilla cookie filling. Stack and chill. Add silky cocoa frosting. Then build the top from large decorations down to the smallest curls and crumbs.
That order is what keeps the cake tall, clean, and dramatic.
Most importantly, do not hide the pale filling. Those contrasting cookie-cream bands are part of what makes the first slice so striking. Keep them thick, keep the cake cold during assembly, and give each decoration enough space to be seen.
When the knife finally passes through the wafer-covered crown and reveals the dark chocolate layers underneath, you get exactly what a celebration cake should deliver: a dessert that looks impressive before anyone has even tasted the first bite.