
Some chocolate cakes are made for a quiet afternoon with coffee. This is not one of them.
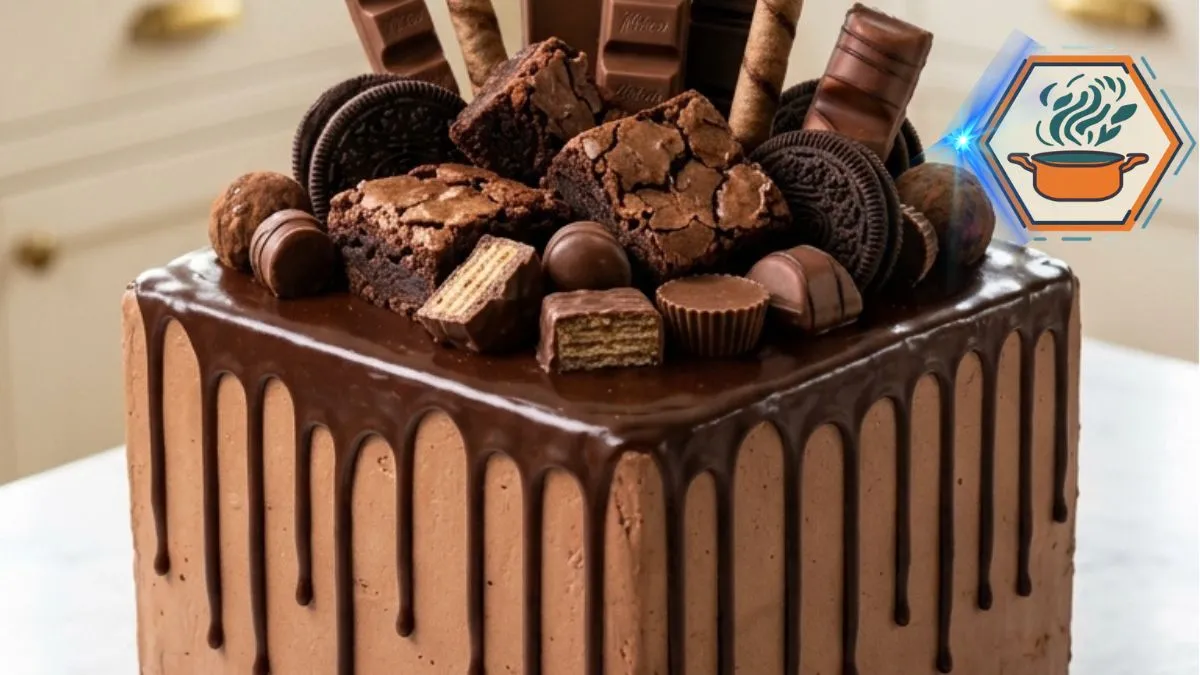
The Ultimate Chocolate Brownie Overload Cake is the cake you bring into a room when you want everyone to stop and look. First comes the tall square chocolate cake. Then the glossy ganache drips. Look closer and you find fudgy brownies, chocolate sandwich cookies, wafer rolls, truffles, chocolate bars, and round chocolate candies packed across the top.
Yet a cake like this cannot rely on looks alone.
Under all that chocolate, the cake needs a soft, moist crumb strong enough to carry the decorations. The frosting must hold the layers together. The ganache needs to drip without running to the bottom. Most importantly, every topping needs a place so the finished cake looks abundant rather than chaotic.
That balance is what makes this recipe work.
For additional baking guidance, King Arthur Baking’s chocolate cake guide provides useful reference points for testing chocolate cake doneness and handling layers. The FDA also reminds home bakers that raw flour and batter should not be tasted before baking.
If chocolate desserts are your favorite kind of kitchen project, RecipesMind also has a useful guide to mastering caramelized sugar, another technique where timing and temperature make a major difference.
Affiliate disclosure: As an Amazon Associate I earn from qualifying purchases. This article may contain affiliate links to kitchen tools I find useful for preparing this recipe.
JUMP TO
Ultimate Chocolate Brownie Overload Cake
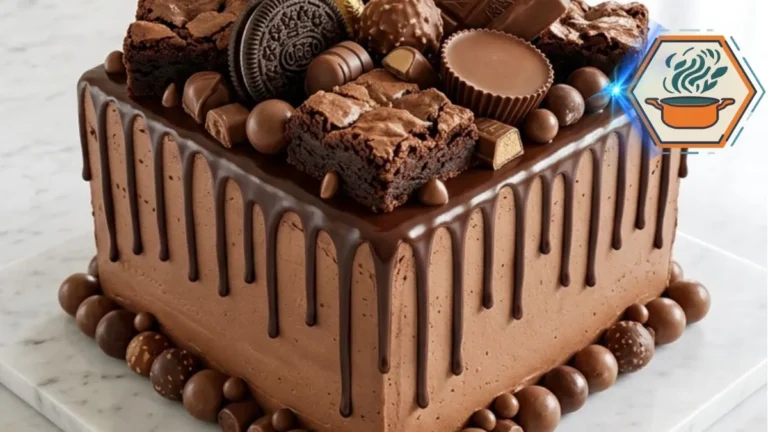
A tall square chocolate cake layered with creamy chocolate buttercream, finished with glossy chocolate ganache, fudgy brownies, sandwich cookies, wafer rolls, truffles, and assorted chocolate pieces. This version includes exact assembly, cooling, ganache, and decorating details for a rich but stable celebration cake.
- Total Time: 3 hours 30 minutes
- Yield: 16–20 servings
Ingredients
Chocolate Cake
- 2 cups (240 g) all-purpose flour
- 1 ¾ cups (350 g) granulated sugar
- ¾ cup (64 g) natural unsweetened cocoa powder
- 2 teaspoons baking powder
- 1 teaspoon baking soda
- ½ teaspoon fine salt
- 2 large eggs, room temperature
- 1 cup (240 ml) whole milk, room temperature
- ½ cup (120 ml) neutral vegetable oil
- 2 teaspoons vanilla extract
- ¾ cup (180 ml) hot brewed coffee or hot water
Chocolate Buttercream
- 1 ½ cups (340 g) unsalted butter, softened
- 4 cups (480 g) powdered sugar, sifted
- ¾ cup (64 g) natural unsweetened cocoa powder, sifted
- ⅓ cup (80 ml) heavy cream, plus 1–3 tablespoons if needed
- 2 teaspoons vanilla extract
- ¼ teaspoon fine salt
Chocolate Ganache
- 8 oz (225 g) semisweet chocolate, finely chopped
- ¾ cup (180 ml) heavy cream
Brownie and Chocolate Decoration
For a result close to the reference image:
- 8–10 fudgy brownie chunks, about 10 oz (280 g)
- 6 chocolate sandwich cookies
- 5–6 chocolate-covered wafer pieces
- 5 chocolate wafer rolls
- 5–6 mini chocolate cups
- 8 chocolate truffles
- 7–9 pieces milk and dark chocolate bars
- 12–16 small chocolate squares or chunks
- 20–24 round chocolate candies or truffles for the lower border
- 2 tablespoons chocolate curls or small chocolate shards, optional
Instructions
- Preheat the oven to 350°F (175°C). Grease two 8-inch square cake pans. Line the bottoms with parchment paper and lightly grease the parchment.
- In a large bowl, whisk the flour, granulated sugar, cocoa powder, baking powder, baking soda, and salt until evenly mixed.
- Add the eggs, milk, vegetable oil, and vanilla. Mix on low speed until the dry ingredients are moistened. Scrape the bowl.
- Slowly pour in the hot coffee while mixing on low. The batter will look thin. This is expected. Do not add extra flour.
- Divide the batter evenly between the prepared pans.
- Bake for 28–32 minutes, or until the centers spring back lightly and a toothpick inserted into the center comes out with a few moist crumbs but no wet batter.
- Cool in the pans for 10–15 minutes. Turn the cakes onto wire racks, remove the parchment, and cool completely.
- Make the buttercream. Beat the softened butter for 2–3 minutes until creamy. Gradually add powdered sugar and cocoa powder on low speed.
- Add vanilla, salt, and ⅓ cup heavy cream. Beat until smooth and fluffy. Add additional cream only 1 tablespoon at a time if the frosting is too firm.
- Level obvious cake domes with a serrated knife after the cakes are completely cool.
- Place the first square layer on a cake board. Spread about ¾–1 cup chocolate buttercream over the top.
- Add the second cake layer. Press very gently to settle it.
- Cover the entire cake with a thin crumb coat. Refrigerate for 20–30 minutes.
- Apply the final buttercream layer to the top and sides. Keep a soft spatula texture rather than making the surface completely smooth.
- Refrigerate the frosted cake for another 20 minutes before adding the ganache.
- For the ganache, place the finely chopped chocolate in a heatproof bowl.
- Heat ¾ cup heavy cream until steaming and just beginning to simmer around the edges. Do not boil aggressively.
- Pour the cream over the chocolate. Leave untouched for 2–3 minutes.
- Stir slowly until completely smooth and glossy.
- Allow the ganache to cool until it is still pourable but noticeably thicker. Test a single drip on the back of the chilled cake.
- If the drip runs straight to the bottom, wait several minutes. If it barely moves, warm the ganache very gently.
- Spoon controlled ganache drips around the cake edges, then cover the top with a thin layer of ganache.
- Place the tallest chocolate bars toward the back and center of the cake.
- Insert the wafer rolls at different heights and angles.
- Arrange brownie chunks across the middle. Turn some cut surfaces toward the camera or serving side so their fudgy centers remain visible.
- Add chocolate sandwich cookies, wafer pieces, mini cups, truffles, and chocolate squares around the brownies.
- Fill small gaps without hiding the entire ganache surface.
- Arrange round chocolate candies or truffles around the bottom edge of the square cake.
- Chill for 15–20 minutes to help the decorations settle.
- Before serving, allow the cake to stand at room temperature for about 20–30 minutes for a softer buttercream texture.
Notes
- Use natural unsweetened cocoa powder for the most predictable result with this ingredient balance.
- Hot coffee makes the chocolate flavor deeper but should not make the cake taste strongly of coffee.
- Hot water can replace coffee in the same amount.
- Do not frost warm cake layers.
- Do not pour hot ganache over buttercream.
- Always test one ganache drip before covering the visible sides.
- Large toppings are heavy. Keep the heaviest brownie pieces near the center rather than near the cake edges.
- Add crisp wafer rolls and cookies near serving time when possible.
- For clean slices, temporarily remove a few large decorations before cutting.
- Use a warm, clean knife and wipe it between slices.
- Prep Time: 1 hour 10 minutes
- Additional Time: 1 hour 50 minutes For cooling and chilling during assembly.
- Cook Time: 30 minutes
- Category: Dessert
- Method: Baking
- Cuisine: American
What Makes This Chocolate Brownie Overload Cake Special?
The secret is contrast.
A forkful begins with tender chocolate cake and creamy frosting. Then you reach the denser brownie pieces. Cookies add crunch. Wafer rolls are crisp and light. Truffles bring another creamy chocolate texture.
The ganache ties everything together.
There is also a visual trick behind the design. The decorations should not all sit at the same height. Tall chocolate bars and wafer rolls create the background. Brownies fill the middle. Cookies, truffles, and smaller chocolate pieces fill the gaps.
This gives you the overflowing appearance shown in the inspiration cake while keeping the square silhouette visible.
Ingredients for the Chocolate Cake
For two 8-inch square layers, you will need:
- 2 cups (240 g) all-purpose flour
- 1 ¾ cups (350 g) granulated sugar
- ¾ cup (64 g) unsweetened cocoa powder
- 2 teaspoons baking powder
- 1 teaspoon baking soda
- ½ teaspoon fine salt
- 2 large eggs, at room temperature
- 1 cup (240 ml) whole milk, at room temperature
- ½ cup (120 ml) neutral vegetable oil
- 2 teaspoons vanilla extract
- ¾ cup (180 ml) hot brewed coffee
Which Cocoa Powder Should You Use?
Use natural unsweetened cocoa powder for the most predictable result with this formula.
Natural cocoa is acidic, while Dutch-process cocoa has been alkalized. That difference can affect recipes containing chemical leaveners. Because this cake contains both baking soda and baking powder, changing the cocoa can alter flavor, color, and potentially the rise.
Do not use sweetened drinking chocolate.
Why Add Hot Coffee?
Coffee does not need to make the finished cake taste like mocha.
Here it adds liquid while supporting the deep cocoa character. Hot liquid also helps disperse the cocoa through the batter. If you avoid coffee, use the same quantity of hot water.
King Arthur also uses coffee or water in several chocolate cake formulas.
Ingredients for the Chocolate Buttercream
You will need:
- 1 ½ cups (340 g) unsalted butter, softened
- 4 cups (480 g) powdered sugar, sifted
- ¾ cup (64 g) unsweetened cocoa powder, sifted
- ⅓ to ½ cup (80–120 ml) heavy cream
- 2 teaspoons vanilla extract
- ¼ teaspoon fine salt
The salt may seem like a tiny detail, but it matters in such a rich cake. It keeps the frosting from tasting flat or simply sugary.
Start with ⅓ cup of cream, not the full amount. Add more only if necessary.
The butter should be soft enough to beat but not greasy or partly melted.
Ingredients for the Chocolate Ganache
You will need:
- 8 oz (225 g) semisweet chocolate, finely chopped
- ¾ cup (180 ml) heavy cream
Finely chopping the chocolate helps it melt evenly.
Do not pour boiling cream directly over the cake. The ganache is made while warm, then allowed to cool until it becomes thick enough to produce controlled drips.
Toppings
This is where the Ultimate Chocolate Brownie Overload Cake earns its name.
Prepare a mixture of:
- Fudgy brownie chunks
- Chocolate sandwich cookies
- Milk chocolate bars
- Dark chocolate bars
- Chocolate-covered wafer pieces
- Chocolate wafer rolls
- Mini chocolate cups
- Chocolate truffles
- Round chocolate candies or malted chocolate balls
- Small chocolate curls or shards
You do not need every topping from the same brand.
What matters more is matching the shapes, heights, colors, and textures.
Equipment You Will Need
Have these tools ready before mixing:
- Two 8-inch square cake pans, preferably light-colored aluminum pans with straight sides
- Parchment paper
- Large mixing bowls
- Whisk
- Electric or stand mixer
- Cooling racks
- Offset spatula
- Serrated knife
- Cake board or serving plate
- Small saucepan
- Heatproof bowl
- Spoon or piping bag for ganache
A square cake board makes the finished presentation much cleaner.
Step 1: Prepare the Pans Properly
Preheat your oven to 350°F (175°C).
Grease two 8-inch square pans.
Cut parchment to fit the bottoms. Place it inside and lightly grease the parchment.
Do not skip this step. Chocolate cake can be delicate while warm, and clean layers make assembly much easier.
If possible, weigh your empty mixing bowl before starting. Later, weigh the finished batter and divide it evenly between the pans. I find a digital kitchen scale especially useful here because it takes the guesswork out of dividing batter between two square pans.
That small step helps the layers bake at nearly the same height.
Step 2: Mix the Dry Ingredients
In a large bowl, whisk together:
- Flour
- Sugar
- Cocoa powder
- Baking powder
- Baking soda
- Salt
Break up every visible cocoa lump.
Sifting the cocoa first is helpful because cocoa powder tends to form stubborn little pockets.
Step 3: Add the Wet Ingredients
Add the eggs, milk, vegetable oil, and vanilla.
Mix on low speed until the dry ingredients are moistened. Increase to medium briefly and mix until combined.
Scrape the bottom and sides of the bowl.
Now slowly pour in the hot coffee while mixing on low.
The batter will become quite thin.
That is normal. Do not add extra flour.
A loose chocolate cake batter can still produce a tender, moist cake. Similar thin-batter methods are used in established chocolate cake recipes.
Step 4: Bake the Chocolate Layers
Divide the batter evenly between your prepared pans.
Bake at 350°F for approximately 28–32 minutes.
Start checking around 27 minutes because ovens vary.
The cakes are ready when the centers spring back lightly and a toothpick inserted near the center comes out clean or with a few moist crumbs rather than wet batter. These are also standard visual checks described by King Arthur for chocolate layer cake.
Let the layers cool in their pans for about 10–15 minutes.
Carefully turn them onto cooling racks.
Remove the parchment and allow them to cool completely.
Never frost warm cake.
Step 5: Make the Chocolate Buttercream
Beat the softened butter for about 2–3 minutes until creamy.
Add the powdered sugar gradually.
Mix on low at first so your kitchen does not disappear beneath a cloud of sugar.
Add the sifted cocoa and salt.
Pour in the vanilla and about ⅓ cup heavy cream.
Beat until smooth and fluffy.
If the frosting feels too stiff, add cream one tablespoon at a time.
If it becomes too loose, chill it for 10–15 minutes before using.
For this particular cake, slightly firm buttercream is better than very soft frosting because the top will carry a considerable amount of chocolate.
Step 6: Build a Stable Square Cake
If either layer has a large dome, trim it gently with a serrated knife.
Place the first layer on the cake board.
Spread a generous, even layer of buttercream over it. Keep the filling roughly ½ inch thick.
Add the second layer.
Check the cake from every side before continuing. Square cakes make leaning much easier to notice than round cakes.
Apply a thin crumb coat over the top and sides. A small offset icing spatula is particularly helpful around the square corners, where a large straight spatula can pull away more frosting than you want.
Refrigerate for about 20–30 minutes.
The crumb coat traps loose crumbs and gives your final frosting layer a cleaner surface.
Add the remaining buttercream.
Smooth the sides while leaving a little natural spatula texture. The inspiration cake is polished but not perfectly sharp or artificial.
Chill again for around 20 minutes before adding ganache.
That cold surface is one of the keys to controlled chocolate drips.
Step 7: Make Glossy Chocolate Ganache
Place the finely chopped semisweet chocolate in a heatproof bowl.
Heat the cream until it is steaming and just beginning to simmer around the edges. Do not aggressively boil it.
Pour it over the chocolate.
Leave it untouched for 2–3 minutes.
Then stir slowly from the center outward until glossy and smooth.
Now comes the detail that many short recipes miss:
Do not immediately pour it onto the cake.
Fresh ganache may be too hot and thin. It can melt the buttercream or run all the way down the sides.
Allow it to cool until it remains fluid but falls slowly from a spoon.
Test one drip on the back of the chilled cake.
If it races downward, wait longer.
If it barely moves, gently warm the ganache.
Once the consistency looks right, create irregular drips around the edges and spread ganache across the top.
Step 8: Recreate the Overload Decoration
This part looks spontaneous, but a little planning produces a much better result.
Begin with the tallest pieces.
Insert large chocolate bar sections vertically toward the back and center. Angle some slightly instead of forming a straight row.
Add wafer rolls at different heights.
Next, place large brownie chunks across the middle. Show their cut sides whenever possible so the fudgy centers remain visible.
Add chocolate sandwich cookies between them. Keep some whole and partially hide others.
Then fill smaller spaces with:
- Truffles
- Mini chocolate cups
- Wafer pieces
- Chocolate squares
- Small chocolate chunks
Avoid covering every inch of ganache. Small visible areas make each topping easier to distinguish.
Finally, arrange round chocolate truffles or candies around the bottom edge of the square cake.
That border gives the heavy top decoration a visual finish.
The Height Trick That Makes the Cake Look Professional
Think of the decoration as three zones.
Back and center: tall chocolate bars and wafer rolls.
Middle: brownie chunks, cookies, and medium chocolate pieces.
Front and gaps: truffles, small wafers, chocolate squares, and curls.
This creates depth.
If every decoration is the same height, the cake can look like a tray of candy. Different heights turn those individual sweets into one dramatic design.
Common Mistakes to Avoid
Ganache Running to the Bottom
Your ganache is probably too warm or your cake is not cold enough.
Test a single drip first.
Buttercream Sliding
The butter may have been too warm. Chill the frosting briefly before assembling.
Cake Breaking During Assembly
The layers were probably still warm or handled too early. Cool them completely before trimming or stacking.
Dry Chocolate Cake
Too much flour or too much baking time are common causes.
For better accuracy, weigh flour rather than packing a measuring cup. Also begin checking the cake before the maximum baking time.
Decorations Falling Over
Push tall pieces slightly into the frosting or ganache. Place heavy brownies closer to the center rather than balancing them near an edge.
Can You Make It Ahead?
Yes, and doing some work in advance can make assembly easier.
Bake the layers one day before decorating. Once completely cool, wrap them well and store them appropriately until assembly.
You can also prepare the brownies ahead.
Decorate the cake closer to serving time when possible, especially if you want the cookies and wafer rolls to retain their crisp texture.
For another chocolate dessert idea, you can also see our strawberry-filled chocolate cake guide.
How to Cut an Overload Cake
Do not try to force a knife through the entire chocolate mountain.
Remove a few of the tallest decorations first and place them on the serving plate.
Use a long, sharp knife to slice the cake. Wipe the blade between cuts.
Because this dessert is extremely rich, smaller portions usually work better than standard birthday-cake wedges.
Let a refrigerated cake sit briefly at room temperature before serving so the buttercream and chocolate can soften slightly.
Final Kitchen Notes
The Ultimate Chocolate Brownie Overload Cake succeeds because the cake underneath the decoration gets as much attention as the decoration itself.
Cool the layers completely. Use frosting firm enough to support the cake. Chill before adding ganache. Test the ganache before committing to the drips. Then build the toppings from tallest to smallest.
Most of all, do not rush the decorating stage.
The goal is abundance with structure.
When the final brownie chunk settles between the cookies and glossy chocolate bars, you should still be able to recognize the square cake underneath. That is the difference between a pile of chocolate and a true chocolate overload centerpiece.
Frequently Asked Questions
What is an Ultimate Chocolate Brownie Overload Cake?
It is a rich chocolate layer cake covered with chocolate buttercream and ganache, then decorated generously with brownies, cookies, wafers, truffles, and assorted chocolates.
Can I use water instead of coffee?
Yes. Replace the coffee with an equal amount of hot water. Coffee gives the chocolate profile more depth, but it is not required.
Why is my chocolate cake batter so thin?
The thin texture is intentional because the recipe contains milk, oil, eggs, and hot coffee. Do not compensate by adding extra flour.
Can I make this cake without brownie pieces?
Yes. Replace them with extra chocolate cookies, cake truffles, chocolate-covered wafers, or pieces of chocolate bar. However, brownies provide the dense, fudgy contrast that defines this version.
How do I stop ganache from melting my frosting?
Chill the frosted cake first and allow the ganache to cool before applying it. Test one drip on the back of the cake. If it runs too quickly, wait a few more minutes.
How do I get neat chocolate drips?
Use a chilled cake and thick but still pourable ganache. Apply one test drip before decorating the visible sides.
Can I make this chocolate overload cake the day before?
Yes. The cake itself can be assembled ahead. For the best texture, consider adding crisp cookies and wafer decorations closer to serving time.
What toppings work best on a chocolate overload cake?
Use toppings with different sizes and textures. Brownie chunks, sandwich cookies, wafer rolls, truffles, chocolate bars, mini chocolate cups, and round chocolate candies create the layered appearance.
How do I keep a tall chocolate cake stable?
Use completely cooled layers, level obvious domes, apply a crumb coat, chill between major decorating stages, and keep very heavy decorations near the center.
What is the secret to making the decoration look like the inspiration cake?
Height and placement. Put tall bars and wafer rolls toward the center and back. Arrange brownies across the middle. Use cookies and smaller chocolates to fill the front and gaps. Finish with round chocolate pieces around the base. This keeps the extravagant chocolate-loaded appearance while preserving the cake’s distinctive square shape.