
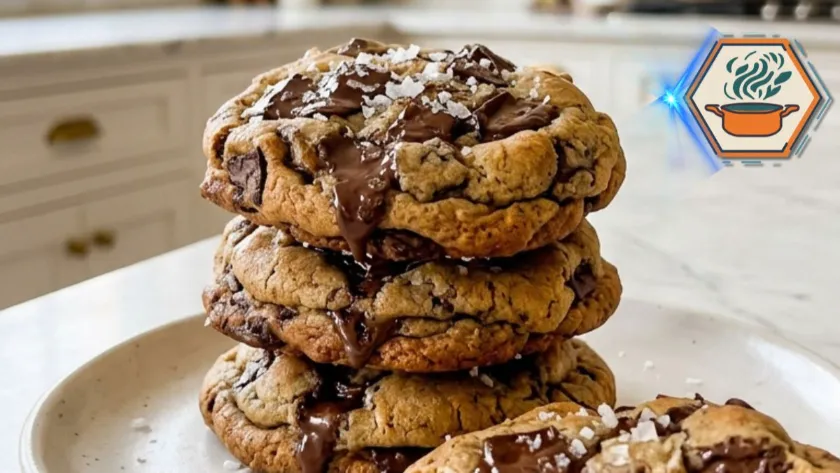
There’s something unforgettable about walking into a bakery and smelling freshly baked cookies. The warm aroma of butter, brown sugar, vanilla, and melted chocolate instantly brings back childhood memories. After trying countless recipes over the years, I realized that the secret to truly Perfect Chunky Chocolate Chip Cookies isn’t just about following a list of ingredients—it’s about understanding the little details that create thick cookies with crispy edges, soft centers, and pools of melted chocolate in every bite.
This recipe is designed for anyone who loves bakery-style cookies that look as impressive as they taste. Whether you’re baking for family, friends, or simply satisfying your sweet tooth, these cookies deliver the perfect balance of texture and flavor every single time.
If you enjoy homemade baking, you’ll also love our guide to https://recipesmind.com/secret-to-crunchy-cookies/, where you’ll discover more tips for creating irresistible baked treats.
JUMP TO
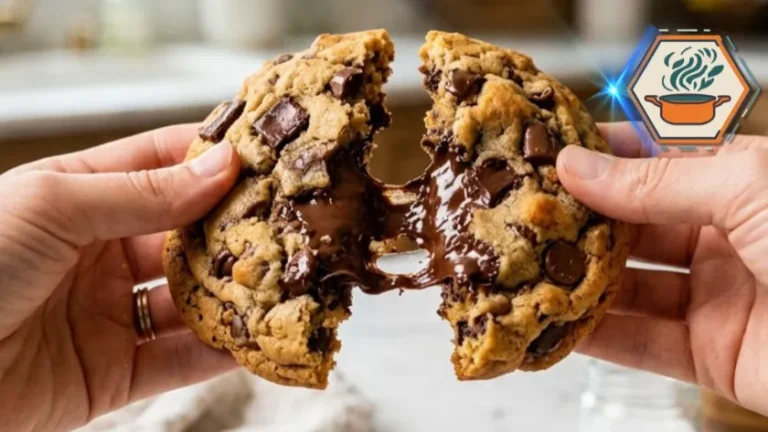
Perfect Chunky Chocolate Chip Cookies
These bakery-style Perfect Chunky Chocolate Chip Cookies are thick, chewy, buttery, and filled with gooey chocolate chunks. Crispy on the outside, soft in the center, and easy to make at home with simple pantry ingredients.
- Total Time: 1 hour 32 minutes (includes 1-hour chilling)
- Yield: 18 large cookies
Ingredients
Dry Ingredients
- 2¼ cups (280 g) all-purpose flour
- 1 tsp baking soda
- 1 tsp fine sea salt
Wet Ingredients
- 1 cup (225 g) unsalted butter, softened (18–20°C / 65–68°F)
- ¾ cup (150 g) granulated sugar
- ¾ cup (165 g) packed light brown sugar
- 2 large eggs, room temperature
- 2 tsp pure vanilla extract
Chocolate
- 2 cups (340 g) semi-sweet chocolate chunks
- Flaky sea salt for topping
Instructions
Preheat oven to 375°F (190°C).
Line two baking sheets with parchment paper.
Step 2
Whisk together flour, baking soda and salt.
Set aside.
Step 3
Beat softened butter with both sugars for 3–4 minutes until pale and fluffy.
Step 4
Mix in eggs one at a time.
Add vanilla.
Step 5
Slowly add dry ingredients.
Mix only until combined.
Step 6
Fold chocolate chunks gently using a spatula.
Reserve a few chunks for topping.
Step 7
Cover dough.
Refrigerate at least 1 hour.
Best flavor: 24 hours.
Step 8
Scoop ¼ cup portions.
Shape into tall rough balls.
Do not flatten.
Step 9
Bake 10–12 minutes.
Edges should be golden.
Centers should still look soft.
Step 10
Sprinkle flaky sea salt.
Cool 10 minutes on baking sheet.
Transfer to wire rack.
Notes
✔ Room temperature butter is essential.
✔ Never melt the butter.
✔ Chilling prevents spreading.
✔ Weigh flour instead of using measuring cups for best accuracy.
✔ Press extra chocolate chunks onto the tops before baking.
✔ Cookies continue baking after leaving the oven.
✔ Do not overmix the dough.
✔ Use parchment paper instead of greasing the baking sheet.
✔ Rotate the baking tray halfway if your oven bakes unevenly.
- Prep Time: 20 minutes
- Cook Time: 12 minutes
- Category: Dessert
- Method: Baking
- Cuisine: American
- Diet: Vegetarian
Why These Perfect Chunky Chocolate Chip Cookies Stand Out
Not all chocolate chip cookies are created equal. Some spread too much, while others become dry or cakey. This recipe focuses on creating bakery-quality cookies with:
- Thick and chunky texture
- Crispy golden edges
- Soft, chewy centers
- Large pockets of melted chocolate
- Rich buttery flavor
- Beautiful cracked tops
- A hint of flaky sea salt for balance
The biggest difference is that we use real chocolate chunks instead of regular chocolate chips. Chocolate chunks melt into large pools, creating that luxurious bakery appearance.
Ingredients You’ll Need
Dry Ingredients
- 2¼ cups (280g) all-purpose flour
- 1 teaspoon baking soda
- 1 teaspoon fine salt
Wet Ingredients
- 1 cup (225g) unsalted butter, softened
- ¾ cup (150g) granulated sugar
- ¾ cup (165g) packed light brown sugar
- 2 large eggs, room temperature
- 2 teaspoons pure vanilla extract
Mix-Ins
- 2 cups (340g) semi-sweet chocolate chunks
- Flaky sea salt for finishing
Why Each Ingredient Matters
Butter
Softened butter creates the perfect creamy base. It should feel soft when pressed but still hold its shape. Melted butter causes cookies to spread too much.
Brown Sugar
Brown sugar adds moisture thanks to its molasses content, giving cookies their signature chewy center.
Granulated Sugar
White sugar helps create crispy edges and encourages beautiful caramelization during baking.
Flour
Measure flour carefully using a kitchen scale whenever possible. Too much flour creates dense cookies.
Eggs
Room-temperature eggs blend more smoothly into the dough and create a consistent texture.
Chocolate Chunks
Unlike chips, chunks melt into gooey chocolate pockets that make every bite more indulgent.
Equipment You’ll Need
Having the right equipment makes baking much easier.
- Large mixing bowl
- Electric mixer
- Rubber spatula
- Cookie scoop (¼ cup size)
- Baking sheets
- Parchment paper
- Cooling rack
- Kitchen scale (recommended)
Step-by-Step Instructions
Step 1: Prepare Your Oven
Preheat the oven to 375°F (190°C).
Line baking sheets with parchment paper instead of greasing them. Parchment prevents sticking and promotes even browning.
Step 2: Mix the Dry Ingredients
In a medium bowl, whisk together:
- Flour
- Baking soda
- Salt
Whisking distributes the baking soda evenly so every cookie rises properly.
Step 3: Cream the Butter and Sugars
In a large bowl, beat:
- Softened butter
- Brown sugar
- Granulated sugar
Mix for 3 to 4 minutes until light, fluffy, and pale in color.
This step incorporates air into the dough, helping create thick cookies with a tender crumb.
Step 4: Add Eggs and Vanilla
Add one egg at a time.
Mix well after each addition before adding the next egg.
Finally, mix in the vanilla extract.
Scrape the bowl occasionally to ensure everything combines evenly.
Step 5: Add Dry Ingredients
Gradually add the flour mixture.
Mix only until no dry flour remains.
Overmixing develops gluten, leading to tougher cookies.
Step 6: Fold in Chocolate Chunks
Using a rubber spatula, gently fold the chocolate chunks into the dough.
Reserve a handful of chunks to press onto the tops before baking. This creates the bakery-style appearance shown in professional cookie photos.
The Secret Step: Chill the Dough
Many recipes skip this important step.
Don’t.
Refrigerate the dough for at least one hour.
For even better flavor, chill it for 24 hours.
Benefits include:
- Better flavor development
- Less spreading
- Thicker cookies
- Richer caramel notes
- Improved texture
If chilling overnight, cover the bowl tightly.
Shaping the Cookies
Use approximately ¼ cup of dough per cookie.
Do not flatten the dough.
Instead, shape tall, rough mounds.
The irregular shape creates beautiful cracks while baking.
Leave about 3 inches between cookies because they will spread slightly.
Baking
Bake for 10–12 minutes.
The edges should be lightly golden.
The centers should still appear slightly underbaked.
This is exactly what you want.
Cookies continue baking on the hot tray after leaving the oven.
Immediately sprinkle flaky sea salt on top.
Allow cookies to rest on the baking sheet for 10 minutes before transferring them to a cooling rack.
Professional Tips for Bakery-Style Cookies
Small details make a huge difference.
Always Use Room-Temperature Ingredients
Cold ingredients don’t mix evenly.
Measure Ingredients Carefully
Using too much flour is one of the biggest reasons cookies become dry.
Don’t Overmix
Mix only until ingredients come together.
Save Chocolate for the Top
Adding extra chocolate chunks before baking makes the finished cookies look professionally baked.
Bake One Tray at a Time
This promotes even heat circulation.
Use a Kitchen Scale
Weighing ingredients delivers consistent results every time.
Common Mistakes to Avoid
Using Melted Butter
This causes cookies to spread excessively.
Skipping the Chill Time
Warm dough creates flat cookies.
Overbaking
Remember that cookies continue cooking after leaving the oven.
Using Chocolate Chips Instead of Chunks
Chunks create larger pools of melted chocolate and a richer eating experience.
Flattening the Dough
Tall dough balls naturally produce thick cookies.
Storage Tips
Store cooled cookies in an airtight container.
They remain fresh for up to 5 days at room temperature.
To keep them soft, place a slice of bread inside the container. The bread releases moisture, helping maintain freshness.
Freezing Instructions
Cookie dough freezes beautifully.
After scooping dough balls:
- Freeze until solid.
- Transfer to freezer bags.
- Store for up to 3 months.
Bake directly from frozen by adding 2–3 extra minutes to the baking time.
Already baked cookies can also be frozen for up to 3 months.
Delicious Variations
Once you’ve mastered the original recipe, try these ideas.
Double Chocolate
Replace ¼ cup of flour with cocoa powder.
Dark Chocolate
Use 70% dark chocolate chunks for a richer flavor.
Nut Lovers
Fold in chopped walnuts or pecans.
Espresso Version
Add one teaspoon of espresso powder to deepen the chocolate flavor without making the cookies taste like coffee.
Holiday Cookies
Mix white chocolate chunks with dried cranberries for a festive twist.
Frequently Asked Questions
Why are my cookies flat?
Usually because the butter was too warm, the dough wasn’t chilled, or too little flour was used.
Can I chill the dough overnight?
Absolutely. In fact, chilling for 24 hours often produces even better flavor.
Why use chocolate chunks instead of chips?
Chocolate chunks melt into larger pockets, creating gooey bites and a bakery-style appearance.
Can I freeze the dough?
Yes. Frozen cookie dough is perfect for baking fresh cookies whenever you want.
Why add flaky sea salt?
A small sprinkle enhances the sweetness and intensifies the chocolate flavor while adding a pleasant crunch.
Final Thoughts
These Perfect Chunky Chocolate Chip Cookies prove that outstanding cookies don’t require complicated techniques—just quality ingredients and attention to the small details. From properly creaming the butter to chilling the dough and using generous chocolate chunks, every step contributes to a cookie that’s thick, chewy, and packed with rich flavor.
Whether you’re baking for a weekend gathering, preparing homemade gifts, or simply enjoying an afternoon treat with a glass of milk, this recipe consistently delivers bakery-style results. Once you taste the crispy edges, soft centers, and melted chocolate in every bite, you’ll understand why these cookies quickly become a favorite for both beginner and experienced bakers alike.
For more baking inspiration, don’t miss our guides on https://recipesmind.com/secret-to-crunchy-cookies/ and https://recipesmind.com/jazz-up-sugar-cookies/ to continue improving your homemade desserts.