
This post contains affiliate links. As an Amazon Associate I earn from qualifying purchases.
Buttery pecan cookie bars, fudgy chocolate raspberry brownies, or flaky little vanilla custard pastries: which one would you reach for first? If you can’t pick, you’re in good company. This post gives you all three, each with its own printable recipe card, so you can bake one tonight or set out the whole trio for a party.
The idea comes from a short reel shared by Sugar Rush Daily on Facebook. The reel only shows the finished desserts, so we filled in every step it skips: the par-baked crust under the pecan topping, the trick that turns raspberries jammy inside a brownie, and a real stovetop pastry cream that sets up thick and silky. You’ll also find doneness cues, cooling times, and food safety notes for the egg-based fillings.
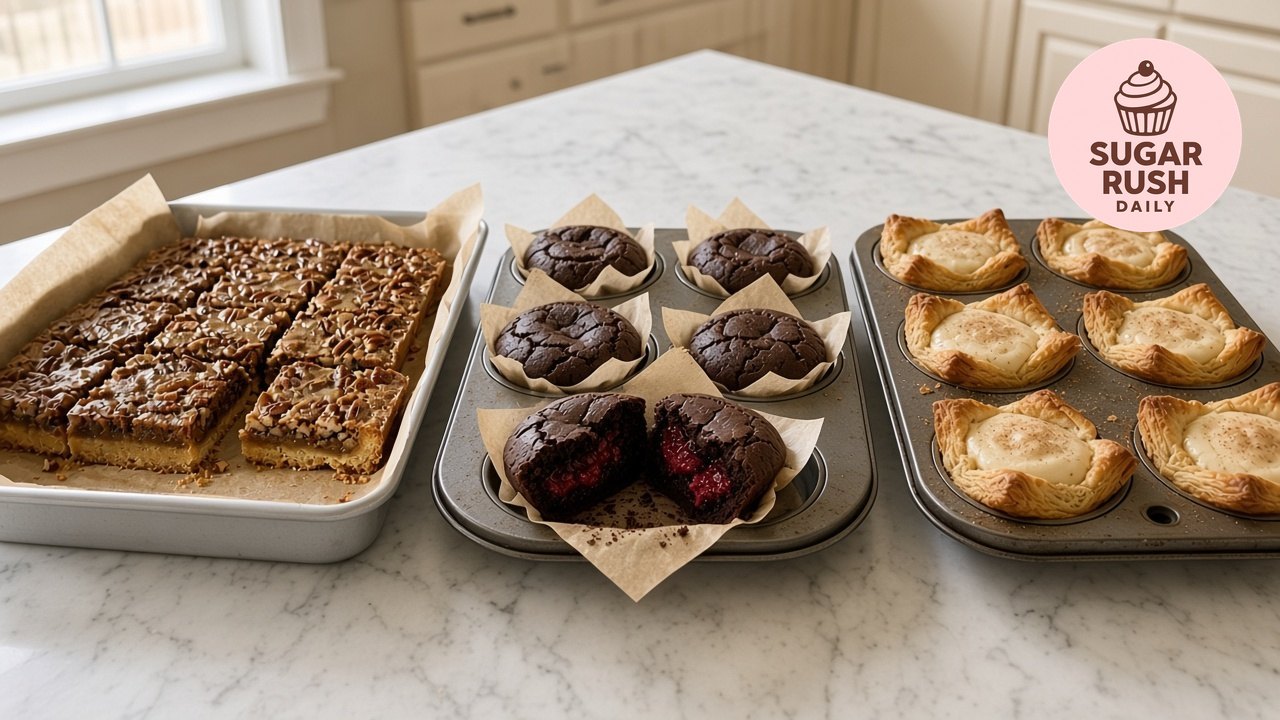
The photos in this post are illustrative AI-generated images. Use the recipe cards for exact amounts, times, and yields.
Table of Contents
- Why This Dessert Trio Works
- Timing at a Glance
- Helpful Tools
- Pecan Cookie Bars
- Fudgy Chocolate Raspberry Brownie Cups
- Flaky Vanilla Custard Pastries
- Make-Ahead and Storage Plan
- Common Mistakes to Avoid
- Frequently Asked Questions
Why This Dessert Trio Works
A good dessert spread needs contrast, and these three cover it. The pecan cookie bars are chewy, nutty, and buttery. The brownie cups are dense and chocolatey, with a bright pop of tart raspberry. The custard pastries are light, crisp, and creamy, with a whisper of nutmeg on top.
They are also easy to serve. The bars slice into neat squares, the brownies bake in their own tulip liners, and the pastries are already portioned. Nobody needs a plate and fork, which makes this trio perfect for potlucks, bake sales, and holiday cookie swaps.
Timing at a Glance
Each recipe has waiting time built in, so plan around it. These totals use the longest time in each range and match the recipe cards:
- Pecan cookie bars: 20 minutes active, 55 minutes in the oven, and 2 1/2 hours to cool and chill. Ready in about 3 hours 45 minutes.
- Raspberry brownie cups: 20 minutes active, 22 minutes in the oven, and 45 minutes to cool. Ready in about 1 hour 27 minutes.
- Vanilla custard pastries: 30 minutes active, 30 minutes of cooking and baking, and 2 hours to chill the pastry cream. Ready in about 3 hours.
Baking all three in one day? Make the pastry cream first so it can chill. Then bake the pecan cookie bars at 350°F, followed by the brownies at the same temperature. Raise the oven to 400°F last for the puff pastry shells.
Helpful Tools
You probably own most of what you need. If you’re missing something, these are practical picks:
- Nordic Ware Naturals Quarter Sheet with Lid: a rimmed aluminum pan close to 9×13 inches, just right for pecan cookie bars. The lid is handy for storing the bars in the fridge.
- Reynolds Kitchens Unbleached Parchment Paper: for the parchment sling that lifts the pecan cookie bars out in one piece.
- USA Pan 12-Cup Muffin Pan: a sturdy standard tin for both the brownie cups and the puff pastry shells.
- Baker’s Signature Tulip Cupcake Liners (Natural Brown): the tall brown liners that give the brownies their bakery look.
- OXO Good Grips 11-Inch Balloon Whisk: keeps the pastry cream smooth and lump-free while it thickens.
- TempPro TP19H Instant-Read Thermometer: the easiest way to confirm the filling of your pecan cookie bars is set.
- Microplane Premium Classic Spice Grater: for a fresh, fragrant dusting of nutmeg over the custard.
- Ateco 4.5-Inch Offset Spatula: spreads the filling evenly and lifts out the first bar cleanly.
You’ll also need mixing bowls, a medium saucepan, a fine-mesh strainer, plastic wrap, and a piping bag or zip-top bag.
Pecan Cookie Bars
Think of these pecan cookie bars as pecan pie in a hand-held square. A brown sugar shortbread base sits under a glossy, gooey filling packed with chopped pecans. One pan makes 24 bars, so there’s plenty to share.
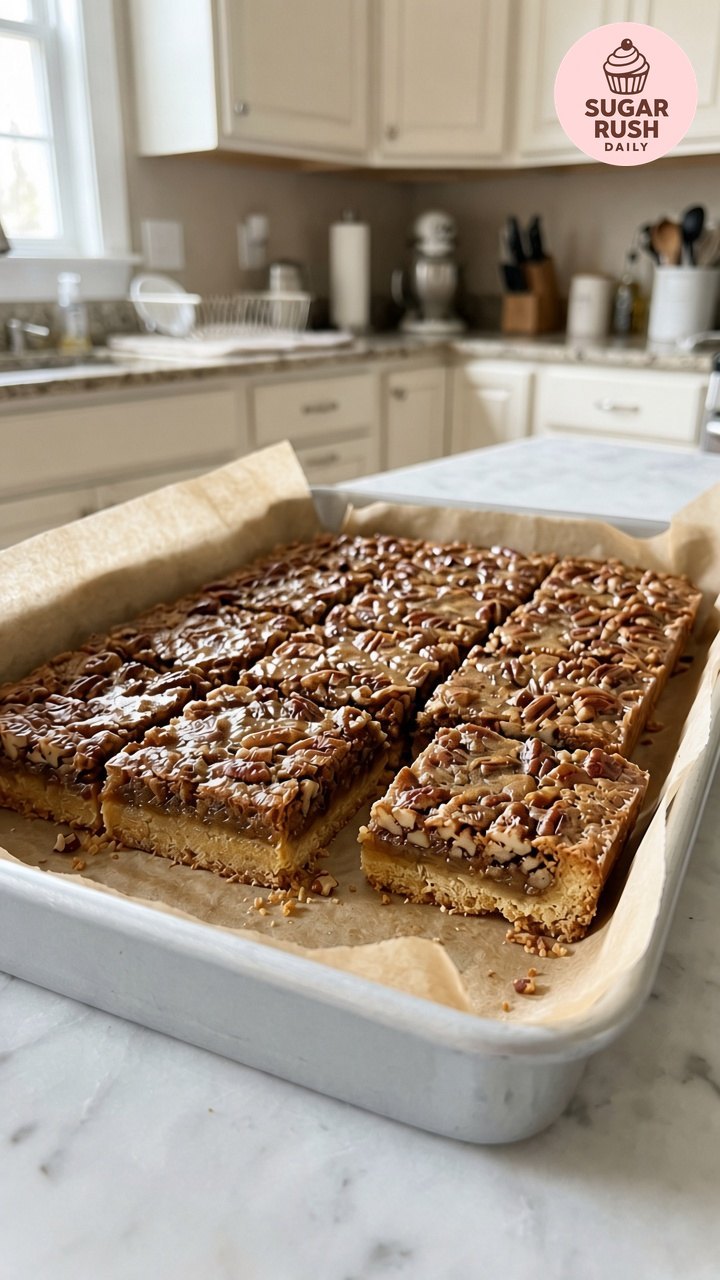
Pecan Cookie Bars
Buttery brown sugar shortbread topped with a glossy, gooey pecan pie filling, baked in a parchment-lined pan and cut into 24 squares. The crust is par-baked first so it stays crisp, and the bars are fully cooled and chilled for clean slices.
- Total Time: 3 hours 45 minutes
- Yield: 24 bars
Ingredients
For the shortbread crust:
3/4 cup (170 g) unsalted butter, melted
1/2 cup (100 g) packed light brown sugar
1 teaspoon vanilla extract
1/2 teaspoon fine salt
2 cups (250 g) all-purpose flour
For the pecan filling:
3 large eggs, at room temperature
1 cup (240 ml) light corn syrup
3/4 cup (150 g) packed light brown sugar
1/4 cup (57 g) unsalted butter, melted and slightly cooled
2 teaspoons vanilla extract
1/4 teaspoon fine salt
2 1/2 cups (about 250 g) pecan halves, coarsely chopped
Instructions
1. Heat the oven to 350°F (175°C) with a rack in the center. Line a 9×13-inch metal pan or a quarter sheet pan with parchment, leaving a 2-inch overhang on the two long sides to use as a sling.
2. Crust: In a bowl, stir the melted butter, brown sugar, vanilla and salt until smooth. Add the flour and stir until a soft, crumbly dough forms. Press it evenly over the bottom of the pan with your fingers or the bottom of a measuring cup.
3. Par-bake the crust for 18 to 20 minutes, until the edges are light golden and the center looks dry and set.
4. Filling: While the crust bakes, whisk the eggs in a large bowl. Whisk in the corn syrup, brown sugar, melted butter, vanilla and salt until smooth. Stir in the chopped pecans.
5. Pour the filling over the hot crust and spread the pecans evenly to the edges with an offset spatula.
6. Bake for 28 to 35 minutes, until the edges are set and slightly puffed and the center jiggles only slightly when you nudge the pan. The center of the filling should read about 200°F (93°C) on an instant-read thermometer. If the edges brown too fast, tent loosely with foil.
7. Cool the pan on a wire rack for about 1 1/2 hours, until it reaches room temperature. Then cover and refrigerate for at least 1 hour, so the bars set and cut cleanly.
8. Lift the slab out with the parchment sling. Use a sharp knife, wiped clean between cuts, to cut 24 bars (4 rows by 6). Serve cool or at room temperature.
Notes
Real ready time: about 3 hours 45 minutes (20 min prep + 55 min baking + about 2 1/2 hours of cooling and chilling). The Total below includes this inactive time.
Don’t skip the par-bake. It keeps the crust crisp under the wet filling.
Pan size: a quarter sheet pan (about 12 x 9 inches inside) is slightly smaller than 9×13, so the bars are a little thicker and may need the full bake time. A glass pan bakes slower; add a few minutes.
For 15 larger bars, cut 3 rows by 5.
Corn syrup swap: pure maple syrup or golden syrup in the same amount; the filling may set slightly softer and taste different.
Food safety and storage: the filling contains eggs. Refrigerate the bars within 2 hours (1 hour above 90°F), covered, and eat within 3 to 4 days. Freeze wrapped bars up to 3 months (quality guideline); thaw in the fridge.
Nutrition is an estimate per bar (1 of 24), calculated from standard USDA FoodData Central values. It varies with brands and bar size.
- Prep Time: 20 minutes
- Cool and chill: 2 hours 30 minutes
- Cook Time: 55 minutes (par-bake 18-20 min + bake 28-35 min, top of ranges)
- Category: Dessert
- Method: Baking
- Cuisine: American
- Diet: Vegetarian
Par-Bake the Crust for Pecan Cookie Bars
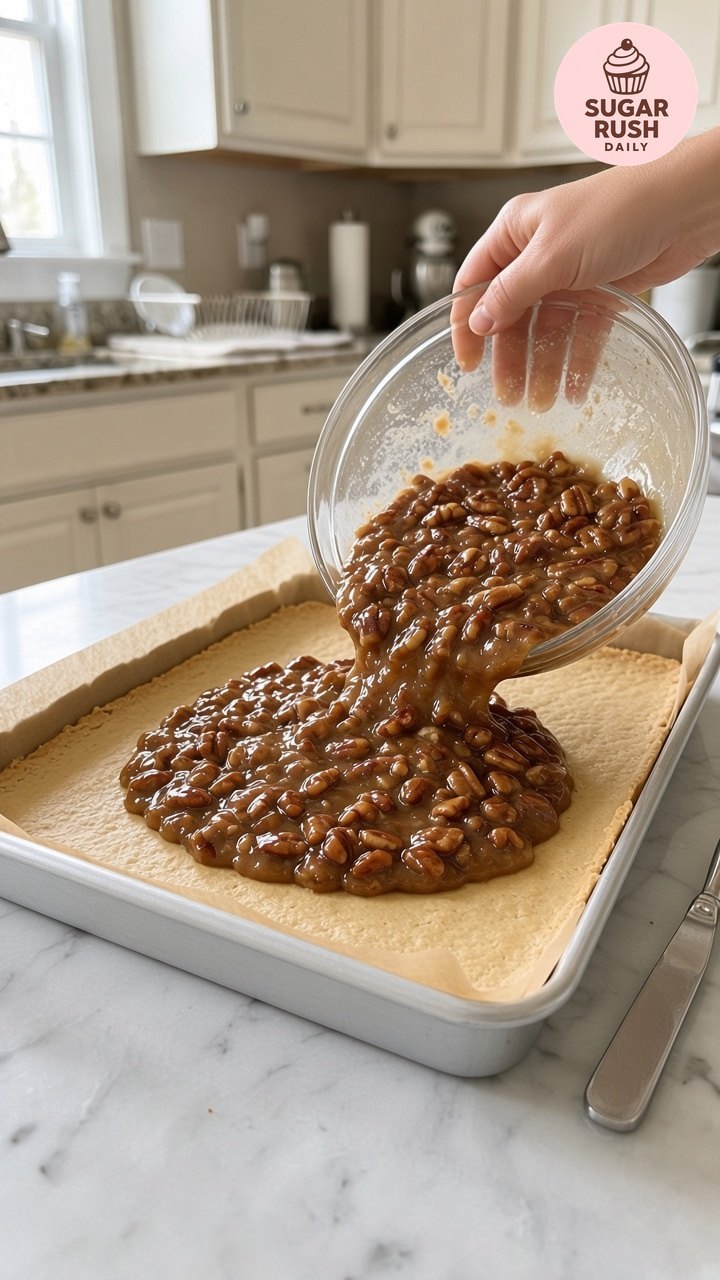
The reel jumps straight to finished bars, but the most important step happens early. Press the shortbread dough into a parchment sling, then bake it on its own for 18 to 20 minutes, until the edges turn light golden. A par-baked crust stays crisp under the wet filling instead of turning soggy.
Pour the filling over the warm crust and spread the pecans evenly. Warm crust and filling bond better, so the layers don’t separate when you cut.
How to Tell the Pecan Cookie Bars Are Done
The edges should look set and slightly puffed. When you nudge the pan, the center should wobble only a little, like set gelatin, not ripple like liquid. For a sure sign, the center of the filling should read about 200°F on an instant-read thermometer. That is well above the 160°F the USDA recommends for egg dishes in its shell eggs from farm to table guide.
Then comes the hard part: waiting. Cool the pan on a rack for about 1 1/2 hours, then chill for 1 hour. Cold filling cuts into clean squares. Lift the whole slab out with the parchment, trim the edges if you like, and use a sharp knife wiped clean between cuts.
Love pecans? Try our caramel pecan cheesecake bars or the simple 3-ingredient butter pecan cookies.
Fudgy Chocolate Raspberry Brownie Cups
These brownies bake in tall tulip liners inside a muffin tin, so every one gets crackly edges and a fudgy middle. Break one open and you’ll find soft, jammy pockets of raspberry. Real baked raspberries don’t stay round and perfect like they do in the reel. They melt into little pools of fruit, and that’s exactly what makes them taste so good.
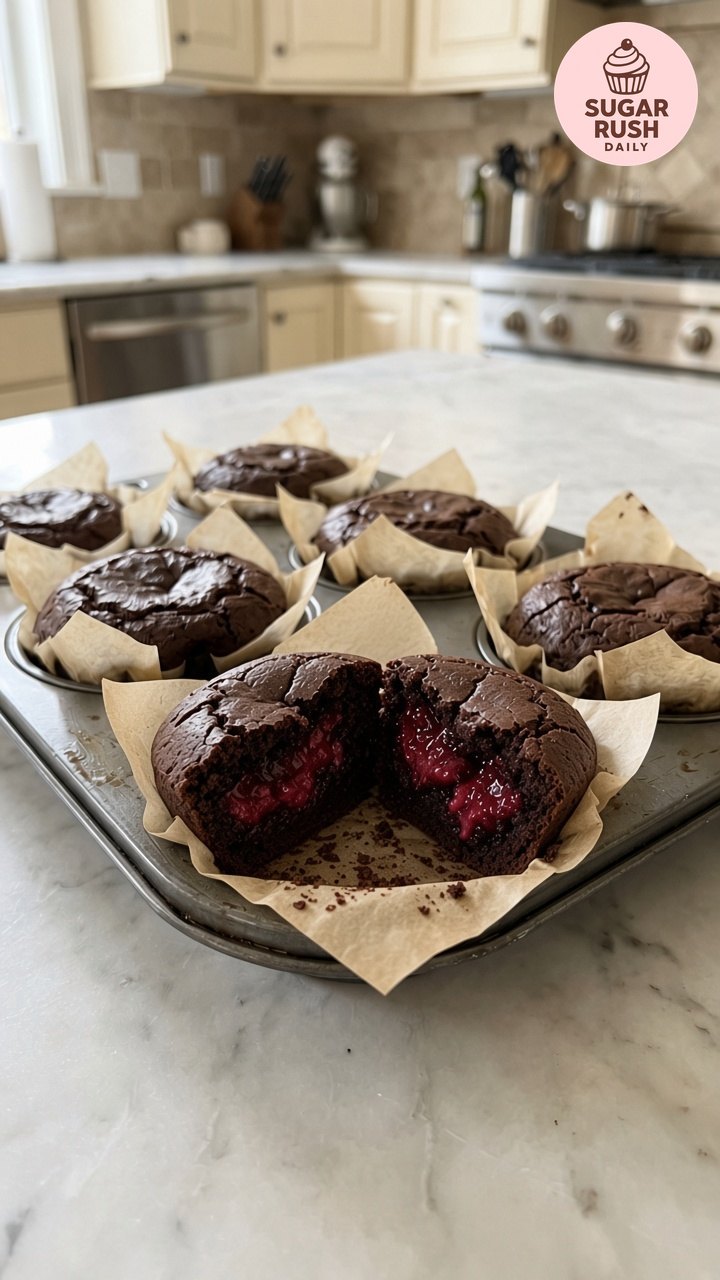
Fudgy Chocolate Raspberry Brownie Cups
Fudgy, crackly-topped chocolate brownies baked in tulip liners in a muffin tin, with fresh raspberries tucked inside so they bake into soft, jammy pockets. Makes 12.
- Total Time: 1 hour 27 minutes
- Yield: 12 brownie cups
Ingredients
1/2 cup (113 g) unsalted butter, cut in pieces
6 oz (170 g) semisweet or bittersweet chocolate (60% to 70% cacao), chopped
3/4 cup (150 g) granulated sugar
1/4 cup (50 g) packed light brown sugar
2 large eggs, at room temperature
1 teaspoon vanilla extract
1/2 teaspoon fine salt
2/3 cup (85 g) all-purpose flour
1/4 cup (21 g) unsweetened cocoa powder
1 cup (about 125 g, about 36 berries) fresh raspberries, rinsed and patted very dry (or frozen, see notes)
Instructions
1. Heat the oven to 350°F (175°C) with a rack in the center. Line a standard 12-cup muffin tin with 12 tulip parchment liners.
2. Melt the butter and chocolate together in a heatproof bowl, in the microwave in 30-second bursts or over a pan of barely simmering water, stirring until smooth. Let cool for 5 minutes, until warm, not hot.
3. In a large bowl, whisk the eggs, granulated sugar, brown sugar, vanilla and salt vigorously for 1 minute, until slightly thick and glossy. This helps form the crackly top.
4. Whisk in the warm chocolate mixture until smooth.
5. Sift or whisk the flour and cocoa together, then fold them in with a spatula just until no dry streaks remain.
6. Spoon about 1 heaping tablespoon of batter into each liner (about half of the batter in total). Press 3 raspberries into the batter in each liner.
7. Divide the remaining batter over the berries, covering them as much as you can.
8. Bake for 18 to 22 minutes, until the tops look set and cracked. A toothpick inserted near the center, away from a berry, should come out with moist crumbs, not wet batter.
9. Cool in the tin for 10 minutes, then lift the brownies in their liners onto a rack and cool for about 35 minutes more. They firm up as they cool.
Notes
Real ready time: about 1 hour 27 minutes (20 min prep + 22 min baking + 45 min cooling). The Total below includes the cooling time.
Frozen raspberries: use them straight from the freezer (do not thaw, or the batter turns streaky) and add 1 to 3 minutes to the bake time.
Buried berries steam and turn jammy; berries left on top dry out. Baked raspberries will look soft and collapsed, not whole.
Don’t overbake: moist crumbs on the toothpick are the goal. A clean toothpick means dry brownies.
Pan option: bake the same batter in a parchment-lined 8-inch square metal pan for 28 to 35 minutes.
Storage: airtight at room temperature for 1 day, then refrigerate up to 4 days because of the fresh fruit. Freeze up to 2 months (quality guideline).
Nutrition is an estimate per brownie cup (1 of 12), calculated from standard USDA FoodData Central values.
- Prep Time: 20 minutes
- Cool: 45 minutes
- Cook Time: 22 minutes (bake 18-22 min)
- Category: Dessert
- Method: Baking
- Cuisine: American
- Diet: Vegetarian
How to Get Jammy Raspberry Pockets
Fill each liner about halfway with batter, press in three raspberries, then cover them with the rest of the batter. Berries buried inside steam gently and turn jammy. Berries left on top dry out and can scorch.
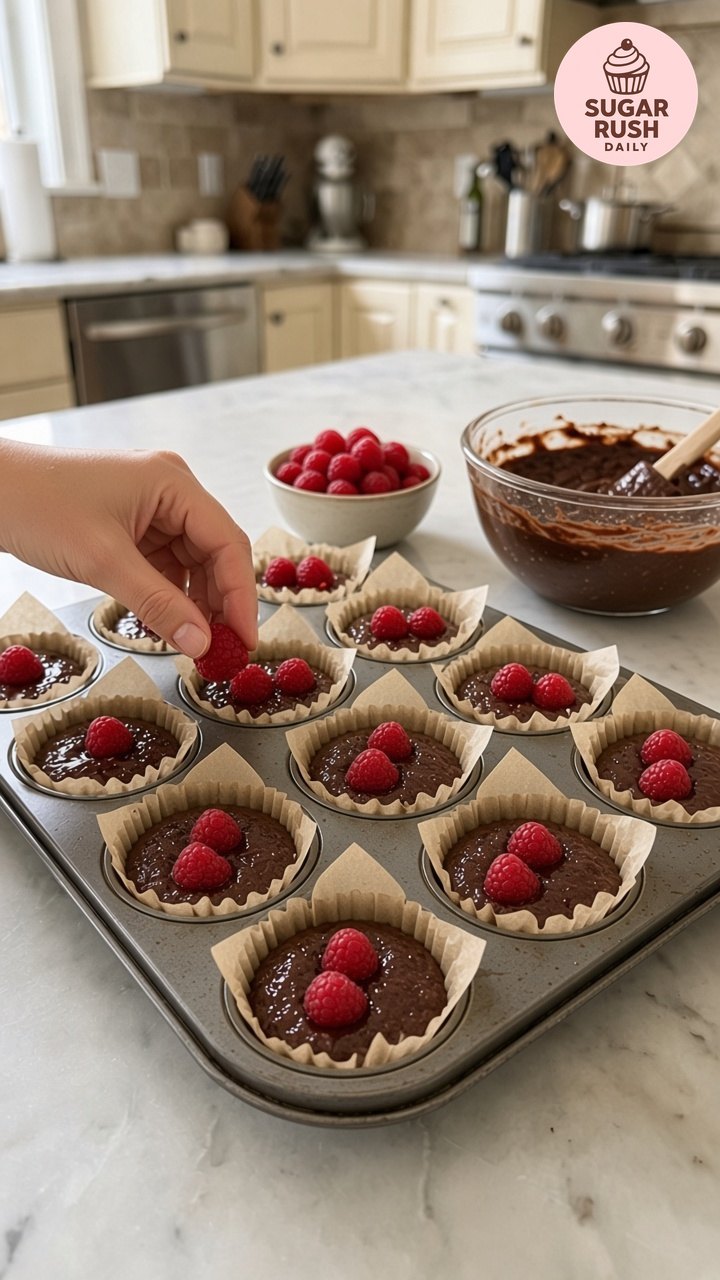
Fresh raspberries should be rinsed and patted completely dry. Frozen raspberries work too. Keep them frozen until the moment you use them, and add 1 to 3 minutes to the bake time. Thawed berries bleed and turn the batter streaky.
For a shiny, crackly top, whisk the eggs and sugars hard for a full minute before adding the flour. Bake until the tops look set and cracked. A toothpick inserted near the center, away from a berry, should come out with moist crumbs, not wet batter. They firm up as they cool, so don’t wait for a clean toothpick.
More fudgy chocolate ideas: our fudgy holiday chocolate brownies and midnight raspberry lava cupcakes.
Flaky Vanilla Custard Pastries
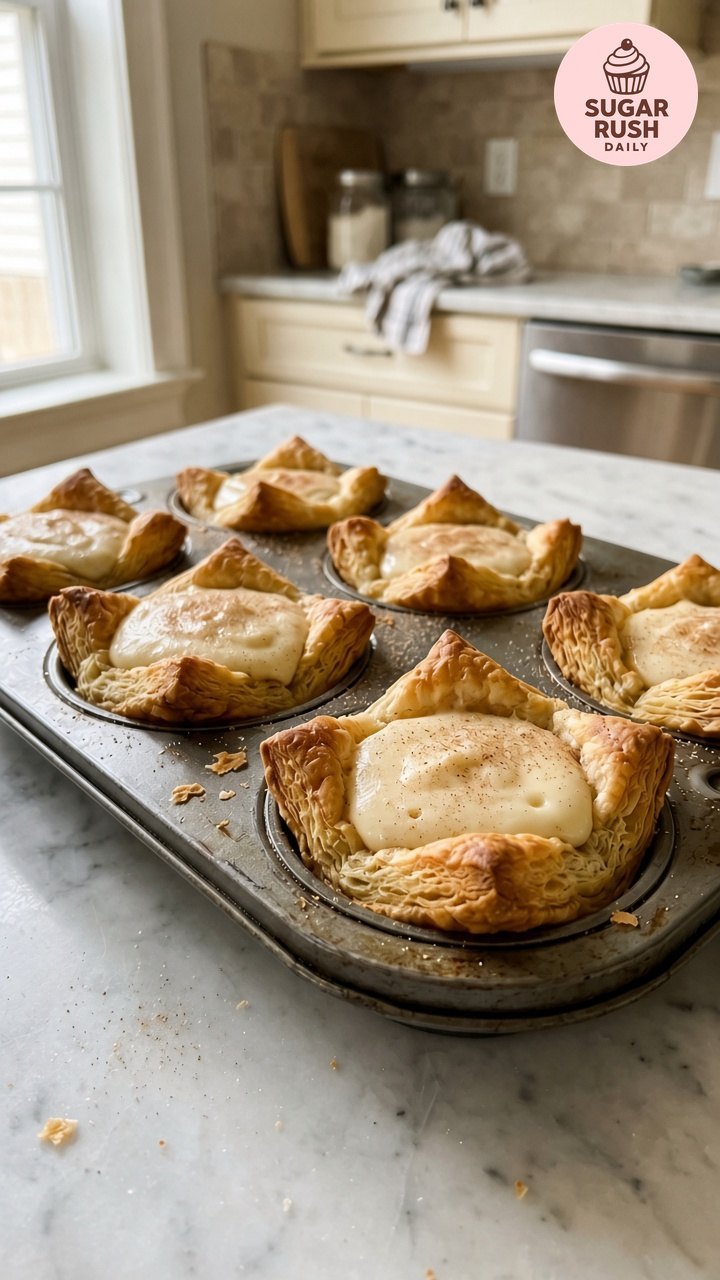
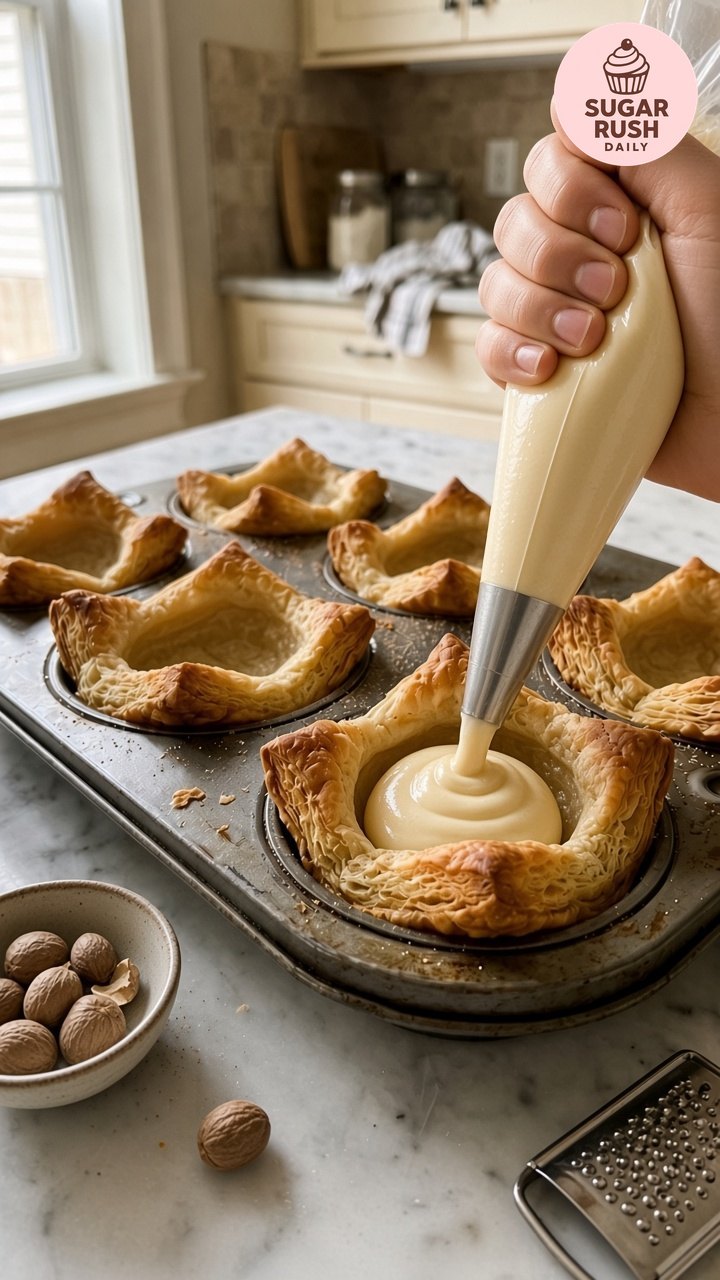
These little pastries look fancy but use store-bought puff pastry. Squares of pastry bake in a muffin tin with their corners folded up. Once they’re cool, you fill them with chilled homemade vanilla pastry cream and finish with a pinch of nutmeg.
Flaky Vanilla Custard Pastries
Crisp puff pastry cups baked in a muffin tin with their corners folded up, filled with chilled homemade vanilla pastry cream and dusted with nutmeg and cinnamon. The shells are baked empty and filled after cooling for crisp layers and a smooth, creamy center. Makes 12.
- Total Time: 3 hours
- Yield: 12 pastries
Ingredients
For the vanilla pastry cream:
2 cups (480 ml) whole milk
1/2 cup (100 g) granulated sugar, divided
4 large egg yolks
1/4 cup (32 g) cornstarch
1/8 teaspoon fine salt
2 tablespoons (28 g) unsalted butter, cold, cut in pieces
2 teaspoons pure vanilla extract (or the seeds of 1 vanilla bean)
For the pastry cups:
1 package (17.3 oz / 490 g, 2 sheets) frozen puff pastry, thawed in the fridge overnight
Butter or nonstick spray, for the tin
1 large egg beaten with 1 tablespoon water (optional, for brushing the corners)
Freshly grated nutmeg and ground cinnamon, for dusting
Instructions
1. Pastry cream: In a medium saucepan, heat the milk with 1/4 cup of the sugar over medium heat until steaming and small bubbles form at the edge. Do not let it boil over.
2. Meanwhile, in a medium bowl, whisk the egg yolks, the remaining 1/4 cup sugar, the cornstarch and salt until smooth and pale.
3. Temper the yolks: slowly pour about half of the hot milk into the yolk mixture while whisking constantly. Pour everything back into the saucepan.
4. Cook over medium heat, whisking constantly and reaching into the corners, until the cream thickens and large bubbles break the surface. Keep it bubbling and keep whisking for 1 full minute so the cornstarch fully thickens.
5. Off the heat, whisk in the butter and vanilla. Strain through a fine-mesh sieve into a clean bowl. Press plastic wrap directly on the surface and refrigerate until cold, at least 2 hours (up to 3 days).
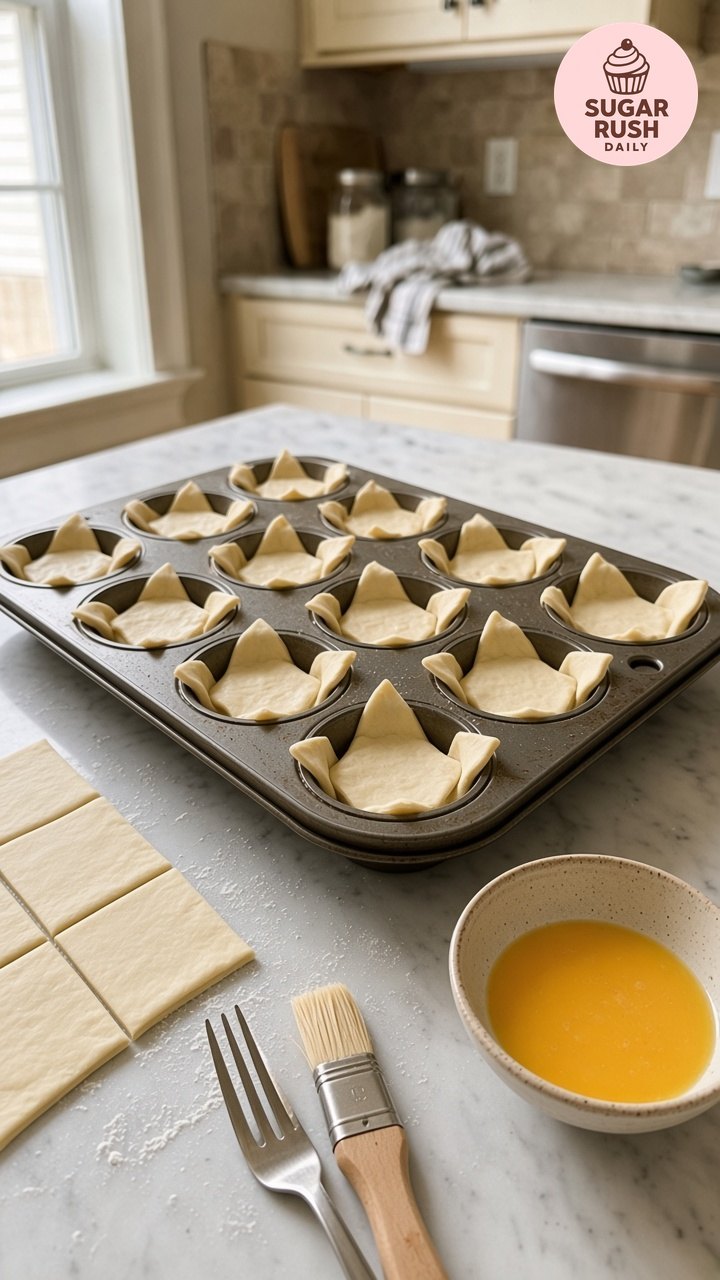
6. Pastry cups: While the cream chills, grease a standard 12-cup muffin tin. On a lightly floured surface, roll each puff pastry sheet into a 12 x 8-inch rectangle and cut it into six 4-inch squares (12 total).
7. Press each square into a cup so the center lies flat on the bottom and the four corners stand up. Prick the bottoms several times with a fork. Brush the corners with egg wash, if using. Chill the tin for 15 minutes.
8. Heat the oven to 400°F (200°C). Bake for 15 to 18 minutes, until deep golden and crisp. While the shells are hot, gently press the puffed centers down with the back of a spoon to reopen the wells. Cool in the tin for 5 minutes, then cool completely on a rack, about 25 minutes.
9. To serve: whisk the cold pastry cream until smooth. Pipe or spoon about 3 tablespoons into each cooled shell. Dust with nutmeg and a pinch of cinnamon. Serve within 2 hours, or refrigerate.
Notes
Real ready time: about 3 hours (30 min active prep + 30 min cooking and baking + 2 hours chilling the pastry cream). The pastry shells are shaped, baked and cooled during the chill, so they are not extra time.
Why boil 1 minute: egg yolks contain an enzyme (amylase) that can thin cornstarch; boiling for about a minute deactivates it and fully thickens the cream.
Why bake the shells empty: pastry cream curdles and keeps the pastry underneath raw at 400°F. Filling baked, cooled shells gives crisp layers and a smooth center.
Keep puff pastry cold while you work; warm pastry won’t puff well. Chill the shaped squares for 15 minutes before baking.
Food safety: pastry cream is a perishable egg dish. Keep it refrigerated, and don’t leave filled pastries out more than 2 hours (1 hour above 90°F).
Storage: pastry cream up to 3 days in the fridge; baked shells airtight at room temperature for 1 day (re-crisp at 350°F for 3 to 5 minutes, then cool). Filled pastries are best the same day and keep in the fridge for about 1 day. Do not freeze filled pastries.
Nutrition is an estimate per pastry (1 of 12), calculated from standard USDA FoodData Central values and typical puff pastry labels; it varies a lot by puff pastry brand.
- Prep Time: 30 minutes
- Chill pastry cream: 2 hours
- Cook Time: 30 minutes (pastry cream about 10-12 min + bake 15-18 min)
- Category: Dessert
- Method: Stovetop and Baking
- Cuisine: American
- Diet: Vegetarian
Make the Pastry Cream on the Stovetop
Heat the milk until steaming. Slowly whisk some of it into the yolks, sugar, and cornstarch to temper them, then pour everything back into the pan. Whisk constantly over medium heat until the cream thickens and bubbles.
Here’s the step many recipes skip: keep it bubbling for 1 full minute while you whisk. Egg yolks contain an enzyme that can thin out cornstarch later, and that minute of boiling switches it off. America’s Test Kitchen explains why in its guide to perfecting pastry cream.
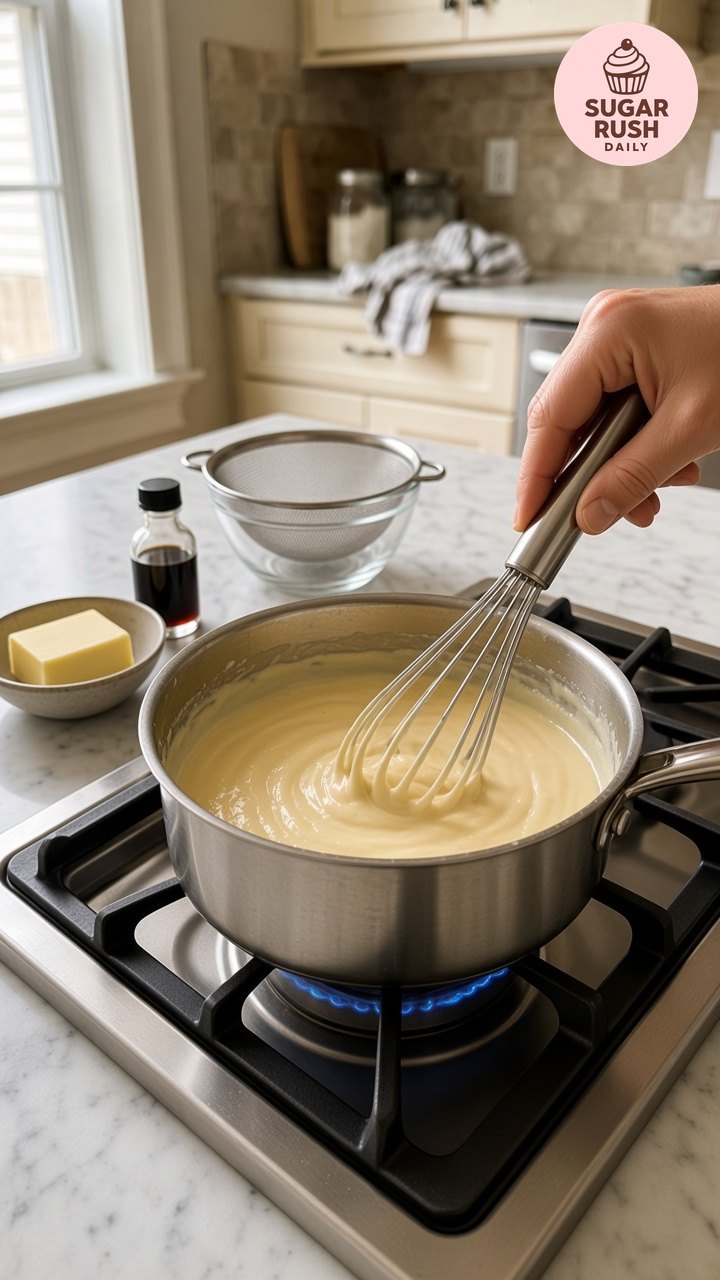
Off the heat, whisk in the butter and vanilla and strain the cream into a bowl. Press plastic wrap right on the surface so no skin forms. Chill it until cold, at least 2 hours.
Bake the Puff Pastry Shells, Then Fill
We bake the pastry shells empty and fill them afterward. Pastry cream doesn’t bake well inside puff pastry at high heat. It can curdle, and the pastry underneath stays raw. Baking the shells alone gives you crisp layers and a smooth, creamy filling, just like the reel.
Press each 4-inch square into a greased cup so the corners stand up. Prick the bottoms with a fork and chill the tin for 15 minutes so the butter in the pastry firms up. Bake until deep golden. While the shells are still hot, gently press the puffed centers down with the back of a spoon to reopen the wells.
Let the shells cool completely. Whisk the cold pastry cream until smooth, then pipe or spoon about 3 tablespoons into each one. Finish with freshly grated nutmeg and a pinch of cinnamon.
For another flaky vanilla treat, see our vanilla custard mille-feuille, or bake a classic old-fashioned custard pie.
Make-Ahead and Storage Plan
All three desserts can be made ahead, but they store differently:
- Pecan cookie bars: The filling is made with eggs, so cover and refrigerate the bars once they cool. Enjoy them within 3 to 4 days. They also freeze well, wrapped tightly, for up to 3 months.
- Raspberry brownie cups: Keep them airtight at room temperature for 1 day. After that, refrigerate them for up to 4 days so the fruit stays fresh. Freeze for up to 2 months.
- Custard pastries: Make the pastry cream up to 3 days ahead and keep it in the fridge. Store the baked shells airtight at room temperature for 1 day. Fill them shortly before serving, and don’t freeze the filled pastries.
The bars and custard pastries shouldn’t sit out longer than 2 hours, or 1 hour on a day above 90°F. That’s the rule in FoodSafety.gov’s four steps to food safety. Set out a few at a time and keep the rest cold.
Want more ideas for a dessert table? Our three fall desserts guide pairs nicely with this trio.
Common Mistakes to Avoid
- Skipping the par-bake. Pecan cookie bars need a pre-baked crust, or the base turns pale and soggy.
- Cutting the bars warm. The filling needs to cool and chill before it slices cleanly.
- Overbaking the brownies. Pull them at moist crumbs. A clean toothpick means dry brownies.
- Thawing frozen raspberries. Add them frozen to avoid pink, streaky batter.
- Stopping the pastry cream too soon. Boil and whisk for 1 full minute, or it may turn runny.
- Filling warm shells. Warm pastry melts the cream and loses its crunch.
Frequently Asked Questions
Can I make pecan cookie bars without corn syrup?
Yes. Many bakers swap in pure maple syrup or golden syrup in the same amount. The filling may set a little softer and taste different, so watch the doneness cues closely.
Can I bake pecan cookie bars in a 9×13-inch pan?
Yes. A 9×13-inch metal pan or a quarter sheet pan both work. A quarter sheet pan is slightly smaller, so the bars come out a touch thicker and may need the full bake time. Glass pans bake slower, so add a few minutes and check often.
Do pecan cookie bars need to be refrigerated?
Yes. The filling contains eggs, so refrigerate pecan cookie bars as soon as they cool, within 2 hours of coming out of the oven. Covered, they keep for 3 to 4 days. Many people like them cold, but you can let them sit out for 15 minutes before serving.
Can I bake the brownie batter in a regular pan?
Yes. Use a parchment-lined 8-inch square pan, scatter the raspberries over half the batter, cover with the rest, and bake 28 to 35 minutes. Check for moist crumbs.
Why did my pastry cream turn runny?
It usually wasn’t boiled long enough. The cream needs to bubble for about 1 minute while you whisk, which fully thickens the cornstarch and stops the yolks from thinning it later.
Can I fill the custard pastries ahead of time?
For the crispiest pastry, fill them within an hour of serving. Filled pastries keep in the fridge for about 1 day, but the shells soften.
Is there a printable version of each recipe?
Yes. Each dessert has its own recipe card with a print button, exact quantities, and full timing, right inside its section above.
Pick Your Favorite (or Bake All Three)
Whether you start with the pecan cookie bars, the raspberry brownies, or the custard pastries, take your time with the steps the reel doesn’t show. They’re what turn a pretty video into desserts you’ll want to make again. Which one are you baking first?