
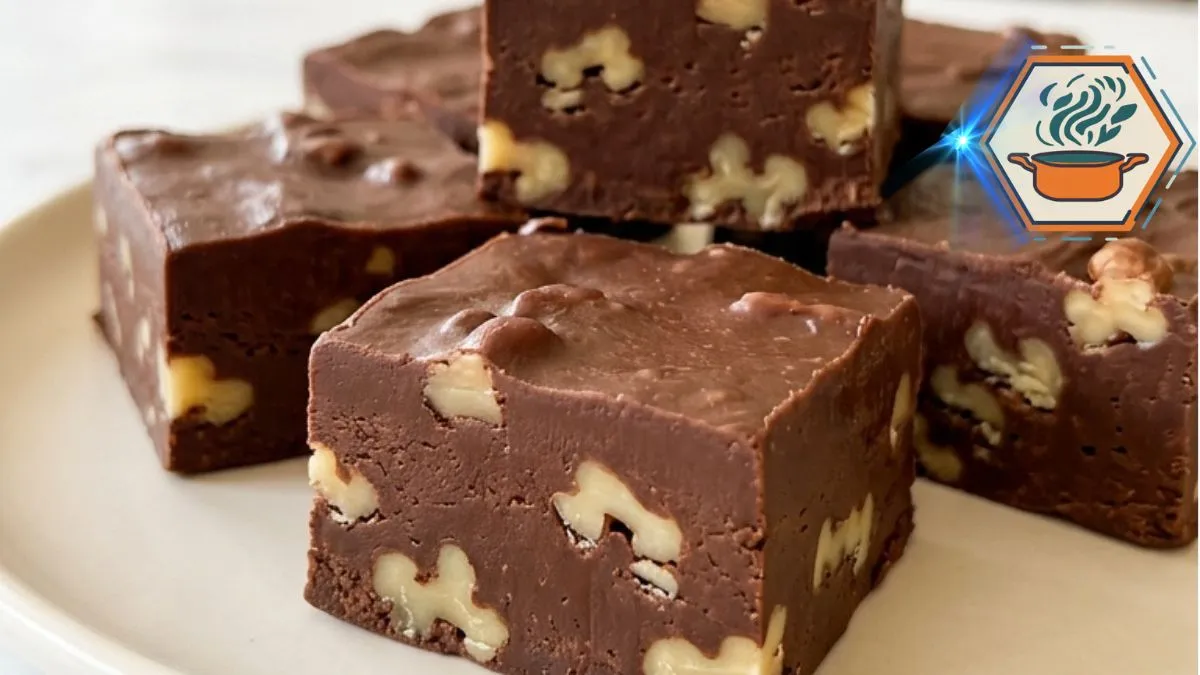
There is something special about a plate of Old-Fashioned Chocolate Nut Fudge. Thick chocolate squares do not need fancy decoration to get attention. The first thing you notice is their deep chocolate color. Then comes the dense, creamy center and those irregular pieces of walnut or pecan showing through every cut side.
This recipe brings that candy-shop feeling into a home kitchen. It uses semisweet chocolate, sweetened condensed milk, butter, vanilla, salt, and plenty of nuts. The method is simple, but the small details matter. Chocolate needs gentle heat. The nuts should stay chunky. And the fudge needs enough chilling time before you try to cut it.
Chocolate can scorch when heated too aggressively. Keeping the saucepan over low heat and watching it closely gives you much more control. King Arthur Baking also recommends low heat when melting chocolate directly in a saucepan and warns against allowing water to contact melting chocolate. You can read their guide to melting chocolate for more background on the technique.
The result here is not cake-like or crumbly. It is dense, smooth, rich, and slightly soft once it has rested for a few minutes outside the refrigerator. It is the kind of homemade fudge that looks especially inviting stacked high on a simple serving plate.
Affiliate disclosure: As an Amazon Associate I earn from qualifying purchases. This article may contain affiliate links to kitchen tools I find useful for preparing this recipe.v
JUMP TO
Why You’ll Love This Old-Fashioned Chocolate Nut Fudge
The best part of this recipe is its simplicity. You do not need to make a traditional cooked sugar syrup or judge a soft-ball stage. Sweetened condensed milk helps create the rich body of the fudge, while semisweet chocolate supplies its structure and chocolate flavor.
There is also a strong contrast between textures.
The chocolate portion is thick and creamy. The nuts stay crisp and noticeable. Because they are roughly chopped rather than ground into tiny pieces, you see pieces of nut inside the finished squares.
This is important if you want the appearance shown in the recipe photo.
The fudge should be:
- Thick rather than thin
- Firm enough to cut cleanly
- Creamy rather than cakey
- Deep chocolate brown
- Packed with visible nut pieces
- Smooth on top with a few natural spatula swirls
- Slightly softer after sitting at room temperature
It is also a useful make-ahead dessert because most of the waiting happens while the fudge chills.
If you enjoy understanding why small ingredient choices change a recipe, you may also like our guide to the secret to a great meatloaf. The dish is different, but the same principle applies: small details can make a big difference in texture.
Ingredients You’ll Need
This recipe makes about 25 thick squares from one 8-inch square pan.
Chocolate Fudge
- 3 cups semisweet chocolate chips
- 1 can (14 oz) sweetened condensed milk
- ¼ cup unsalted butter, cut into small pieces
- 1 teaspoon vanilla extract
- ¼ teaspoon fine salt
- 1¼ cups walnuts or pecans, roughly chopped
Do not substitute evaporated milk for sweetened condensed milk. They are different products, and this recipe relies on the concentrated sweetness and thickness of condensed milk.
For the closest visual result to the reference, choose nuts with a pale golden interior and leave many pieces large enough to be clearly visible after cutting.
Equipment That Makes the Recipe Easier
You do not need specialized candy-making equipment.
A few basic tools make the process much easier:
- 8-inch square baking pan
- Parchment paper
- Heavy-bottomed saucepan
- Silicone spatula
- Large sharp knife
- Cutting board
If you need an 8-inch pan, you can browse 8-inch square baking pans.
For lining and lifting the finished block, here are parchment paper.
A flexible spatula is particularly helpful because the mixture becomes thick quickly. You can see silicone baking spatulas.
For neat portions, a long blade helps you cut through the chilled block in one controlled motion. Here are chef’s knives.
How to Make Old-Fashioned Chocolate Nut Fudge
1. Prepare the pan first
Line an 8-inch square pan with parchment paper.
Leave several inches hanging over two opposite sides. These become handles later, allowing you to lift the entire chilled block from the pan without damaging its edges.
Lightly pressing the parchment into the corners also helps the fudge keep a neat square shape.
Do this before melting anything. Once the chocolate mixture is ready, you want to transfer it to the pan without delay.
2. Prepare the nuts
Measure 1¼ cups of walnuts or pecans.
Roughly chop them.
This detail is easy to overlook, but it changes both appearance and texture. Avoid turning the nuts into fine crumbs. Aim for irregular pieces, with some around ¼ to ½ inch.
That creates the clearly visible nut pockets seen through the sides of each chocolate square.
3. Combine the base ingredients
Place the semisweet chocolate chips, sweetened condensed milk, and pieces of unsalted butter in a heavy saucepan.
Use the lowest practical heat setting.
Start stirring as the chocolate begins to soften.
4. Melt slowly
Continue heating while stirring frequently and scraping the bottom and corners of the saucepan.
The mixture will gradually become dark, glossy, and very thick.
Do not bring it to a boil.
High heat is one of the easiest ways to spoil the texture. Chocolate can scorch, and excessive heating may leave your mixture less smooth.
Keep all equipment dry as well. Water contacting melted chocolate can cause it to seize.
5. Remove it from the heat
As soon as the chocolate and butter have completely melted and the mixture looks uniform, take the saucepan off the burner.
Do not continue cooking simply because you expect fudge to require a long cooking time. This condensed-milk version does not use the same process as traditional boiled fudge.
6. Add vanilla and salt
Stir in the vanilla and salt.
Salt may seem insignificant beside three cups of chocolate, but it helps balance the intense sweetness.
Mix only until incorporated.
7. Fold in the nuts
Add the roughly chopped walnuts or pecans.
Fold them through with your spatula until they are spread fairly evenly throughout the mixture.
Do not spend too long stirring. The fudge will begin setting as it cools.
8. Transfer it immediately
Scrape the mixture into your lined pan.
Push it into all four corners. Then smooth the top with your spatula.
You do not need a perfectly polished surface.
In fact, shallow spatula marks and gentle swirls help give these squares their homemade appearance.
9. Chill until firm
Place the pan in the refrigerator for at least 3 to 4 hours.
Do not rush this stage.
The center should feel thoroughly firm before cutting. If the middle is still soft, you may crush or smear the edges instead of producing the thick squares you want.
For the most convenient schedule, make it in the evening and cut it the following day.
The Secret to Smooth, Creamy Fudge
Temperature control is the most important detail in this particular method.
Use low heat.
Chocolate does not benefit from being hurried. King Arthur Baking’s testing found that direct saucepan melting can work well over low heat, though chocolate must be watched carefully because scorching remains a risk.
Another key detail is the ratio of ingredients.
Do not casually add extra milk because the mixture appears thick. It is supposed to be thick. Adding unnecessary liquid changes the final consistency.
Likewise, do not reduce the chocolate significantly if you still expect the same firm squares.
For another chocolate dessert where texture is central to the final result, see our knafeh chocolate bar variations.
Should You Use Walnuts or Pecans?
Both work.
Walnuts provide a slightly stronger flavor and a recognizable irregular shape. Their lighter interiors also create a beautiful contrast against dark chocolate.
Pecans taste a little sweeter and buttery. They produce a softer flavor contrast while still giving the fudge plenty of crunch.
For the appearance closest to our reference, walnuts are an excellent choice.
Whichever nut you choose, roughly chop it rather than processing it into crumbs.
A food-allergy note is important here. Walnuts and pecans are among the tree nuts the FDA recognizes as major food allergens. Milk is also a major allergen, and chocolate chips may contain additional allergens depending on the brand. Always check individual ingredient labels when preparing food for someone with allergies.
How to Get Thick, Clean Fudge Squares
Once the fudge is completely chilled, use the parchment overhang to lift it from the pan.
Set the whole block on a cutting board.
Use a large, sharp knife.
For about 25 pieces, cut the block into five strips in one direction and five in the other.
Wipe the blade clean between cuts.
If the fudge is extremely hard straight from a cold refrigerator, allow it to stand briefly before cutting. Do not leave it somewhere hot.
The goal is a clean square with sharp enough edges to hold its shape while still showing a creamy interior.
Those exposed cut sides are part of the appeal. They reveal the random pieces of walnut or pecan embedded throughout the chocolate.
How to Serve Chocolate Nut Fudge
For the best eating texture, remove the desired number of pieces from the refrigerator about 10 minutes before serving.
The chocolate softens slightly.
That small temperature change makes each bite feel creamier without causing the square to lose its shape.
Stack several pieces on a simple plate for an old-fashioned candy-shop presentation. Avoid covering them with toppings if you want to preserve the classic appearance.
This fudge also works well for:
- Holiday dessert trays
- Homemade food gifts
- Christmas candy boxes
- Family gatherings
- Coffee breaks
- Potlucks
- Small after-dinner treats
If you enjoy traditional sweets with contrasting textures, our guide to understanding peanut brittle is another useful read.
How to Store Homemade Fudge
Place the finished squares in an airtight container.
For this recipe, I recommend keeping them refrigerated, especially if you want the squares to stay firm and neat. Separate stacked layers with parchment paper so the surfaces do not stick together.
They can be kept refrigerated for up to about two weeks, though quality is generally best when enjoyed sooner.
Before serving, let a piece sit out for around 10 minutes to regain that pleasantly creamy bite.
Common Mistakes to Avoid
Using high heat: This is the biggest mistake. Melt the ingredients slowly.
Boiling the mixture: This recipe is not traditional boiled fudge. Once everything is melted and smooth, remove it from the heat.
Using evaporated milk: It is not interchangeable with sweetened condensed milk here.
Finely grinding the nuts: Tiny pieces disappear visually. Rough chunks give the fudge its characteristic look.
Getting water into the chocolate: Even a small amount can cause melting chocolate to seize. Keep pans, utensils, and work surfaces dry.
Cutting too early: A warm center will make clean squares difficult.
Using the wrong pan size: A larger pan produces thinner pieces. An 8-inch square pan creates the thick proportions intended for this recipe.
Adding extra liquid: A thick mixture is normal. Resist the temptation to thin it.
Can You Customize the Recipe?
Yes, but remember that substitutions can change the texture.
Pecans are the easiest replacement for walnuts because the quantity can remain the same.
You could also experiment with different semisweet chocolates. Results may differ because chocolate chips vary in cacao percentage, sugar, fat, and formulation.
If your goal is to reproduce the pictured fudge closely, make the original recipe first.
Once you know exactly how that batch behaves, experimenting becomes much easier.
Why This Is a Great Make-Ahead Dessert
Timing is one reason this recipe is so practical.
The active preparation is short. Most of the total time is simply chilling.
You can prepare the fudge several hours before guests arrive, or make it the previous day. Once firm, cut the block and return the squares to an airtight container in the refrigerator.
It also travels better when cold because the pieces are firmer.
For anyone building a mixed dessert table, pair it with a contrasting baked sweet rather than another dense chocolate dessert. Our 3-ingredient banana bread is one simple option.
Frequently Asked Questions
Why is my chocolate fudge grainy?
Excessive heat is one possible cause. Keep the saucepan over low heat and stir carefully. Also keep water away from the melting chocolate.
Why didn’t my fudge set?
First check your ingredients and measurements. This recipe specifically calls for a 14-ounce can of sweetened condensed milk, not evaporated milk. It also needs at least 3 to 4 hours of refrigeration before cutting.
Do I need a candy thermometer?
No. This version does not require cooking sugar syrup to a particular candy-making temperature.
Can I make fudge without nuts?
You can omit the nuts, but the result will no longer have the same texture or appearance as Old-Fashioned Chocolate Nut Fudge. The nuts provide an important crunchy contrast.
Are walnuts or pecans better in chocolate fudge?
Both are good choices. Walnuts offer a stronger nut flavor, while pecans tend to taste richer and slightly sweeter. Choose walnuts for a look especially close to the pictured version.
Can I use milk chocolate instead of semisweet chocolate?
It is possible to develop a milk-chocolate variation, but a straight substitution will make the flavor sweeter and may alter the final texture. Semisweet chocolate is the safer choice for the recipe as written.
How long should fudge chill before cutting?
Give it at least 3 to 4 hours in the refrigerator. The center should be fully firm before you lift and cut the block.
How do you cut fudge without making a mess?
Use a large sharp knife and wipe it between cuts. Make long, decisive cuts instead of sawing repeatedly through the fudge.
Print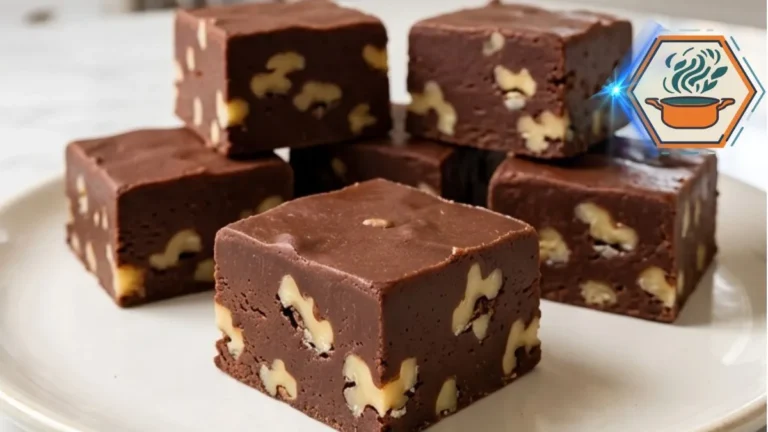
Old-Fashioned Chocolate Nut Fudge
| Rich and creamy Old-Fashioned Chocolate Nut Fudge made with semisweet chocolate, sweetened condensed milk, butter, vanilla, and crunchy walnuts or pecans. These thick homemade fudge squares are smooth, dense, and easy to make without a candy thermometer. |
- Total Time: 4 hours 15 minutes
- Yield: 25 squares
Ingredients
3 cups (about 510 g) semisweet chocolate chips
1 (14-ounce/396 g) can sweetened condensed milk
1/4 cup (57 g) unsalted butter, cut into small pieces
1 teaspoon pure vanilla extract
1/4 teaspoon fine salt
1 1/4 cups (about 150 g) roughly chopped walnuts or pecans
Instructions
1. Line an 8-inch (20 cm) square baking pan with parchment paper, leaving an overhang on two opposite sides. Set aside.
2. Roughly chop the walnuts or pecans. Keep some pieces around 1/4 to 1/2 inch so the nuts remain clearly visible inside the finished fudge.
3. Add the semisweet chocolate chips, sweetened condensed milk, and butter to a heavy-bottomed saucepan.
4. Place the saucepan over low heat. Stir continuously with a silicone spatula, scraping the bottom and corners of the pan, until the chocolate and butter are fully melted and the mixture is thick, glossy, and smooth. Do not allow the mixture to boil.
5. Remove the saucepan from the heat as soon as the mixture is completely smooth. Stir in the vanilla extract and salt until combined.
6. Add the roughly chopped walnuts or pecans. Fold gently until the nuts are evenly distributed. Avoid overmixing as the fudge will begin to firm as it cools.
7. Immediately transfer the mixture to the prepared pan. Press it evenly into all four corners and smooth the top with a spatula. Leave a few subtle natural swirls on the surface for a homemade finish.
8. Refrigerate for at least 3 to 4 hours, or until the center is completely firm.
9. Lift the chilled fudge from the pan using the parchment-paper overhang and place it on a cutting board.
10. Using a large, sharp knife, cut the fudge into 5 rows by 5 rows to make approximately 25 thick squares. Wipe the blade clean between cuts for neater edges.
11. For the creamiest texture, let the fudge squares stand at room temperature for about 10 minutes before serving.
Notes
Keep the heat low. High heat can scorch the chocolate and may produce a grainy or oily texture.
Do not substitute evaporated milk for sweetened condensed milk. They are different products and will not produce the same result in this recipe.
Keep all utensils and the saucepan dry while melting the chocolate.
Do not finely grind the nuts. Rough, irregular pieces create the visible nut-filled appearance of the finished squares.
An 8-inch square pan is important for producing thick fudge squares. A larger pan will make the fudge thinner.
The mixture should be quite thick before it goes into the pan. Do not add milk or water to thin it.
Allow the fudge to chill completely before cutting. Cutting it too soon can cause soft, messy edges.
For serving, let chilled fudge sit at room temperature for about 10 minutes. It should soften slightly while still holding its square shape.
Store in an airtight container in the refrigerator, with parchment paper between layers, for up to about 2 weeks.
Ingredient brands and the type of nuts used can slightly change the final texture, flavor, and nutrition.
- Prep Time: 10 minutes
- Additional/Chill Time: 4 hours
- Cook Time: 5 minutes
- Category: Dessert
- Method: Stovetop, No-Bake
- Cuisine: American
- Diet: Vegetarian
Final Thoughts
A good Old-Fashioned Chocolate Nut Fudge does not need elaborate decoration. Its appeal comes from the contrast between a rich chocolate center and generous pieces of crunchy nuts.
The technique is straightforward, but patience makes the difference. Keep the heat low. Use sweetened condensed milk rather than evaporated milk. Leave the nuts chunky. Give the pan enough time to chill. Then use a sharp knife to reveal those beautiful nut-filled centers.
Serve the squares after about 10 minutes at room temperature and you get what this recipe is meant to deliver: thick chocolate fudge that holds its shape while remaining dense, creamy, and soft to the bite.