
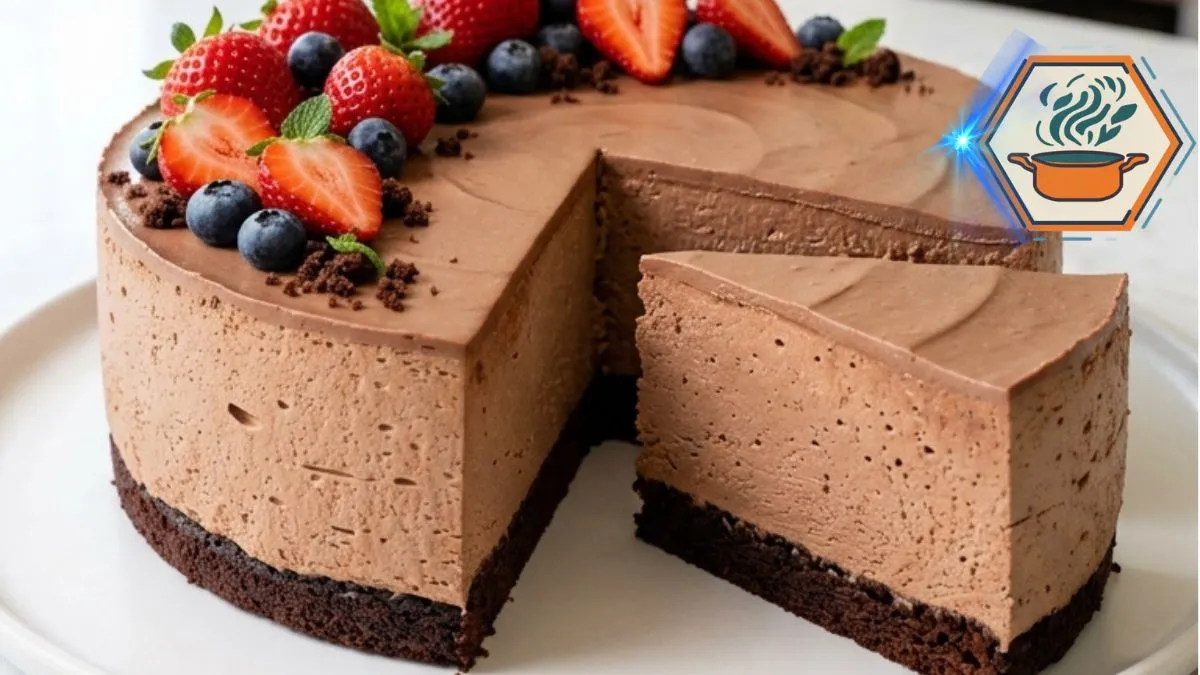
The first slice of this Chocolate Berry Mousse Cheesecake tells you almost everything about the dessert. A thin, dark chocolate cake sits at the bottom. Above it is a much taller layer of creamy chocolate cheesecake mousse. A soft chocolate topping covers the surface, while strawberries and blueberries bring color and freshness. Cut into it, and the mousse reveals tiny air pockets rather than the dense texture of a traditional baked cheesecake.
That contrast is what makes this cake special. It looks impressive, but each layer has a clear purpose. The cake base gives the mousse something firm to sit on. Hot coffee deepens the cocoa flavor without turning the dessert into a coffee cake. King Arthur Baking also notes that coffee can deepen chocolate flavor in chocolate cakes. Their chocolate cake recipes also commonly combine cocoa with brewed coffee or water.
The mousse is where patience matters. Gelatin must first hydrate in cold water before it is dissolved and mixed into the filling. Adding dry gelatin straight to the filling can leave unwanted lumps. King Arthur Baking recommends blooming powdered gelatin in cold liquid before dissolving it.
This recipe takes those small technical details seriously. The goal is not simply a cake that tastes good. It should also hold its tall shape, slice cleanly, and closely match the chocolate-and-berry presentation shown above.
Affiliate disclosure: As an Amazon Associate I earn from qualifying purchases. This article may contain affiliate links to kitchen tools I find useful for preparing this recipe.v
JUMP TO
Why This Chocolate Berry Mousse Cheesecake Works
There are three chocolate textures in one slice.
First comes the thin cake layer. It is soft enough to cut with a fork but sturdy enough to support the mousse.
Next comes the main attraction: a tall chocolate cheesecake mousse. Cream cheese gives it body and a slight tang. Semisweet chocolate brings richness. Whipped cream adds air. A restrained amount of gelatin helps the mousse stand once the springform ring comes off.
Finally, a thin chocolate cream layer gives the top a smooth finish.
Fresh berries matter too. Chocolate, cream cheese, and heavy cream can make a dessert feel very rich. Strawberries and blueberries add juicy, fresh bites between the chocolate.
For another fruit-and-chocolate dessert idea, see our strawberry filled chocolate cake guide.
Ingredients You Will Need
Chocolate Cake Base
- ¾ cup (90 g) all-purpose flour
- ⅓ cup (28 g) unsweetened cocoa powder
- ½ teaspoon baking powder
- ¼ teaspoon baking soda
- ¼ teaspoon fine salt
- ½ cup (100 g) granulated sugar
- 1 large egg, at room temperature
- ⅓ cup (80 ml) whole milk
- ¼ cup (60 ml) neutral vegetable oil
- 1 teaspoon vanilla extract
- ¼ cup (60 ml) hot brewed coffee
Important: The original concept needs a true baked base rather than loose cookie crumbs. Flour, egg, oil, cocoa, and leaveners are therefore important. They create a cohesive crust-like cake layer that will not fall apart when a large slice is removed.
If you do not want coffee, use the same amount of hot water. The chocolate flavor will still work.
Chocolate Cheesecake Mousse
- 12 oz (340 g) semisweet chocolate, finely chopped
- 16 oz (454 g) full-fat block cream cheese, softened
- ¾ cup (90 g) powdered sugar
- 2 teaspoons vanilla extract
- Pinch of fine salt
- 1½ cups (360 ml) cold heavy whipping cream, divided
- 1 tablespoon unflavored powdered gelatin
- 3 tablespoons (45 ml) cold water
Use block-style full-fat cream cheese, not whipped cream cheese from a tub. The firmer texture helps the mousse hold its height.
Smooth Chocolate Cream Topping
- 4 oz (113 g) milk or semisweet chocolate, finely chopped
- ½ cup (120 ml) heavy cream
- 1 tablespoon (14 g) unsalted butter
Milk chocolate gives a softer, sweeter finish. Semisweet chocolate produces a deeper chocolate flavor.
Berry Decoration
- 8 to 10 fresh strawberries
- ½ cup fresh blueberries
- About ¼ cup chocolate cake crumbs
- A few small fresh mint leaves
Wash the berries before decorating, then dry them completely.
Water left on the fruit can mark the chocolate surface and cause the berries to slide.
Equipment That Makes the Recipe Easier
You do not need professional pastry equipment. A few basic tools, however, make the result much more predictable.
You will need:
- 9-inch springform pan
- Parchment paper
- Electric hand or stand mixer
- Mixing bowls
- Silicone spatula
- Whisk
- Small saucepan
- Sharp knife
- Cooling rack
A springform pan is especially useful because the sides release without forcing the delicate mousse upside down.
For this recipe, a standard 9-inch pan is the right size. You can browse 9-inch springform pans on Amazon and later replace this with your affiliate link.
An offset spatula also helps create the slightly relaxed surface seen in the finished cake rather than an unnaturally perfect top. Here are offset spatulas on Amazon.
Step 1: Prepare the Pan Correctly
Preheat the oven to 350°F (175°C).
Grease the bottom of a 9-inch springform pan lightly. Cut a circle of parchment paper to fit the bottom and press it into place.
Do not heavily grease the sides.
The mousse will later sit directly against them, and excessively greasy sides can affect the finish.
Set the pan on a baking sheet if your springform pan tends to leak.
Step 2: Make the Thin Chocolate Cake Base
Whisk the flour, cocoa powder, baking powder, baking soda, salt, and granulated sugar in a medium bowl.
Break up any cocoa lumps.
In another bowl, whisk together the egg, milk, vegetable oil, and vanilla.
Add the wet mixture to the dry ingredients.
Stir only until mostly combined.
Now slowly add the hot coffee while stirring. The batter will become noticeably thinner. That is normal.
Pour batter into the prepared pan to form a layer roughly ¾ inch thick.
Depending on your exact pan and measurements, you may have a little batter left. Do not make the base too tall merely to use every drop.
Bake for about 15 to 18 minutes.
The cake is ready when the center springs back lightly and a tester comes out with a few moist crumbs rather than raw batter.
Do not overbake it. A dry base becomes much firmer after refrigeration.
Allow the cake to cool completely in the pan.
This point cannot be rushed. Warm cake can soften or partially melt the mousse.
Reserve a small piece of cake for the crumbs on top if needed.
Step 3: Bloom the Gelatin
Put 3 tablespoons cold water in a small bowl.
Sprinkle the gelatin evenly over the entire surface rather than dumping it into one pile.
Leave it untouched for about 5 to 10 minutes.
It should absorb the water and become thick.
This process is called blooming. It allows the gelatin granules to hydrate before they are dissolved.
The small amount used here is deliberate. We want enough structure to support the tall mousse but not so much that the cheesecake feels rubbery.
Step 4: Make the Chocolate Mixture
Place the finely chopped semisweet chocolate in a heatproof bowl.
Heat ½ cup of the heavy cream over medium-low heat until steaming. Do not let it boil aggressively.
Pour the hot cream over the chocolate.
Leave it alone for 2 minutes.
Then begin stirring from the center outward until the chocolate and cream become glossy and smooth.
Gently melt the bloomed gelatin until liquid. A few seconds of gentle heat is enough.
Do not boil gelatin.
Immediately whisk it into the warm chocolate mixture until fully incorporated.
Let the chocolate mixture cool until it is barely warm but still fluid.
This temperature matters.
If it is very hot, it can soften the cream cheese and collapse the whipped cream later. If it becomes cold and thick, the gelatin and chocolate may begin setting before everything is mixed.
Step 5: Build the Cheesecake Mousse
Put the softened cream cheese in a large bowl.
Beat it until smooth before adding anything else.
Add powdered sugar, vanilla, and salt. Beat again until creamy and lump-free.
Scrape down both the sides and bottom of the bowl.
Gradually add the barely warm chocolate mixture while beating at low to medium speed.
Stop once the filling looks uniform.
In a clean chilled bowl, whip the remaining 1 cup cold heavy cream.
Whip to medium peaks.
When you lift the beaters, the cream should hold a peak with a tip that bends slightly.
Avoid taking it all the way to stiff, grainy peaks.
Fold about one-third of the whipped cream into the chocolate mixture. Once incorporated, gently fold in the remaining cream in two additions.
Use broad movements with a spatula.
Do not vigorously stir.
Those tiny pockets of air are responsible for the mousse-like interior visible in each slice.
Step 6: Fill and Chill the Cheesecake
Check that the chocolate cake base is completely cool.
Spoon the mousse over it.
Spread the filling toward the edges and gently press it into the perimeter so large air gaps do not remain against the pan.
Smooth the top.
Do not obsess over making it perfectly flat. A slight handmade finish suits this cake.
Refrigerate for at least 6 hours.
Overnight is better.
Do not try to release the cheesecake after two or three hours simply because the surface feels firm. The center of a tall mousse layer takes longer to set.
Step 7: Make the Smooth Chocolate Topping
Finely chop 4 ounces of chocolate and place it in a heatproof bowl.
Heat ½ cup heavy cream until steaming.
Pour it over the chocolate and wait 2 minutes.
Stir slowly until glossy.
Add the butter and mix until smooth.
Now comes an easily missed step:
Do not pour hot ganache onto the cold mousse.
Let the topping cool until it is still spreadable but no longer hot.
A small instant-read kitchen thermometer on Amazon can be useful for chocolate work, although it is not required.
Spread a thin layer over the chilled mousse.
The goal is not a thick ganache shell. You want a soft chocolate surface that cuts easily with the mousse beneath it.
Chill for another 30 minutes.
Step 8: Release the Cake Without Damaging the Sides
Take the cheesecake from the refrigerator.
Warm a thin knife under hot water and wipe it dry.
Carefully run it around the inside edge of the springform pan.
Release the latch slowly.
Lift the ring vertically rather than dragging it against the mousse.
If you regularly make mousse cakes, acetate can make the sides even cleaner. You can find cake acetate collars on Amazon.
For this particular homemade presentation, however, perfectly polished sides are not necessary. Tiny natural air pockets make the mousse look inviting.
Step 9: Decorate With Strawberries and Blueberries
Decoration is deliberately simple.
Keep some strawberries whole and halve or quarter others.
Arrange them casually across one side of the cheesecake and toward the center.
Scatter blueberries between the strawberries.
Add a few irregular chocolate cake crumbs.
Finish with just a handful of tiny mint leaves.
Less mint is better here. It should add small green accents rather than cover the chocolate.
This asymmetric arrangement gives the cheesecake the relaxed presentation seen in the reference style.
If you enjoy working with fruit fillings and toppings, our guide to what strawberry puree is made of explains another useful berry preparation. You can also learn how to make puree for other desserts.
How to Get Those Clean, Tall Slices
A beautiful mousse cheesecake can turn messy at the final step if you use a cold, dull knife.
Fill a tall container with hot water.
Dip a long, sharp knife into it.
Dry the blade.
Cut straight down through the cheesecake instead of sawing back and forth.
Pull the knife out carefully, wipe it completely clean, warm it again, and repeat.
For the same visual effect as the reference cake, remove a generous wedge rather than a very narrow slice.
The cross-section should reveal:
- A thin dark chocolate cake base
- A much taller milk-chocolate-colored mousse
- Small natural air pockets
- A thin chocolate top
- Clean but slightly natural knife marks
Common Mistakes to Avoid
Using cold cream cheese: It can leave pale lumps throughout the chocolate mousse.
Adding hot chocolate to whipped cream: Too much heat can destroy the airy texture.
Skipping the gelatin bloom: Dry gelatin can form unpleasant grains or lumps.
Overwhipping the cream: Grainy cream is harder to fold smoothly into the cheesecake mixture.
Making the cake base too thick: This dessert should be mousse-forward. The chocolate base is only the supporting layer.
Decorating with wet berries: Moisture can leave marks on the chocolate topping.
Removing the springform ring too early: Six hours is the minimum target. Overnight chilling gives more dependable slices.
Using warm cake: Even slightly warm cake can interfere with the mousse layer.
Storage and Make-Ahead Tips
This is a good dessert to make one day before serving.
Prepare the cake, mousse, and chocolate topping on day one. Refrigerate overnight. Add fresh berries closer to serving time for the freshest appearance.
Because the filling contains cream cheese and heavy cream, keep the finished cheesecake refrigerated. FDA food-safety guidance generally calls for perishable cheese foods to remain refrigerated and warns against leaving refrigerated cheese foods at room temperature for extended periods.
Keep the cake covered so the mousse does not absorb refrigerator odors.
For the best texture, take out only the portion you intend to serve rather than leaving the whole cake sitting on the table for a long period.
What Makes the Texture Different From Regular Cheesecake?
A classic baked cheesecake gets much of its structure from eggs and baking.
This version does not bake the cheesecake layer.
Instead, its texture comes from cream cheese, chocolate, whipped cream, chilling, and a small amount of gelatin.
That produces a lighter mouthfeel.
It should not feel like chocolate-flavored gelatin. Nor should it collapse like loose whipped cream.
The sweet spot sits between those two textures: creamy enough to melt on the tongue, yet stable enough to stand in a tall slice.
That is why accurately measuring the gelatin and heavy cream matters.
Chocolate Berry Mousse Cheesecake FAQs
Can I Make Chocolate Mousse Cheesecake Without Gelatin?
You can make some mousse cheesecakes without gelatin, but this particular tall design needs reliable support. Removing the gelatin can produce a softer cake that may slump once the springform ring is removed.
Why Is My Chocolate Cheesecake Mousse Grainy?
The chocolate may have been too cool when combined with the cream cheese, or the cream may have been overwhipped.
Gelatin can also create lumps when it is not hydrated correctly. Powdered gelatin should first bloom in cold liquid before being dissolved.
Can I Use Milk Chocolate Instead of Semisweet Chocolate?
Yes, but expect a sweeter and softer chocolate flavor.
For the main mousse, semisweet chocolate gives better balance against the powdered sugar and cream. Milk chocolate works especially well for the thin top layer.
Can I Make This Cheesecake the Day Before?
Yes. In fact, making it the day before is recommended.
An overnight chill gives the mousse plenty of time to become stable. Decorate with fresh strawberries and blueberries shortly before serving.
Can I Use Frozen Berries?
Fresh berries are strongly preferred for the decoration.
Frozen fruit releases liquid as it thaws. That juice can stain the chocolate topping and make the finished cake look wet.
Why Did My Mousse Cheesecake Collapse?
Common reasons include too little chilling time, incorrectly measured gelatin, gelatin that was not fully dissolved, or whipped cream that did not reach medium peaks.
The mousse also needs to stay cold.
Can I Replace the Coffee?
Yes.
Use ¼ cup hot water instead. Coffee is there to support the cocoa flavor rather than make the base taste strongly of coffee. King Arthur Baking similarly describes coffee as a natural partner for deepening chocolate flavor.
How Long Does Chocolate Mousse Cheesecake Need to Set?
Give it at least 6 hours in the refrigerator. For the most reliable tall slices, chill it overnight.
Can I Use a Regular Cake Pan?
Technically yes, but removing a delicate chilled mousse cake from a standard pan is much harder.
A 9-inch springform pan is the practical choice because the outer ring can be released without turning the cheesecake upside down.
Print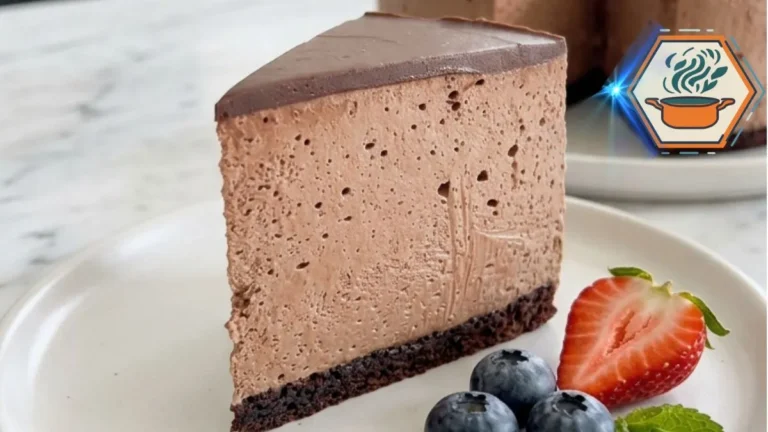
Chocolate Berry Mousse Cheesecake
A chilled Chocolate Berry Mousse Cheesecake with a thin dark chocolate cake base, a tall layer of creamy chocolate cheesecake mousse, a smooth chocolate topping, and fresh strawberries and blueberries. The mousse is light and creamy while a small amount of gelatin gives each tall slice enough structure to hold its shape.
- Total Time: About 7 hours 35 minutes minimum
- Yield: 12 servings
Ingredients
Chocolate Cake Base
- ¾ cup (90 g) all-purpose flour
- ⅓ cup (28 g) unsweetened cocoa powder
- ½ teaspoon baking powder
- ¼ teaspoon baking soda
- ¼ teaspoon fine salt
- ½ cup (100 g) granulated sugar
- 1 large egg, room temperature
- ⅓ cup (80 ml) whole milk
- ¼ cup (60 ml) neutral vegetable oil
- 1 teaspoon vanilla extract
- ¼ cup (60 ml) hot brewed coffee
Chocolate Cheesecake Mousse
- 12 oz (340 g) semisweet chocolate, finely chopped
- 16 oz (454 g) full-fat block cream cheese, softened
- ¾ cup (90 g) powdered sugar
- 2 teaspoons vanilla extract
- Pinch of fine salt
- 1½ cups (360 ml) cold heavy whipping cream, divided
- 1 tablespoon unflavored powdered gelatin
- 3 tablespoons (45 ml) cold water
Smooth Chocolate Cream Topping
- 4 oz (113 g) milk chocolate or semisweet chocolate, finely chopped
- ½ cup (120 ml) heavy cream
- 1 tablespoon (14 g) unsalted butter
Berry Topping
- 8–10 fresh strawberries
- ½ cup fresh blueberries
- ¼ cup reserved chocolate cake crumbs
- A few small fresh mint leaves
Instructions
- Prepare the pan. Preheat the oven to 350°F (175°C). Lightly grease the bottom of a 9-inch springform pan and line it with parchment paper.
- Mix the dry ingredients. Whisk the flour, cocoa powder, baking powder, baking soda, salt, and granulated sugar until evenly combined. Break up any cocoa lumps.
- Add the wet ingredients. Whisk the egg, milk, oil, and vanilla together. Add them to the dry ingredients and mix just until combined. Slowly stir in the hot coffee. The batter will be fairly thin.
- Bake the chocolate base. Pour enough batter into the prepared pan to create a layer about ¾ inch thick. Bake for 15–18 minutes, or until the center springs back lightly and a tester comes out without wet batter. Reserve a little baked cake for decorating if desired.
- Cool completely. Leave the cake base in the springform pan and allow it to cool completely before adding the mousse. Do not add mousse to a warm cake.
- Bloom the gelatin. Place 3 tablespoons cold water in a small bowl. Sprinkle the gelatin evenly over the water. Let it stand for 5–10 minutes, until hydrated and thick.
- Prepare the chocolate mixture. Place the chopped semisweet chocolate in a heatproof bowl. Heat ½ cup heavy cream until steaming but not vigorously boiling. Pour it over the chocolate. Let stand for 2 minutes, then stir until smooth.
- Add the gelatin. Gently heat the bloomed gelatin just until it becomes liquid. Do not boil it. Whisk it immediately into the warm chocolate mixture. Let the mixture cool until barely warm but still fluid.
- Beat the cream cheese. Beat the softened cream cheese until completely smooth. Add powdered sugar, vanilla, and salt. Beat again, scraping the bowl as needed.
- Add the chocolate. Gradually beat the barely warm chocolate mixture into the cream cheese until smooth and evenly colored.
- Whip the cream. In a separate clean bowl, whip the remaining 1 cup cold heavy cream to medium peaks. Do not whip until grainy or extremely stiff.
- Finish the mousse. Fold about one-third of the whipped cream into the chocolate mixture. Gently fold in the rest in two additions. Stop as soon as no obvious white streaks remain.
- Fill the cheesecake. Spoon the mousse over the completely cooled cake base. Gently spread it to the edges and smooth the surface.
- Chill. Refrigerate for at least 6 hours. For the cleanest, most stable slices, refrigerate overnight.
- Make the chocolate topping. Place 4 oz chopped chocolate in a bowl. Heat ½ cup heavy cream until steaming. Pour it over the chocolate and wait 2 minutes. Stir until smooth, then stir in the butter.
- Cool before spreading. Allow the chocolate topping to cool until slightly thickened and no longer hot. Spread a thin layer over the cold mousse. Never pour very hot chocolate topping directly onto the mousse.
- Chill again. Refrigerate for approximately 30 minutes, or until the topping has settled.
- Release the cheesecake. Warm a thin knife with hot water and dry it. Run it carefully around the edge of the cheesecake. Slowly release and lift away the springform ring.
- Decorate. Arrange completely dry strawberries and blueberries over one side and toward the center. Add a few chocolate cake crumbs and small mint leaves.
- Slice and serve. Dip a sharp knife in hot water and wipe it dry. Cut straight down through the cheesecake. Clean and warm the knife between cuts.
Notes
- Use full-fat block cream cheese rather than whipped or spreadable cream cheese.
- The cream cheese should be softened before mixing to reduce lumps.
- The cake base must be completely cool before adding mousse.
- Bloom powdered gelatin in cold water before melting it.
- Never boil the gelatin.
- Allow the chocolate mixture to become barely warm before combining it with the filling.
- Whip the heavy cream to medium peaks, not dry or grainy stiff peaks.
- Fold gently to retain the tiny air pockets that give the center its mousse texture.
- Chill for at least 6 hours. Overnight is preferred.
- The ganache must cool before it touches the mousse.
- Wash the berries ahead of time and dry them thoroughly.
- For the reference-style appearance, use a thin dark base and a much taller mousse layer.
- Decorate the cake asymmetrically rather than covering the entire surface with fruit.
- For clean slices, warm and dry the knife before every cut.
- Results vary slightly with chocolate cocoa percentage, whipping consistency, ingredient brands, and refrigerator temperature.
- Prep Time: 45 minutes
- Additional Chilling Time: 6 hours 30 minutes minimum
- Cook Time: 15–18 minutes
- Category: Dessert
- Method: Bake and Chill
- Cuisine: American-inspired
Final Kitchen Notes
The success of this Chocolate Berry Mousse Cheesecake comes from small details rather than complicated pastry tricks.
Cool the cake completely. Soften the cream cheese. Bloom the gelatin in cold water. Let the chocolate cool before combining it with the filling. Whip the cream only to medium peaks. Give the mousse enough refrigerator time. Dry every berry before it touches the chocolate.
Most importantly, do not judge the cheesecake before it has chilled overnight.
When you finally remove that generous first wedge, you should see exactly what makes this dessert worth the wait: a thin dark base, a tall creamy chocolate center, a soft chocolate top, and fresh berries breaking up all that richness.
For more dessert techniques, you can also read our guides to mastering caramelized sugar and keeping madeleines moist, or browse more recipes and kitchen ideas on RecipesMind.