
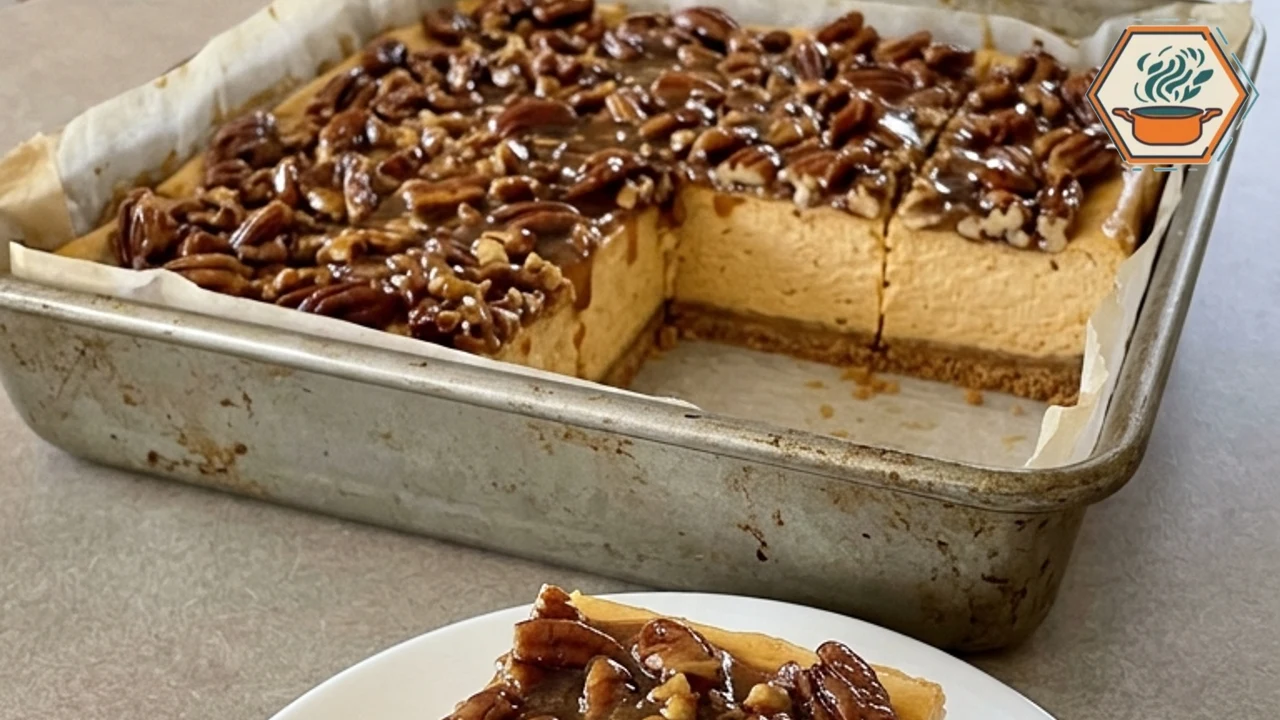
No-bake pumpkin cheesecake bars bring together a buttery graham cracker crust, a thick pumpkin cream cheese filling, and glossy maple pecans. They have the cozy flavors of a fall dessert table, with a cool, mousse-like center and no oven to compete with dinner.
The contrast is the best part: a tender crumb base, creamy pumpkin, and sweet pecans with a little chew. Cut the pan into small squares for Thanksgiving, or keep a few portions chilled for a quiet afternoon dessert. These are rich enough that a modest square feels complete.
This version is developed from the supplied RecipesMind visual concept and established no-bake cheesecake techniques. It has not been kitchen-tested. The photos illustrate the intended appearance; your bar height and firmness will depend on the pan, ingredients, and whipping. The important planning detail is an overnight refrigerator rest, not a quick freezer shortcut.
Why These No-Bake Pumpkin Cheesecake Bars Work
Full-fat cream cheese supplies the body, while properly whipped cream lightens the filling without turning it into a pudding. Plain pumpkin puree brings the fall flavor. Powdered sugar sweetens the mixture without the grittiness that undissolved granulated sugar can leave in a cold filling.
The maple flavor stays in the topping. Adding a generous pour of syrup directly to the filling would introduce more liquid and make setting less dependable. Here, a brief stovetop simmer combines syrup, butter, brown sugar, and cream into a spoonable sauce that coats the pecans.
No-bake means no oven: neither the crust nor the cheesecake is baked. The topping still needs about 5 minutes on the stove, including heating. The recipe contains no eggs or gelatin. For the alcohol-free version specified here, choose alcohol-free vanilla flavoring and check your other ingredient labels.
Ingredients That Matter
The printable recipe card below contains all quantities for 16 squares in a 9-inch square pan. Use a pan at least 2 inches deep. A different pan changes the thickness, and a large rectangular pan will make these noticeably thinner.
- Graham cracker crumbs: crush them finely so the base holds together. Large chunks leave weak spots when you lift a bar.
- Butter: melted butter binds the crust. Let it cool slightly before stirring it into the crumbs.
- Brick cream cheese: use three 8-ounce packages of full-fat cream cheese. Spreadable tub products and whipped varieties have different textures and are not direct swaps.
- Plain pumpkin puree: measure 1 cup, rather than emptying a whole can into the bowl. Pumpkin pie filling already contains sweetener and spices and changes the balance.
- Heavy whipping cream: keep it cold and use cream with at least 36% milk fat. Milk and half-and-half cannot create the same structure.
- Pumpkin pie spice: this is a spice blend, not pie filling. Two teaspoons give a warm flavor without covering the maple topping.
- Maple syrup and pecans: use pure maple syrup for its flavor, and a mixture of pecan halves and smaller pieces so each square is easier to cut.
If your puree has visible separated liquid, stir the can first and avoid scooping a watery layer. Homemade puree varies considerably in moisture; canned plain puree is the more predictable choice for this particular no-bake filling.
Helpful Equipment
Affiliate Disclosure: As an Amazon Associate I earn from qualifying purchases. Product links may earn a commission at no additional cost to you.
- A 9-inch square metal pan gives the bars their square shape. The linked pan is a similar option, not a claim that it is the exact pan pictured.
- Parchment paper creates a sling so you can remove the chilled dessert without tipping it out.
- An electric hand mixer makes smooth cream cheese and stiff whipped cream easier to achieve. A stand mixer you already own also works.
- A flexible silicone spatula lets you fold gently and scrape the bowl without losing as much air.
- An offset icing spatula is optional, but useful for smoothing the top without repeatedly dragging a large spoon through the filling.
Also set out two mixing bowls, measuring cups and spoons, a small saucepan, a heat-safe bowl for cooling the topping, and a sharp knife. You do not need a springform pan, a water bath, or a food processor; a sealed bag and rolling pin can crush the crackers.
How to Make No-Bake Pumpkin Cheesecake Bars
1. Prepare the Pan and Press the Crust
Let the cream cheese soften for about 30 minutes, checking it frequently. It should yield easily to gentle pressure without becoming warm or oily. Keep the whipping cream refrigerated. This preliminary softening time is included in the ready-to-serve schedule.
Line the pan with two crossed strips of parchment, leaving handles over the edges. Mix 2 cups graham cracker crumbs, 2 tablespoons granulated sugar, 6 tablespoons melted butter, and 1/8 teaspoon salt until evenly damp. Press the mixture across the bottom, especially into the corners, using a flat-bottomed measuring cup.
Firm pressure helps the chilled butter bind the crumbs, but do not grind the base into a rock-hard layer. Refrigerate it for 15 minutes while you make the filling. That short crust chill overlaps the active preparation; it is not another 15 minutes added to the total.
2. Make a Smooth Pumpkin Base
Beat the 24 ounces of softened cream cheese with 1 cup sifted powdered sugar until smooth. Scrape the bottom and sides of the bowl, then add 1 cup pumpkin puree, 2 teaspoons pumpkin pie spice, and 1 teaspoon alcohol-free vanilla flavoring. Mix just until the color is even.
Do this smoothing before the whipped cream goes in. Trying to beat out cream cheese lumps afterward can flatten the air you need. A few extra scrapes now are more helpful than prolonged high-speed mixing later.
3. Whip, Fold, and Spread
In a separate cold bowl, whip 1 cup cold heavy cream to stiff peaks. Lift the beaters: the peak should hold its shape rather than immediately bending into the bowl. Stop while the cream still looks smooth; a grainy appearance signals that it has gone too far.
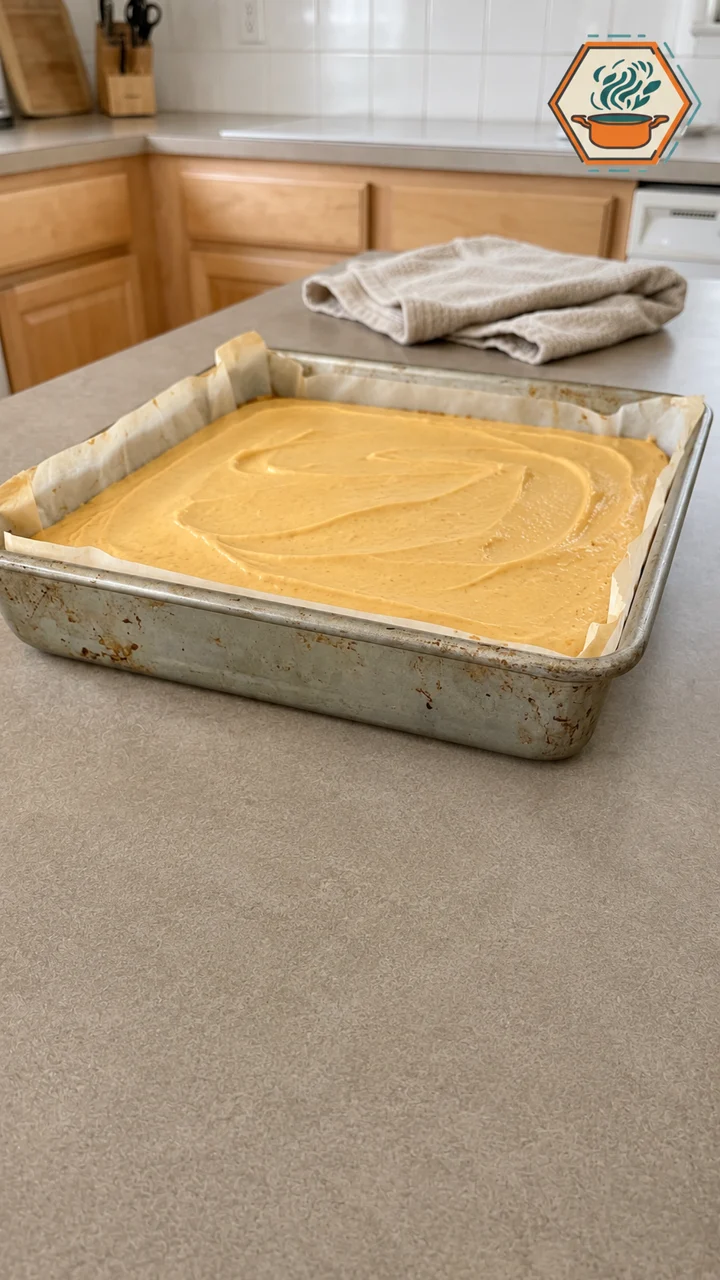
Fold about one-third into the pumpkin base to loosen it, then fold in the rest with broad, gentle strokes. Scrape around the bowl and lift through the center until no white streaks remain. Spread the filling over the chilled crust and smooth the surface.
4. Refrigerate Until the Center Is Firm
Cover the pan without pressing the cover onto the filling. Refrigerate on a level shelf for at least 8 hours, preferably overnight. The center should feel set rather than ripple loosely when the pan is moved gently.
Expect a creamy, mousse-style slice rather than the dense texture of baked cheesecake. If the middle still feels very soft after chilling, leave it longer. Freezing a loose filling briefly may make it cuttable while frozen, but it does not correct the underlying proportions or whipped-cream structure.
5. Cook and Cool the Maple Pecans
Once the cheesecake has completed its chill, leave it in the refrigerator. In a small saucepan, combine 1/3 cup maple syrup, 2 tablespoons butter, 2 tablespoons light brown sugar, 2 tablespoons heavy cream, and 1/8 teaspoon salt. Bring to a gentle simmer over medium-low heat, stirring to dissolve the sugar.
Simmer for 2 minutes, stir in 1 cup pecan halves and pieces, and cook for 1 more minute. Allow about 5 minutes total on the stove, including heating. Avoid a hard boil, which can reduce the sauce too far and make it overly sticky when cold.
Transfer to a heat-safe bowl and let cool for about 20 minutes, stirring occasionally. The topping must be at room temperature and still spoonable before it touches the filling. If it is warm, wait longer. A hot sauce can soften the cheesecake right when you want neat edges.
6. Top, Cut, and Serve Cold
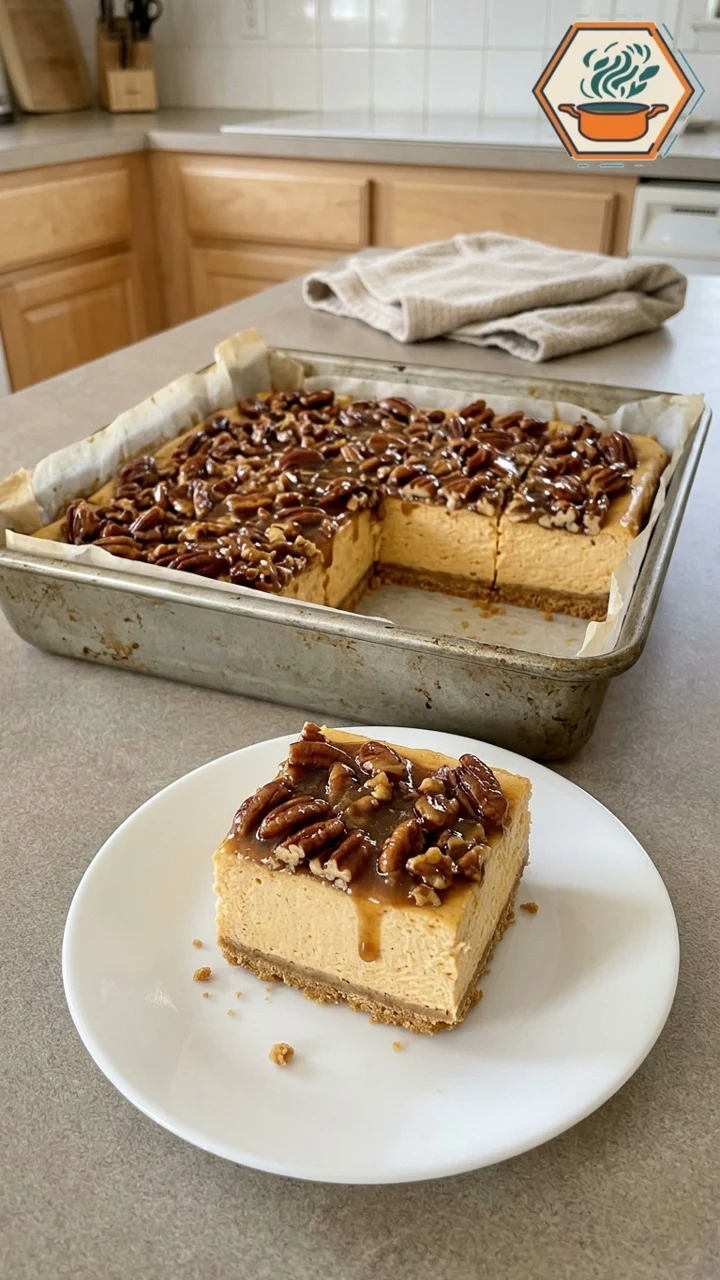
Spoon the cooled pecans evenly over the surface. Lift carefully using the parchment handles while supporting the base with a wide spatula, or cut directly in the pan if that feels steadier. Divide into 4 rows by 4 columns for 16 squares.
Tips for Clean Slices
Use a sharp knife warmed under hot running water and wiped completely dry. Make a straight downward cut, then clean the blade between slices. Drying matters: extra water on the knife can streak the filling and wet the crumb base.
Choose pecan pieces where you plan to cut, or gently move a large half aside before pressing the knife through. Sawing across a thick pecan can drag topping through the creamy center. Serve with a small spatula that reaches under the crust.
| Problem | Likely cause and next step |
|---|---|
| Soft center | Check chilling time, dairy type, and puree quantity. Chill longer; do not add more liquid. |
| Small white lumps | The cream cheese was too cold. Smooth it fully before adding whipped cream next time. |
| Crumbly base | Use fine crumbs, measure the butter, and press the base evenly before chilling. |
| Topping too firm | It may have simmered too hard or reduced too much. Warm it separately and loosen with a teaspoon of cream, then cool again. |
| Untidy edges | Cut colder bars with a clean, dry blade and avoid sawing through large pecans. |
Make-Ahead, Storage, and Serving Time
Plan on approximately 9 hours 30 minutes from start to serving: 30 minutes preliminary softening, 35 minutes active preparation, 8 hours chilling, 5 minutes stovetop cooking, and about 20 minutes topping cooling. Longer chilling or a warmer kitchen can extend that schedule. The printable card uses the same timing.
For a holiday meal, make the cheesecake base the day before. Keep it covered in the refrigerator, then prepare and cool the pecans near serving time. Adding the topping later helps preserve its texture and avoids an unnecessarily long rest on the cream filling.
Store covered leftovers in the refrigerator for up to 3 days at 40°F or below. Follow the FDA’s refrigerated-food guidance: limit the total time this dairy dessert spends out of refrigeration to 2 hours, or 1 hour when the temperature exceeds 90°F. Put out a few portions and keep the rest cold.
For longer storage, freeze untopped portions tightly wrapped for up to 1 month for best quality. Thaw overnight in the refrigerator and add freshly cooled topping. The filling may be slightly softer after thawing. Do not thaw it on the counter.
Frequently Asked Questions
Can I use pumpkin pie filling?
Use plain pumpkin puree for this recipe. Pie filling contains added sugar and seasonings, and its consistency can vary. Substituting it would require adjusting and retesting the filling rather than making a simple one-for-one swap.
Do these bars need gelatin?
This formula relies on full-fat cream cheese, stiffly whipped heavy cream, and a long refrigerator rest. It contains no gelatin. It is intended to be creamy rather than rubbery; substitutions and additional puree can make the set less dependable.
Can I leave off the pecans?
Yes. The cheesecake base can be served plain, or with a small spoonful of the cooled maple sauce. For a nut allergy, omit the pecans and check every ingredient and preparation surface for cross-contact. The complete recipe otherwise contains tree nuts, dairy, and wheat.
Can I use an 8-inch pan or a 9-by-13-inch pan?
The specified 9-inch square pan is the most straightforward choice. An 8-inch pan makes a deeper dessert and may not have sufficient capacity. A 9-by-13-inch pan spreads the same mixture much thinner. Do not expect the same height or portion size after changing the pan.
Can I use a different sweetener?
The sugar contributes texture as well as sweetness. Liquid sweeteners can loosen the filling, while some granulated substitutes remain gritty in a cold dessert. This recipe is not written as a sugar-free formulation, and those changes have not been tested.
More Desserts to Make Ahead
If you like desserts that wait in the refrigerator while dinner comes together, try our chocolate eclair cake. For a different fruit-and-cream combination, see the no-bake white chocolate cherry cheesecake. Each has its own chilling schedule, so plan ahead before choosing a serving time.
Printable Recipe
Use the recipe card for the full ingredient list, all preparation steps, and the complete ready-to-serve timing. Nutrition has not been calculated.
Print
No-Bake Pumpkin Cheesecake Bars with Maple Pecans
Creamy pumpkin cheesecake squares with a buttery graham cracker crust and a glossy maple pecan topping. No oven, eggs, or gelatin required. Plan for an overnight chill.
- Total Time: 9 hours 30 minutes
- Yield: 16 squares
Ingredients
Graham Cracker Crust
2 cups (200 g) fine graham cracker crumbs
2 tablespoons (25 g) granulated sugar
6 tablespoons (85 g) unsalted butter, melted and cooled slightly
1/8 teaspoon fine salt
Pumpkin Cheesecake Filling
24 ounces (680 g) full-fat brick cream cheese, softened
1 cup (120 g) powdered sugar, sifted
1 cup (225 g) canned pure pumpkin puree, not pie filling
2 teaspoons pumpkin pie spice
1 teaspoon alcohol-free vanilla flavoring
1 cup (240 ml) cold heavy whipping cream, at least 36% milk fat
Maple Pecan Topping
1 cup (110 g) pecan halves and pieces
1/3 cup (80 ml) pure maple syrup
2 tablespoons (28 g) unsalted butter
2 tablespoons (25 g) packed light brown sugar
2 tablespoons (30 ml) heavy whipping cream
1/8 teaspoon fine salt
Instructions
Allow about 30 minutes to soften the cream cheese, checking it frequently; keep the whipping cream cold. Line a 9-inch square pan at least 2 inches deep with two crossed parchment strips, leaving handles. Clear a level refrigerator shelf.
Mix crumbs, granulated sugar, melted butter, and salt until evenly damp. Press firmly and evenly over the pan bottom with a flat-bottomed cup. Refrigerate for 15 minutes while making the filling; this overlaps the active preparation time.
Beat the softened cream cheese with the powdered sugar until smooth, scraping the bowl. Add pumpkin puree, spice, and vanilla; mix just until evenly combined.
In a separate cold bowl, whip the 1 cup cold heavy cream to stiff peaks that hold their shape. Stop before the cream becomes grainy.
Fold one-third of the whipped cream into the pumpkin mixture, then gently fold in the remainder. Spread over the cold crust and smooth the top. Cover without touching the surface. Refrigerate for at least 8 hours, preferably overnight, until the center is firm enough to slice. Keep refrigerated while preparing the topping.
Combine maple syrup, butter, brown sugar, 2 tablespoons cream, and salt in a small saucepan. Bring to a gentle simmer over medium-low heat, stirring. Simmer for 2 minutes, then stir in the pecans and cook for 1 minute. Allow about 5 minutes total stovetop time including heating. Remove from heat.
Transfer the topping to a heat-safe bowl and let cool for about 20 minutes, stirring occasionally, until room temperature and still spoonable. Do not add warm topping to the cheesecake. If it is still warm, wait longer.
Spoon the cooled topping evenly over the chilled cheesecake. Lift carefully using the parchment handles, supporting the base with a wide spatula, or cut directly in the pan. Cut into 16 squares with a clean sharp knife, wiping between cuts. Serve cold.
Notes
Timing: 35 minutes active preparation plus 5 minutes stovetop cooking, 30 minutes preliminary softening, 8 hours refrigeration, and about 20 minutes topping cooling = approximately 9 hours 30 minutes ready to serve. The 15-minute crust chill overlaps filling preparation. Longer chilling or cooling adds to the total. Cook time applies only to the stovetop topping; the crust and filling are not baked.
Use full-fat brick cream cheese and canned plain pumpkin for a more dependable texture. Do not substitute spreadable cream cheese, milk, or pumpkin pie filling. This is a mousse-style cheesecake; actual height and firmness vary with ingredients and whipping.
Store covered at 40°F or below for up to 3 days. For best texture, make the cheesecake base one day ahead and add the cooled topping near serving. Freeze untopped portions, well wrapped, for up to 1 month for best quality; thaw overnight in the refrigerator. Keep total time at room temperature under 2 hours, or 1 hour above 90°F. Contains dairy, wheat, and tree nuts. Nutrition is not calculated.
- Prep Time: 35 minutes
- Cook Time: 5 minutes
- Category: Dessert
- Method: No-Bake
- Cuisine: American