
No-bake cherry chocolate cheesecake brings together a dark cookie crust, a thick vanilla cream cheese filling, and glossy whole cherries. The chocolate stays in the bottom layer, so every bite balances cocoa, tangy cream, and bright fruit. It is a lovely choice when you want a centerpiece dessert without turning on the oven.
The secret is less about complicated technique and more about temperature. The crust needs to be cold, the cream needs properly whipped peaks, and the cherry topping must cool completely. Give the filling an overnight rest, and dessert can be waiting in the refrigerator long before you need it.
By Elian Cove
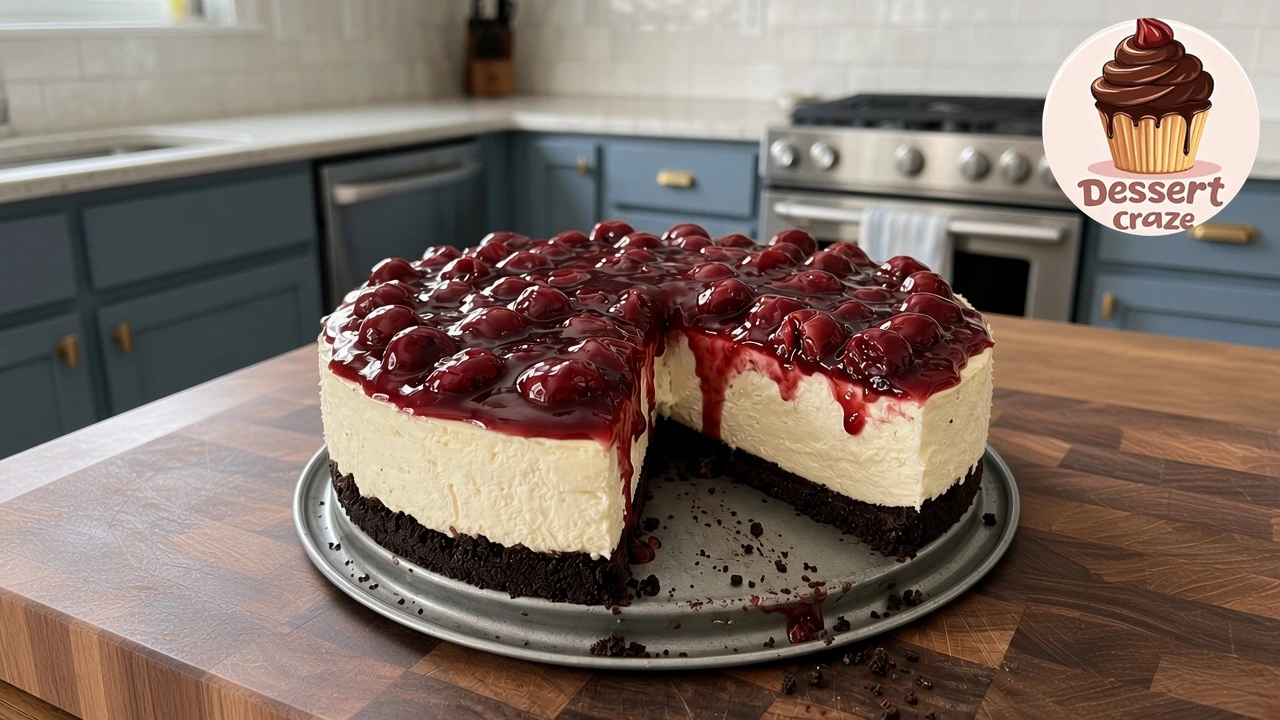
Table of contents
- Why this cheesecake works
- Ingredients and equipment
- A realistic make-ahead schedule
- How to make the cheesecake
- Recipe card
- Troubleshooting and serving
- Storage and freezing
- Frequently asked questions
Why this no-bake cherry chocolate cheesecake works
This is a vanilla cheesecake with a chocolate cookie crust, not a chocolate-flavored filling. That distinction keeps the ivory center light in color and lets the cherry topping stand out. The bottom-only crust also leaves those creamy sides visible once the springform ring comes away.
Full-fat block cream cheese gives the filling body. Separately whipped heavy cream provides lift, while a long refrigerator rest firms the mixture without eggs or gelatin. The result should be creamy and mousse-like rather than dense like a baked New York cheesecake.
The method follows established principles explained in Sally’s no-bake cheesecake guide: use firm cream cheese, fold in stiffly whipped cream, and allow a generous chill. This particular cherry-and-chocolate combination is a researched editorial formulation, not a kitchen-tested recipe or a reproduction of quantities from the social post.
Ingredients and equipment for three distinct layers
For one 9-inch cheesecake, gather 35 regular chocolate sandwich cookies, including their cream filling, and 5 tablespoons melted unsalted butter. Cookie sizes vary, so aim for 403 grams of whole cookies before crushing. Avoid thin or extra-stuffed cookies, which change the balance of crumbs and fat.
The filling uses three 8-ounce blocks of full-fat cream cheese, 3/4 cup powdered sugar, 1/4 cup full-fat sour cream, 2 teaspoons vanilla, 1 teaspoon lemon juice, and 1 1/4 cups cold heavy whipping cream. Choose cream with at least 36% milk fat. Softened cream cheese blends smoothly; cold cream holds air. Do not swap their temperatures.
For the topping, use 1 pound of pitted dark sweet cherries, fresh or frozen, with 1/3 cup sugar, 1 tablespoon lemon juice, and a cornstarch slurry. Weigh fresh cherries after removing stems and pits. Sour cherries need a different sweetness balance, so they are not a direct substitute here.
Affiliate disclosure: As an Amazon Associate, RecipesMind earns from qualifying purchases. These tools are optional; use suitable equipment you already own.
- A Nordic Ware 9-inch springform pan lets you release the ring without turning the soft cake upside down. Choose a pan about 3 inches deep.
- A Cuisinart HM-50 hand mixer handles the cream cheese and whipped cream in separate bowls. Start low to limit splashes.
- An OXO silicone everyday spatula is useful for scraping the bowl and folding without beating away the air.
- An OXO quick-release cherry pitter helps with fresh fruit. Check every cherry for a remaining pit; skip this tool when using already-pitted frozen cherries.
- A Cuisinart 2-quart stainless saucepan gives the cherry topping room to bubble and stir without crowding.
You will also need two bowls, a food processor or sturdy zip-top bag and rolling pin, a flat-bottomed glass, and a shallow heatproof container for cooling the sauce. No water bath is needed.
A realistic make-ahead schedule
Plan on 13 hours 20 minutes from refrigerated ingredients to serving, including a 12-hour filling chill. That is a planning estimate, not measured testing time. Active preparation is about 50 minutes, with another 10 minutes of stovetop cooking. Fresh cherry pitting or unusually firm cream cheese may take longer.
Begin with 30 minutes to soften the cream cheese and sour cream. Make the crust in 10 minutes, then refrigerate it for 30 minutes. Prepare the filling during the last 20 minutes of that crust chill. Allow 5 minutes to spread it, then refrigerate for 12 hours.
Make and cool the cherry topping during those 12 hours: about 10 minutes preparation, 10 minutes cooking, and 60 minutes cooling, longer if needed. Finish with 5 minutes to unmold and decorate. The overlapping work is already included in the total; do not add the topping’s cooling time again. Six to eight hours is a practical minimum filling chill, but overnight is the better plan for tidy slices.
How to make no-bake cherry chocolate cheesecake
1. Press a bottom-only chocolate crust
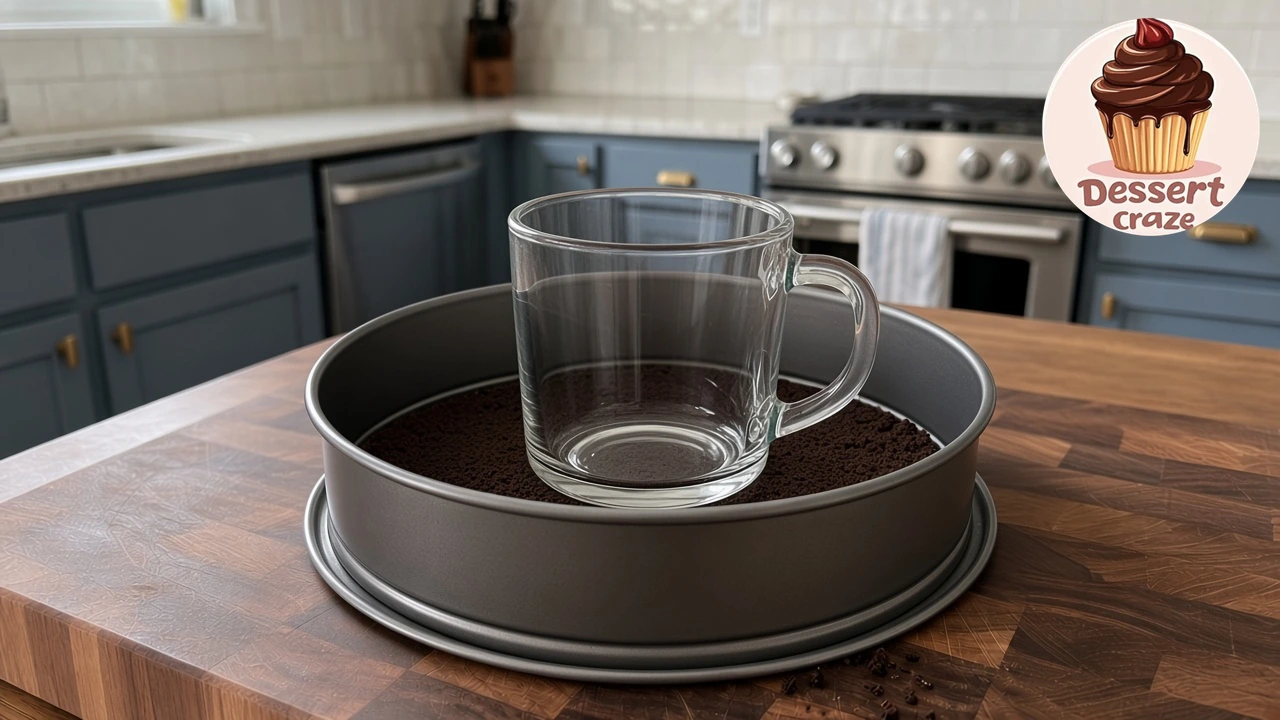
Secure the springform ring and line the base with a parchment circle. Grind the cookies, filling included, into fine crumbs. Stir in the melted butter until evenly damp. Press firmly into an even layer across the bottom only, roughly 3/8 to 1/2 inch thick depending on compression.
Use the solid flat bottom of a glass, keeping it upright. Do not push crumbs up the ring. Refrigerate for 30 minutes before adding filling. Southern Bite’s cookie-crust instructions also support a refrigerator-set crust without baking.
2. Whip the cream, then smooth the cheese mixture
In a clean bowl, whip cold heavy cream to stiff peaks. Lift the beaters: the peak should remain upright rather than curl into a soft puddle. Stop before the cream looks grainy or separates.
In another bowl, beat the softened cream cheese until smooth. Beat in the powdered sugar, sour cream, vanilla, and lemon juice, scraping the bottom and sides. Finish removing lumps now; vigorous mixing after folding in cream would sacrifice the airy structure.
3. Fold gently and fill the pan
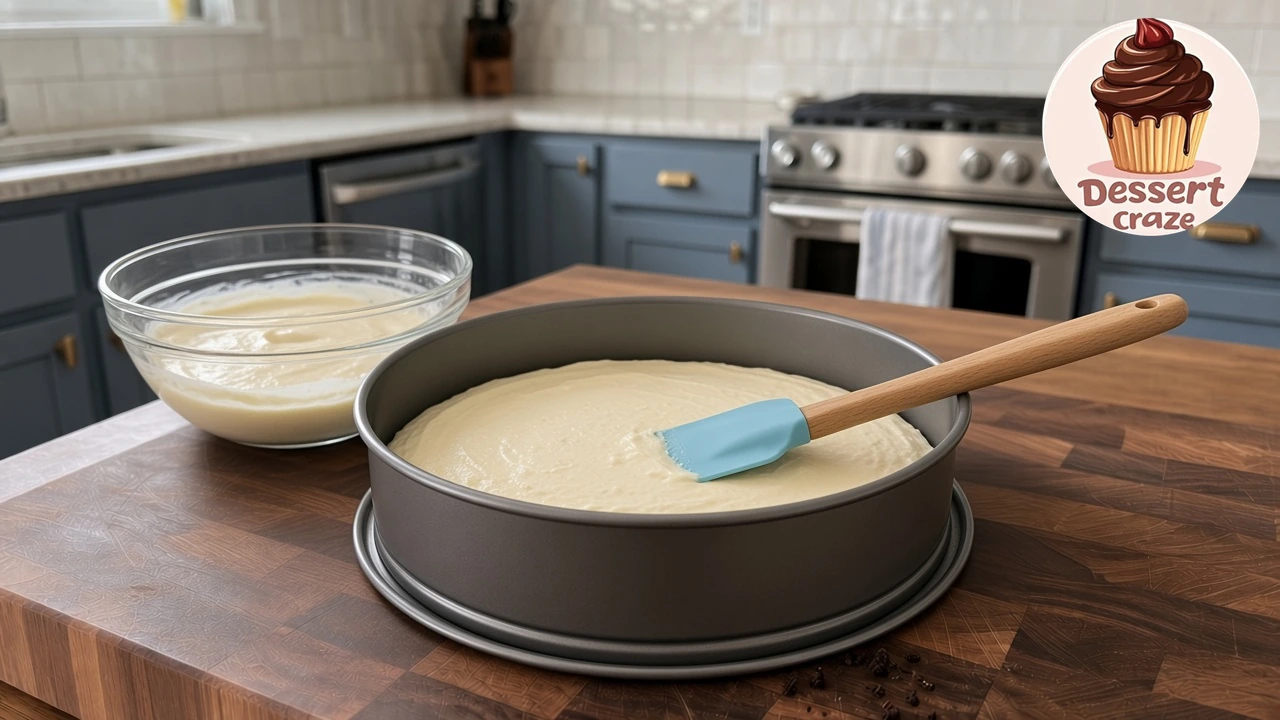
Fold one-third of the whipped cream into the cream cheese mixture to lighten it. Add the remaining cream in two portions, sweeping the spatula down the side and up through the middle. Stop when no white streaks remain.
Spread over the cold crust, working gently into the edges so there are no large air pockets. Level the top without repeatedly pressing down. Leave space below the rim; if your pan is unusually shallow, refrigerate excess filling separately rather than overfilling it.
4. Refrigerate until the filling is set
Cover without letting the cover touch the filling. Refrigerate at 40°F or below for 12 hours. The center should hold its shape when the pan is gently moved, not ripple like a liquid. A chilled cheesecake remains soft and creamy, so do not expect a baked-cake texture.
Do not freeze the filling to rush this setting stage. Freezing for later storage comes only after the cheesecake has properly set in the refrigerator.
5. Cook, thicken, and completely cool the cherries
While the cake chills, combine the cherries, sugar, lemon juice, and 2 tablespoons water in the saucepan. Cook over medium heat, stirring gently, until juicy and simmering, about 7–9 minutes. Frozen cherries can go straight into the pan and may need extra time.
Mix 1 1/2 tablespoons cornstarch with another 2 tablespoons cold water. Stir the slurry again, add it to the bubbling cherries, and cook at a gentle boil for about 1 minute, stirring until glossy and thick. Keep the fruit mostly whole.
Transfer to a shallow heatproof container. Let the initial heat dissipate briefly, then refrigerate until completely cold, allowing about 60 minutes overall and more if needed. Do not wait for a deep saucepan to cool on the counter. Fruit sauces thicken further as they cool, as this homemade cherry sauce guide explains.
6. Unmold, top, and slice
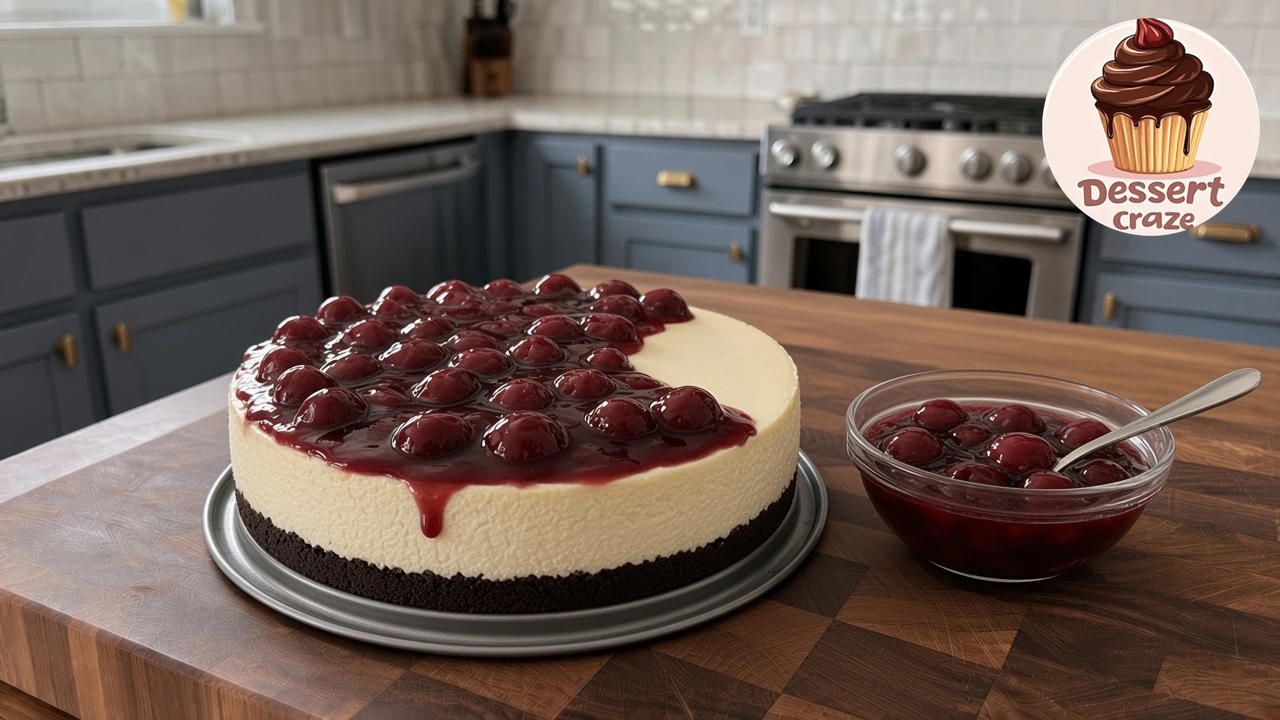
Loosen the cold cheesecake from the ring with a thin silicone or plastic tool suitable for your pan’s surface. Release the ring carefully and keep the cake on its metal base. Spoon the cold cherry topping over the set filling, leaving a narrow border if you prefer fewer drips.
Use a sharp knife warmed in hot water and wiped dry. Clean and dry it between cuts. Slide a server beneath the crust rather than lifting only the creamy filling.
No-bake cherry chocolate cheesecake recipe card
The full ingredient amounts and repeatable instructions are collected below. Nutrition is an estimate per one of 12 slices, including all the cherry topping.
Print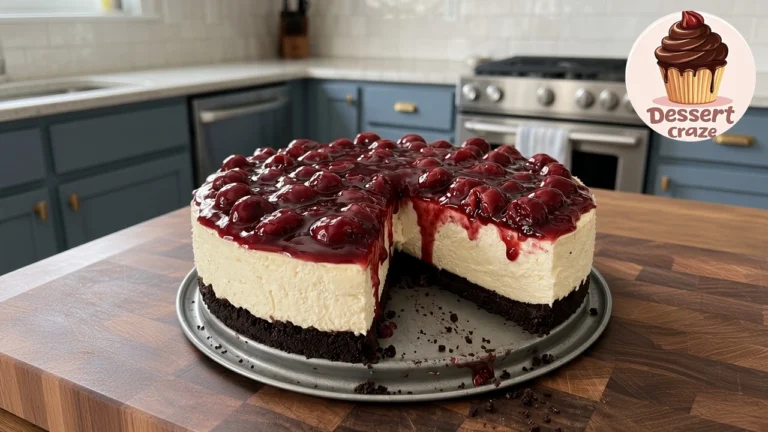
No-Bake Cherry Chocolate Cheesecake
A bottom-only chocolate sandwich-cookie crust, fluffy vanilla cream cheese filling, and glossy whole-cherry topping. No oven or gelatin; overnight refrigeration gives the best slicing texture. Researched editorial formulation, not kitchen-tested. Nutrition and timing are estimates.
- Total Time: 800 minutes
- Yield: 1 (9-inch) cheesecake; 12 slices
Ingredients
CHOCOLATE COOKIE CRUST
35 regular chocolate sandwich cookies, cream filling included (about 403 g; approximately 3 cups fine crumbs)
5 tablespoons (70 g) unsalted butter, melted
VANILLA CHEESECAKE FILLING
24 ounces (678 g; three 8-ounce blocks) full-fat block cream cheese, softened
3/4 cup (90 g) powdered sugar, sifted if lumpy
1/4 cup (60 g) full-fat sour cream, softened
2 teaspoons (10 ml) pure vanilla extract
1 teaspoon (5 ml) lemon juice
1 1/4 cups (300 ml) heavy whipping cream, at least 36% milk fat, cold
WHOLE-CHERRY TOPPING
1 pound (454 g; about 3 cups, depending on size) pitted dark sweet cherries, fresh or unsweetened frozen; weigh after pitting
1/3 cup (67 g) granulated sugar
1 tablespoon (15 ml) lemon juice
1/4 cup (60 ml) water, divided: 2 tablespoons for fruit + 2 tablespoons for slurry
1 1/2 tablespoons (12 g) cornstarch
Instructions
1. Allow about 30 minutes to soften cream cheese and sour cream; extend only as needed without exceeding safe room-temperature exposure. Keep heavy cream refrigerated. Secure the ring on a 9-inch springform pan about 3 inches deep; line the base with a parchment circle.
2. Spend about 10 minutes grinding whole cookies, cream filling included, to fine crumbs. Mix with melted butter. Press firmly and evenly over the bottom ONLY, roughly 3/8–1/2 inch thick; use the solid flat bottom of an upright glass. Refrigerate for 30 minutes. During the last 20 minutes of this crust chill, prepare the filling.
3. In a clean bowl, whip the cold heavy cream on medium-high speed until stiff peaks stand upright, about 3–5 minutes. Stop before it becomes grainy. In another bowl, beat softened cream cheese smooth. Beat in powdered sugar, sour cream, vanilla, and 1 teaspoon lemon juice, scraping the bowl until there are no cream cheese lumps.
4. Fold one-third of the whipped cream into the cheese mixture. Gently fold in the rest in two additions until no streaks remain. Do not continue beating with the mixer. Allow about 5 minutes to spread over the chilled crust and smooth the top; leave space below the rim. Cover without touching the surface.
5. Refrigerate at 40°F (4°C) or below for 12 hours for the planned overnight set; at least 6–8 hours is a practical minimum, but slices may be softer. The center should hold its shape without liquid ripples. Do not freeze to rush the setting stage.
6. During the filling chill, allow about 10 minutes to wash, stem, pit, inspect, weigh, and measure fresh cherries and topping ingredients. Use frozen pitted cherries straight from the freezer; inspect for stray pits. In a 2-quart saucepan, combine cherries, granulated sugar, 1 tablespoon lemon juice, and 2 tablespoons water. Cook over medium heat, stirring gently, until juicy and simmering, about 7–9 minutes; frozen fruit may need longer.
7. Whisk cornstarch with the remaining 2 tablespoons cold water until smooth. Stir the slurry again and add to bubbling cherries. Return to a gentle boil and cook about 1 minute, stirring, until thick and glossy. Keep cherries mostly whole. Total stovetop planning time is 10 minutes; extend if needed for the thickening cue.
8. Transfer topping to a shallow heatproof container, let initial heat dissipate briefly, then refrigerate until completely cold, about 60 minutes overall or longer as needed. Do not leave a deep saucepan cooling on the counter. This cooling happens DURING the filling’s 12-hour chill. Never put warm topping on the cheesecake.
9. Allow about 5 minutes to loosen the set cheesecake from the ring with a thin non-scratching tool, release the ring, and spoon cold topping over the surface. Leave on the metal base. Slice into 12 portions with a warmed, wiped-dry sharp knife; wipe between cuts and support the crust with a server. Serve cold.
Notes
TIMING: 50 minutes active prep + 10 minutes stovetop cooking + 740 minutes NET inactive time = 800 minutes (13 hours 20 minutes) ready to serve using a 12-hour filling chill. These are planning estimates, not measured test results.
CRITICAL-PATH SCHEDULE: 0–30 min soften dairy; 30–40 make crust; 40–70 chill crust, preparing filling during 50–70; 70–75 spread filling; 75–795 refrigerate filling 12 hours; 795–800 unmold and decorate. During 75–795, prepare topping (10 min), cook (10 min), and cool completely (about 60 min). Active prep is 10 crust + 20 filling + 5 assembly + 10 topping prep + 5 finishing = 50 min. Net waiting is 30 softening + 10 non-overlapped crust chill + 700 filling-chill minutes excluding the 20 min topping prep/cook = 740 min. Topping cooling is contained within the filling chill, not added again. If an additional-time field is available, use 740 minutes NET inactive; preserve the 800-minute rendered total. If not, keep all timing explanation in Notes and explicitly set Total to 13 hours 20 minutes. Shortening filling chill to 6–8 hours gives approximately 7 hours 20 minutes–9 hours 20 minutes total, with a softer set. Overnight remains recommended. Pitting, softening, extra cooking, or extra cooling can extend the estimate.
PAN/YIELD: One 9-inch round springform cheesecake, about 12 slices. Use a ring about 3 inches deep; leave headroom. Heights are approximate and depend on whipping and crumb compression. Do not force excess filling into a shallow pan; chill it separately.
INGREDIENTS: Regular sandwich cookies with cream included, not thin/extra-stuffed. Full-fat block cream cheese, not spreadable tubs or low-fat products. Heavy whipping cream must be cold and at least 36% fat. Sour cherries are not a direct sweetness-equivalent swap. No eggs or gelatin; stovetop cherry cooking is still required.
STORAGE: Covered at 40°F (4°C) or below, use within 4 days of assembly (conservative recommendation); topping and cake may be made a day ahead and kept separately. Add cold topping near serving. Limit cumulative unrefrigerated dairy exposure during softening/preparation/serving to 2 hours, or 1 hour above 90°F (32°C). Keep remaining cake cold while serving slices.
FREEZING: Set plain cheesecake fully in refrigerator first, wrap well, freeze at 0°F (-18°C) without topping up to 3 months for best quality, and thaw covered in refrigerator about 8 hours or overnight. Do not thaw on counter. Make fresh topping after thawing; cornstarch sauce can weep after freezing. Freezing is storage, not a substitute for the initial set.
ALLERGENS: Milk, wheat, and usually soy; check cookie and ingredient labels. Vegetarian when using suitable cookies/dairy; not gluten-free or vegan.
NUTRITION: Approximate ingredient-based estimate per 1/12 cake with all topping; brand and portion differences matter. Not laboratory analysis. Images are AI-assisted illustrations guided by the supplied visual reference, not photographs documenting a kitchen test.
- Prep Time: 50 minutes
- Additional Time: 740 minutes NET inactive (12 hours 20 minutes; overlapping stages explained in Notes)
- Cook Time: 10 minutes
- Category: Dessert
- Method: No-Bake / Stovetop Topping
- Cuisine: American
- Diet: Vegetarian
Troubleshooting and serving tips
Loose filling: The most common causes are spreadable or reduced-fat cream cheese, underwhipped cream, and insufficient chilling. If it still seems soft after an overnight rest, serve chilled spoonfuls in dessert bowls rather than promising neat slices. More sugar or uncooked cornstarch is not a dependable rescue.
Crumbly crust: Large cookie pieces create weak spots. Crush finely, mix the butter through thoroughly, and press the base evenly. A few crumbs on the serving base are normal; pressing harder and harder can make the crust difficult to cut.
Watery topping: The sauce needs to bubble after the slurry is added. Judge the cooled sauce, not just the hot pan: it should coat the cherries and move slowly from a spoon. If yours remains thin, simmer it again briefly, then cool completely before using it.
Serve small, cold slices after a hearty meal, or offer coffee alongside the rich filling. For another chilled fruit option, try no-bake strawberry cheesecake. If you want a baked chocolate-and-cherry centerpiece for another occasion, explore Black Forest cherry cream layer cake.
Storage, make-ahead, and freezing
Keep the cheesecake covered in the refrigerator at 40°F or below and use within 4 days of assembly as a conservative home-storage recommendation. Make the cake and topping a day ahead and store them separately; add the cherries shortly before serving for the cleanest appearance.
Follow the FDA’s cold-storage and two-hour guidance. Perishable food should not spend more than 2 hours total at room temperature, or 1 hour above 90°F. Count softening, preparation, and serving exposure together. Bring out only the slices you plan to serve.
For longer storage, first set the plain cheesecake overnight, then wrap it well and freeze without the cherry topping for up to 3 months for best quality. Thaw covered in the refrigerator for about 8 hours or overnight. Prepare fresh topping afterward; cornstarch-thickened fruit sauce can become watery after freezing. Never thaw cheesecake on the counter.
Frequently asked questions
Is this completely no-bake?
Yes. Neither the cookie crust nor the filling goes into the oven. The cherry topping does require about 10 minutes on the stovetop, so no-bake does not mean no cooking.
Can I use frozen cherries?
Yes. Use unsweetened pitted dark sweet cherries without thawing. Check for stray pits and let the fruit release its juices before adding the slurry. Extra stove time may be needed.
Does it need gelatin?
This formulation uses full-fat cream cheese, stiff whipped cream, and refrigeration rather than gelatin. Do not replace the cream with milk or canned aerosol whipped cream; neither provides the same structure.
Can I finish it the same day?
You can allow at least 6–8 hours for the filling to chill, but the published planning time uses 12 hours for a firmer set. If timing is tight, make it the evening before instead of relying on the freezer to hurry it along.
Where does the chocolate flavor come from?
From the chocolate sandwich-cookie crust. The filling stays vanilla, and the topping stays cherry. There is no melted chocolate or cocoa in the cream cheese layer.