
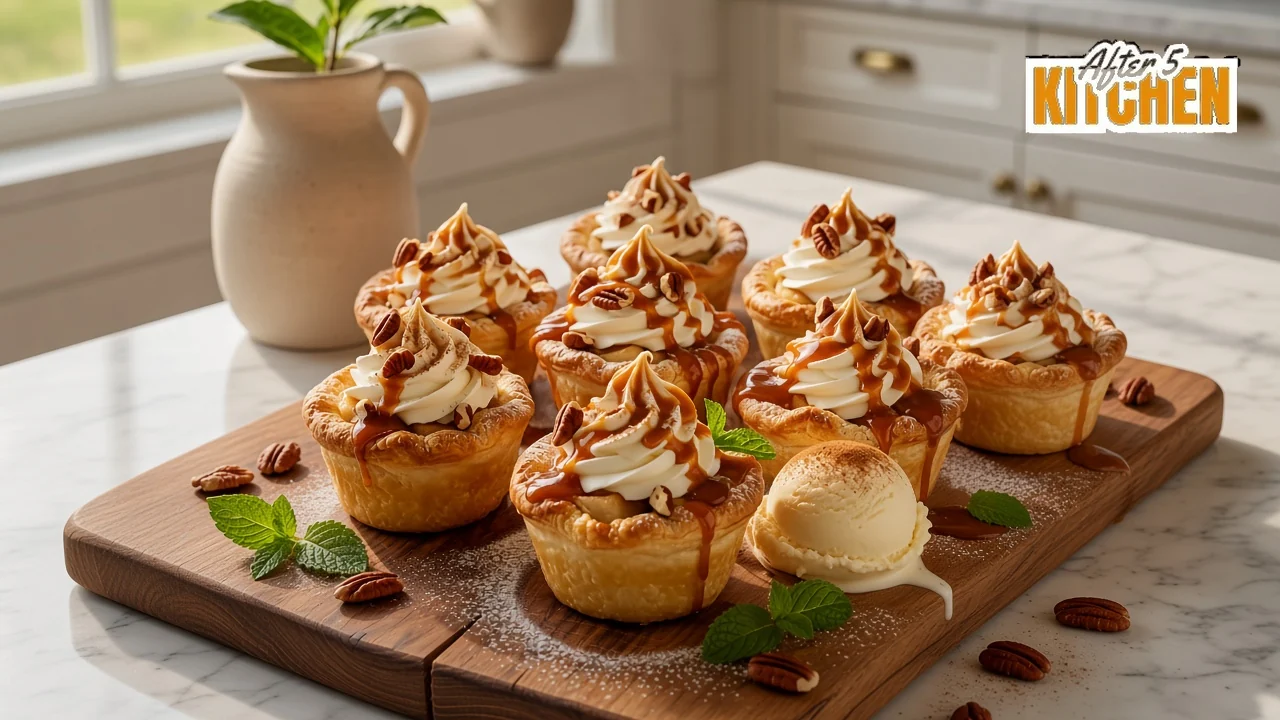
Flaky golden pastry, warm cinnamon apples, and a cloud of whipped cream on top: these apple pie cups taste like a slice of apple pie you can hold in one hand. The base recipe really does start with just two store-bought ingredients, a can of refrigerated crescent roll dough and a can of apple pie filling, so you can go from fridge to oven in about fifteen minutes.
That makes them a handy answer for the busy nights when dessert feels like one task too many, the potluck you forgot about until this morning, or a Thanksgiving table that needs something small and cozy next to the big pies. Kids can help press the dough into the pan, and nobody needs a rolling pin.
Recipe note: this measured version is based on the recipe shared by After 5 Kitchen and on the dough maker’s published baking temperature. RecipesMind has not kitchen-tested it, so bake times and the amount of filling per cup are estimates. Ovens, pans, and dough brands vary, and the visual cues below matter more than the timer.
In This Article
- Why this shortcut works
- Ingredients: the two-ingredient base and the extras
- Helpful equipment
- How to make apple pie cups
- Toppings and serving ideas
- Storage, make-ahead, and reheating
- FAQ
- Recipe card
Why These Apple Pie Cups Work
Crescent dough is a soft, buttery yeast dough that bakes up tender and lightly flaky. Pressed into a standard muffin well, each triangle forms a rustic little cup with ragged edges that turn crisp and deeply golden in the oven. It is not puff pastry and it is not a traditional rolled pie crust, so expect a bread-like, pull-apart pastry with crunchy rims rather than shattering layers.
Canned apple pie filling is already cooked, sweetened, and thickened, so it only needs to heat through while the dough bakes. Chopping the larger slices into small pieces helps the filling settle into the cups instead of tenting the dough or sliding over the sides. A spoonful of cinnamon and a little vanilla, the two extras the original recipe strongly recommends, make the canned filling taste much closer to homemade.
If you love this shortcut style, our cinnamon sugar apple pie roll-ups use a similar fridge-to-oven approach, and our two-ingredient apple cinnamon cookies are another easy fall bake.
Ingredients: The Two-Ingredient Base and the Extras
The “two-ingredient” name describes only the base. Everything else is a recommended flavor boost, a pan-prep supply, or an optional topping. The exact quantities are in the recipe card below.
The two main ingredients
- Refrigerated crescent roll dough: one 8-count can, about 8 ounces. The maker’s directions say to keep it refrigerated until you are ready to use it and to bake at 375°F, so we use that temperature here. One can gives you 8 triangles, which means 8 cups.
- Apple pie filling: one 21-ounce can. You will probably not need the whole can for 8 cups; extra filling is normal (see storage below).
Recommended for best flavor
- Ground cinnamon: 1 teaspoon, stirred into the filling.
- Vanilla extract: 1 teaspoon, stirred into the filling.
For the pan
- Nonstick cooking spray or a thin coat of softened butter for the 8 wells you will use. Even a nonstick pan benefits from a light coat, because sugary filling that bubbles over can glue the pastry to the rim.
Optional toppings
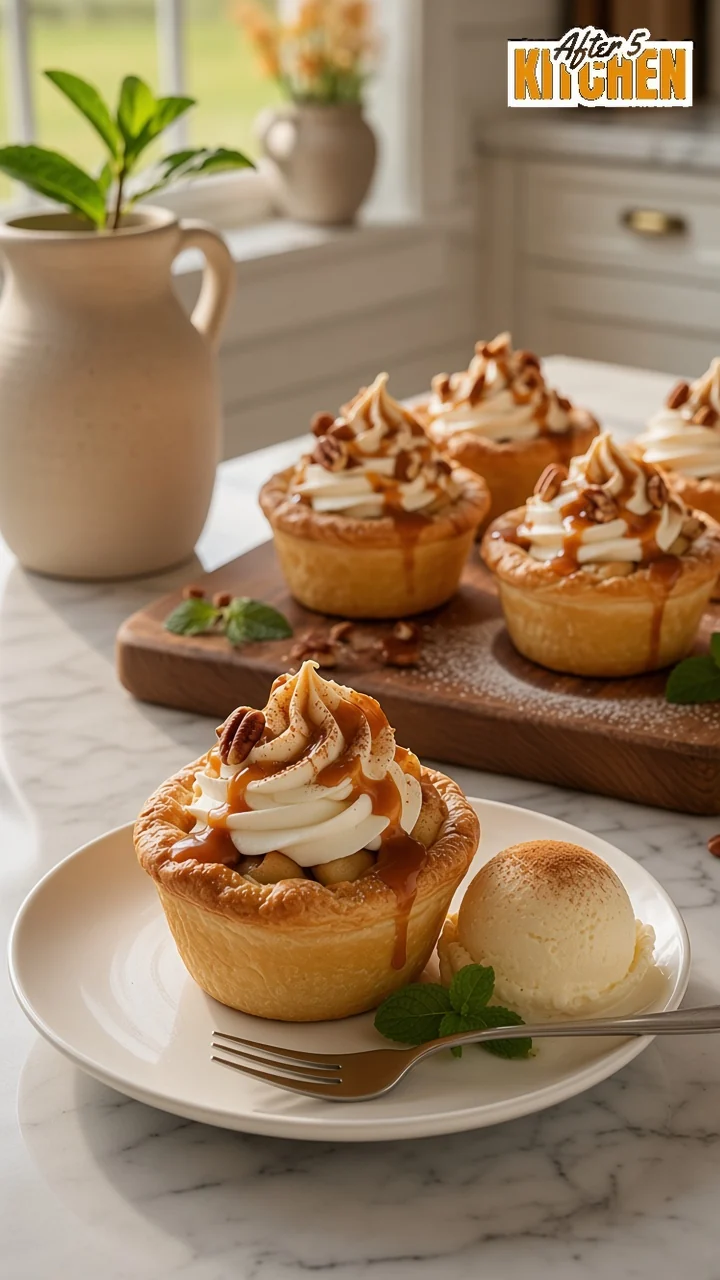
Powdered sugar, vanilla ice cream, whipped cream, caramel sauce, chopped pecans, an extra pinch of cinnamon, and fresh mint leaves. The tall whipped cream swirls with caramel and pecans in the photos are a dressed-up serving option, not part of the base recipe.
Helpful Equipment
Disclosure: this post contains affiliate links. As an Amazon Associate, RecipesMind earns from qualifying purchases at no extra cost to you. Use whatever similar tools you already own.
Essentials
- USA Pan 12-Well Muffin Pan: a standard 12-cup muffin pan with wells about 2¾ inches across. You will fill only 8 wells, and that is fine. If your pan has an unfamiliar coating, check its manufacturer’s care guidance for cooking spray and empty wells.
- Victorinox Swiss Classic 3.25-Inch Paring Knife: for chopping the large canned apple slices into small pieces right in a shallow bowl or on a small board.
- OXO Good Grips 2-Piece Silicone Spatula Set: the small spatula is ideal for folding cinnamon and vanilla evenly into the sticky filling and scraping the bowl.
- Checkered Chef Stainless Steel Cooling Racks: moving the cups to a rack after the short rest in the pan keeps the bottoms from steaming and turning soft.
Optional but handy
- Ateco 4.5-Inch Offset Spatula: a small, thin blade slides around the edge of each cup to loosen and lift it out without tearing the warm pastry. A butter knife also works.
How to Make Apple Pie Cups
1. Heat the oven and prep the pan
Heat the oven to 375°F (190°C) and set a rack in the center. Most home ovens need about 10 to 15 minutes to preheat, so do this first; the prep below fits inside that time. Lightly grease 8 wells of a standard 12-cup muffin pan, including the top rim around each well.
2. Shape the crescent dough cups
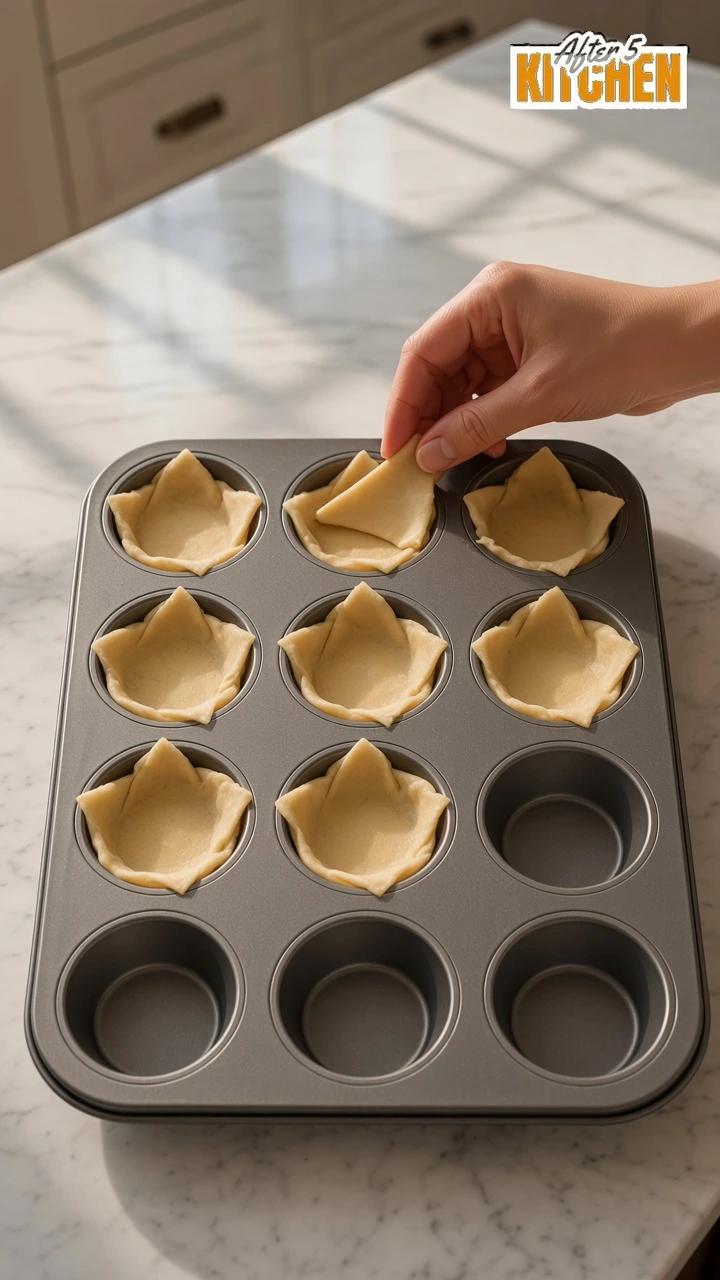
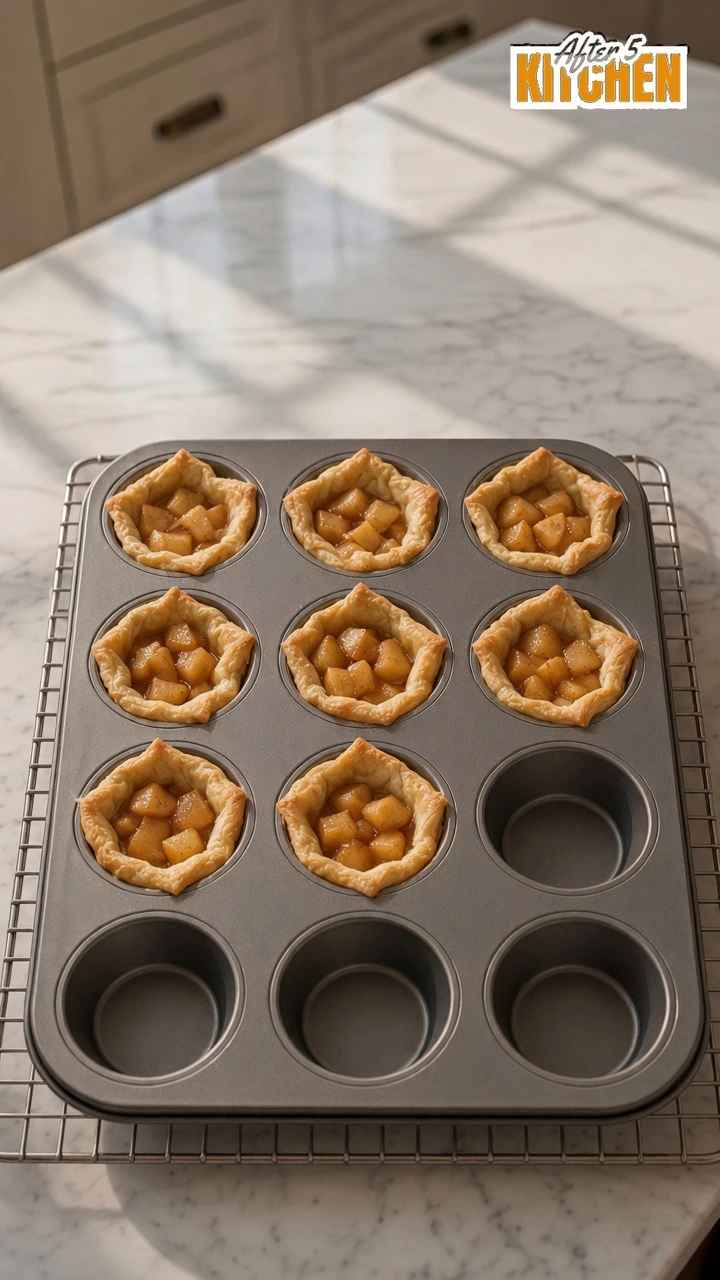
Keep the dough in the fridge until you are ready, then unroll it and separate it along the perforations into 8 triangles. Press one triangle into each greased well, nudging the dough up the sides to form a small cup. Pinch any thin spots or tears closed; the corners can stand a little above the rim for that rustic look. Leave the other 4 wells empty.
3. Chop and season the filling
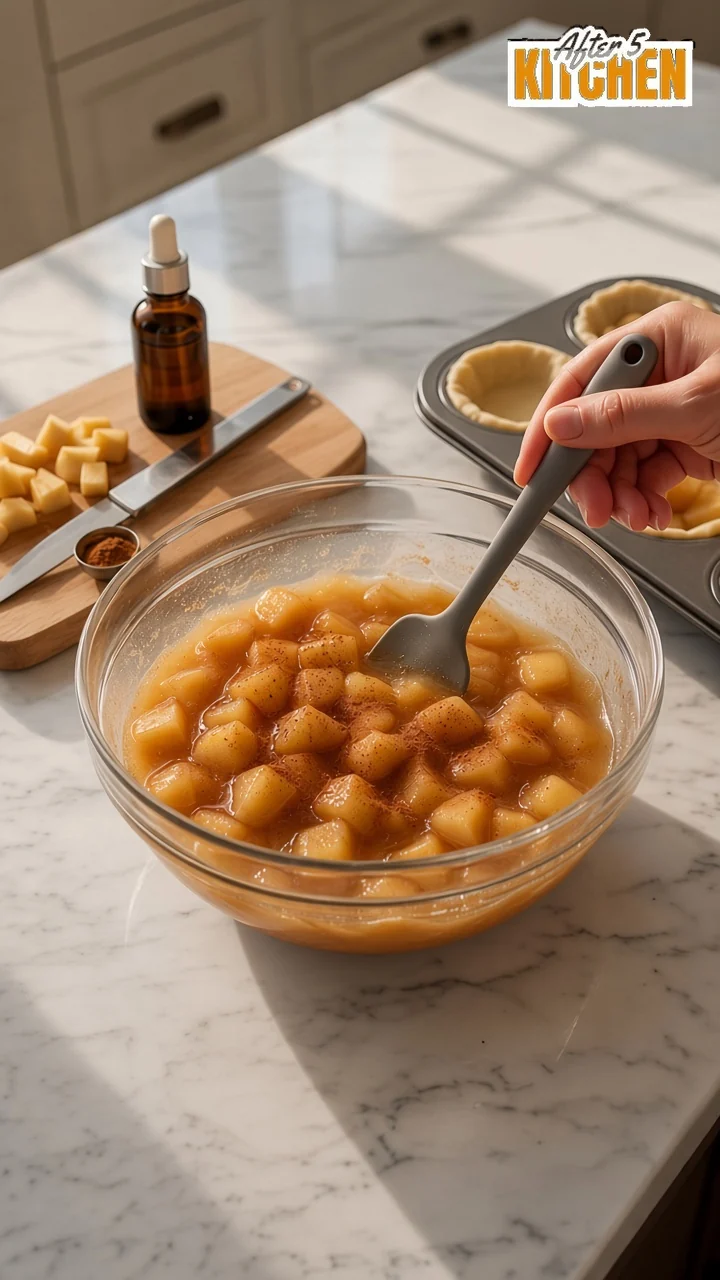
Spoon the apple pie filling into a bowl and cut any large apple slices into roughly ½-inch pieces. Add the cinnamon and vanilla, if using, and stir with a spatula until evenly mixed. Mixing them into the filling, rather than sprinkling them on each cup, keeps every bite seasoned the same.
4. Fill the cups without overfilling
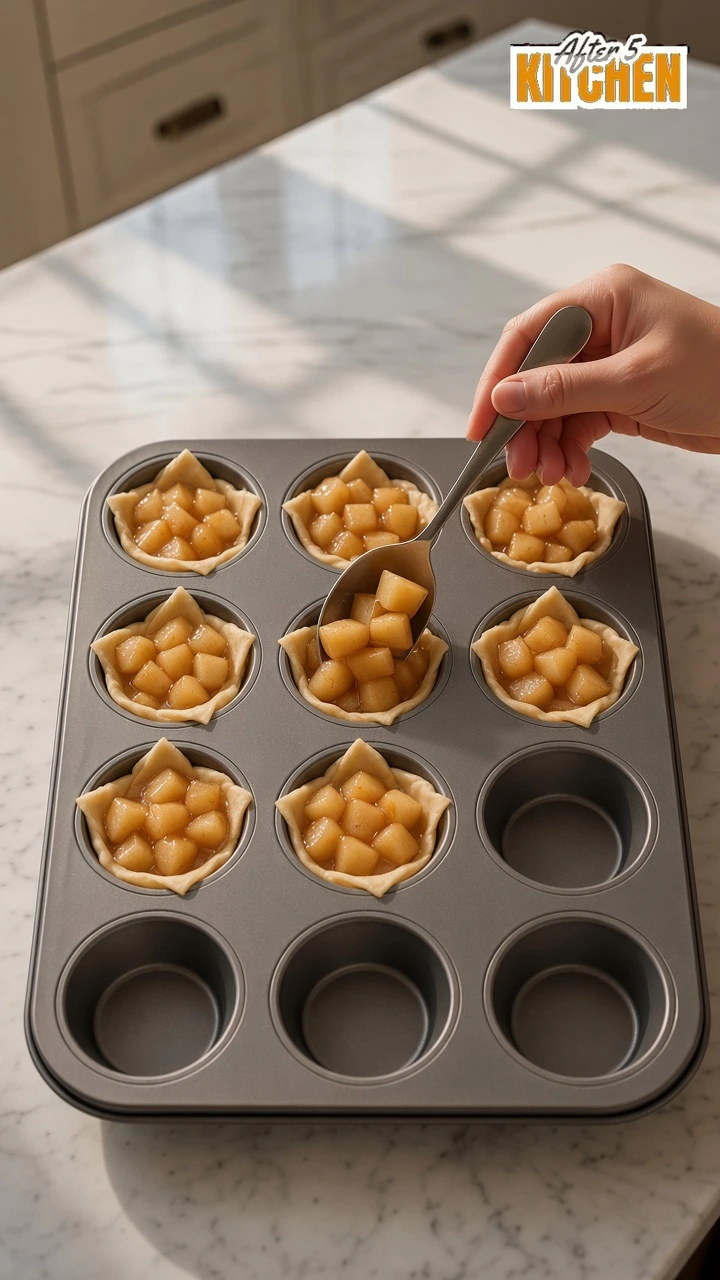
Divide the filling among the 8 dough cups, roughly 2 to 3 tablespoons each depending on the size of your wells. Stop when the filling is about level with the dough at the inside edge of the well. Overfilled cups bubble over, stick to the pan, and can leave the pastry pale and soggy underneath.
5. Bake until fully golden
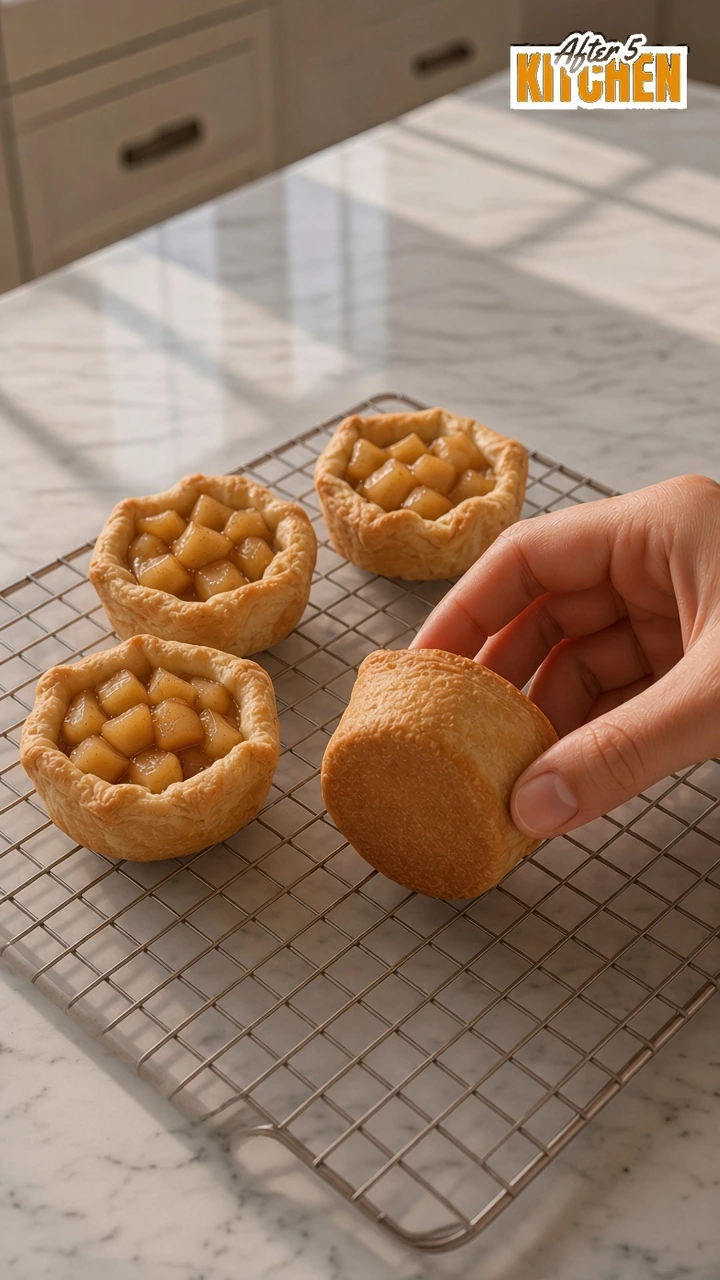
Bake for 14 to 18 minutes, until the pastry has puffed and the edges are a deep golden brown and the filling is bubbling. Crescent dough wrapped around wet filling takes longer than plain crescent rolls, so do not pull the pan as soon as the tops look light golden. Gently lift one cup with a thin spatula: the side and bottom should look golden and set, not pale or doughy. If the rims brown before the bottoms are done, tent loosely with foil and give them a few more minutes.
6. Cool briefly, then remove
Let the cups rest in the pan for 5 minutes so the pastry firms up and the filling settles. Then run a thin spatula around each one and lift it onto a cooling rack. The filling stays very hot for a while, so give little ones an extra few minutes before the first bite.
Toppings and Serving Ideas
Serve them warm. For the simplest finish, dust them with powdered sugar right before serving. For a dessert-table version like the photos, pipe a swirl of whipped cream on each cup, drizzle with caramel sauce, and scatter chopped pecans and a pinch of cinnamon on top, with a scoop of vanilla ice cream on the side and a mint leaf for color.
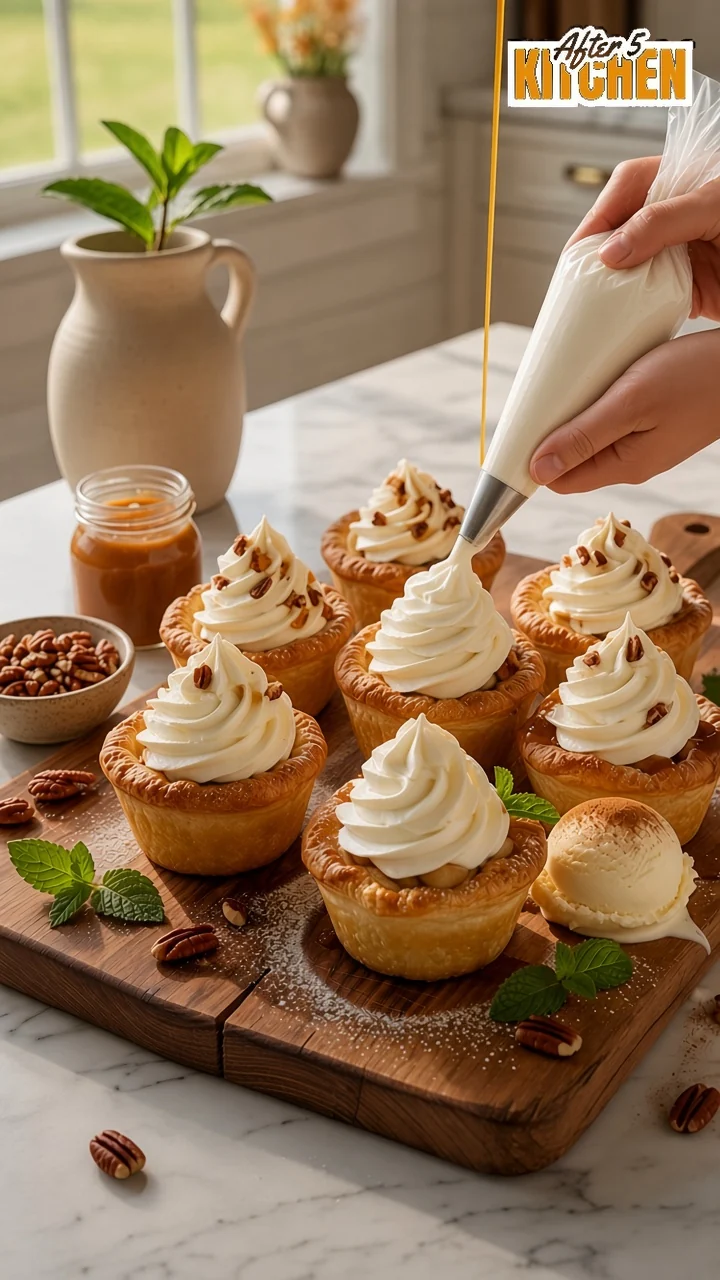
Add whipped cream and ice cream only at the moment you serve. Whipped cream softens and slides off warm pastry fairly quickly, so it is better stored separately in the fridge and spooned on just before eating. Want more apple-and-caramel ideas for the same table? Try our caramel apple blondies or the apple cinnamon cheesecake crunch.
Storage, Make-Ahead, and Reheating
The source recipe lists 2 days at room temperature, 4 days in the fridge, and 2 months in the freezer. Here is how we suggest applying those numbers safely:
- Plain cups (no dairy toppings), room temperature: fruit pies made with sugar are generally considered safe covered at room temperature for up to 2 days, according to food-safety guidance summarized by University of Maine Cooperative Extension. Cool completely, then cover loosely. For the crispest pastry, eat them within a day.
- Plain cups, refrigerator: for longer storage, refrigerate in an airtight container and enjoy within 4 days total from baking. The pastry will soften in the fridge; this limit is a conservative quality estimate.
- Perishable toppings: keep whipped cream and other dairy toppings refrigerated, and refrigerate any topped leftovers within 2 hours of serving. Iowa State University Extension notes that cream-style desserts need refrigeration. Store toppings separately when you can, and add them just before serving.
- Freezer: for best quality, freeze the plain cooled cups only (no whipped cream). Freeze in a single layer, then bag; use within about 2 months (a quality estimate; texture will change). Keep ice cream in the freezer as usual and scoop it on after reheating. Whipped cream is better made fresh or kept refrigerated than frozen on the cups.
- Leftover apple pie filling: transfer to a covered non-metal container, refrigerate, and follow the storage guidance on the can label.
Reheating: warm plain cups in a 350°F oven or an air fryer for a few minutes, just until heated through and crisp again. Thaw frozen cups in the refrigerator first. Add toppings after reheating.
Make-ahead tip: these are best the day they are baked. If you need a head start, chop and season the filling up to a day ahead and keep it covered in the fridge, then shape and bake the cups shortly before serving. Curious why canned and homemade pie fillings set the way they do? Our guide to why cornstarch goes into apple pie explains the thickener at work.
Frequently Asked Questions
Why does the recipe make 8 cups when the pan has 12 wells?
One standard can of crescent dough holds 8 triangles, and each triangle makes one cup. Standard pans come in 12-well sizes, so 4 wells simply stay empty. For 12 cups you would need a second can of dough, and likely not much more filling than one can provides.
Can I use puff pastry or pie crust instead?
You can, but it becomes a different recipe with different timing. Puff pastry rises more and pie crust stays flatter and crisper. This version is written for crescent dough’s soft, rustic texture.
How do I keep the bottoms from getting soggy?
Chop the apples small, avoid overfilling, bake until the sides and bottoms are truly golden, and move the cups to a rack after 5 minutes so steam does not collect underneath.
Can I use homemade apple filling?
Yes, as long as it is cooked and thickened first and cooled before filling the dough. Raw apples will not soften in this short bake time.
Are these really only two ingredients?
The base is two ingredients: crescent dough and apple pie filling. Cinnamon and vanilla are recommended extras, cooking spray is for the pan, and every topping is optional.
Apple Pie Cups Recipe Card
Print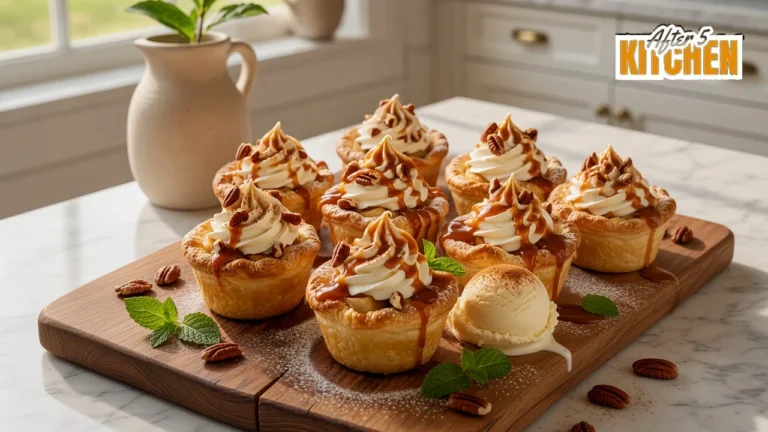
Two-Ingredient Apple Pie Cups
Rustic, golden crescent dough cups baked in a muffin pan with cinnamon-spiced apple pie filling. The base is just two ingredients; cinnamon, vanilla and toppings are optional extras.
- Total Time: 38 minutes
- Yield: 8 cups
Ingredients
Main ingredients
• 1 (8-count, about 8 oz) can refrigerated crescent roll dough
• 1 (21 oz) can apple pie filling
Recommended
• 1 teaspoon ground cinnamon
• 1 teaspoon vanilla extract
For the pan
• Nonstick cooking spray or softened butter
Optional toppings
• Powdered sugar, whipped cream, vanilla ice cream, caramel sauce, chopped pecans, extra ground cinnamon, fresh mint leaves
Instructions
1. Heat the oven to 375°F (190°C) with a rack in the center. Lightly grease 8 wells (and their rims) of a standard 12-cup muffin pan.
2. Unroll the cold crescent dough and separate it into 8 triangles. Press one into each greased well, shaping a small cup up the sides; pinch any tears closed. Leave 4 wells empty.
3. Spoon the apple pie filling into a bowl and cut large apple slices into about ½-inch pieces. Stir in the cinnamon and vanilla, if using, until evenly mixed.
4. Divide the filling among the 8 cups, about 2–3 tablespoons each, stopping when it is level with the dough. Do not overfill. Refrigerate any leftover filling.
5. Bake 14–18 minutes, until the pastry is puffed and deep golden at the edges and the filling bubbles. Lift one cup to check that the bottom and sides are golden and not doughy; bake a few minutes longer if needed, tenting with foil if the rims darken first.
6. Cool in the pan 5 minutes, then loosen with a thin spatula and move to a wire rack.
7. Serve warm, dusted with powdered sugar or topped just before serving with whipped cream, caramel, pecans, cinnamon, mint and a scoop of vanilla ice cream.
Notes
Yield is 8 because one can holds 8 triangles; a 12-cup pan is fine with 4 empty wells. Double the dough for 12–16.
Untested estimates: bake time, filling per cup and yield depend on oven, pan and dough brand.
Storage: plain cups covered at room temperature up to 2 days (eat within 1 day for crisp pastry), or refrigerated up to 4 days total. Store perishable toppings separately when possible; refrigerate whipped-cream leftovers within 2 hours. For best quality, freeze plain cooled cups (no whipped cream) up to about 2 months. Keep ice cream frozen and add after reheating. Reheat plain cups at 350°F or in an air fryer until warm and crisp; add toppings after.
Leftover filling: covered non-metal container in the fridge; follow the can label.
- Prep Time: 15 minutes
- Rest: 5 minutes
- Cook Time: 18 minutes
- Category: Dessert
- Method: Baking
- Cuisine: American
1 thought on “Easy Two-Ingredient Apple Pie Cups: 8 Golden Treats”