
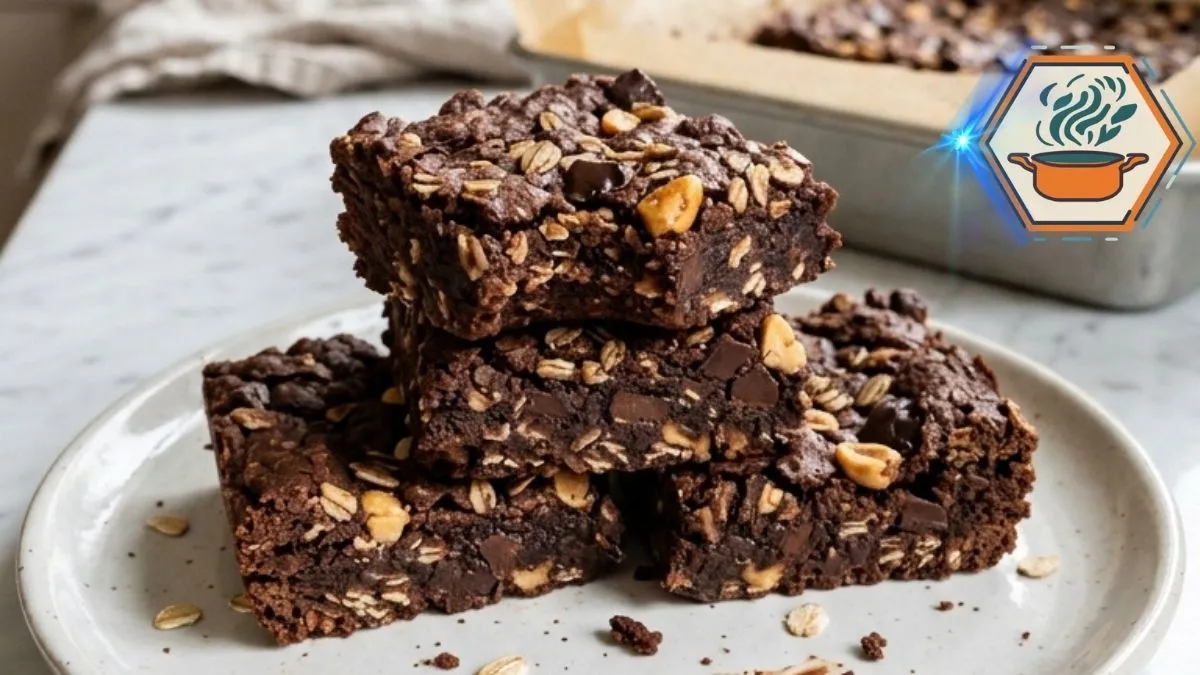
There is something special about pulling a pan of Chewy Chocolate Peanut Butter Oat Bars from the oven. The chocolate on top is still glossy. The edges have just started to set. In the middle, the bars remain soft, dense, and almost brownie-like. Then comes the hardest part: waiting for the pan to cool before cutting the first thick square.
These bars bring together old-fashioned rolled oats, creamy peanut butter, cocoa, honey, and generous pieces of chocolate. Unlike a thin granola bar, each square has real weight and a clearly visible oat texture. Rolled oats are whole-grain oats that have been steamed, flattened, and dried, according to the Harvard T.H. Chan School of Public Health guide to oats. That structure is one reason old-fashioned oats work so well when a baked bar needs both chew and texture.
The recipe is simple, but small details matter. The amount of liquid, the way the mixture is pressed into the pan, and the baking time can change the final texture. Even cooling matters. For more information about whole grains and how they differ from refined grains, the Harvard Nutrition Source whole-grain guide offers useful background.
Affiliate disclosure: As an Amazon Associate I earn from qualifying purchases. This article may contain affiliate links to kitchen tools I find useful for preparing this recipe.
JUMP TO
Why You’ll Love These Chocolate Peanut Butter Oat Bars
The first bite starts with chocolate. Then comes the nutty peanut butter, followed by the hearty chew of the oats.
What makes these bars especially appealing is their texture. They are not meant to become hard or crunchy. They should stay dense and soft in the center while being firm enough to pick up once completely cool.
They are also practical. You make one mixture, press it into one pan, add the topping, and bake.
You get:
- Thick, substantial squares
- Visible rolled oats
- Peanut butter in every bite
- Cocoa throughout the base
- Melted chocolate pockets
- A lightly textured peanut topping
- No complicated layers
If you enjoy simple homemade baking, you may also like our 3 Ingredient Banana Bread or this guide to boosting banana flavor in baking.
Ingredients You’ll Need
For an 8-inch square pan, gather the following.
For the oat bars:
- 2½ cups old-fashioned rolled oats
- ½ cup unsweetened cocoa powder
- ¾ cup creamy peanut butter
- ½ cup honey or pure maple syrup
- ½ cup milk
- ⅓ cup unsalted butter, melted and slightly cooled
- 1 teaspoon vanilla extract
- ½ teaspoon fine salt
- ¾ cup roughly chopped dark or semisweet chocolate
For the textured chocolate topping:
- ½ cup roughly chopped chocolate
- 2 tablespoons old-fashioned rolled oats
- 2 tablespoons roasted peanuts, roughly chopped
- A small pinch of flaky salt, optional
That last pinch is not essential, but it can balance the sweetness and make the chocolate and peanut flavors more distinct.
For a result that resembles the photographed bars, use chopped chocolate rather than only chocolate chips. Irregular pieces create those larger melted chocolate pockets across the surface.
Choosing the Right Oats Matters
Use old-fashioned rolled oats.
Quick oats are cut and processed into smaller pieces. They absorb moisture differently and can produce a more uniform, less visibly textured bar.
Steel-cut oats are the opposite problem. They are much thicker and require a different cooking method. Do not substitute them cup-for-cup here.
Old-fashioned oats give the bars the rustic appearance we want. You should still be able to recognize individual oat flakes after baking.
For anyone interested in the differences among groats, steel-cut, rolled, and instant oats, Harvard provides a useful overview of oat varieties.
Equipment for Consistent Results
You do not need a mixer.
A large bowl, sturdy spatula, measuring cups, parchment paper, and an 8 x 8-inch metal baking pan are enough.
Pan size matters more than it may seem. A larger pan spreads the mixture into a thinner layer. That changes both baking time and texture.
For the thick squares shown in this recipe, stick with an 8-inch square pan.
For readers who need one, this Amazon 8-inch square baking pan search is a practical starting point.
Parchment also makes a major difference when removing these dense bars. You can find suitable options through this Amazon parchment paper search.
How to Make Chewy Chocolate Peanut Butter Oat Bars
Start by heating your oven to 350°F (175°C).
Line an 8-inch square metal baking pan with parchment. Leave enough paper extending over two opposite sides to form handles. Lightly grease any exposed areas of the pan.
This makes removing the cooled slab much easier.
1. Mix the wet ingredients
Place the peanut butter and honey or maple syrup in a large bowl.
Add the melted butter, milk, and vanilla.
Whisk until the mixture looks smooth and uniform.
Your melted butter should be warm but not extremely hot. Very hot butter can make the mixture greasy and may start melting the chocolate too early.
A standard smooth creamy peanut butter gives the most predictable texture. Very runny natural peanut butter can change the moisture balance because oil separation varies by brand.
2. Add the dry ingredients
Add the rolled oats, cocoa powder, and salt.
Switch to a sturdy spatula and stir until no dry pockets of cocoa remain.
The mixture should be very thick and sticky. It is not supposed to resemble pourable cake batter.
Fold in ¾ cup of chopped chocolate.
If your mixture seems unusually loose, wait two or three minutes. The oats will begin absorbing some moisture.
3. Press the mixture firmly
Transfer everything to your lined pan.
This step is easy to underestimate.
Press the mixture firmly into the corners and across the base. A loosely packed mixture is more likely to crumble after baking.
Use the back of a spoon, a silicone spatula, or a small piece of parchment to compact and level the surface.
For easy measuring and mixing, a set like those found in this Amazon stainless-steel measuring cups search can be useful.
4. Build the chunky topping
Scatter the remaining ½ cup chopped chocolate over the surface.
Add 2 tablespoons rolled oats and 2 tablespoons chopped roasted peanuts.
Gently press everything into the top.
Do not bury the toppings.
The goal is to keep the chocolate chunks, peanuts, and oats clearly visible after baking. This creates the rustic appearance seen in the finished pan.
How Long Should You Bake the Bars?
Bake at 350°F for 20–24 minutes.
Start checking around 20 minutes.
You are looking for set edges with a center that still appears slightly soft.
This is different from testing a cake. A toothpick does not need to emerge completely clean.
If you wait until the entire center looks dry and firm inside the oven, the bars can become dry once they cool.
Ovens vary, and dark pans can brown baked goods faster than light-colored pans. Treat 20–24 minutes as a working range rather than an absolute rule.
An inexpensive oven thermometer can help when an oven runs hotter or cooler than its setting. Here is an Amazon oven thermometer search if you need one.
The Most Important Step Happens After Baking
Do not immediately cut the bars.
When they first leave the oven, the center is intentionally soft. The chocolate is melted, the fats are warm, and the structure has not fully settled.
Place the entire pan on a cooling rack.
Allow the bars to cool completely in the pan, ideally for about 1½ to 2 hours at room temperature.
Then use the parchment handles to lift out the whole slab.
For particularly neat squares, you can chill the cooled slab for another 20–30 minutes before slicing.
Use a large sharp knife. Wipe the blade between cuts if melted chocolate begins sticking to it.
This single cooling step can make the difference between thick photo-ready squares and warm bars that fall apart.
How to Get That Dense, Chewy Center
Three things matter most: moisture, compression, and baking time.
First, don’t reduce the peanut butter or liquid without adjusting the rest of the formula. The oats need moisture.
Second, press the mixture firmly into the pan. You are building a compact oat bar rather than a fluffy cake.
Third, do not overbake.
The edges should hold their shape while the center remains softer. Residual heat continues affecting the bars after the pan leaves the oven.
This principle is similar to other baked treats where texture depends on controlling moisture. Our guide to the secret to crunchy cookies explains the opposite end of that texture spectrum.
Honey or Maple Syrup?
Both work, but they do not taste identical.
Honey gives the bars a deeper sweetness and helps create a sticky, chewy consistency.
Maple syrup brings a lighter maple note and makes a good alternative when that flavor is preferred.
Do not replace either with a dry granulated sweetener using the same quantity. Honey and maple syrup contribute liquid as well as sweetness. Removing that moisture changes the recipe.
Common Mistakes to Avoid
Using the wrong pan: A 9 x 13-inch pan will make this quantity far too thin.
Using quick oats: They change the visible texture that gives these bars their rustic look.
Not packing the mixture: Press firmly. This helps the cooled bars hold together.
Overbaking: The center should still be a little soft when the pan comes out.
Cutting while warm: Warm bars may crumble or compress beneath the knife.
Finely chopping all the chocolate: Keep some pieces relatively large. Those irregular chunks produce visible pools and pockets of chocolate.
Skipping parchment: You can grease the pan, but parchment makes removing and cutting the finished slab much easier.
Storage and Freezing
Once completely cool, place the squares in an airtight container. If stacking them, put parchment between the layers.
For longer storage, refrigeration is the cautious choice, particularly because this recipe contains milk. USDA general leftover guidance recommends refrigeration at 40°F or below and notes that many cooked leftovers should be used within three to four days.
You can also freeze individual squares. Wrap them well, then place them inside a freezer-safe container or bag. Thaw in the refrigerator before serving.
For the best eating texture, let a refrigerated bar sit briefly at room temperature. The peanut butter and chocolate soften as they warm.
Serving Ideas
These bars need very little decoration.
Serve one with coffee for a sweet breakfast treat. Add fresh strawberries or banana slices alongside it. For dessert, warm a square very briefly so the chocolate begins to soften again.
You can also cut smaller pieces for a party tray.
For another fruit-and-chocolate idea, see our strawberry filled chocolate cake.
One important note: peanuts and milk are major food allergens in the United States. Depending on the chocolate used, other allergens may also be present. The FDA recommends checking ingredient labels carefully when cooking for someone with a food allergy.
Print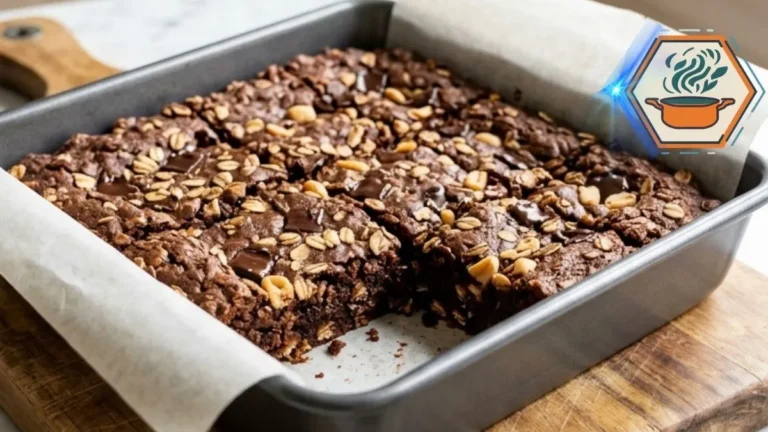
Chewy Chocolate Peanut Butter Oat Bars
Thick and chewy chocolate peanut butter oat bars made with old-fashioned rolled oats, cocoa, creamy peanut butter, honey, and chunky chocolate. The centers stay soft and dense while roasted peanuts, oats, and melted chocolate create a rustic topping.
- Total Time: 1 hour 54 minutes (including cooling)
- Yield: 12 thick bars
Ingredients
For the bars
- 2½ cups old-fashioned rolled oats
- ½ cup unsweetened cocoa powder
- ¾ cup creamy peanut butter
- ½ cup honey or pure maple syrup
- ½ cup whole or 2% milk
- ⅓ cup unsalted butter, melted and slightly cooled
- 1 teaspoon vanilla extract
- ½ teaspoon fine salt
- ¾ cup dark or semisweet chocolate, roughly chopped
For the topping
- ½ cup dark or semisweet chocolate, roughly chopped
- 2 tablespoons old-fashioned rolled oats
- 2 tablespoons roasted peanuts, roughly chopped
- Pinch of flaky sea salt, optional
Instructions
- Preheat the oven to 350°F (175°C). Line an 8-inch square metal baking pan with parchment paper, leaving an overhang on two sides.
- Add the peanut butter and honey or maple syrup to a large mixing bowl. Add the melted butter, milk, and vanilla. Whisk until smooth.
- Add the rolled oats, cocoa powder, and salt. Stir with a sturdy spatula until no dry cocoa remains. The mixture should be thick and sticky.
- Fold in ¾ cup of roughly chopped chocolate. Let the mixture stand for 2–3 minutes so the oats can begin absorbing moisture.
- Transfer the mixture to the prepared pan. Press it down firmly and evenly, including into the corners. This is important for bars that hold together after cooling.
- Scatter ½ cup chopped chocolate, 2 tablespoons oats, and 2 tablespoons chopped roasted peanuts over the top. Press the toppings lightly into the surface without burying them.
- Bake for 20–24 minutes. The edges should look set, but the center should remain slightly soft. Do not wait for the center to become completely dry.
- Place the pan on a wire rack and allow the bars to cool completely for about 1½–2 hours.
- Lift the slab from the pan using the parchment overhang. For cleaner cuts, chill it for another 20–30 minutes.
- Cut into 12 thick bars or squares with a sharp knife. Wipe the blade between cuts when necessary.
Notes
- Do not overbake. The bars continue to firm while cooling.
- Use old-fashioned rolled oats, not steel-cut oats.
- Quick oats will give a finer, softer texture and will not reproduce the same visible oat structure.
- A standard creamy, stabilized peanut butter gives the most predictable result. Natural peanut butter can vary because its oil may separate.
- Roughly chopped chocolate creates larger, irregular melted pockets like those visible in the reference recipe.
- Pack the mixture firmly into the pan. A loosely packed mixture is more likely to crumble.
- Use an 8 × 8-inch metal pan for thick bars. Changing the pan size changes their thickness and baking time.
- Allow the bars to cool completely before slicing. Cutting them hot can make them fall apart.
- The optional flaky salt should be added sparingly.
- Allergen note: Contains peanuts and milk. Chocolate may contain milk, soy, tree nuts, or other allergens depending on the brand.
- Prep Time: 15 minutes
- Cooling Time: 1 hour 30 minutes
- Cook Time: 20–24 minutes
- Category: Breakfast
- Method: Baking
- Cuisine: American-inspired
Frequently Asked Questions
Why are my peanut butter oat bars falling apart?
They may have been cut too soon or packed too loosely before baking. Press the mixture firmly into the pan and allow it to cool completely before slicing.
Can I use quick oats?
They can absorb moisture differently and will create a softer, less distinct oat texture. Old-fashioned rolled oats are the better choice for this recipe.
Can I use natural peanut butter?
You can, but results may vary. Natural peanut butter can separate into oil and solids. Stir it extremely well first. A smooth, emulsified creamy peanut butter gives more consistent bars.
Can I use chocolate chips instead of chopped chocolate?
Yes. However, roughly chopped chocolate gives you irregular melted pockets and a more rustic surface similar to the bars pictured here.
Why should the middle still look slightly soft?
Because the bars continue to set while cooling. Baking until the center looks completely dry can produce firmer, drier bars.
Can I make these without peanuts?
Peanut butter is a structural ingredient here, not just a topping. A direct substitution can change the consistency. A seed butter may work, but the recipe would need separate testing before promising identical results.
Are these breakfast bars or dessert bars?
They can be either. The rolled oats and peanut butter make them suitable as a substantial sweet breakfast bar, while cocoa and generous chocolate also put them comfortably in dessert territory.
Final Kitchen Notes
The beauty of Chewy Chocolate Peanut Butter Oat Bars comes from their simplicity. There is no frosting to perfect and no complicated assembly.
What matters is getting the small details right.
Use old-fashioned rolled oats. Choose creamy peanut butter. Keep some chocolate pieces chunky. Press the mixture firmly into an 8-inch square pan. Bake only until the edges set. Most importantly, give the bars enough time to cool.
When you finally lift the parchment from the pan and make that first cut, the inside should reveal what you were waiting for: dense chocolate oats, a soft peanut butter-rich center, visible oat flakes, roasted peanut pieces, and irregular pockets of chocolate.
That is exactly the texture these bars are meant to have.