
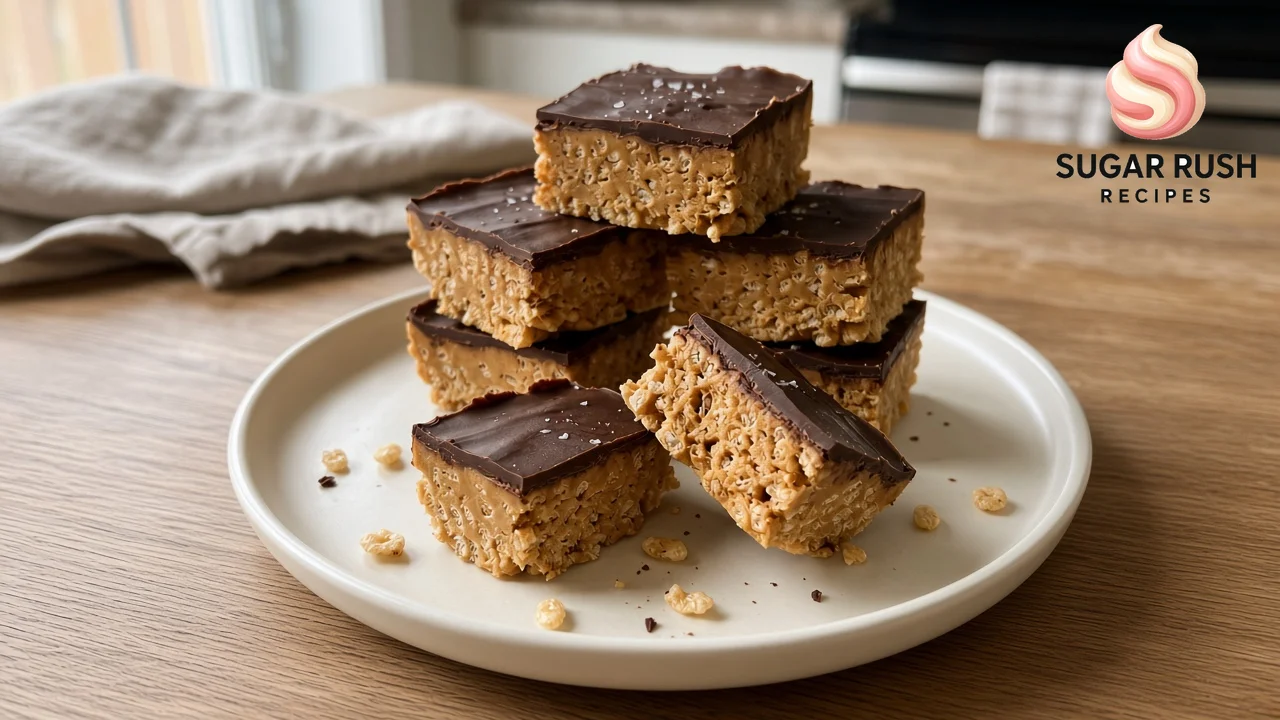
These no-bake chocolate peanut butter crunch bars are the kind of treat you can stir together on a weeknight with the oven off. A creamy peanut butter and honey base gets packed with crispy rice cereal, pressed into a square pan, and covered with a smooth layer of melted chocolate and a few flakes of sea salt. After a stint in the fridge, the slab cuts into nine tidy squares that hold their shape and taste best cold.
The idea comes from a post on the Sugar Rush Recipes Facebook page. It promised a creamy peanut butter base packed with crispy cereal, a smooth chocolate topping, and just a little sea salt, then asked readers a fair question: would you keep the chocolate topping thick, or make it a little thinner? The post and its short video showed the steps but no measurements, so the recipe below fills in realistic amounts for an 8×8-inch pan, clear melting directions, chill times, and an honest answer to that topping question.
If you like peanut butter treats you can make without baking, you may also enjoy our two-ingredient peanut butter oat bars, or the cereal-bar classic in our brown butter rice crispy treats.
Affiliate Disclosure: As an Amazon Associate I earn from qualifying purchases. Product links in this article may earn a commission at no additional cost to you.
What’s in This Post
- Why These No-Bake Chocolate Peanut Butter Crunch Bars Work
- Tools You’ll Need
- Ingredients, at a Glance
- Make the Peanut Butter Honey Base
- Fold in the Crispy Rice Cereal
- Press the Base Into the Pan
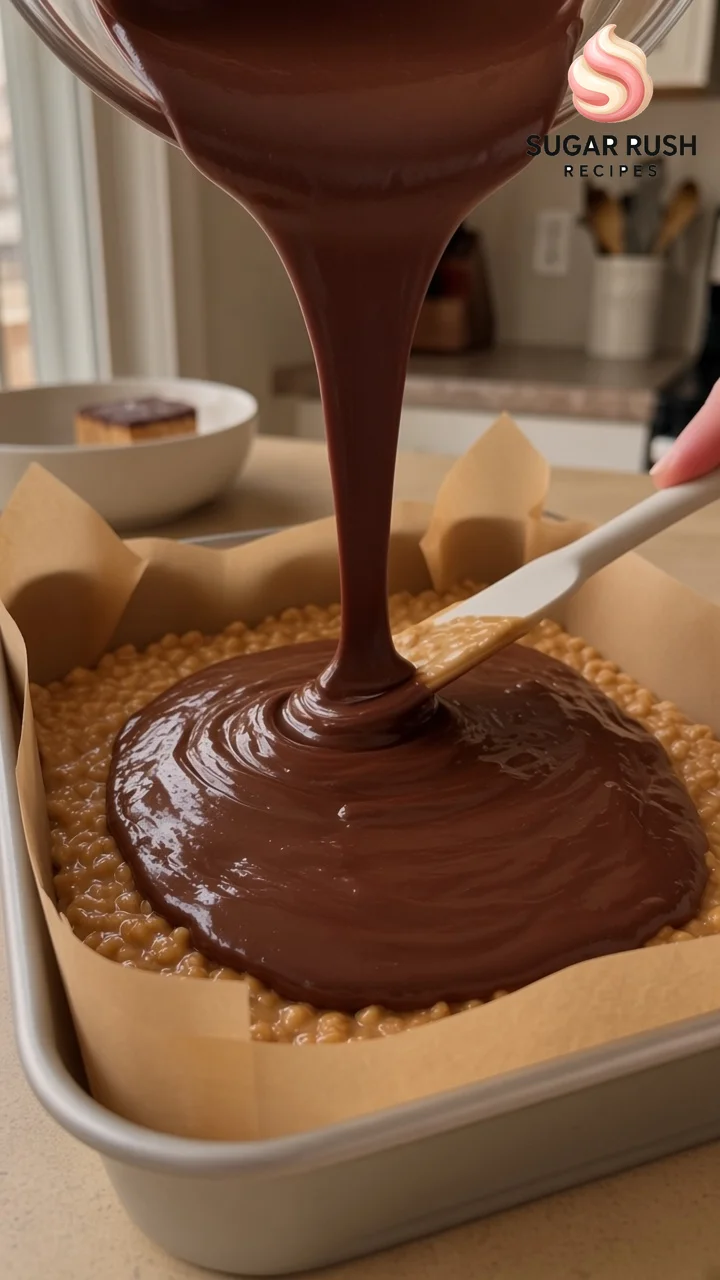
- Melt and Spread the Chocolate
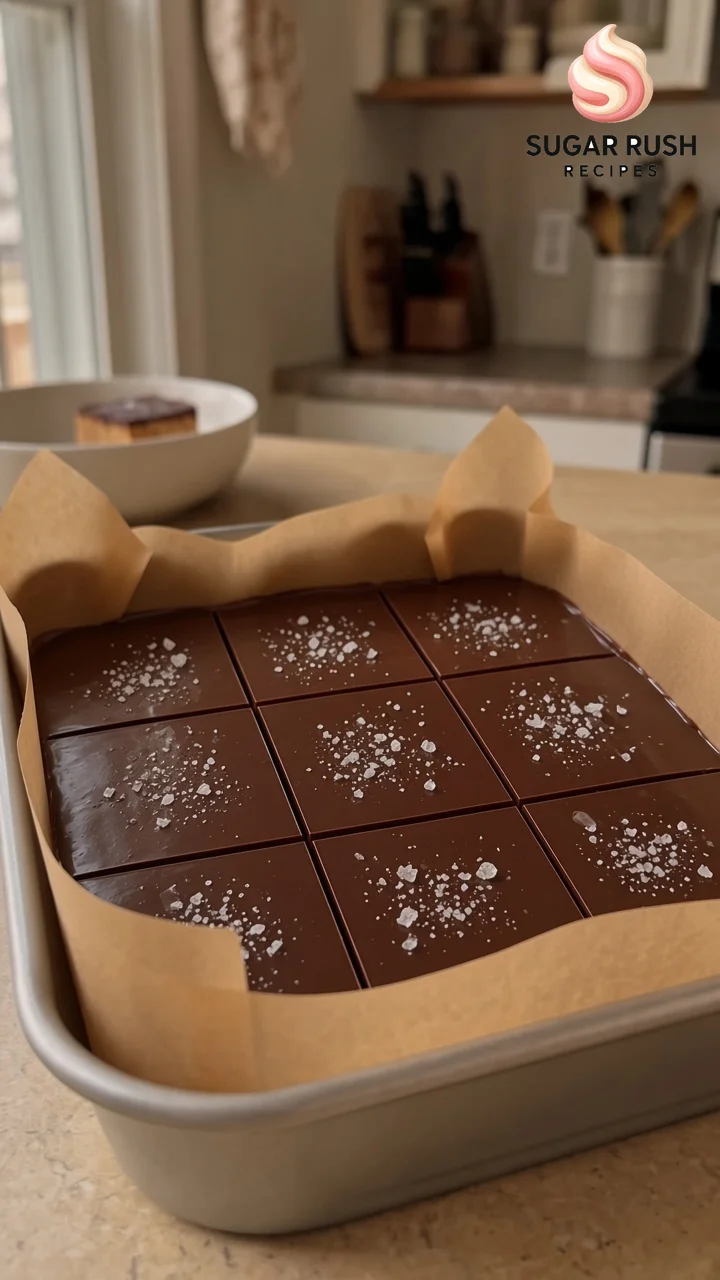
- Salt, Chill, and Slice
- Thick or Thin Chocolate Topping?
- Timing and Make-Ahead
- Storage
- Swaps and Variations
- Common Mistakes and Easy Fixes
- FAQ
Why These No-Bake Chocolate Peanut Butter Crunch Bars Work
There are only a handful of ingredients here, so each one has a job. Getting the ratios right is what turns a sticky bowl of cereal into a bar that slices cleanly.
- Peanut butter and honey as the glue: One cup of creamy peanut butter and half a cup of honey make a thick, sticky binder that coats about 3 cups of crispy rice cereal. Honey adds sweetness and stickiness without any stovetop candy work.
- A short warm-up for an easier stir: Thirty seconds or so in the microwave loosens the peanut butter and honey so they blend smoothly and coat every piece of cereal. The mixture should feel warm, not hot.
- Firm pressing: Packing the base tightly into a parchment-lined pan is what makes the bars hold together. A loosely pressed base crumbles when you cut it.
- Chocolate with a little coconut oil: A spoonful of refined coconut oil melted with the chocolate chips makes the topping pour and spread easily, and it keeps the set chocolate a little softer, so it is less likely to crack when you slice.
- Flaky salt while the chocolate is soft: A light sprinkle of flaky sea salt sticks to the wet chocolate and balances all that sweetness.
Tools You’ll Need
You do not need anything special, but a few basics make the job neater.
- An 8×8-inch square pan, such as the USA Pan 8-Inch Square Cake Pan, gives you a base about 3/4 inch thick and nine generous squares. (The listing also offers a multi-pack; one 8-inch pan is all you need.)
- If You Care Unbleached Parchment Paper lines the pan so you can lift the whole slab out for cutting. Leave a couple of inches of overhang on two sides to use as handles.
- A small offset spatula, like the Wilton 9-Inch Angled Spatula, spreads the melted chocolate in an even layer right to the edges without dragging up the cereal.
- A pinch of Maldon Sea Salt Flakes is the finishing touch. Any flaky finishing salt works; fine table salt is too sharp to sprinkle on top.
You will also want a large microwave-safe glass bowl for the base, a smaller heatproof bowl for the chocolate, a silicone spatula, and a flat-bottomed measuring cup or glass for pressing.
Ingredients, at a Glance
For the base, you need 1 cup (256 g) of creamy peanut butter, 1/2 cup (170 g) of honey, 1 teaspoon of vanilla extract, a small pinch of fine salt if your peanut butter is unsalted, and 3 cups (about 85 g) of crispy rice cereal. For the topping, you need 1 1/2 cups (255 g) of semisweet chocolate chips and 1 1/2 tablespoons of refined coconut oil, plus about 1/2 teaspoon of flaky sea salt for finishing. The full list, with amounts, is in the recipe card at the end of the post.
- Peanut butter: Use a no-stir creamy peanut butter. Natural peanut butter that separates can make the base oily and loose, so if that is all you have, stir it very well and expect a softer bar.
- Honey: A mild honey, such as clover, lets the peanut butter lead. Maple syrup works in a pinch, but it is thinner, so the bars set softer.
- Crispy rice cereal: Any crisp puffed rice cereal works. Measure it lightly; do not pack the cup.
- Chocolate: Semisweet chips give the dark, glossy top shown in the photos. Bittersweet is less sweet; milk chocolate is sweeter and sets softer.
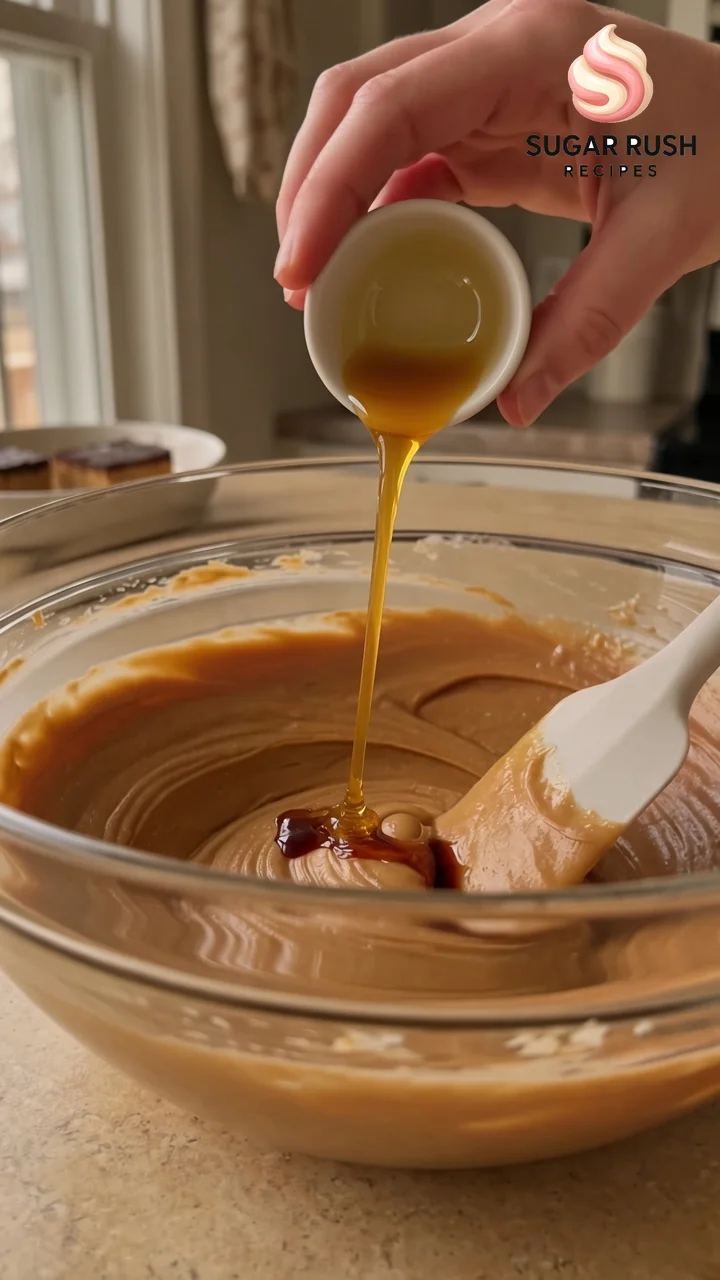
- Coconut oil: In the video, a white spoonful goes into the bowl with the chocolate chips. We call for refined coconut oil, which has no coconut flavor. Vegetable shortening is a fine swap, and you can leave the fat out entirely if you prefer a firmer chocolate layer that is a bit harder to cut.
Make the Peanut Butter Honey Base
Line an 8×8-inch pan with parchment, leaving an overhang on two sides. In a large microwave-safe glass bowl, combine the peanut butter and honey. Microwave for 20 to 30 seconds, then stir until the mixture is smooth, glossy, and evenly blended. It should feel warm to the touch, not hot. Stir in the vanilla and a pinch of salt if your peanut butter is unsalted.
You can skip the microwave and stir everything at room temperature, as the video does. It just takes more elbow grease, and very thick peanut butter may leave a few dry spots of cereal.
Fold in the Crispy Rice Cereal
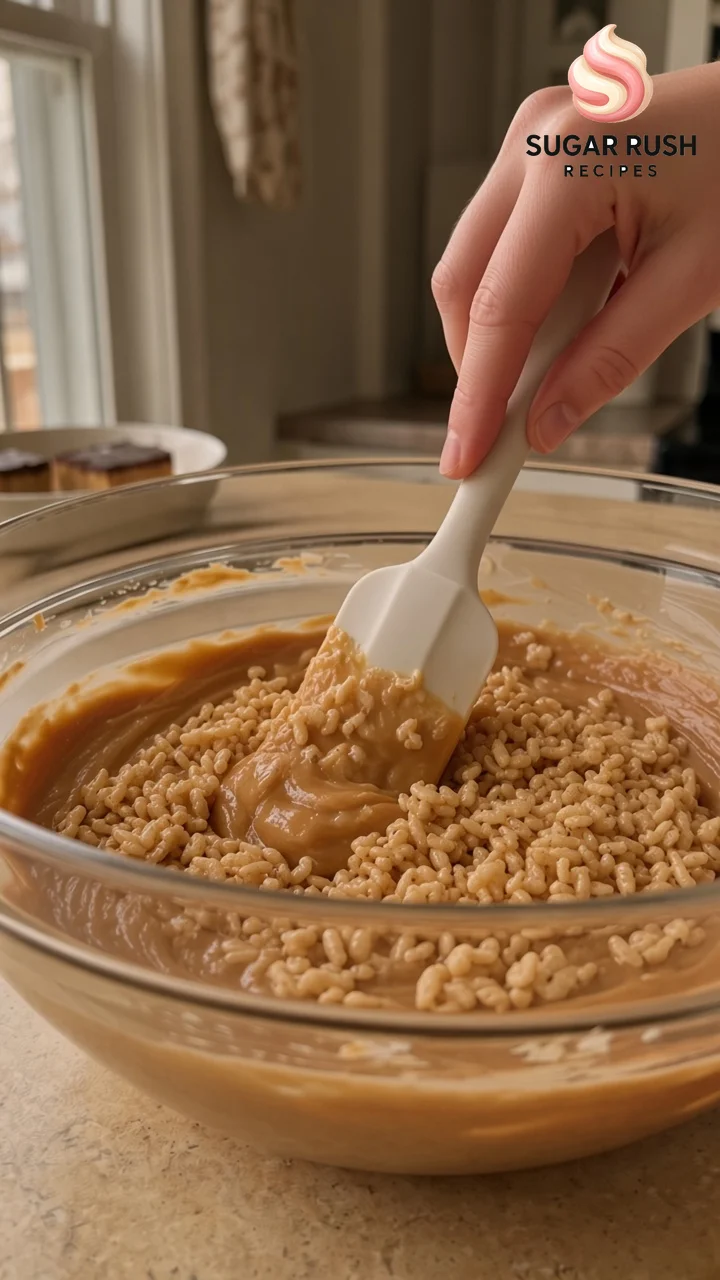
Add the crispy rice cereal to the bowl and fold with a silicone spatula, scraping up from the bottom, until every piece is coated and no dry cereal remains. Fold gently. Hard stirring crushes the cereal, and crushed cereal makes a dense, pasty bar instead of a crunchy one.
The mixture should look thick and clumpy, and it should hold together when you squeeze a little in your hand. If it seems dry and loose, add another tablespoon of peanut butter.
Press the Base Into the Pan
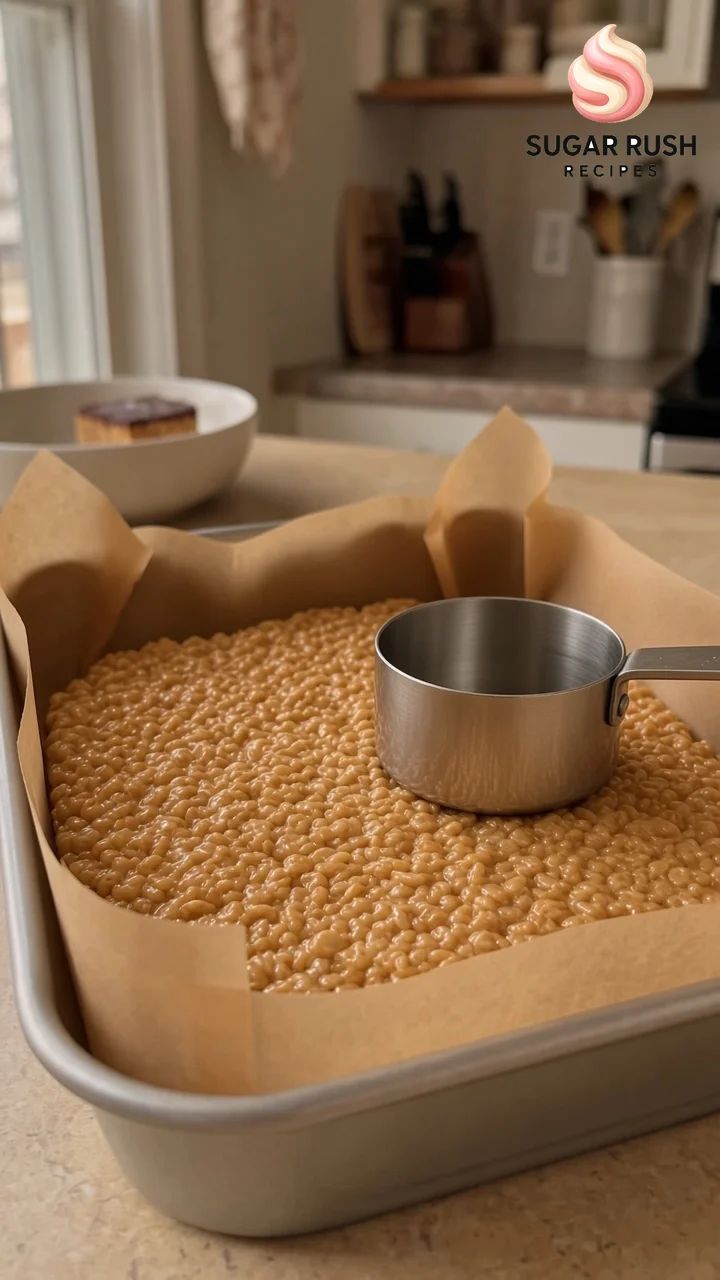
Scrape the mixture into the lined pan and spread it toward the corners. Lay a piece of parchment on top, then press down firmly with a flat-bottomed measuring cup or glass until the layer is compact and level, about 3/4 inch thick. Pay extra attention to the edges and corners, which are the first places to crumble.
If you have a few minutes, chill the pressed base for about 15 minutes while you melt the chocolate. A cool, firm base is easier to spread chocolate over, and the cereal stays put.
Melt and Spread the Chocolate
Put the chocolate chips and coconut oil in a heatproof bowl. Melt them using either method below, then pour the chocolate over the base and spread it into an even layer with an offset spatula, working all the way to the edges.
- Microwave: Heat at 50% power in 30-second bursts, stirring well after each one. Stop when a few small pieces of chocolate are still visible, then keep stirring; the leftover heat will melt them. This usually takes 1 1/2 to 2 1/2 minutes total.
- Double boiler: Set the bowl over a saucepan with about an inch of barely simmering water, making sure the bottom of the bowl does not touch the water. Stir until smooth, then take the bowl off the heat. Keep every drop of water and steam out of the chocolate, because even a little can make it seize into a thick, grainy paste.
Overheated chocolate turns dull and thick, so go slowly. Smooth, glossy chocolate that falls off the spatula in a ribbon is ready.
Salt, Chill, and Slice
While the chocolate is still wet, sprinkle a light pinch of flaky sea salt over the top. If you wait until the chocolate sets, the salt will not stick. Refrigerate the pan, uncovered, for about 1 hour, until the chocolate is completely firm.
Use the parchment overhang to lift the slab onto a cutting board, or cut it right in the pan as the video does. Let it sit at room temperature for 5 to 10 minutes so the chocolate is less likely to crack. Then use a large, sharp knife to cut a 3×3 grid for nine bars. For the cleanest edges, dip the knife in hot water, dry it, and wipe it between cuts. Press straight down instead of sawing back and forth.
Thick or Thin Chocolate Topping?
To answer the question from the original post: both work. The difference is texture and how easily the bars cut.
- Thick (the default here): 1 1/2 cups (255 g) of chips with 1 1/2 tablespoons of coconut oil makes a layer about 1/4 inch thick, roughly one-third the height of the base, like the bars in the photos. It tastes more like a candy bar. Let the slab stand a few minutes before cutting so the chocolate does not crack.
- Thinner: 1 cup (170 g) of chips with 1 tablespoon of coconut oil makes a thinner layer, roughly 1/8 inch. The peanut butter crunch takes the lead, the bars cut more easily straight from the fridge, and each square is a little lighter.
If you are serving kids, or stacking bars in a lunch box, go thin. If these are dessert, go thick. Either way, spread the chocolate evenly so every square gets the same amount.
Timing and Make-Ahead
Plan on about 20 minutes of hands-on time, including melting the chocolate. Add the optional 15-minute chill for the pressed base and about 1 hour for the topping to set, and the bars are ready to slice and serve in about 1 hour and 35 minutes. Without the base chill, they can be ready in about 1 hour and 20 minutes.
These are a good make-ahead treat. You can make the whole slab a day or two early, keep it covered in the refrigerator, and slice it when you need it. Bars cut cleanest after they have been fully chilled and allowed to sit briefly at room temperature.
Storage
Store the bars in an airtight container in the refrigerator for up to 1 week, with parchment between layers so the chocolate does not stick. They soften at warm room temperature because of the honey and coconut oil, so serve them cold, and do not leave them out for long on a warm day.
To freeze, wrap the bars individually and freeze them in a freezer bag for up to 2 months. Thaw them in the refrigerator, or let them sit on the counter for about 10 minutes before eating.
Swaps and Variations
- Crunchy peanut butter: Use it in place of creamy for extra texture.
- Peanut-free: Sunflower seed butter works in the same amount. If you are baking for someone with an allergy, check the cereal and chocolate labels for peanut warnings.
- Gluten-free: Many crispy rice cereals contain malt made from barley, so they are not gluten-free. Choose a cereal labeled gluten-free if you need it, and check the chocolate label too.
- Vegan: Swap the honey for maple syrup and use dairy-free chocolate chips. Expect a slightly softer base.
- Toppings: Swirl a spoonful of warm peanut butter into the wet chocolate, or scatter chopped roasted peanuts over it along with the salt.
Peanuts are a major allergen, so label the bars if you are sharing them. The FDA’s guide to food allergies lists the major allergens. Honey is not safe for babies; the CDC says not to give honey to children younger than 1 year.
Common Mistakes and Easy Fixes
- Bars that crumble: The base was not pressed firmly enough, or the cereal was packed into the measuring cup. Press hard, especially at the edges, and measure cereal loosely.
- Greasy, soft bars: Oily natural peanut butter or too little cereal. Use no-stir peanut butter and keep the bars refrigerated.
- Thick, grainy chocolate: The chocolate was overheated or got wet. Melt it slowly in short bursts, and keep water away from the bowl.
- Chocolate that cracks when you cut: The slab is too cold or the topping is very thick. Let it stand 5 to 10 minutes, use a warm, dry knife, and press straight down.
- Salt that slides off: It went on after the chocolate set. Sprinkle it right after spreading.
- Too sweet: Use bittersweet chocolate and add the pinch of salt to the base.
For another easy chocolate and peanut butter bar, try our chewy chocolate peanut butter oat bars. If you want a richer chocolate project for a holiday tray, our four-ingredient chocolate fudge is just as simple.
FAQ
Can I use a 9×9-inch pan?
Yes. The same amounts fit a 9×9-inch pan, but both layers will be about 20% thinner, and the bars a little smaller. Press the base firmly, since a thinner base breaks more easily. Chill times stay about the same.
Do I have to warm the peanut butter and honey?
No, but it helps. A 20- to 30-second warm-up makes the mixture easier to blend and helps it coat the cereal evenly. Let it cool briefly if it feels hot, and do not boil it.
Can I skip the coconut oil?
Yes. Plain melted chocolate sets firmer and can crack more when you cut it. Let the bars stand at room temperature for a few extra minutes before slicing. Vegetable shortening is a good substitute for coconut oil.
Do these bars need to be refrigerated?
For the best texture, yes. The honey and coconut oil soften as the bars warm up, so keep them in the fridge and serve them cold.
How many bars does this make?
A 3×3 grid gives nine generous bars. For a party tray, cut a 4×4 grid for 16 smaller squares.
How many calories are in one bar?
As a rough estimate, one of nine bars has about 420 calories with the thick chocolate topping. The thinner topping saves about 50 calories per bar. The recipe card has the full estimate, which will vary with brands.
Print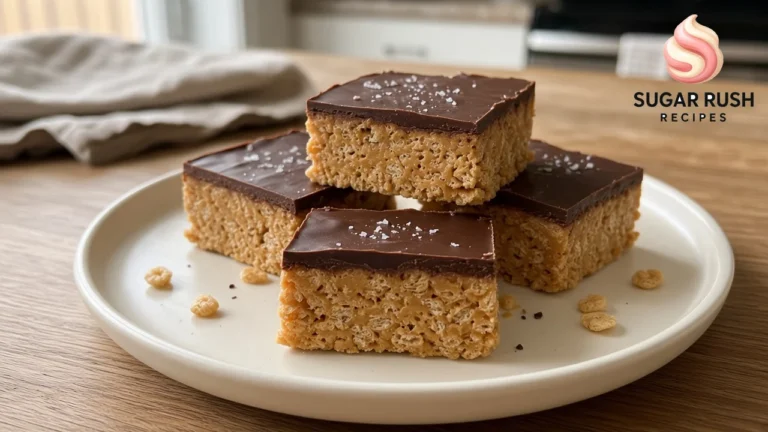
No-Bake Chocolate Peanut Butter Crunch Bars
A creamy peanut butter and honey base packed with crispy rice cereal, topped with smooth chocolate and flaky sea salt. No oven needed; makes 9 squares in an 8×8 pan.
- Total Time: 1 hour 35 minutes
- Yield: 9 bars (or 16 small squares)
Ingredients
For the peanut butter crunch base
1 cup (256 g) creamy no-stir peanut butter
1/2 cup (170 g) honey
1 teaspoon vanilla extract
Pinch of fine salt (only if your peanut butter is unsalted)
3 cups (about 85 g) crispy rice cereal, lightly measured
For the chocolate topping
1 1/2 cups (255 g) semisweet chocolate chips (use 1 cup / 170 g for a thinner layer)
1 1/2 tablespoons refined coconut oil or vegetable shortening (1 tablespoon for the thinner layer)
About 1/2 teaspoon flaky sea salt, for finishing
Instructions
Line an 8×8-inch pan with parchment paper, leaving an overhang on two sides.
In a large microwave-safe glass bowl, microwave the peanut butter and honey for 20 to 30 seconds. Stir until smooth and glossy; it should feel warm, not hot. Stir in the vanilla, plus a pinch of salt if your peanut butter is unsalted.
Add the crispy rice cereal and fold gently until every piece is coated and no dry cereal remains.
Scrape the mixture into the pan. Cover with parchment and press down firmly with a flat-bottomed cup until compact and level, about 3/4 inch thick, paying attention to the edges. If you have time, chill for 15 minutes.
Put the chocolate chips and coconut oil in a heatproof bowl. Microwave at 50% power in 30-second bursts, stirring after each, until almost melted, then stir until smooth (about 1 1/2 to 2 1/2 minutes total). Or melt over a pan of barely simmering water, keeping all water out of the chocolate.
Pour the chocolate over the base and spread it evenly to the edges with an offset spatula. Sprinkle with flaky sea salt right away, while the chocolate is still wet.
Refrigerate uncovered for about 1 hour, until the chocolate is completely firm.
Lift the slab out with the parchment (or cut in the pan). Let it stand 5 to 10 minutes, then cut a 3×3 grid with a sharp knife dipped in hot water and wiped dry between cuts. Serve cold.
Notes
Timing: about 20 minutes hands-on (including melting the chocolate) + an optional 15-minute chill for the base + about 1 hour for the topping to set = about 1 hour 35 minutes until ready to slice and serve (about 1 hour 20 minutes if you skip the base chill). There is no baking.
Thick or thin topping: the default 1 1/2 cups of chips gives a layer about 1/4 inch thick, about one-third the height of the base. For a thinner layer that cuts more easily straight from the fridge, use 1 cup (170 g) chips and 1 tablespoon coconut oil.
Pan size: a 9×9-inch pan also works with the same amounts; both layers will be about 20% thinner.
Warming the peanut butter and honey is optional but makes blending and coating easier. Do not let the mixture get hot.
Use no-stir peanut butter. Oily natural peanut butter makes a softer, greasier bar.
Coconut oil keeps the chocolate pourable and less likely to crack when sliced. Refined coconut oil has no coconut flavor. Shortening works the same way, or leave it out for a firmer chocolate layer.
Storage: refrigerate in an airtight container, with parchment between layers, for up to 1 week. Freeze individually wrapped bars for up to 2 months. The bars soften at warm room temperature, so serve them cold.
Many crispy rice cereals contain barley malt; choose a cereal labeled gluten-free if needed. Contains peanuts. Do not serve honey to children under 1 year old.
Nutrition is an estimate for 1 of 9 bars with the thick topping, calculated from typical ingredient labels. It will vary with brands. The thinner topping is about 50 calories less per bar.
- Prep Time: 20 minutes
- Additional Time: 1 hour 15 minutes
- Category: Dessert
- Method: No-Bake
- Cuisine: American
- Diet: Vegetarian