
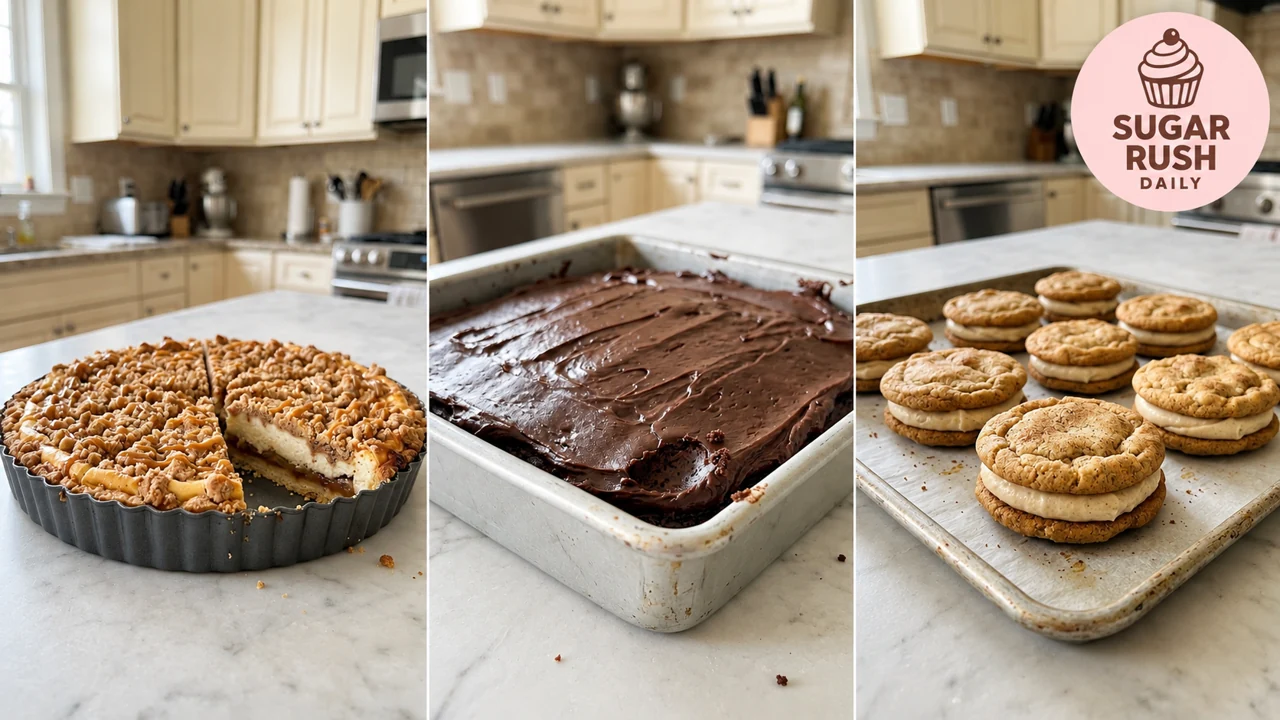
These three dessert table recipes give everyone a different reason to linger over the last course: caramel apple crumble cheesecake tart, double chocolate fudge cream cake, and cinnamon maple cheesecake sandwich cookies. Choose a buttery tart slice, a rich square of chocolate cake, or a soft cookie with a creamy maple center.
The ideas come from Sugar Rush Daily’s dessert trio. Each recipe below stands alone with its own quantities, pan size, timing, storage notes, and printable card. You do not have to make all three, and you should not expect the tart and cookies to be ready as soon as they leave the oven.
These are researched written interpretations of the supplied visual inspiration, not kitchen-tested recipes. The images illustrate the intended appearance. Follow the doneness and texture checks as well as the estimated times.
Three Cozy Dessert Table Recipes at a Glance
| Dessert | Yield | Active work | Full time to serve |
|---|---|---|---|
| Caramel apple cheesecake tart | 8 slices | 40 minutes | About 7 hours 40 minutes |
| Double chocolate cake | 9 squares | 30 minutes | About 3 hours 25 minutes |
| Maple cheesecake sandwich cookies | 12 sandwiches | 40 minutes | About 3 hours 5 minutes |
The tart includes a pre-baked crust, final baking, cooling, and four hours of refrigeration. The cake includes ganache cooling and setting. The cookies include dough chilling, cooling, and a short rest after filling. Read each card’s timing note before planning your afternoon.
Helpful Baking Tools
Affiliate Disclosure: As an Amazon Associate I earn from qualifying purchases. Product links may earn a commission at no additional cost to you.
- A 9-inch removable-bottom tart pan suits the shallow tart. Check usable depth: at least 1 inch, with filling kept below the rim.
- A 9-inch square metal pan is the specified size for the chocolate cake.
- Rimmed baking sheets hold the cookies and support the tart pan. The linked example is a two-pack; bake the cookie sheets sequentially.
- Parchment paper lines cookie sheets and can make cake removal easier.
- An electric hand mixer smooths the cream cheese fillings and creams cookie butter.
- A digital kitchen scale helps divide cookie dough evenly and measure flour without packing a cup.
- A medium cookie scoop is optional for similar portions; weigh an initial portion against the recipe rather than assuming every scoop is identical.
- An instant-read food thermometer checks the tart’s egg filling at its center.
Also gather bowls, a flexible spatula, a skillet for the apples, a small saucepan for the ganache cream, and a cooling rack. Use suitable equipment you already own. These links are shopping examples, not claims that the exact products appear in the images.
Caramel Apple Crumble Cheesecake Tart
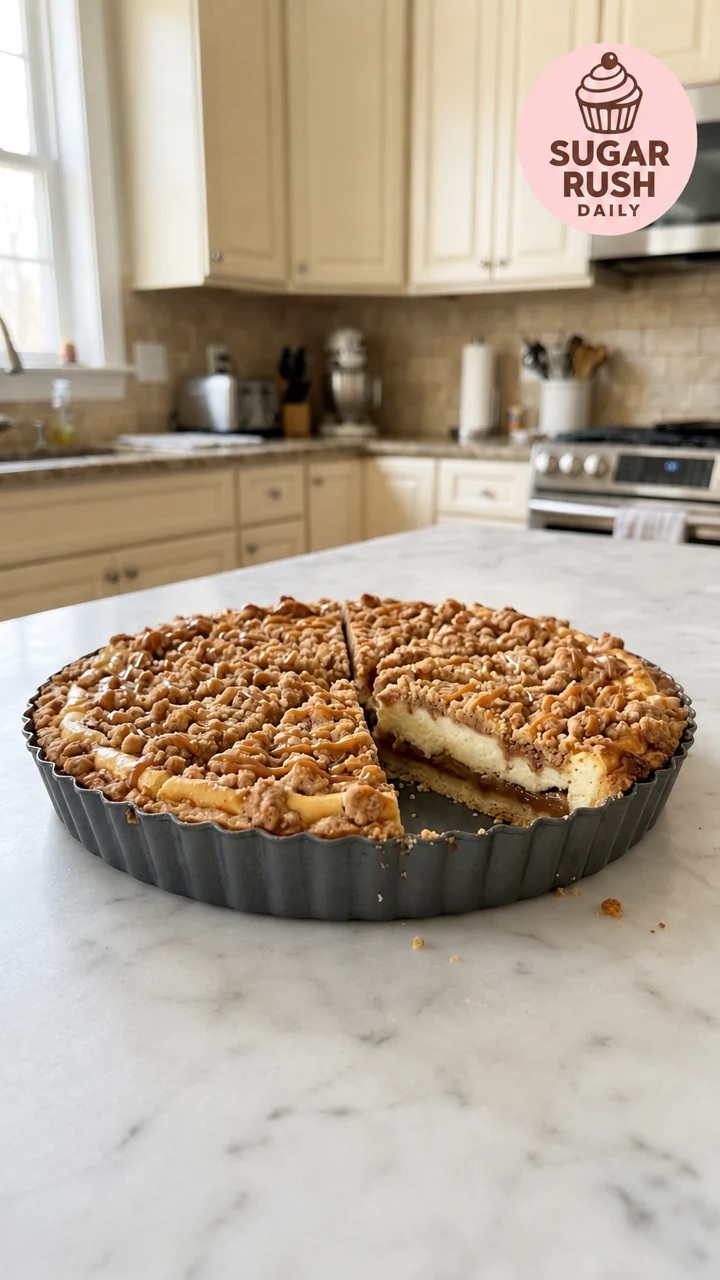
This is a shallow tart with several thin layers: shortbread, cooked cinnamon apples, vanilla cheesecake, and crumbs. A final caramel drizzle supplies the glossy finish. It is not a tall cheesecake, so the pan dimensions and restrained filling quantities matter.
Cook the Apples and Pre-Bake the Crust
Finely diced apples soften more evenly in a thin tart than large chunks. Cook them until nearly tender and thicken their juices before cooling. Hot, watery fruit can soften the crust and disturb the egg filling.
Chill the pressed shortbread shell, then pre-bake until dry-looking and pale golden. Give it ten minutes to cool before adding the apples and cheesecake. This extra stage helps the bottom bake through beneath the moist filling.
Bake, Cool, Then Chill Before Unmolding
Keep the layers below the rim. Bake until the crumbs are golden and the filling has set edges with a slight center wobble, rather than a liquid wave. Check at least 160°F in the egg filling, consistent with FDA egg-dish temperature guidance.
Cool for about an hour, refrigerate for at least four hours, and remove the ring only when cold. Support the bottom when moving it. Add the caramel near serving time to keep the crumbs from getting wet too early.
Print
Caramel Apple Crumble Cheesecake Tart
A shallow shortbread tart with a thin cooked apple layer, baked vanilla cheesecake filling, cinnamon crumbs, and a caramel drizzle. Makes 8 slices in a 9-inch tart pan.
- Total Time: 7 hours 40 minutes
- Yield: 8 slices
Ingredients
For the shortbread crust:
1 cup (120 g) all-purpose flour
1/4 cup (30 g) confectioners’ sugar
5 tablespoons plus 1 teaspoon (75 g) unsalted butter, softened
1/8 teaspoon fine salt
For the apple layer:
2 small firm apples, peeled, cored, and finely diced (250 g prepared fruit)
1 1/2 teaspoons (7 g) unsalted butter
2 tablespoons (25 g) packed light brown sugar
1/2 teaspoon ground cinnamon
1 teaspoon (3 g) cornstarch mixed with 1 tablespoon cold water
For the cheesecake:
8 ounces (225 g) full-fat brick cream cheese, softened
3 tablespoons plus 1 teaspoon (40 g) granulated sugar
1 large egg
1 teaspoon alcohol-free vanilla flavoring
For the crumble:
6 tablespoons (45 g) all-purpose flour
2 tablespoons plus 1 teaspoon (30 g) packed light brown sugar
2 tablespoons (28 g) unsalted butter, cold and diced
1/2 teaspoon ground cinnamon
For finishing:
3 tablespoons thick prepared caramel sauce, checked for alcohol-free ingredients
Instructions
1. Allow about 30 minutes for the crust butter to soften. Use a 9-inch fluted removable-bottom tart pan at least 1 inch deep, set on a rimmed baking sheet. Lightly grease the pan. This is a shallow tart, not a tall cheesecake.
2. Cook the apples before assembling: melt the 7 g butter in a skillet, add the diced apples, 25 g brown sugar, and 1/2 teaspoon cinnamon. Cook over medium heat for 6–8 minutes until nearly tender and most released liquid has evaporated. Stir the cornstarch-water slurry again, add it, and cook until bubbling and thick, about 1 minute. Plan about 10 minutes stovetop cooking overall. Spread the apples in a shallow dish to cool while making the crust; do not add hot apples to the egg filling.
3. Mix the softened crust butter with its confectioners’ sugar and salt, then work in the 120 g flour until a soft crumbly dough forms. Press thinly and evenly across the bottom and up the sides of the tart pan. Prick the bottom lightly with a fork and refrigerate for 20 minutes. Take the cream cheese from the refrigerator now so its softening overlaps the crust stages.
4. Heat the oven to 350°F (175°C). Bake the empty chilled crust on its baking sheet for about 15 minutes, until dry-looking and pale golden. If the bottom puffs, gently flatten it with the back of a spoon. Cool for 10 minutes before filling; keep the oven on.
5. Beat the softened cream cheese with 40 g granulated sugar until smooth. Mix in the egg and vanilla on low speed just until combined. Separately rub the cold crumble butter into its flour, brown sugar, and cinnamon to form small clumps.
6. Spread the cooled, thick apples in a thin layer over the crust. Spoon on the cheesecake mixture and smooth gently. Scatter the crumble over the top. Keep filling below the rim; do not force extra mixture into an unusually shallow pan.
7. Bake for about 35–40 minutes, checking that the crumbs are golden and the filling edges are set with a slight center wobble, not liquid sloshing. The egg filling should reach at least 160°F (71°C) in its center. Shield darkening edges loosely with foil if needed and continue until the filling is cooked.
8. Cool on a rack for about 60 minutes, then refrigerate promptly for at least 4 hours. Keep total counter cooling under 2 hours, or under 1 hour above 90°F. Remove the outer ring only when cold, supporting the base, and drizzle with the caramel sauce before cutting into 8 slices.
Notes
Timing: about 40 minutes active work including the drizzle, 60 minutes total cooking (10 minutes apples, 15 minutes crust, about 35 minutes filled tart), 30 minutes preliminary crust-butter softening, 20 minutes crust chilling, 10 minutes crust cooling, 60 minutes final cooling, and 4 hours refrigerator chilling = approximately 7 hours 40 minutes. A 40-minute final bake or longer chilling adds time. Apples cool during crust work; cream cheese softens during crust chilling and pre-baking.
Use a 9-inch tart pan at least 1 inch deep and keep the layers thin. The pan size is a written recipe specification, not a measurement taken from the image. Pan shapes vary; do not overfill. This recipe is not written for a springform cheesecake pan or a deep pie dish.
Refrigerate covered at 40°F or below for up to 3 days. Best texture is within 1–2 days; the crumble softens with storage. Add caramel shortly before serving. Freeze wrapped slices up to 1 month for best quality and thaw in the refrigerator. Contains wheat, dairy, and egg. These written quantities interpret the supplied Sugar Rush Daily visual inspiration and established baking methods; they have not been kitchen-tested. Times are planning estimates: use the texture and doneness checks. No alcohol or pork-derived gelatin is used. Nutrition has not been calculated.
- Prep Time: 40 minutes
- Cook Time: 1 hour
- Category: Dessert
- Method: Baking
- Cuisine: American
Double Chocolate Fudge Cream Cake
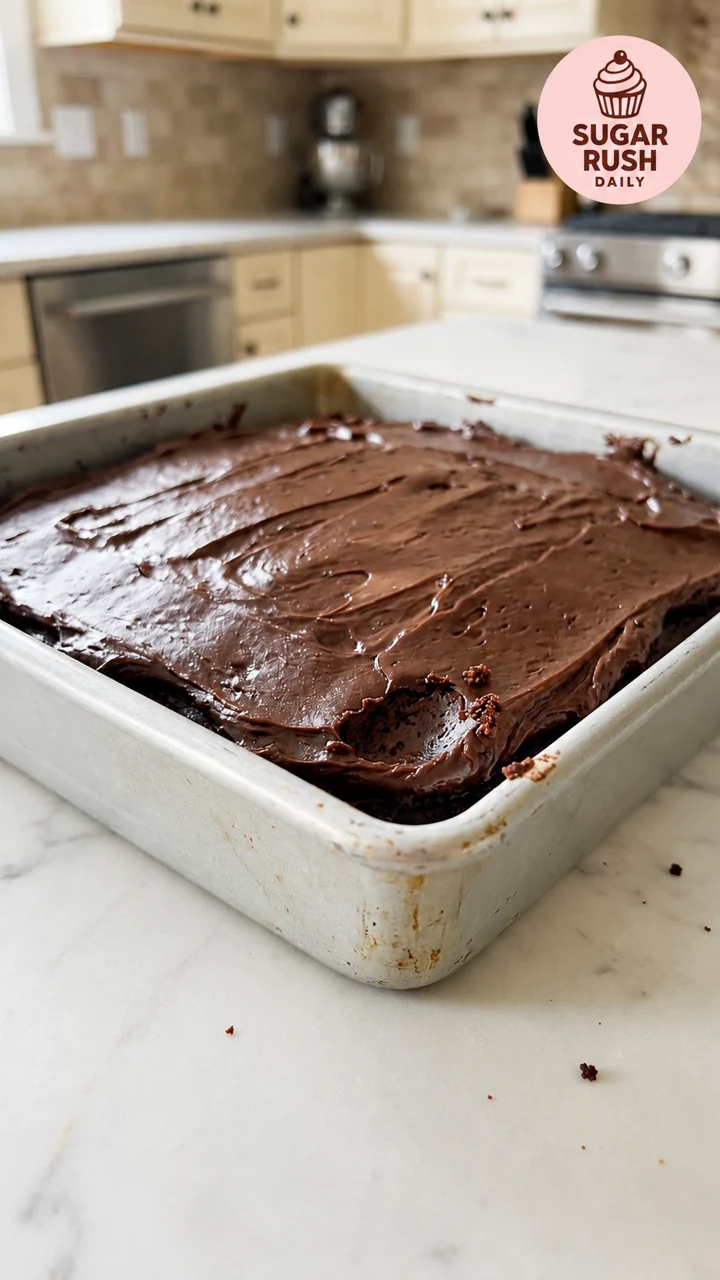
The chocolate dessert is a fully baked cocoa cake with a thick chocolate-and-cream topping. “Double chocolate” refers to cocoa in the cake and semisweet chocolate in the frosting. There is no separate hidden cream layer and no intentionally raw center.
Pair a Cooled Cake with Spreadable Ganache
Whisk the dry ingredients thoroughly, stir in the egg, buttermilk, oil, and vanilla, then add the hot water carefully. Use natural cocoa as specified. Bake until a skewer shows moist crumbs without raw batter; spoonable frosting should not be mistaken for an underbaked cake.
Make the ganache after the cake comes out. Pour steaming cream over finely chopped chocolate, wait briefly, and stir from the center. Let it thicken while the cake cools. King Arthur Baking’s ganache reference explains the chocolate-and-cream foundation; the card here gives the quantities for this cake.
Frost only when the cake is fully cool and the ganache spreads rather than pours. A short refrigerator rest settles the topping. It should remain creamy; it is not meant to become a hard chocolate shell.
PrintDouble Chocolate Fudge Cream Cake
A moist cocoa cake baked in a 9-inch square pan and finished with a thick semisweet chocolate-and-cream ganache. It is cake with fudge cream frosting, not a molten pudding cake.
- Total Time: 3 hours 25 minutes
- Yield: 9 squares
Ingredients
For the cake:
1 1/4 cups (150 g) all-purpose flour
1/3 cup (30 g) unsweetened natural cocoa powder
3/4 cup plus 2 tablespoons (175 g) granulated sugar
3/4 teaspoon baking powder
1/2 teaspoon baking soda
1/4 teaspoon fine salt
1 large egg
1/2 cup (120 ml) cultured buttermilk
1/4 cup (60 ml) neutral oil
1 teaspoon alcohol-free vanilla flavoring
6 tablespoons (90 ml) hot water
Butter or baking spray, for greasing the pan
For the fudge cream:
8 ounces (225 g) semisweet chocolate, about 55–60% cacao, finely chopped
3/4 cup (180 ml) heavy whipping cream
1 tablespoon (14 g) unsalted butter
Pinch fine salt
Instructions
1. Heat the oven to 350°F (175°C). Grease a 9-inch square metal pan at least 2 inches deep. Line the bottom with parchment if desired, leaving handles if you plan to lift the cake; it can also be frosted and served in its pan.
2. Whisk the flour, natural cocoa, sugar, baking powder, baking soda, and salt in a large bowl, breaking up cocoa lumps. Whisk the egg, buttermilk, oil, and vanilla separately. Mix the wet ingredients into the dry ingredients just until combined, then carefully stir in the hot water. The batter will be relatively thin.
3. Pour into the prepared pan and bake for about 30–35 minutes, using 35 minutes for planning. The center should spring back lightly, and a skewer should show a few moist crumbs but no raw batter. This is not a deliberately underbaked molten center.
4. Set the cake on a rack. Make the fudge cream now: put the chopped chocolate in a heat-safe bowl. Heat the cream just until steaming with small bubbles at the edge, about 3–5 minutes; do not boil hard. Pour over the chocolate, wait 3 minutes, then stir slowly from the center until smooth. Stir in the butter and salt.
5. Allow about 90 minutes after making the ganache for the cake to cool completely and the ganache to thicken to a soft spreading consistency; these cooling periods overlap. Stir the ganache occasionally. If the room is warm or it sets slowly, refrigerate it in short intervals, stirring, and add the extra time to your schedule. Do not put frosting on a warm cake.
6. Spread the thickened fudge cream over the cooled cake, making gentle swirls. Refrigerate for about 30 minutes to settle the frosting, then cut into 9 squares. Let individual servings lose their chill for about 15 minutes if desired; keep the rest refrigerated.
Notes
Timing: about 30 minutes active preparation and frosting, 40 minutes cooking (35-minute cake bake plus up to 5 minutes heating cream), 90 minutes overlapping cake/ganache cooling, 30 minutes frosting setting, and about 15 minutes to take the chill off servings = approximately 3 hours 25 minutes. Slower cooling or ganache thickening adds time. Oven preheating overlaps preparation.
Use natural unsweetened cocoa and cultured buttermilk as written. This formula has not been tested with Dutch-process cocoa, milk substitutes, or a different pan size. The two chocolates in the name refer to cocoa in the cake and semisweet chocolate in the fudge cream; no hidden filling is claimed.
Keep covered at 40°F or below for up to 4 days. Limit total room-temperature time to 2 hours, or 1 hour above 90°F. Freeze wrapped portions up to 1 month for best quality and thaw in the refrigerator. Contains wheat, dairy, and egg. These written quantities interpret the supplied Sugar Rush Daily visual inspiration and established baking methods; they have not been kitchen-tested. Times are planning estimates: use the texture and doneness checks. No alcohol or pork-derived gelatin is used. Nutrition has not been calculated.
- Prep Time: 30 minutes
- Cook Time: 40 minutes
- Category: Dessert
- Method: Baking
- Cuisine: American
Cinnamon Maple Cheesecake Sandwich Cookies
Soft cinnamon-sugar cookies surround a maple cream cheese filling. The center is cheesecake-style frosting added after baking, not a disk of raw cheesecake batter. One batch makes 24 cookies, paired into 12 sandwiches.
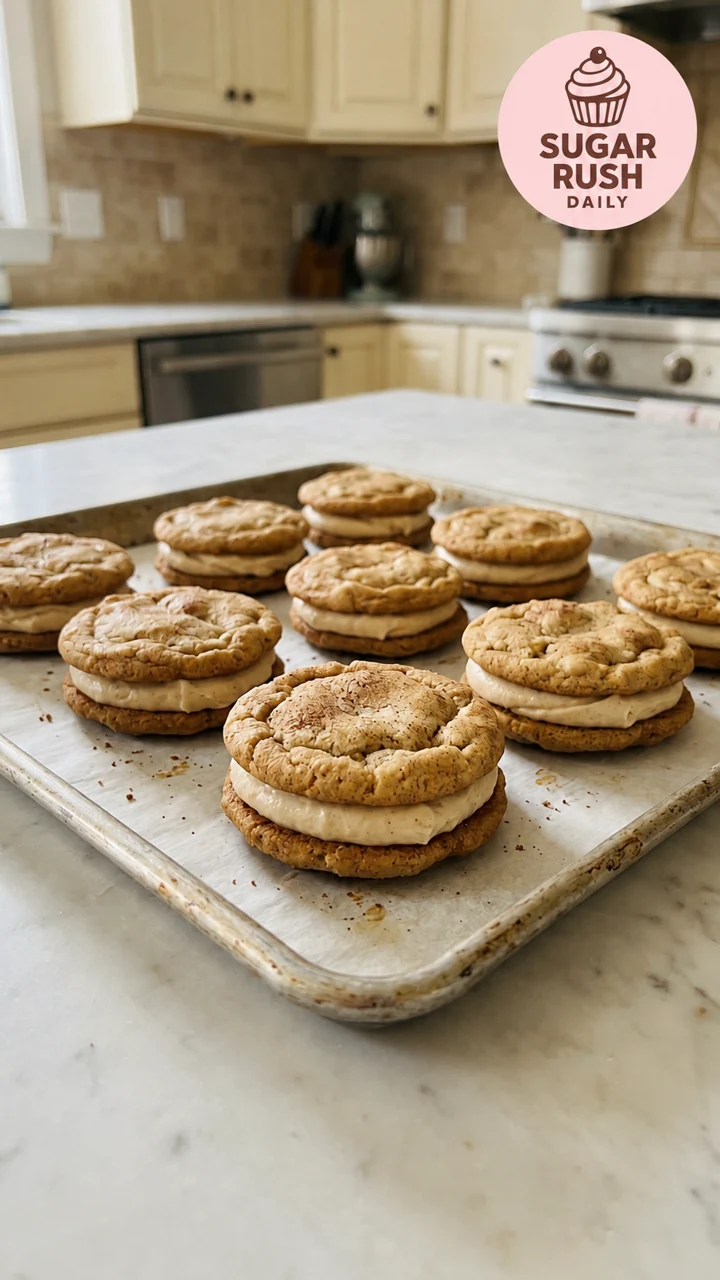
Cool the Cookies Completely Before Filling
Chill the dough, divide it into equal portions, and keep the unbaked dough cold between trays. Similar sizes make tidier pairs. Look for set edges and puffed, lightly cracked tops without visibly raw centers.
For the filling, use full-fat brick cream cheese and pure maple syrup. Beat the butter and sugar first, then mix in the cheese and flavorings briefly. Extra syrup adds liquid as well as flavor, so resist adding more without adjusting the whole formula.
Match the cookies after they cool, divide the filling evenly, and chill the assembled sandwiches. Warm cookies make the center slide out. For general ingredient guidance, Sally’s cream cheese frosting notes explain why spreadable tub cheese differs from bricks.
PrintCinnamon Maple Cheesecake Sandwich Cookies
Soft cinnamon-sugar cookies paired with a maple cream cheese filling. The cheesecake-style center is a refrigerated cream cheese frosting, not a separately baked cheesecake.
- Total Time: 3 hours 5 minutes
- Yield: 12 sandwich cookies
Ingredients
For 24 cookies:
1/2 cup (113 g) unsalted butter, softened
3/4 cup (150 g) granulated sugar
1/4 cup (50 g) packed light brown sugar
1 large egg
1 teaspoon alcohol-free vanilla flavoring
1 3/4 cups (210 g) all-purpose flour
1 teaspoon ground cinnamon
3/4 teaspoon cream of tartar
1/2 teaspoon baking soda
1/4 teaspoon fine salt
For rolling:
2 tablespoons (25 g) granulated sugar
1 teaspoon ground cinnamon
For the maple cheesecake-style filling:
6 ounces (170 g) full-fat brick cream cheese, cool but softened enough to mix
1/4 cup (56 g) unsalted butter, softened
1 1/2 cups (180 g) confectioners’ sugar, sifted
2 tablespoons (42 g) pure maple syrup
1/4 teaspoon ground cinnamon
1/2 teaspoon alcohol-free vanilla flavoring
Pinch fine salt
Instructions
1. Allow about 30 minutes for the cookie butter to soften. Keep the filling cream cheese refrigerated until about 30 minutes before making the filling; its softening can overlap the last cookie bake and cooling. Line two baking sheets with parchment.
2. Beat the cookie butter and both sugars until creamy and lighter, about 2 minutes. Beat in the egg and vanilla. Whisk the flour, 1 teaspoon cinnamon, cream of tartar, baking soda, and salt separately, then mix into the butter mixture only until combined. Cover and refrigerate the dough for 30 minutes.
3. Heat the oven to 350°F (175°C). Mix the rolling sugar and cinnamon. Divide the dough into 24 equal portions, about 24–25 g each, and roll lightly in cinnamon sugar. Arrange at least 2 inches apart and flatten gently into thick disks. Keep unbaked portions chilled between batches.
4. Bake one sheet at a time for 10–12 minutes, until the edges are set and the tops are puffed and lightly cracked, with no visibly raw, shiny centers. Plan about 25 minutes total for two sequential sheets. Cool 5 minutes on each sheet, then transfer to a rack. Allow the last batch about 30 minutes total cooling before filling.
5. For the filling, beat the softened 56 g butter with the confectioners’ sugar until smooth, scraping the bowl. Briefly beat in the softened cream cheese, then the maple syrup, cinnamon, vanilla, and salt on low speed just until combined. Avoid prolonged beating after the cheese is added. If too soft to hold a mound, chill briefly and add that waiting time to your plan.
6. Pair completely cooled cookies of similar size. Divide the filling evenly among 12 flat cookie undersides, about 2 tablespoons each, and top with the matching cookies. Press lightly without squeezing out the filling. Refrigerate the assembled sandwiches for 30 minutes before serving, then keep them chilled.
Notes
Timing: about 40 minutes active work including filling and assembly, 25 minutes baking two sequential trays, 30 minutes preliminary cookie-butter softening, 30 minutes dough chilling, 30 minutes final-batch cooling, and 30 minutes assembled-cookie chilling = approximately 3 hours 5 minutes. Earlier cookies cool while the second tray bakes. Filling ingredient softening overlaps the later baking/cooling; extra filling chilling adds time.
Use full-fat cream cheese bricks and pure maple syrup, not pancake syrup. The filling is softer than buttercream and must be refrigerated. Do not add extra syrup to chase a stronger flavor; extra liquid makes the center harder to contain. There is no raw egg or raw flour in the filling.
Refrigerate filled cookies airtight at 40°F or below and use within 3 days. Keep total room-temperature time under 2 hours, or under 1 hour above 90°F. Unfilled cookies can be made a day ahead and kept airtight. Freeze wrapped sandwiches up to 1 month for best quality; thaw in the refrigerator. Contains wheat, dairy, and egg. These written quantities interpret the supplied Sugar Rush Daily visual inspiration and established baking methods; they have not been kitchen-tested. Times are planning estimates: use the texture and doneness checks. No alcohol or pork-derived gelatin is used. Nutrition has not been calculated.
- Prep Time: 40 minutes
- Cook Time: 25 minutes
- Category: Dessert
- Method: Baking
- Cuisine: American
Make-Ahead and Storage
Make the tart first, or the day before, because it needs the longest cold rest. The chocolate cake can cool while you work on the cookies, provided you have enough rack space. Keep cream cheese filling refrigerated until the cookie shells are cool. All three recipes use a 350°F oven, but their pan sizes and bake times remain different.
| Dessert | Covered refrigeration at 40°F or below | Finish near serving |
|---|---|---|
| Apple cheesecake tart | Up to 3 days; best texture within 1–2 | Caramel drizzle |
| Chocolate fudge cream cake | Up to 4 days | Let individual portions lose their chill briefly |
| Filled maple cookies | Up to 3 days | Keep chilled until needed |
Keep total room-temperature time for these dairy-containing desserts under two hours, or under one hour above 90°F. Follow the FDA’s storage guidance, refrigerate promptly, and use clean utensils for serving. A countertop display is not a substitute for cold storage.
Frequently Asked Questions
Do I Need to Make All Three?
No. Each printable card has its own ingredient list and yield. Choose one recipe for a smaller gathering, or plan the tart ahead if you want the full selection.
Can I Use the Same Pan for the Tart and Cake?
No. A fluted removable-bottom tart pan and a square cake pan have different shapes, depth, and capacity. Use the pan specified in each card rather than transferring the whole batch into whichever pan is nearby.
Can I Add More Maple Syrup to the Cookie Filling?
More syrup makes the filling looser. The written amount balances maple flavor with a center that can stay between the cookies when chilled. Do not assume additional sugar or chilling will reliably correct a large extra pour.
Why Is My Chocolate Frosting Too Thin?
It may still be warm, or the chocolate-to-cream balance may have changed. Use the specified semisweet chocolate, allow cooling, and chill briefly if needed. Milk and white chocolate do not behave like semisweet chocolate at the same ratio.
Are These Recipes Gluten-Free or Dairy-Free?
No. All three contain wheat, dairy, and egg. Check packaged caramel and chocolate for additional allergens. No tested special-diet substitutions are claimed.
More Sugar Rush Daily Dessert Ideas
For another trio, explore our apple roses, chocolate pudding cake, and maple cookie cups. If you prefer a single fruit-and-crumb cake, try our lemon blueberry cream cheese coffee cake. Follow each recipe’s own ingredients and full cooling schedule.
For these dessert table recipes, the useful choice is texture: crisp crumbs and apples, soft chocolate cake, or cinnamon cookies with a chilled creamy center. Pick the one that fits your time and the kind of bite you want to serve.