
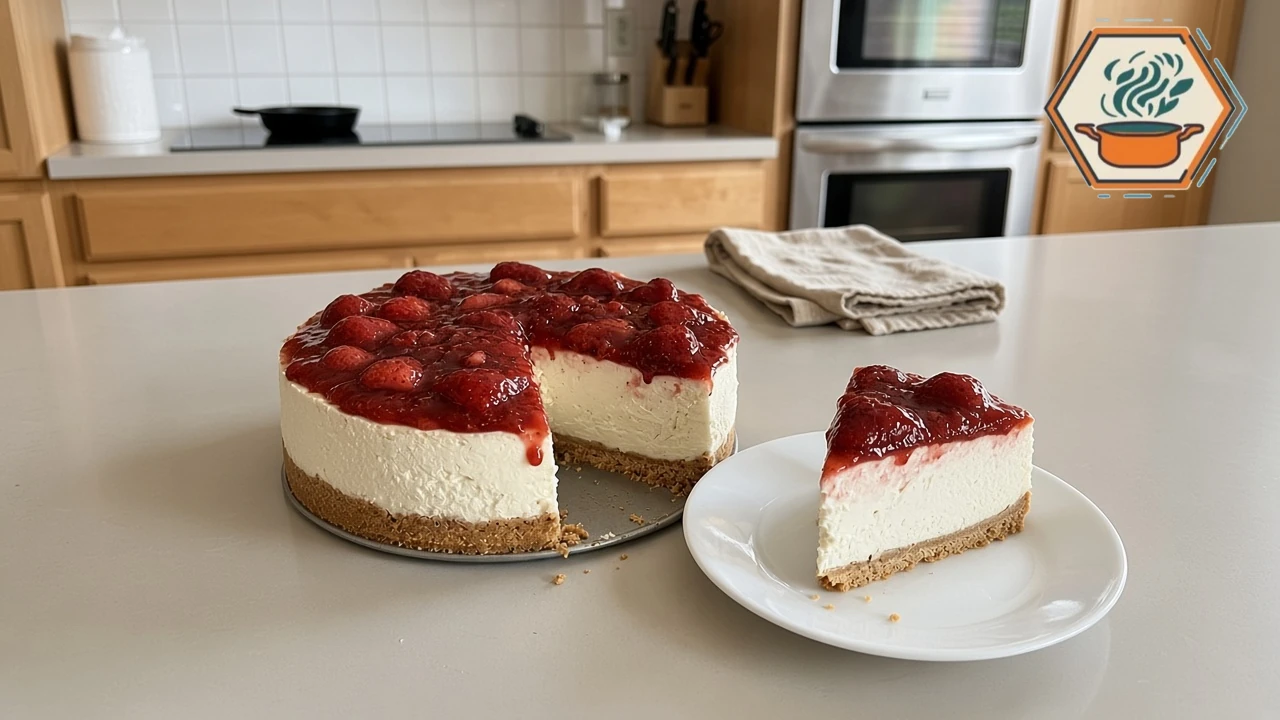
A thick white cheesecake, a buttery graham cracker base, and glossy red strawberries spilling gently over the edge: this no-bake strawberry cheesecake keeps the appeal of the original photo without asking you to turn on the oven. The filling is designed to be fluffy rather than dense, with enough cream-cheese tang to balance the sweet fruit.
There is a little stovetop cooking for the homemade strawberry topping, but neither the crust nor the filling is baked. No raw eggs, gelatin, or boxed filling mix are needed. The biggest ingredient is time: plan on an overnight refrigerator set instead of trying to rush a soft cheesecake into slices.
Recipe development note: this measured version was developed from established no-bake cheesecake and fruit-sauce methods to accompany the supplied visual reference. It has not been kitchen-tested by RecipesMind. Times, finished height, and topping yield are estimates; ingredient brands and berry juiciness can change the result.
In This Article
- Why it works
- Ingredients and equipment
- The no-oven crust
- A fluffy filling that sets
- Homemade strawberry topping
- Timing, serving, and storage
- Troubleshooting and FAQ
- Recipe card
Why This No-Bake Strawberry Cheesecake Works
This is a refrigerator-set cheesecake, not a baked custard. Full-fat block cream cheese provides body, while separately whipped heavy cream gives the filling a lighter, mousse-like texture. Gentle folding protects that air. The refrigerator then firms the dairy mixture and the butter in the crust so the layers can hold together when cold.
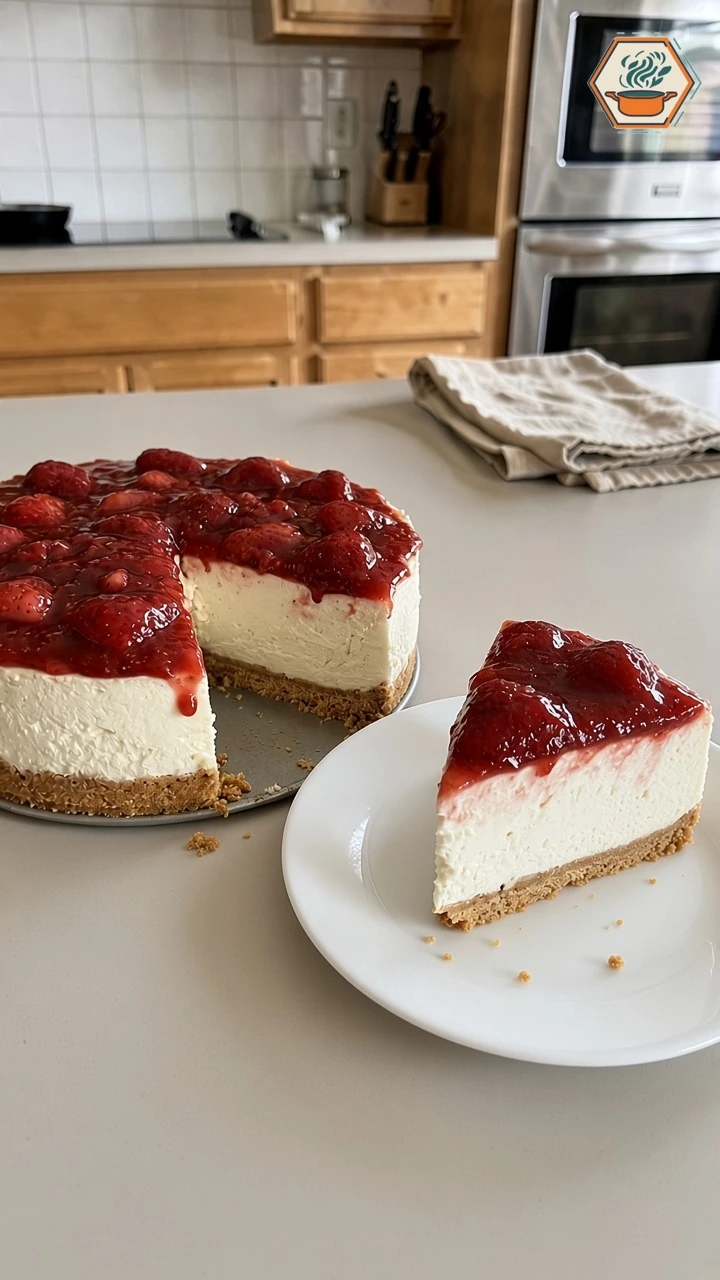
The visual goal is straightforward: a round cake with a modest crumb base, a much thicker white filling, and a generous layer of chunky cooked strawberries. Keep the berries on top rather than stirring their juice into the filling. That keeps the center white and avoids adding extra liquid where you need structure.
For the technique behind the filling, see Sally’s Baking’s no-bake cheesecake guidance, especially its advice on full-fat bricks, firm whipped cream, and refrigerator setting. Prefer the denser baked style? Our New York cheesecake is a different dessert, not a shortcut version of this one.
Ingredients and Useful Equipment
The complete measured ingredient list is in the recipe card below. Buy full-fat cream cheese sold in blocks, not whipped spread or a reduced-fat tub. Heavy whipping cream should contain at least 36% milk fat and stay cold until whipping. The cream cheese, by contrast, needs brief softening so it beats smooth without lumps.
Graham cracker crumbs should be fine and fairly uniform. Melted butter binds them without baking; a little brown sugar brings a gentle caramel note. For the filling, powdered sugar dissolves readily, vanilla softens the tang, and a small amount of sour cream and lemon juice adds brightness without turning it into lemon cheesecake.
Use ripe but firm strawberries. Rinse them before hulling, drain well, and leave tiny berries whole while halving larger ones. Cornstarch thickens the released juice into a spoonable glaze. Frozen berries are possible, but they release more liquid and soften more; fresh berries are the closer match to the reference’s recognizable fruit pieces.
Affiliate disclosure: As an Amazon Associate, RecipesMind earns from qualifying purchases. Use equipment you already own whenever it suits the method; the linked brands are suggestions, not requirements.
Essential equipment for this format includes a 9-inch springform pan at least 3 inches deep, two mixing bowls, a mixer, a flexible spatula, and a small saucepan. A Nordic Ware 9-inch springform pan has a removable ring for releasing the cake. Its charcoal finish differs from the silver reference pan; either color works. Do not substitute a shallow ready-made pie shell for this tall filling.
A KitchenAid 5-speed hand mixer handles both whipping and smoothing in separate bowls. For folding and scraping, the small spatula in the OXO 2-piece silicone spatula set is useful; the extra jar spatula is not necessary for this recipe. An existing flexible scraper is equally suitable.
Make a Truly No-Oven Graham Crust
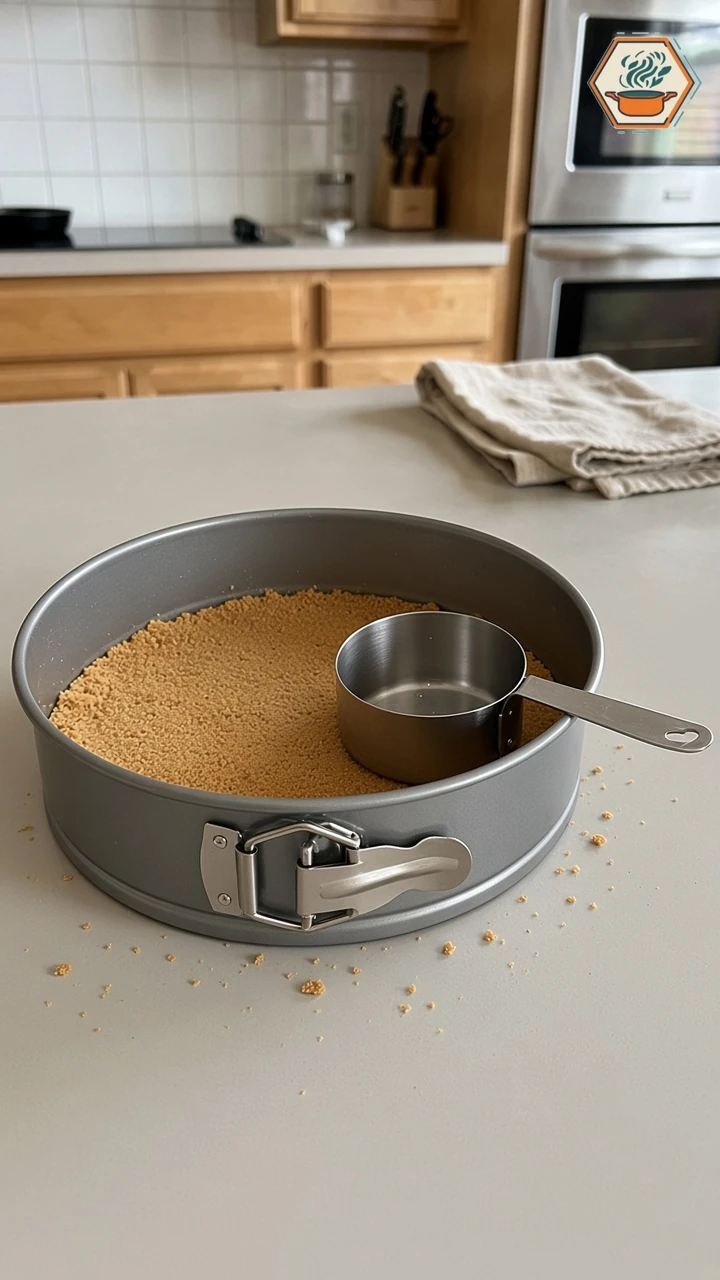
The crust should feel like evenly damp sand before it goes into the pan. Dry pockets become loose crumbs later, so scrape the bowl thoroughly after stirring in the butter. Press across the bottom and only slightly up the sides, rather than building a tall crumb wall that competes with the white filling.
A flat-bottomed metal measuring cup helps level the surface. Press firmly enough to bind the crumbs, but stop before grinding them into a rock-hard slab. Refrigerate for 30 minutes before adding filling. There is no hidden pre-bake, no oven temperature to remember, and no freezer step standing in for chilling.
Build a Fluffy Filling That Sets
Start with cold cream in a clean bowl and whip until the lifted beaters leave peaks that stand upright. The surface should still look smooth. Soft, slumping peaks are not enough support; grainy, separated cream has gone too far. Watch the cream more closely than the clock, especially with a powerful mixer.
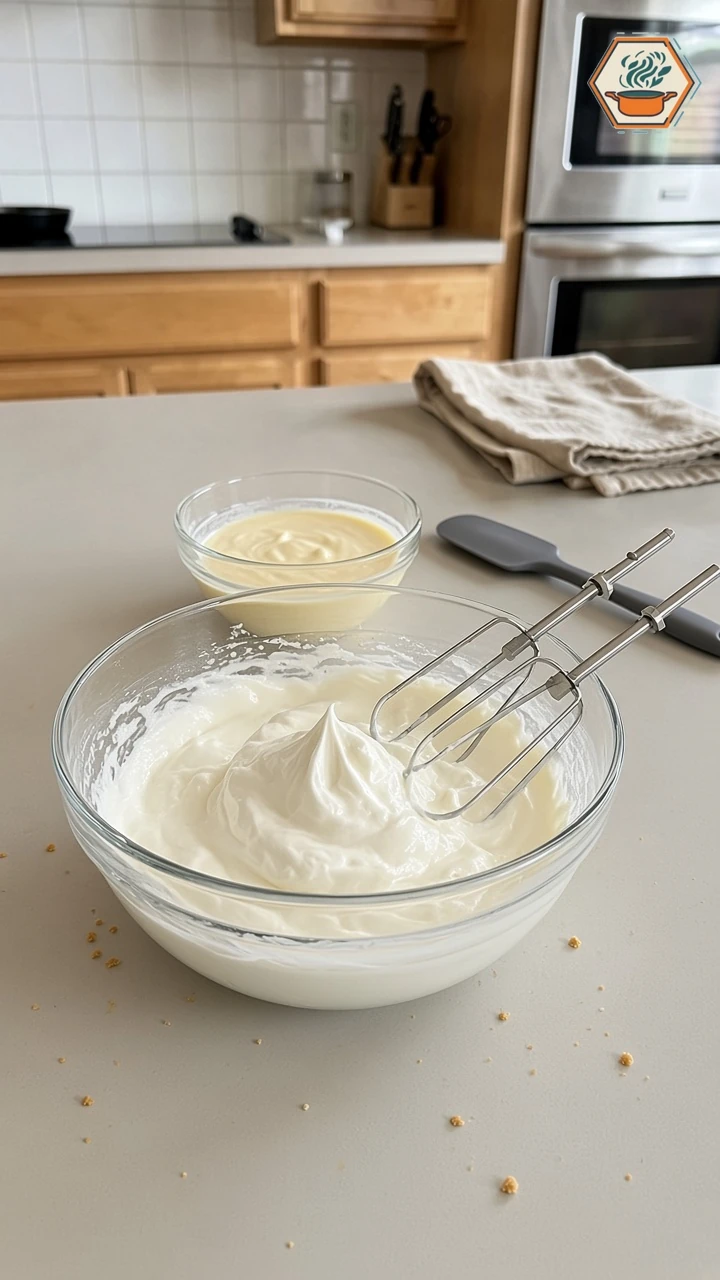
Beat the softened cream cheese with the powdered sugar until no visible lumps remain, then blend in the sour cream, vanilla, and lemon. Scrape the bottom of the bowl as well as the sides. Once the whipped cream is added, stop using high-speed mixing: use slow, sweeping folds instead of stirring in circles.
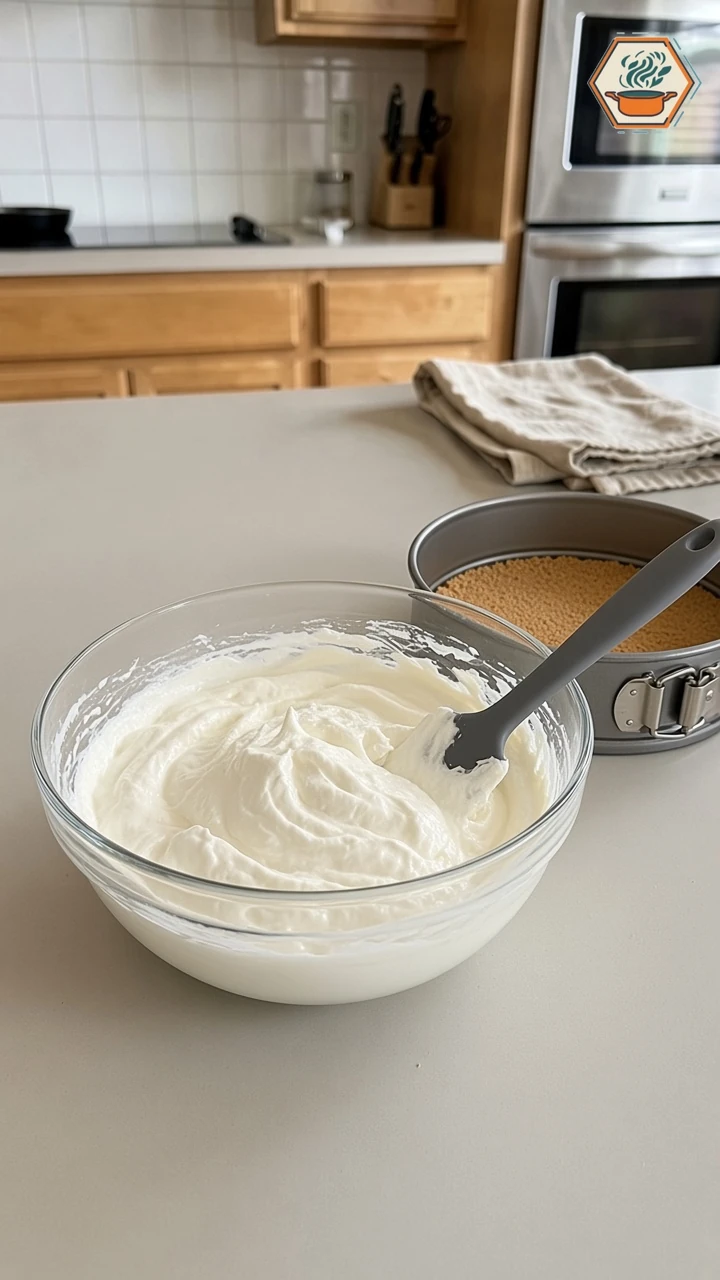
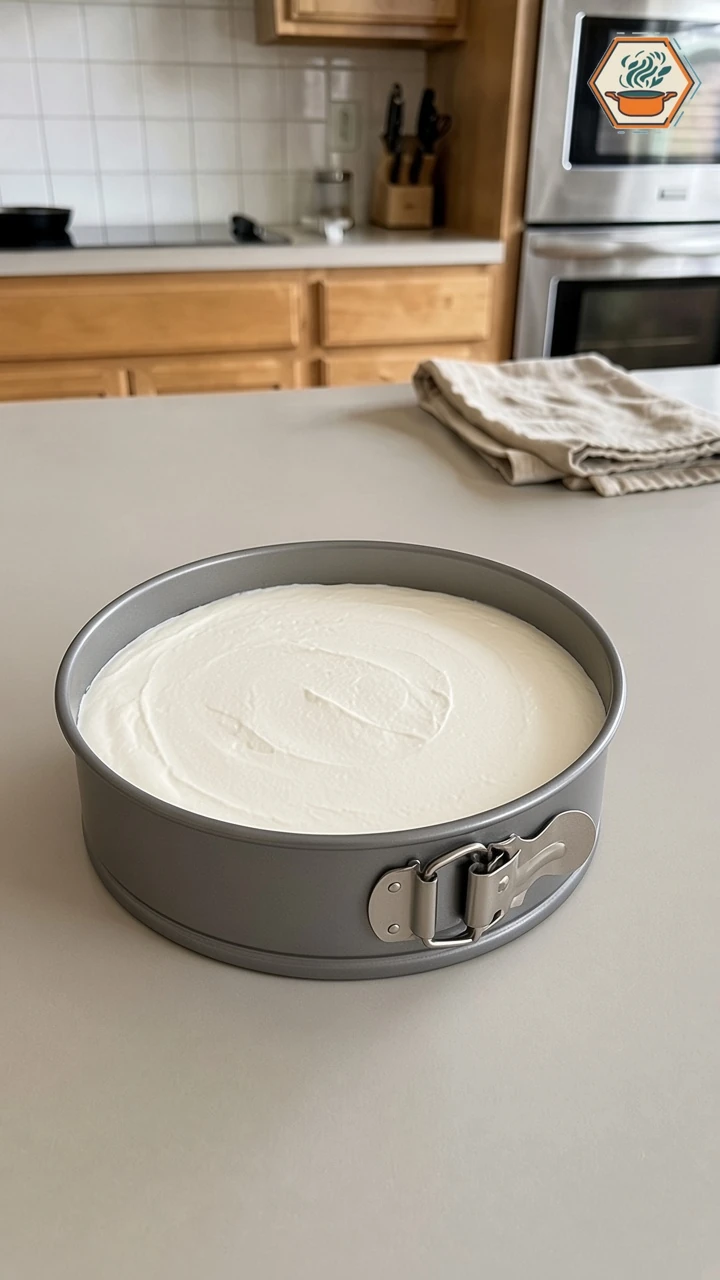
Spread the filling into the cold crust, reaching the edges so there are no large trapped gaps. An optional Wilton 9-inch angled spatula makes leveling easier, although a spoon works. The listed 9 inches is its overall length, not its blade length. Leave room above the filling for the berry layer.
Cover without letting the wrap touch the surface, and refrigerate for 12 hours. Keep the springform ring attached throughout setting. A chilled filling should feel firm enough to support a spoonful of cooled topping, not flow when the pan is moved gently. If it still seems loose, allow more refrigerator time rather than pretending a frozen edge means the center is ready.
Make the Homemade Strawberry Topping
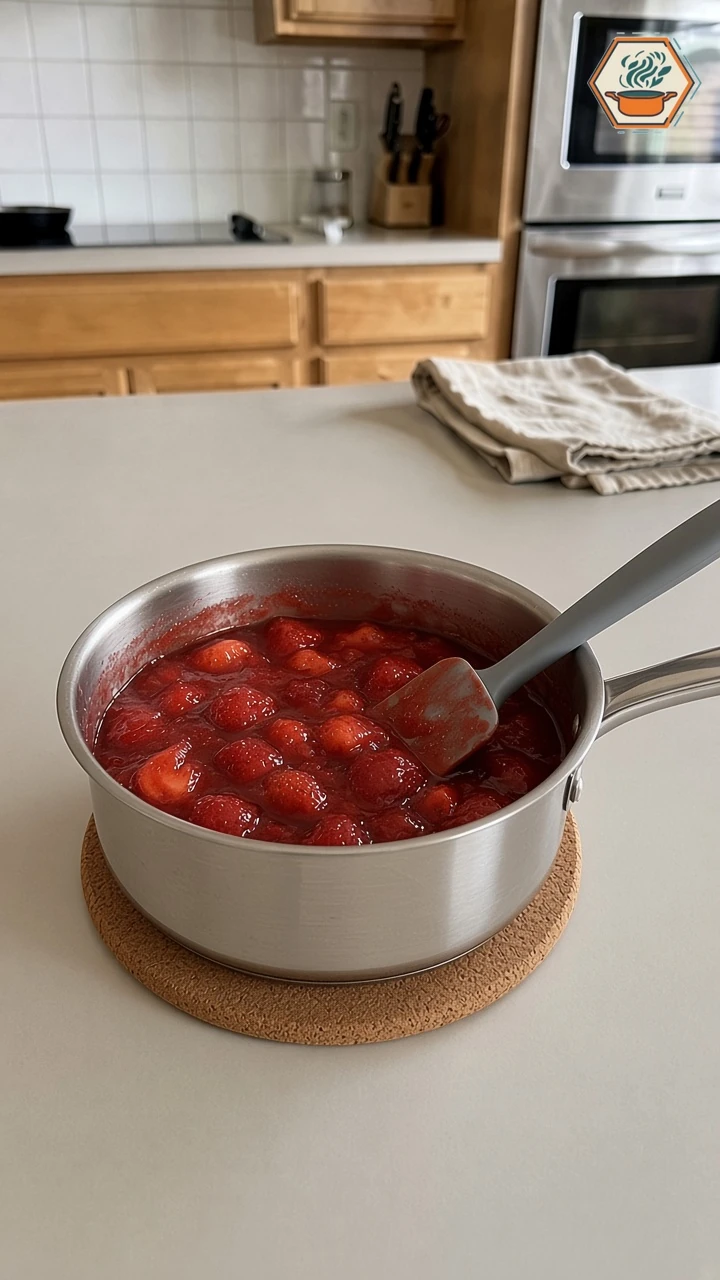
This topping is deliberately chunky: glossy red glaze around whole small berries and larger halves, not a smooth jam or a ring of raw strawberry slices. Cook gently so some pieces keep their shape. A small amount of mashed fruit supplies juice and color while the rest stays recognizable.
A Cuisinart 1.5-quart stainless saucepan provides enough space for the fruit and its bubbling juice; any similar nonreactive saucepan is fine. Stir along the bottom to avoid scorching. Dissolve the cornstarch in cool water separately before adding it, then simmer until the juice looks glossy and noticeably thickened.
The slurry-and-simmer method follows the principles in this established homemade strawberry topping guide. This version uses a generous fruit quantity for the round cake. Do not add extra water casually: berries already release plenty of juice, and a watery topping can run down into the crust.
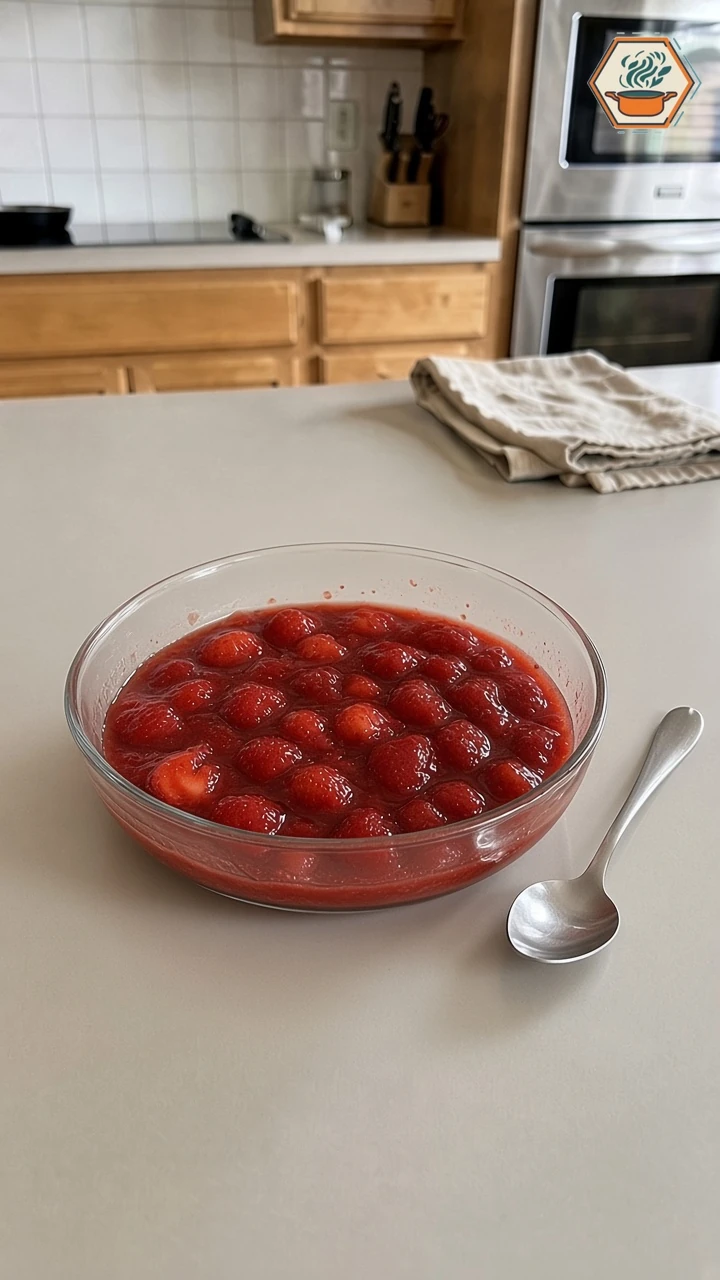
Transfer the cooked topping to a shallow heat-safe dish for faster cooling. Refrigerate promptly, using an ice-water bath first if helpful, and keep it separate during the overnight set. It must be fully cooled and refrigerator-cold before it goes on the cake. Never pour warm sauce over the delicate filling. Topping cooling happens during the long cheesecake chill, so it does not add another overnight wait.
Timing, Serving, and Safe Storage
Allow about 14 hours 55 minutes from refrigerated ingredients to serving: 45 minutes hands-on prep, 10 minutes cooking, and 14 hours additional time. The additional time includes about 1 hour for cream-cheese softening, 30 minutes for the crust, 12 hours for the filling, and a final 30-minute chill after topping. This is a conservative sequential plan; topping cooling fits inside the 12-hour set. If your ingredients soften faster, the elapsed time can be shorter.
Spoon on the cold topping with the ring still attached, spreading gently without pressing the fruit into the filling. Chill again, loosen the rim carefully with a thin non-scratching utensil, and unlatch it. Serve from the silver base rather than attempting a risky transfer. Cut 12 wedges with a clean knife, wiping it between cuts; a few crumbs on the plate are entirely normal.
Keep the cheesecake covered at 40°F or below and use within 3–4 days of preparation, counting any make-ahead days. The crust will soften beneath the fruit over time. For the clearest layers, make the cake the day before and add the separately chilled topping closer to serving. Dairy desserts should not sit on a warm buffet all afternoon.
Follow USDA leftover safety guidance: refrigerate perishables within 2 hours, or within 1 hour when the temperature is above 90°F. Those limits include preparation and serving exposure; discard cake that exceeds them. Freezing is not a setting method. For this untested berry-topped version, refrigerated storage is the recommended plan because thawing may change the fruit glaze and filling texture.
Troubleshooting and Frequently Asked Questions
Why is my filling too soft?
Common causes are spreadable cream cheese, underwhipped cream, rough folding, or too little refrigerator time. Chill longer before releasing the ring. If it will not hold a wedge, serve it in bowls while keeping it cold rather than promising a fix with extra sugar or uncooked starch.
Can I skip the homemade topping?
You can serve the plain cake with fresh berries, but it will not have the reference photo’s thick cooked strawberry layer. Do not swap in a thin syrup and expect the same appearance. For another fruit-forward option, browse our four-ingredient strawberry no-bake cheesecake; its ingredient structure is different, so follow that recipe separately.
Can I make individual portions?
Dessert cups avoid unmolding, but their yield and chilling needs will differ from this large cake. Our mini strawberry cheesecakes in cups is a better starting point than guessing how many glasses this batch fills. Keep every portion refrigerated until serving.
What else can I make without baking?
Try Woolworth cheesecake for a different chilled cheesecake style or no-bake peach cream dessert for another fruit-and-cream direction. Neither requires changing this recipe’s liquid balance. Keep this no-bake strawberry cheesecake simple first: a cold slice, a plain plate, and plenty of berries are enough.
No-Bake Strawberry Cheesecake Recipe Card
Use the measured recipe below for one 9-inch cake. The long chill is part of the recipe, not optional downtime.
Print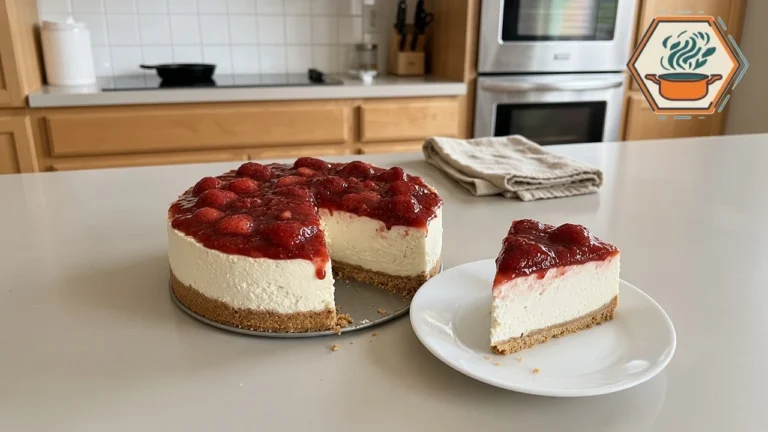
No-Bake Strawberry Cheesecake with Homemade Topping
A tall, fluffy vanilla cheesecake over a chilled graham cracker crust with a generous layer of chunky homemade strawberry topping. No oven, no eggs, and no gelatin; allow an overnight refrigerator set.
- Total Time: 14 hours 55 minutes
- Yield: 1 (9-inch) cheesecake; 12 slices
Ingredients
Chilled graham cracker crust• 2 cups (240 g) fine graham cracker crumbs• 3 tablespoons (38 g) packed light brown sugar• 1/2 cup (113 g) unsalted butter, melted and cooled until just warm• 1/8 teaspoon fine saltFluffy cheesecake filling• 32 ounces (907 g; four 8-ounce blocks) full-fat block cream cheese, softened until pliable but not warm• 1 cup (120 g) powdered sugar, sifted if lumpy• 1/4 cup (60 g) full-fat sour cream• 2 teaspoons pure vanilla extract• 1 tablespoon (15 ml) fresh lemon juice• 1 1/2 cups (360 ml) cold heavy whipping cream, at least 36% milk fatHomemade strawberry topping• 1 1/2 pounds (680 g) fresh strawberries, weighed after hulling; leave tiny berries whole and halve larger berries• 1/3 cup (67 g) granulated sugar• 1 tablespoon (15 ml) fresh lemon juice• 1 1/2 tablespoons (12 g) cornstarch• 2 tablespoons (30 ml) cool water
Instructions
1. Prepare ingredients and pan. Allow approximately 1 hour for the cream cheese to become pliable in a cool kitchen; use sooner if ready. Keep heavy cream refrigerated. Do not exceed safe room-temperature limits. Fasten the ring onto a 9-inch springform base, at least 3 inches deep. A parchment circle on the base is optional; serve on the base rather than sliding the cake off.
2. Press the no-bake crust. Stir crumbs, brown sugar, and salt together, breaking up lumps. Add the just-warm melted butter and stir until all crumbs are evenly moistened. Press into the bottom of the pan and only about 1/2 inch up the sides using a flat-bottomed cup. Refrigerate 30 minutes. Do not bake or freeze.
3. Whip the cold cream. With clean beaters and a clean bowl, whip the heavy cream on medium-high until smooth, stiff peaks stand when the beaters lift, approximately 3–5 minutes. Do not continue until grainy. Refrigerate the whipped cream while preparing the cream cheese mixture.
4. Make the filling. In a separate large bowl, beat softened cream cheese and powdered sugar until smooth, approximately 2–3 minutes, scraping the bowl. Beat in sour cream, vanilla, and lemon juice just until blended. Fold in the cold whipped cream in 3 additions with a silicone spatula, turning the bowl and lifting from the bottom. Stop when evenly combined and fluffy; do not beat at high speed after adding whipped cream.
5. Fill and chill. Spread filling over the cold crust without large gaps, smoothing the top and leaving about 1/2 inch headroom. Keep the ring attached. Cover without touching the filling and refrigerate at 40°F or below for 12 hours, preferably overnight. The filling must be set before topping. Do not use the freezer to force a set.
6. Cook the topping during that chill. Combine strawberries, granulated sugar, and lemon juice in a small nonreactive saucepan. Mash a few berries lightly to help release juice, leaving most whole or halved. Warm over medium-low heat, stirring, until juicy and gently simmering, about 5–7 minutes. Stir cornstarch and cool water together in a small cup until smooth; stir the slurry into the fruit. Simmer gently, stirring along the bottom, for 1–2 minutes until thickened and glossy, approximately 10 minutes stovetop time total. Avoid boiling vigorously or crushing all the fruit. Estimated yield: about 2–2 1/4 cups, depending on berry size and evaporation.
7. Cool topping separately. Transfer to a shallow heat-safe dish. Cool promptly, using an ice-water bath if helpful, and refrigerate within 2 hours of cooking. Loosely cover while cooling, then cover once cold. Allow approximately 1–2 hours to become completely refrigerator-cold; this happens during the cheesecake’s 12-hour chill and is not added again to elapsed time. Never put warm topping on the filling.
8. Top the set cheesecake. When the cheesecake has chilled 12 hours and the topping is cold, spoon the topping gently over the cake with the ring still attached. Keep the layer within the pan; if your berries yield more than fits, reserve the excess for serving. Refrigerate another 30 minutes. The fruit layer will remain spoonable, not a solid gelatin slab.
9. Release and serve. Loosen the edge carefully with a thin non-scratching utensil, unlatch the springform ring, and lift it away. Serve from the base. Cut into 12 wedges with a sharp knife, wiping clean between cuts. Keep cake refrigerated until serving and return leftovers promptly to the refrigerator.
Notes
• Development status: Original measured formulation informed by established methods, developed to accompany the supplied reference photo. Not kitchen-tested by RecipesMind. Times, topping yield, cake height, and final texture are estimates, not guarantees; use the stated visual cues and add refrigerator time if needed. Reference-guided images illustrate the intended look, not a documented test batch.
• Time accounting: 45 minutes active prep (including measuring, mixing, and finishing), 10 minutes stovetop cooking, and 14 hours additional softening/chilling = 14 hours 55 minutes in a conservative sequential schedule. Additional time is 1 hour cream-cheese softening + 30 minutes crust chill + 12 hours filling set + 30 minutes final chill. Topping cooling overlaps the 12-hour filling chill. Starting with already pliable cream cheese shortens elapsed time. More chilling may be necessary.
• Cream cheese and cream: Use US full-fat block cream cheese, not whipped spread, reduced-fat cream cheese, or a tub spread. Heavy cream must stay cold and whip to firm peaks. Do not substitute milk, canned spray cream, or extra sour cream for the whipping cream. Those swaps have not been validated for a freestanding cake.
• Pan: One 9-inch pan at least 3 inches deep. Actual whipped volume varies; never mound filling above the pan rim. Reserve a little filling separately in a refrigerated cup if your pan lacks headroom. A 10-inch pan makes a lower cake; this recipe does not give validated timing or yield for other formats.
• Strawberries: Fresh firm berries give the closest whole/halved look. Frozen unsweetened berries may be used without thawing but soften more and may need longer cooking to achieve a thick spoonable sauce. Cook by consistency, cool fully, and keep excess sauce off the cake if too loose. Do not use raw flour or dry cornstarch to patch a runny finished filling.
• Food safety: Use pasteurized dairy. Keep refrigerator at 40°F or below. Limit cumulative time dairy is unrefrigerated to 2 hours, or 1 hour above 90°F; discard cake exceeding those limits. Store covered and use within 3–4 days of preparation, including any make-ahead days. Refrigerate cooked topping promptly in a shallow container. A longer shelf life from a different cheesecake recipe is not adopted here.
• Make ahead: Prepare the cake and topping the day before; store separately and covered in the refrigerator. Add cold topping after the filling sets, then chill another 30 minutes before serving. The fruit will soften the crumb base as it sits. Refrigerator storage is recommended for this untested topped version; freezing is not a shortcut to setting.
• Nutrition and video are intentionally blank. No fabricated calories, test results, reviews, or ratings.
- Prep Time: 45 minutes
- Additional softening/chilling: 14 hours
- Cook Time: 10 minutes
- Category: Dessert
- Method: No-Bake / Refrigerating; stovetop topping
- Cuisine: American