
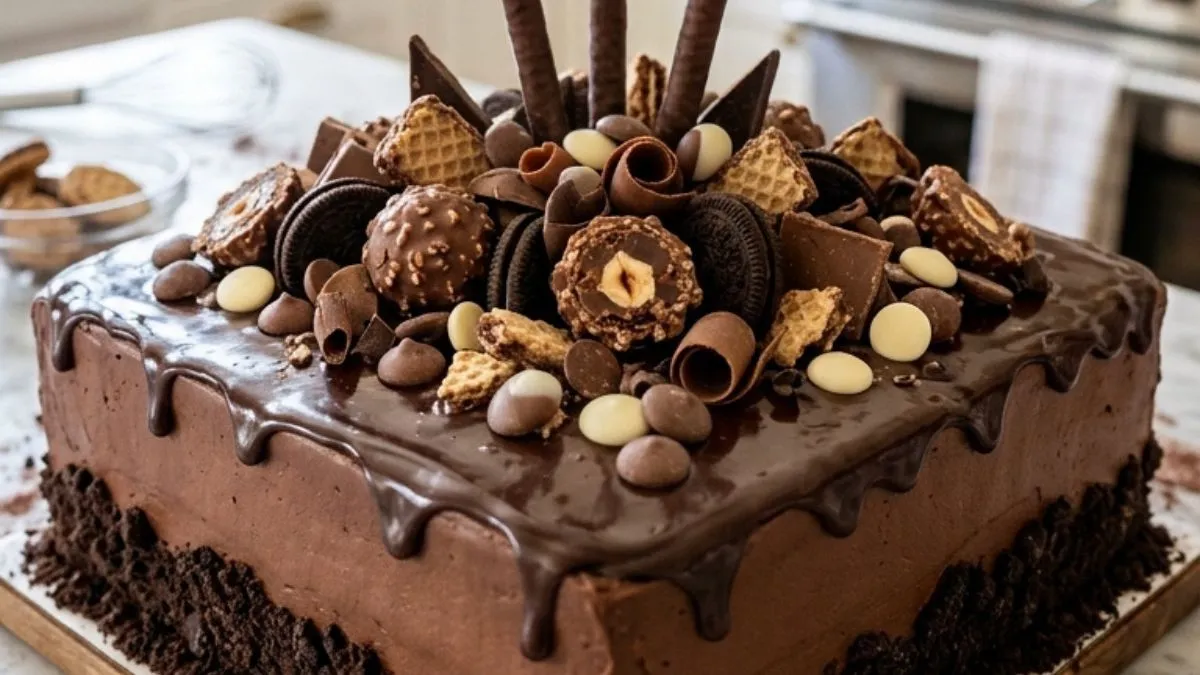
There are chocolate cakes, and then there are cakes that make everyone stop talking when they reach the table. This Chocolate Candy Crunch Overload Cake belongs to the second group.
The first time I pictured this cake, I did not want another towering bakery-style drip cake. I wanted something wider, slightly lower, and unapologetically chocolate-heavy. The square shape mattered. So did the glossy top, the casual pile of candy, and that thick dark cookie border running around the bottom.
The result is a three-layer chocolate cake with a soft crumb, creamy chocolate buttercream, glossy semisweet ganache, chocolate-hazelnut truffles, wafer pieces, sandwich cookies, chocolate drops, and plenty of crushed dark cookies.
Coffee plays a quiet but useful role in the batter. It can deepen chocolate flavor without necessarily making the finished cake taste like a cup of coffee, a principle also discussed by King Arthur Baking’s guide to coffee in chocolate cake. And because chocolate cake can be harder to judge visually than a pale cake, it helps to check several signs of doneness rather than trusting color alone. King Arthur Baking’s cake doneness guide explains why spring-back, edges pulling slightly from the pan, and a clean tester are useful clues.
This recipe is rich, but texture keeps it interesting. You get tender cake first. Then soft buttercream. Next comes silky ganache. Finally, the cookies, wafers, truffles, and chocolate pieces add the crunch.
Affiliate disclosure: As an Amazon Associate I earn from qualifying purchases. This article may contain affiliate links to kitchen tools I find useful for preparing this recipe.
jump to
Why This Chocolate Candy Crunch Overload Cake Works
A heavily decorated cake can easily become too sweet or too dense. The trick is giving every layer a job.
The cocoa cake provides the main chocolate flavor. Buttermilk contributes acidity and moisture. Vegetable oil keeps the crumb soft even after refrigeration. Hot coffee brings out the cocoa notes.
This style of thin chocolate batter is normal. Do not keep adding flour because the batter looks more fluid than vanilla cake batter. Other established chocolate cake formulas also produce relatively thin batter.
The buttercream has another job. It creates structure between the layers and gives the ganache a smooth surface to sit on.
Then there is the crunch.
Rather than hiding crunchy ingredients inside the cake, most of them stay outside. That helps them remain crisp and creates the distinctive appearance we want.
For more chocolate baking inspiration, you can also read our guide to mastering caramelized sugar when you want to add another dessert technique to your repertoire.
Ingredients You’ll Need
For the chocolate cake
- 2½ cups (about 300 g) all-purpose flour
- ¾ cup (about 65 g) unsweetened cocoa powder
- 2 cups (400 g) granulated sugar
- 2 teaspoons baking soda
- 1 teaspoon baking powder
- ½ teaspoon fine salt
- 3 large eggs, at room temperature
- 1¼ cups (300 ml) buttermilk, at room temperature
- ¾ cup (180 ml) neutral vegetable oil
- 2 teaspoons vanilla extract
- 1 cup (240 ml) hot freshly brewed coffee
Use coffee that is hot but not aggressively boiling when it goes into the batter.
For the chocolate buttercream
- 1½ cups (340 g) unsalted butter, softened
- ¾ cup (65 g) unsweetened cocoa powder
- 5 cups (about 600 g) powdered sugar, sifted if lumpy
- ⅓ to ½ cup (80–120 ml) heavy cream
- 2 teaspoons vanilla extract
- ¼ teaspoon fine salt
Do not pour in all the cream immediately. Butter temperature, cocoa, and powdered sugar can change the consistency. Start with less and add more by the tablespoon.
For the glossy ganache
- 10 oz (285 g) good-quality semisweet chocolate, finely chopped
- 1 cup (240 ml) heavy cream
Chocolate matters here. Chocolate chips may contain ingredients designed to help them retain their shape. A good semisweet baking chocolate usually gives a smoother ganache.
For the candy crunch topping
- 6–8 chocolate-hazelnut truffles
- 4–6 chocolate-covered wafer sticks
- Extra wafer pieces
- 5–7 small chocolate sandwich cookies
- Milk chocolate drops
- White chocolate drops
- Chocolate curls or broken chocolate pieces
- 2 cups crushed dark chocolate sandwich cookies or chocolate wafers
Crush some cookies finely for the base. Keep the rest coarse for the top. That difference in texture makes the finished cake look much closer to the reference style.
Equipment That Actually Helps
You do not need a professional pastry kitchen. Still, a few pieces of equipment make a noticeable difference.
Three matching 8-inch square aluminum cake pans are particularly useful. Matching pans give the layers similar dimensions and baking times. This is one purchase I would prioritize for anyone who regularly makes layer cakes.
A quality bowl-lift stand mixer is a larger investment, but it makes more sense for frequent bakers than another collection of small gadgets. A high-capacity mixer is useful here because five cups of powdered sugar plus butter and cocoa create a substantial batch of frosting. See 7-quart bowl-lift stand mixers on Amazon.
I also recommend a digital kitchen scale. Three layers look much cleaner when each pan contains nearly the same amount of batter. Instead of judging by eye, weigh the filled pans. See digital baking scales on Amazon.
Finally, serious home bakers may appreciate an instant-read thermometer. It can be useful throughout the kitchen, although cake temperature should not be treated as the only test of doneness. See premium instant-read kitchen thermometers on Amazon.
These are deliberately tools with uses far beyond one chocolate cake.
Prepare the Square Cake Pans Properly
Heat the oven to 350°F (175°C). Place a rack near the center.
Grease three 8-inch square pans lightly. Cut parchment squares to fit the bottoms. Place them inside and grease the parchment lightly as well.
Do not skip the parchment.
This cake is moist, and trying to release a warm, delicate square layer from an unlined pan can end badly.
If your oven runs unevenly, avoid placing one pan directly beneath another. Bake on the same rack when space permits. If necessary, bake in batches rather than overcrowding the oven.
Make the Chocolate Cake Batter
In a large bowl, whisk together:
- Flour
- Cocoa powder
- Sugar
- Baking soda
- Baking powder
- Salt
Spend about 30 seconds whisking. Cocoa can hide small lumps.
In another bowl, whisk the eggs until combined. Add buttermilk, vegetable oil, and vanilla.
Pour the wet mixture into the dry ingredients.
Whisk gently until most dry patches disappear. Do not beat the batter for several minutes.
Now slowly add the hot coffee while whisking.
The batter will become noticeably thinner. That is expected.
Scrape the bottom and sides of the bowl with a flexible spatula. Flour pockets often hide near the bottom.
Divide the batter equally among the three prepared pans. A scale makes this easy.
Bake for 27–32 minutes, checking toward the early end of the range.
The cakes are ready when the centers spring back after a gentle touch and a thin tester inserted into the center comes out clean or with a few moist crumbs rather than wet batter. Those visual and tactile checks are particularly useful for dark chocolate cakes.
Let the cakes cool in their pans for about 10–15 minutes. Carefully turn them onto wire racks, remove the parchment, and allow them to cool completely.
Never frost warm cake.
Make a Stable Chocolate Buttercream
Beat the softened butter for about 3 minutes until creamy and slightly lighter.
Add the cocoa and mix at low speed.
Add the powdered sugar gradually rather than dumping in all five cups. Alternate some of the sugar with small additions of cream.
Add vanilla and salt.
Once incorporated, beat until smooth and fluffy.
You are looking for buttercream that spreads easily but still holds a ridge when you lift the spatula.
If it is stiff, add heavy cream one tablespoon at a time.
If it becomes too soft, add a little powdered sugar or chill it for 10 minutes.
For more general baking ideas, our banana bread preparation guide covers several useful habits for working with batters and measuring ingredients.
Stack the Cake Without Losing the Square Shape
If the cooled layers have pronounced domes, trim them carefully with a serrated knife.
Put the first layer on a square cake board or serving plate.
Spread an even layer of buttercream across it. Do not make the filling excessively thick, or the upper layers may slide.
Add the second cake and repeat.
Place the final layer on top, ideally upside down. The flat bottom of the baked layer gives you a cleaner top surface.
Apply a very thin coating of buttercream across the entire cake. This is the crumb coat.
Chill for 20–30 minutes.
The buttercream should feel firm before you continue.
Apply the final coat. Smooth the sides while preserving the clear square corners. Do not chase absolute perfection. Subtle spatula marks help retain the homemade look of this cake.
How to Get That Glossy Chocolate Ganache
Finely chop the semisweet chocolate and place it in a heatproof bowl.
Heat the cream until steaming and just beginning to show bubbles around the edge. Pour it over the chocolate.
Leave it untouched for 2–3 minutes.
Then stir slowly from the center outward until glossy.
Here comes the detail that can save the entire appearance of your cake:
Do not immediately pour hot ganache over cold buttercream.
Let the ganache cool and thicken first.
Test a small amount against the edge of the cake. It should move downward slowly and stop before reaching the bottom.
Too warm? Wait.
Too thick? Warm it very briefly.
The goal is a glossy top with short and medium irregular drips, not chocolate flowing all the way down every side.
Build the Signature Candy Mound
Spread ganache over the entire top.
While it is still slightly tacky, start decorating.
Place the tallest wafer sticks toward the rear-center. Use different heights and slight angles rather than lining them up symmetrically.
Build outward with:
- Chocolate-hazelnut truffles
- Sandwich-cookie halves
- Broken wafers
- Milk chocolate drops
- White chocolate drops
- Chocolate curls
Keep the arrangement concentrated through the center.
The cake should still have visible ganache around the mound. Covering every inch would make the design look cluttered instead of abundant.
Think controlled mess.
That is the visual character of this cake.
Do Not Skip the Dark Cookie-Crumb Border
This detail changes the whole cake.
Crush enough dark cookies to make roughly 1½ cups of fine-to-medium crumbs for the base. Reserve the remaining crumbs for the top.
The cake’s buttercream should be cool but not rock hard. If necessary, spread a very thin fresh layer of buttercream around the bottom 1–1½ inches.
Cup cookie crumbs in your hand and gently press them against the lower sides.
Rotate the cake and repeat until all four sides have a thick dark border.
Place a tray or parchment underneath while doing this. It catches the considerable amount of crumbs that will fall.
Press a little more crumb mixture around the cake board immediately beside the cake. This produces that rustic, almost overflowing cookie-crust appearance.
If you enjoy texture-focused desserts, see our guide to the secret to crunchy cookies.
The Most Common Mistakes
The biggest problem is decorating too early.
Warm layers melt buttercream. Warm ganache melts the final frosting. Soft buttercream cannot support heavy candy.
Patience is part of the recipe.
Also watch for these problems:
- Dry cake: Begin checking before the maximum baking time.
- Dense cake: Measure flour carefully and do not overmix after adding it.
- Sliding layers: Chill the crumb-coated cake before final frosting.
- Ganache running to the bottom: It was probably applied too warm or too fluid.
- Ganache barely moving: It cooled too much.
- Cookie border falling off: Press it into tacky buttercream, not a dry chilled surface.
- Soggy wafers: Add crunchy decorations close to serving when possible.
- Collapsed decoration: Put heavy truffles directly against the ganache or stable candy pieces instead of balancing them on fragile wafers.
Make-Ahead and Storage Tips
This cake becomes much easier when you divide the work.
Bake the layers one day ahead. Once completely cool, wrap each layer tightly.
The buttercream can also be prepared ahead and refrigerated. Bring it back toward cool room temperature and beat it briefly before using.
For the best crunch, add wafers and exposed cookie pieces on the day you plan to serve the cake.
Once decorated, refrigerate the cake if necessary for stability. However, chocolate buttercream and cake usually taste better after losing the refrigerator chill.
Take it out about 30–60 minutes before serving, depending on room temperature.
The buttercream should soften slightly while the structure remains stable.
Yield: 16–20 servings
Prep time: 1 hour 15 minutes
Bake time: 27–32 minutes
Cooling and decorating: about 1 hour 30 minutes
Total time: about 3 hours 15 minutes
FAQs About Chocolate Candy Crunch Overload Cake
Can I make this cake without coffee?
Yes. Replace the coffee with the same quantity of hot water. Coffee adds complexity to the chocolate flavor, while water lets the cocoa flavor remain more direct.
Why is my chocolate cake batter so thin?
That is normal for this recipe. The hot coffee increases the liquid content, creating a pourable batter. Do not compensate by adding extra flour unless you have actually measured an ingredient incorrectly.
Can I make this cake in round pans?
Technically, yes. However, you will lose one of its defining visual features. The square shape is part of the Chocolate Candy Crunch Overload Cake design, so three 8-inch square pans are preferred.
How do I stop ganache drips from running down the entire cake?
Allow the ganache to cool before applying it. Test one drip first. If it races toward the cake board, wait several more minutes before trying again.
Can I use chocolate chips for ganache?
They can work, but finely chopped semisweet baking chocolate is my preferred choice for this finish. The goal is a fluid, glossy ganache that becomes thick enough to produce controlled drips.
How do I keep the candy topping crunchy?
Decorate as close to serving time as practical. Wafer pieces and exposed cookies slowly absorb moisture from frosting, ganache, and the refrigerator.
Can I freeze the cake layers?
Yes. Cool them completely, wrap them very well, and freeze them without frosting. Thaw while wrapped so condensation forms primarily on the wrapping rather than directly on the cake.
What makes this cake different from a regular chocolate drip cake?
The proportions and decoration are different. This cake is lower, wider, and square. Its ganache is glossy but intentionally irregular. The candy forms a loose central mound rather than a formal border. Most importantly, a thick dark cookie-crumb crust surrounds the entire base.
Print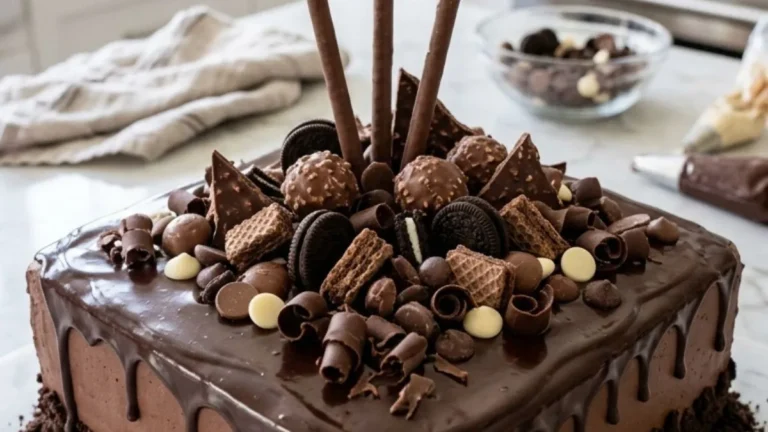
Chocolate Candy Crunch Overload Cake
A rich three-layer square chocolate cake covered with creamy chocolate buttercream and glossy semisweet ganache, then piled with chocolate-hazelnut truffles, crunchy wafers, sandwich cookies, chocolate drops, and a thick dark cookie-crumb border.
- Total Time: 3 hours 15 minutes
- Yield: 16–20 servings
Ingredients
Chocolate Cake
- 2½ cups (300 g) all-purpose flour
- ¾ cup (65 g) unsweetened cocoa powder
- 2 cups (400 g) granulated sugar
- 2 teaspoons baking soda
- 1 teaspoon baking powder
- ½ teaspoon fine salt
- 3 large eggs, room temperature
- 1¼ cups (300 ml) buttermilk, room temperature
- ¾ cup (180 ml) neutral vegetable oil
- 2 teaspoons vanilla extract
- 1 cup (240 ml) hot freshly brewed coffee
Chocolate Buttercream
- 1½ cups (340 g) unsalted butter, softened
- ¾ cup (65 g) unsweetened cocoa powder
- 5 cups (600 g) powdered sugar
- ⅓–½ cup (80–120 ml) heavy cream, as needed
- 2 teaspoons vanilla extract
- ¼ teaspoon fine salt
Chocolate Ganache
- 10 oz (285 g) semisweet baking chocolate, finely chopped
- 1 cup (240 ml) heavy cream
Chocolate Candy Crunch Topping
- 6–8 chocolate-hazelnut truffles
- 4–6 chocolate-covered wafer sticks
- Additional chocolate wafer pieces
- 5–7 small chocolate sandwich cookies
- Milk chocolate drops
- White chocolate drops
- Chocolate curls or broken chocolate pieces
- 2 cups crushed dark chocolate cookies, divided
Instructions
- Prepare the pans. Preheat the oven to 350°F (175°C). Lightly grease three 8-inch square cake pans. Line their bottoms with parchment paper and lightly grease the parchment.
- Mix the dry ingredients. In a large bowl, whisk the flour, cocoa powder, granulated sugar, baking soda, baking powder, and salt for about 30 seconds.
- Mix the wet ingredients. In a separate bowl, whisk the eggs, buttermilk, vegetable oil, and vanilla until evenly combined.
- Make the batter. Pour the wet mixture into the dry ingredients. Mix gently until most dry streaks disappear. Slowly whisk in the hot coffee. The finished batter should be smooth and fairly thin.
- Divide the batter. Divide it evenly between the three prepared pans. For the most even layers, weigh the filled pans with a digital kitchen scale.
- Bake. Bake for 27–32 minutes. Start checking at 27 minutes. The centers should spring back lightly when touched, and a tester inserted in the middle should come out clean or with a few moist crumbs.
- Cool completely. Leave the cakes in their pans for 10–15 minutes. Turn them onto wire racks, remove the parchment, and cool completely before frosting.
- Prepare the buttercream. Beat the softened butter for about 3 minutes. Add the cocoa powder. Gradually add the powdered sugar, alternating with small amounts of heavy cream. Add vanilla and salt. Beat until fluffy but stable. Add additional cream 1 tablespoon at a time only if needed.
- Assemble the layers. Level pronounced domes if necessary. Place the first layer on a square cake board. Spread an even layer of buttercream over it. Repeat with the second layer. Place the third layer on top, preferably upside down for a flatter surface.
- Crumb coat. Spread a thin layer of buttercream over the top and all four sides. Refrigerate for 20–30 minutes, until firm.
- Apply the final frosting. Cover the chilled cake with the remaining chocolate buttercream. Smooth the sides while keeping the square corners visible. Slight spatula marks are fine.
- Prepare the ganache. Place finely chopped semisweet chocolate in a heatproof bowl. Heat the heavy cream until steaming with small bubbles appearing around the edge. Pour it over the chocolate. Leave untouched for 2–3 minutes, then stir gently from the center outward until smooth and glossy.
- Test the ganache. Allow it to cool until it has thickened. Test one drip on the cake. It should travel slowly down the side and stop before reaching the base. If it runs quickly, let the ganache cool longer.
- Cover the top. Spread ganache across the top and gently encourage several short and medium drips over the edges. Keep the drips irregular rather than perfectly spaced.
- Build the chocolate mound. While the ganache remains tacky, position the tallest wafer sticks toward the rear-center. Add truffles, sandwich-cookie pieces, broken wafers, milk and white chocolate drops, and chocolate pieces around them. Keep some glossy ganache visible.
- Create the cookie border. Use about 1½ cups of crushed dark cookies for the base. If the chilled buttercream is too dry for crumbs to stick, spread a very thin fresh layer of buttercream over the bottom 1–1½ inches. Press the crumbs around all four sides to form a thick dark border.
- Finish the cake. Scatter some of the remaining coarse cookie crumbs across the ganache and around the base. Chill only until the cake and decorations are stable.
- Serve. For better texture and flavor, remove the cake from the refrigerator about 30–60 minutes before serving. Cut into 16–20 portions.
Notes
- Do not add extra flour because the batter looks thin. The fluid consistency is intentional.
- All refrigerated cake ingredients should preferably be close to room temperature before mixing.
- Do not frost warm cake layers.
- Add heavy cream to the buttercream gradually. You may not need the full ½ cup.
- Finely chopped semisweet baking chocolate generally gives the ganache a smoother finish than shape-holding chocolate chips.
- Never pour very hot ganache directly onto chilled buttercream.
- Test one ganache drip before covering the entire cake.
- Put the tallest wafers toward the back so the cake keeps the same visual identity as the reference.
- Add exposed wafers as close to serving as practical for better crunch.
- Do not omit the thick cookie-crumb base. It is part of the signature appearance of this cake.
- Candy brands and sizes vary, so topping quantities can be adjusted slightly.
- Nutrition is an estimate and changes according to the exact candies, cookies, chocolate, buttermilk, cream, and serving size used.
- Prep Time: 1 hour 15 minutes
- Additional Time / Cooling & Decorating: 1 hour 30 minutes
- Cook Time: 30 minutes
- Category: Dessert
- Method: Baking
- Cuisine: American-inspired
Final Baking Notes
The appeal of this Chocolate Candy Crunch Overload Cake is not perfect piping or flawless symmetry.
It is contrast.
Soft chocolate cake meets silky buttercream. Glossy ganache meets rough cookie crumbs. Clean square sides meet a deliberately chaotic pile of candy.
That is why I would resist making the decoration too precise.
Keep the square silhouette clean. Keep the chocolate frosting smooth enough to look intentional. Let a handful of ganache drips develop naturally. Then give the center some personality with tilted wafers, truffles, broken cookies, chocolate drops, and scattered crumbs.
And do not forget that final dark cookie border.
It is not an afterthought. It is one of the details that turns this from another chocolate layer cake into a recognizable Chocolate Candy Crunch Overload Cake.