
Some recipes start with a long shopping list. This 2-Ingredient White Chocolate Fudge starts with two packages from the pantry and ten minutes in the kitchen. White chocolate chips melt into vanilla frosting to create thick, creamy fudge that firms in the refrigerator. There is no candy thermometer, boiling sugar syrup, or oven involved.
The simplicity is what makes this recipe interesting, but the details still matter. White chocolate can overheat quickly, and different white baking chips can behave differently because their formulations vary. True white chocolate contains cocoa butter as part of its composition, according to the FDA standard of identity for white chocolate. That difference matters when you are melting it and trying to get a smooth, firm result.
This frosting-based method is also a recognized shortcut for making fudge. Other tested versions pair store-bought frosting with white baking chips and refrigerate the mixture until set. The proportions can vary according to the type of white chocolate used. For more easy cooking ideas, you can also visit RecipesMind and browse recipes built around practical home-kitchen methods.
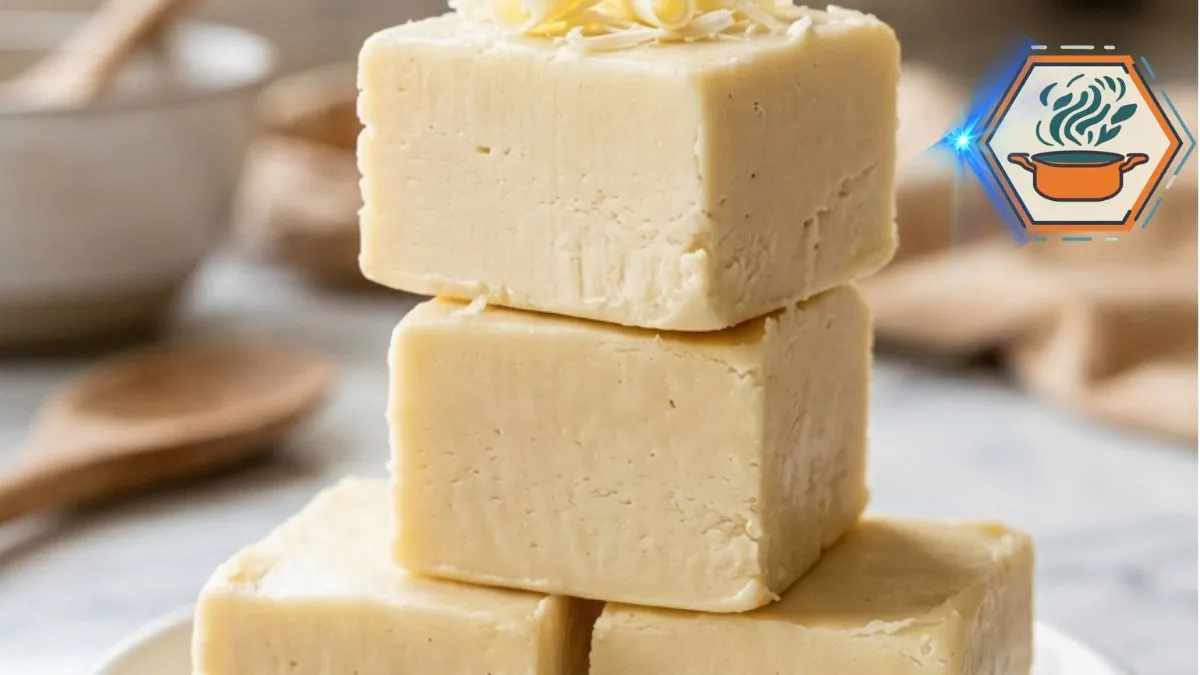
The first time you see the finished squares, they look far more complicated than they really are. They are pale, thick, creamy, and easy to stack. Add a few delicate white chocolate curls and they become the kind of homemade candy that looks right at home on a holiday dessert tray.
The secret isn’t adding more ingredients. It is controlling the heat, choosing the right chips, mixing thoroughly, and giving the fudge enough time to become firm before cutting it.
Affiliate disclosure: As an Amazon Associate I earn from qualifying purchases. This article may contain affiliate links to kitchen tools I find useful for preparing this recipe.v
jump to
Why This 2-Ingredient White Chocolate Fudge Works
Traditional fudge can involve cooking sugar to a specific temperature. This recipe takes a very different route.
The white chocolate provides much of the structure and rich flavor. Vanilla frosting contributes sweetness and helps create the soft, creamy consistency. Once combined, the mixture becomes considerably thicker. Refrigeration then helps it become firm enough to cut.
It is a useful recipe for beginners because there are fewer variables to control.
You get:
- About 10 minutes of preparation.
- No oven time.
- No candy thermometer.
- One 8×8-inch pan.
- 36 small pieces.
- A recipe that can be prepared ahead.
- Plenty of room for optional toppings.
There is one important point, though. Two ingredients does not mean that technique is irrelevant.
White chocolate dislikes excessive heat. If you microwave it for too long, it may become thick, grainy, or scorched. Short heating intervals are much safer than one long blast. Other frosting-fudge recipes similarly recommend controlled microwave heating rather than aggressively heating the chocolate.
The Two Ingredients You Need
For the basic fudge, use:
- 16 oz (454 g) white chocolate chips
- 16 oz (454 g) prepared vanilla frosting
That’s the entire base recipe.
For the appearance shown in our recipe inspiration, you can optionally add:
- A small pinch of flaky sea salt.
- White chocolate curls or shavings.
Those toppings are optional, so the fudge itself remains a true two-ingredient recipe.
White chocolate chips
This is the ingredient worth choosing carefully.
Not every bag labeled as white baking chips has exactly the same composition. Some contain cocoa butter, while other white morsels use different fats. A published frosting-fudge recipe even adjusts the quantity depending on whether pure white chocolate or confectionery-style morsels are being used.
For repeatable results, use the same brand once you find one that melts smoothly and sets well.
Vanilla frosting
Use prepared, ready-to-spread vanilla frosting, not dry frosting mix.
A standard tub around 16 ounces is ideal for this version. Avoid whipped frosting for your first attempt. Its additional air can change the final density.
The goal is the compact, rich texture visible in the finished squares.
Equipment That Makes the Recipe Easier
You do not need specialized candy equipment.
A few basic tools make the process cleaner:
- 8×8-inch square baking pan.
- Parchment paper.
- Microwave-safe mixing bowl.
- Silicone spatula.
- Sharp knife.
- Measuring scale if your packages differ in size.
An 8×8-inch pan is particularly useful because it produces the thick squares pictured here. A larger pan spreads the same amount of fudge into a thinner layer.
For easy removal, parchment paper is one tool I would not skip.
Amazon option:8×8-inch square baking pan
Leave parchment extending beyond two opposite sides of the pan. Those paper “handles” let you lift the entire chilled block out without digging around its edges.
Amazon option:Parchment paper for baking
How to Make 2-Ingredient White Chocolate Fudge
Prep time: 10 minutes
Cooking time: 0 minutes
Chilling time: At least 2 hours
Yield: About 36 small squares
Ingredients
- 16 oz white chocolate chips
- 16 oz vanilla frosting
- Pinch of flaky sea salt, optional
- White chocolate curls, optional
Step 1: Prepare the pan
Line an 8×8-inch baking pan with parchment paper.
Cover the bottom and sides where possible. Leave some parchment hanging over two sides.
This small step makes removal much easier later.
Step 2: Melt the white chocolate slowly
Put the white chocolate chips into a completely dry, microwave-safe bowl.
Microwave for 20 seconds.
Remove the bowl and stir.
Continue heating in 20-second intervals, stirring thoroughly after every interval. As the chips begin to melt, reduce the final heating intervals if necessary.
Stop heating when only a few tiny pieces remain. Continue stirring and let the residual heat finish the job.
This matters because white chocolate is easy to overheat.
A microwave-safe glass bowl with enough room for vigorous stirring makes the process much easier.
Amazon option:Microwave-safe glass mixing bowl
Step 3: Warm the frosting
Remove the lid and any foil seal from the frosting container.
Transfer the frosting to a microwave-safe container if its original packaging is not explicitly microwave-safe.
Warm it for approximately 15–20 seconds.
You are not trying to make it hot. It only needs to become softer and easier to combine with the chocolate.
Step 4: Combine immediately
Pour the softened frosting into the melted white chocolate.
Stir steadily with a silicone spatula until no streaks remain.
At first, the mixture may look loose. Keep mixing. It should become smooth, glossy, and noticeably thick.
Scrape the sides and bottom of the bowl several times. Hidden streaks of frosting can otherwise remain underneath the mixture.
Amazon option:Heat-resistant silicone spatula
Step 5: Add salt if desired
For a less one-dimensional sweetness, add a small pinch of flaky sea salt.
Do not add much. White chocolate and vanilla frosting are already strongly flavored and sweet.
The salt should stay in the background.
Step 6: Fill the pan
Immediately transfer the fudge mixture to your lined pan.
It begins thickening as it cools, so do not leave it sitting in the bowl.
Push the mixture into all four corners. Then smooth the top with your spatula.
For the creamy, thick appearance in the finished recipe, keep the surface mostly flat rather than creating deep swirls.
Step 7: Add the white chocolate curls
Scatter a few curls over the top while the fudge is still soft.
To make simple curls at home, gently drag a vegetable peeler along the side of a room-temperature white chocolate bar.
You don’t need many. A light scattering gives the fudge the clean white-on-white appearance shown in the original inspiration.
Step 8: Chill
Place the pan in the refrigerator for at least 2 hours.
Do not try to slice it early simply because the surface feels firm.
The center needs time to set as well.
For especially clean pieces, chilling it a little longer can help.
Step 9: Cut into squares
Lift the chilled fudge from the pan using the parchment.
Place it on a cutting board.
Use a large, sharp knife to cut it into 36 small squares, or make larger pieces if you prefer.
For cleaner edges, wipe the knife between cuts.
How to Get That Thick, Creamy Texture
This recipe does not need a crust.
Unlike cheesecake, pie, or layered bars, the goal is a solid piece of fudge from top to bottom. Adding cookie crumbs or another crust would turn it into a different dessert and would move the result away from the appearance we want.
What does matter is thickness.
Use an 8×8-inch pan rather than a large rectangular pan. The smaller footprint gives the fudge enough height to create those substantial blocks.
Another important detail is moisture.
Your bowl and spatula should be clean and dry before melting the chocolate. Keep water away from the melting process.
Finally, don’t continually reheat the mixture trying to make it thinner. Once the chocolate has melted, gentle stirring is preferable to unnecessary additional heat.
The Biggest Mistakes to Avoid
The chocolate becomes grainy
The most likely issue is excessive heat.
White chocolate needs gentle treatment. Use short microwave bursts and stir each time.
The fudge doesn’t become firm
First, give it more refrigerator time.
Two hours is the minimum for this recipe, not a deadline. A warm kitchen, different frosting formulation, or different type of white chips can change how quickly it firms.
Ingredient formulation also matters. White baking products are not all identical, which is why matching the recipe’s type and quantity of chips is important.
The mixture is difficult to spread
Work quickly once the frosting and chocolate are combined.
If you spend several minutes preparing your pan afterward, the mixture may already be cooling.
That is why the pan should always be lined before melting anything.
The fudge sticks to the knife
Make sure it is thoroughly chilled.
Use a sharp knife and wipe the blade after each cut.
The pieces are too sweet
This is naturally a very sweet candy because both primary ingredients contain sugar.
Cutting smaller squares is the simplest solution. A tiny amount of flaky sea salt can also balance the perception of sweetness.
Simple Variations
Once you have made the classic version successfully, toppings are an easy way to change its appearance.
Try:
- Holiday sprinkles.
- Crushed peppermint candy.
- Chopped pistachios.
- Finely chopped dried cranberries.
- Toasted nuts.
- Freeze-dried strawberry pieces.
- A light dusting of flaky salt.
Sprinkles are particularly useful for birthdays and holidays.
But if you want the same elegant look as our reference recipe, keep it simple. Use white chocolate curls and perhaps a few tiny flakes of salt.
The monochrome finish is part of what makes these squares look so creamy.
If you enjoy experimenting with sweet recipes, our guide to mastering caramelized sugar covers another useful dessert technique. You may also like learning what crème brûlée is made of when you want to move from simple candy to custard-based desserts.
How to Serve White Chocolate Fudge
Because this fudge is rich, small portions work well.
Arrange the squares on a white serving plate, cake stand, or parchment-lined tray. Stack a few pieces for height and scatter several chocolate curls around them.
It works particularly well for:
- Christmas candy trays.
- Valentine’s Day treats.
- Baby showers.
- Birthday dessert tables.
- Homemade food gifts.
- Afternoon coffee.
- Potlucks.
For gifting, let the fudge become fully firm before packing it. Separate layers with parchment or wax paper so the pieces don’t rub against each other.
How to Store It
For best texture, keep the fudge in an airtight container in the refrigerator.
The original recipe calls for storage for up to one week. Keep it well covered so it doesn’t dry out or absorb refrigerator odors.
USDA’s general guidance for perishable leftovers is more conservative: refrigerate promptly, keep the refrigerator at 40°F (4.4°C) or below, and generally use refrigerated leftovers within three to four days. That guidance is broad rather than specific to this high-sugar fudge, so anyone wanting the most conservative food-safety approach can follow the shorter window.
For the best eating texture, take out only the pieces you plan to serve.
Can You Freeze White Chocolate Fudge?
Yes, freezing is an option, though texture and appearance can change slightly after thawing.
Wrap the fudge well and place it in an airtight freezer-safe container. Separating layers with parchment helps protect the surface.
Thaw it in the refrigerator while still covered. This reduces the chance of condensation collecting directly on the fudge.
If presentation matters, add delicate decorative curls after thawing rather than before freezing.
Why This Recipe Is Worth Keeping
There are recipes you make because they challenge you. Then there are recipes you save because they solve a problem.
This one belongs to the second group.
Someone announces a holiday gathering. You need a quick homemade gift. The oven is already occupied. Or you simply want something sweet without turning dessert into an afternoon project.
Two packages and one bowl can get you there.
The final plate doesn’t look like a shortcut. The pieces are thick and pale, the center looks dense and creamy, and those tiny white chocolate curls make the finished batch feel intentional.
That contrast is the best part of 2-Ingredient White Chocolate Fudge: very little preparation, but a result that looks ready for a dessert table.
Frequently Asked Questions
Can you really make fudge with only two ingredients?
Yes. This version combines white chocolate chips and prepared vanilla frosting. Frosting-and-chocolate fudge is an established shortcut method, although exact ratios can differ between recipes and types of chocolate.
Why is my white chocolate fudge not setting?
It may simply need more chilling time. Leave it refrigerated longer before changing the recipe. If it remains very soft, your specific white chips or frosting may have a different fat and moisture composition.
How long does white chocolate fudge take to set?
Plan on at least two hours in the refrigerator. For very neat cuts, longer chilling can be helpful.
Can I use white chocolate bars instead of chips?
Possibly, but don’t assume a straight 1:1 substitution will always behave identically. Products containing cocoa butter can behave differently from white confectionery morsels, and at least one tested frosting-fudge recipe specifically changes the quantity based on which type is used.
For your first batch, stick with the 16 ounces of white chocolate chips specified here.
Does this recipe need condensed milk?
No. There are popular two-ingredient fudge recipes that use sweetened condensed milk, but this particular recipe uses vanilla frosting instead. They are different formulas and shouldn’t be treated as interchangeable without adjusting the recipe.
Can I add sprinkles?
Absolutely. Add them immediately after spreading the fudge into the pan so they adhere before the surface firms.
For the classic creamy appearance, use white chocolate curls instead.
Do I need a candy thermometer?
No. This recipe doesn’t rely on cooking a sugar syrup to a target candy temperature.
Why should I microwave the chocolate in short intervals?
White chocolate can overheat. Short intervals give you more control. Stirring between them also distributes the heat and allows residual warmth to melt remaining pieces without unnecessary microwave time.
Can I make it ahead?
Yes. In fact, making it ahead is convenient because the fudge needs refrigerator time before slicing.
Prepare it the day before you need it, let it become fully firm, and cut it when cold.
Print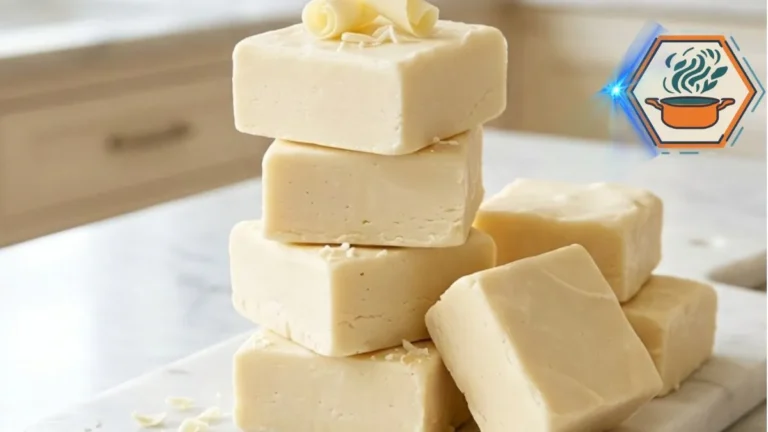
2-Ingredient White Chocolate Fudge
This 2-Ingredient White Chocolate Fudge combines white chocolate chips and vanilla frosting for a rich, creamy no-bake treat. It takes about 10 minutes to prepare, then chills until firm enough to slice into thick, smooth squares.
- Total Time: 2 hours 10 minutes
- Yield: 36 small squares
Ingredients
- 16 oz (454 g) white chocolate chips
- 16 oz (454 g) prepared vanilla frosting
- Pinch of flaky sea salt, optional
- White chocolate curls, optional, for topping
Instructions
- Line an 8×8-inch square baking pan with parchment paper. Leave enough parchment hanging over two sides to lift the fudge out later.
- Make sure your mixing bowl and spatula are completely clean and dry.
- Place the white chocolate chips in a microwave-safe bowl.
- Microwave for 20 seconds, then stir thoroughly.
- Continue microwaving in 20-second intervals, stirring after each interval, until the chocolate is almost completely melted.
- Stop heating when only a few small pieces remain. Stir until the residual heat melts them and the chocolate becomes smooth.
- Transfer the vanilla frosting to a microwave-safe container if its original container is not microwave-safe.
- Warm the frosting for 15–20 seconds, just until softened and easy to stir. Do not make it hot.
- Immediately add the softened frosting to the melted white chocolate.
- Stir thoroughly, scraping the bottom and sides, until the mixture is completely smooth, thick, and uniform.
- Stir in a small pinch of flaky sea salt, if desired.
- Immediately transfer the mixture to the prepared 8×8-inch pan.
- Spread it into the corners and smooth the top with a silicone spatula.
- Add white chocolate curls while the surface is still soft, if desired.
- Refrigerate for at least 2 hours, or until the center is completely firm.
- Lift the chilled fudge from the pan using the parchment paper.
- Cut into 36 small squares with a sharp knife. Wipe the knife between cuts for cleaner edges.
- Keep the fudge covered in the refrigerator.
Notes
- Use an 8×8-inch pan for thick squares similar to the reference photo.
- Do not use a 9×13-inch pan unless you intentionally want much thinner fudge.
- White chocolate burns easily. Short microwave intervals are important.
- Stop microwaving before every last chip has visibly melted. Stirring can finish the melting process.
- Keep water away from the white chocolate while melting.
- Use regular prepared vanilla frosting rather than whipped frosting for the most predictable dense texture.
- The frosting should be softened, not hot.
- Prepare the pan before melting the chocolate because the mixture thickens as it cools.
- Two hours is the minimum chilling time. If the center is still soft, refrigerate longer.
- White chocolate curls and flaky sea salt are optional and therefore do not form part of the two-ingredient base recipe.
- For the closest visual match to the reference image, keep the fudge ivory-white, make thick squares, and use only a small amount of white chocolate curls.
- Different brands can produce slightly different firmness because their ingredient formulations differ.
- Check the ingredient label when shopping. FDA’s U.S. standard for white chocolate specifies cocoa butter among its defining components.
- Prep Time: 10 minutes
- + Time / Chill Time:: 2 hours
- Cook Time: 0 minutes
- Category: Dessert / Candy
- Method: No-Bake / Microwave / Refrigerated
- Cuisine: American
- Diet: Vegetarian
Final Recipe Notes
The ingredient list may be tiny, but the small details decide whether this fudge comes out smooth or frustrating.
Prepare your pan first. Keep the equipment dry. Melt the white chocolate gradually. Warm rather than overheat the frosting. Stir until completely uniform. Spread the mixture immediately. Most importantly, give it enough refrigerator time before cutting.
Follow those points and you get thick, creamy white squares with the soft melt-away quality that makes this recipe so appealing.
And when you have to decide between rainbow sprinkles and those delicate white curls?
For this version, I’d keep it classic.