
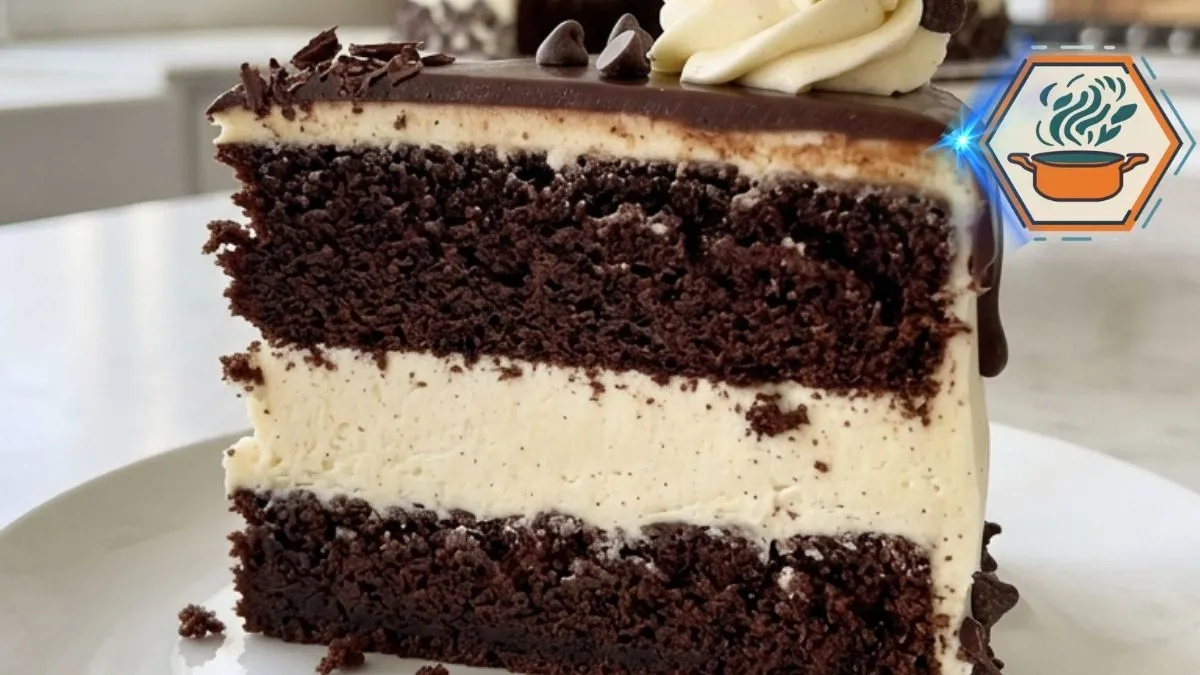
The first thing you notice about a Chocolate Vanilla Cream Dream Cake is not simply the chocolate. It is the contrast. Two dark, moist chocolate cake layers frame an unusually thick band of pale vanilla cream. A glossy chocolate ganache sits on top, while tall vanilla swirls and scattered chocolate chips give the finished cake its bakery-style appearance.
I wanted this version to taste as impressive as it looks. More importantly, I wanted it to be a cake that a home baker could actually reproduce. A tall cream-filled cake can look simple in a photograph, yet small details matter. The cake must be strong enough to carry the filling. The cream must be firm enough to hold its shape. The ganache cannot be hot when it touches the cream. Even the temperature of the cake layers can decide whether you get clean layers or a delicious mess.
The chocolate cake formula uses cocoa, oil, milk, and hot coffee for a soft crumb and deep cocoa character. Using coffee or water in chocolate cake is also a well-established baking method; King Arthur Baking publishes chocolate cake formulas combining cocoa with brewed coffee or water. Their cake baking guide is also a useful independent resource if you are new to layer cakes.
Food safety matters too. Flour should not be tasted raw. The FDA explains that ordinary flour is a raw food and that baking is what addresses microbes that may be present in flour and raw eggs. You can read the FDA flour safety guidance before baking with children.
Affiliate disclosure: As an Amazon Associate I earn from qualifying purchases. This article may contain affiliate links to kitchen tools I find useful for preparing this recipe.
jump to
Why This Chocolate Vanilla Cream Dream Cake Works
This cake is built around three textures.
First comes the moist chocolate cake. Oil keeps the crumb soft, while cocoa provides the main chocolate flavor. Hot coffee adds liquid and brings out the darker cocoa notes. If you dislike coffee, hot water works too.
Then comes the vanilla cream filling. This is deliberately much thicker than the filling in an ordinary layer cake. Cream cheese gives it body. Whipped heavy cream makes it lighter. Powdered sugar adds sweetness without introducing the coarse texture of granulated sugar.
Finally, the chocolate ganache creates a smooth, rich top layer. The whipped vanilla rosettes and chocolate chips finish the same light-and-dark look.
The key is temperature. Do not assemble this cake while the chocolate layers are even slightly warm.
Warm cake melts fat in the filling. The cream then becomes loose and may squeeze out under the weight of the upper layer.
For the dramatic result, patience matters more than complicated pastry skills.
Ingredients You Will Need
Chocolate Cake
- 1¾ cups (about 210 g) all-purpose flour
- 1¾ cups (about 350 g) granulated sugar
- ¾ cup (about 65 g) unsweetened cocoa powder
- 1½ teaspoons baking powder
- 1½ teaspoons baking soda
- ½ teaspoon fine salt
- 2 large eggs
- 1 cup (240 ml) whole milk
- ½ cup (120 ml) neutral vegetable oil
- 2 teaspoons vanilla extract
- ¾ cup (180 ml) hot brewed coffee or hot water
Thick Vanilla Cream Filling
- 12 oz (340 g) full-fat block cream cheese, softened but not warm
- ¾ cup (90 g) powdered sugar
- 2 teaspoons vanilla extract
- 1½ cups (360 ml) cold heavy whipping cream
Important: Use block cream cheese rather than soft cream-cheese spread sold in tubs. The latter usually contains more moisture and can make a tall filling less stable.
Chocolate Ganache
- 8 oz (225 g) semisweet chocolate, finely chopped
- ¾ cup (180 ml) heavy cream
Vanilla Cream Decoration
- ¾ cup (180 ml) cold heavy whipping cream
- 3 tablespoons powdered sugar
- 1 teaspoon vanilla extract
- ½ cup semisweet chocolate chips
Equipment That Makes the Recipe Easier
You do not need professional bakery equipment. A few basic tools make a noticeable difference:
- Two 8-inch round cake pans
- Parchment paper
- Large mixing bowls
- Whisk
- Electric hand or stand mixer
- Rubber spatula
- Wire cooling rack
- Serrated knife or cake leveler
- Offset spatula
- Piping bag
- Large star piping tip
- Cake board or flat serving plate
For tall, even layers, matching pans are particularly useful. You can browse 8-inch round cake pans on Amazon and replace that destination with your affiliate link before publishing.
An offset cake spatula on Amazon is another useful option. It makes spreading the thick cream and ganache much easier without dragging crumbs through the surface.
How to Make the Moist Chocolate Cake Layers
Set an oven rack in the center position. Preheat your oven to 350°F (175°C).
Grease two 8-inch round pans. Place a parchment circle on the bottom of each pan, then lightly grease the parchment.
Do not skip the parchment. A moist chocolate cake can cling to the pan, and breaking one layer makes assembly much harder.
In a large bowl, whisk together:
- Flour
- Sugar
- Cocoa
- Baking powder
- Baking soda
- Salt
Break up every visible cocoa lump.
In another bowl, whisk the eggs, milk, vegetable oil, and vanilla.
Add the wet mixture to the dry ingredients. Mix just until smooth.
Now slowly pour in the hot coffee while whisking at low speed or stirring by hand.
The batter will become thin. That is normal. Do not add extra flour.
Coffee is optional from a flavor perspective. Water can replace it. However, coffee gives the cocoa a deeper character without necessarily making the finished cake taste strongly of coffee.
King Arthur also notes that both natural and Dutch-process cocoa can work in some chocolate cake formulas, though the resulting color and flavor can differ. For this particular recipe, standard natural unsweetened cocoa is the safer default because the formula includes baking soda.
Divide the batter evenly between the prepared pans. A kitchen scale is useful here if you want layers of matching height.
Bake for approximately 28 to 33 minutes.
Check near the lower end of the range. Insert a toothpick into the center. It should come out clean or with a few moist crumbs, but not wet batter.
Do not taste the raw batter. FDA guidance notes that both untreated flour and raw eggs can carry food-safety risks.
Let the cakes rest in their pans for about 10 minutes. Carefully turn them onto cooling racks and remove the parchment.
Cool completely before proceeding.
The Secret to the Thick Vanilla Cream Layer
This is the part that gives the cake its striking appearance.
Your cream cheese should be soft enough to beat smoothly but not warm or greasy.
Beat the cream cheese for about one minute until smooth. Add powdered sugar and vanilla. Beat again until no lumps remain.
In a separate cold bowl, whip 1½ cups of cold heavy cream.
Start at medium speed. Increase the speed as it thickens. Stop when you have firm peaks.
Do not continue beating indefinitely. Overwhipped cream becomes grainy and can eventually begin separating.
Now fold about one-third of the whipped cream into the cream-cheese mixture. Once incorporated, gently fold in the remainder.
Folding rather than aggressively beating helps preserve the cream’s volume.
Refrigerate for 20 to 30 minutes.
If your kitchen is hot, give it a little longer.
For frequent layer cakes, a cake turntable on Amazon can make spreading and decorating much more comfortable. Replace this with your Amazon Associates link before the article goes live.
How to Assemble the Tall Cake Without the Filling Escaping
This stage deserves more attention than most recipes give it.
If the chocolate layers have domed tops, level them with a serrated knife. You want two flat surfaces.
Put the first chocolate layer on a cake board or serving plate.
For extra stability, pipe a ring of vanilla cream around the outer edge first. Then fill the center. Spread the cream into a very thick, level layer.
The goal is to recreate that dramatic pale center rather than a thin stripe of frosting.
Place the second chocolate cake on top.
Press very gently. Do not push it down.
If cream begins escaping around the sides, stop. The filling is probably too warm. Refrigerate the cake for 20 to 30 minutes before doing anything else.
Spread the remaining vanilla cream across the top in an even layer.
Refrigerate the assembled cake for 30 to 45 minutes before adding ganache.
That chilling stage is one of the most important steps in the entire recipe.
How to Make Glossy Chocolate Ganache
Finely chop 8 ounces of semisweet chocolate and place it in a heatproof bowl.
Heat ¾ cup heavy cream until steaming and just beginning to simmer around the edges. It does not need a violent boil.
Pour it over the chocolate.
Leave it untouched for 2 minutes.
Starting in the center, stir slowly until the mixture becomes dark, glossy, and smooth.
Now comes the detail that can save your cake:
Do not pour hot ganache onto cold vanilla cream.
Let the ganache cool until it is thick but still spreadable. If it feels noticeably hot, wait.
Spread it carefully over the chilled top. Work from the center outward with an offset spatula.
You want a generous chocolate layer rather than a paper-thin glaze.
Creating the Vanilla Swirls and Chocolate-Chip Finish
Whip ¾ cup cold heavy cream with three tablespoons powdered sugar and one teaspoon vanilla.
Whip to firm peaks.
Transfer it to a piping bag fitted with a large star tip. A reusable or disposable piping bag and large star-tip set on Amazon is useful for recreating the tall swirls.
Pipe generous vanilla rosettes around the top of the cake.
Scatter semisweet chocolate chips over the ganache and between the swirls.
Do not cover every inch. Leaving visible ganache between the pale cream swirls creates the strong chocolate-and-vanilla contrast.
The Final Chill Is Not Optional
Refrigerate the finished cake for at least 2 hours.
Four hours is even better when you want particularly clean slices.
This gives the cream filling time to firm and allows the whole cake to settle.
When ready to serve, fill a tall glass with hot water. Dip a long sharp knife into it, then dry the blade.
Make one cut.
Clean and warm the blade again before the next cut.
It takes longer, but the result is worth it. You get a clean dark chocolate layer, a defined vanilla center, another chocolate layer, and the smooth topping above.
If you enjoy learning why small details change a cake, our guide to the difference between butter cakes offers more useful baking context.
Common Mistakes and How to Avoid Them
The filling is running out of the cake.
It is probably too warm. Chill it before assembly and work with fully cooled cake layers.
The chocolate cake is dry.
It may have baked too long. Start checking before the maximum baking time. A few moist crumbs on the tester are fine.
The cake sticks to the pans.
Grease the pans and line their bottoms with parchment.
The ganache melts the vanilla layer.
It was applied too hot. Let it cool until spreadable before it touches the cake.
The whipped cream becomes grainy.
It has likely been overwhipped. Stop once firm peaks form.
The layers slide.
The cake or filling may be too warm. Chill between assembly stages.
The cake is leaning.
Uneven cake layers are often responsible. Level each layer before adding the thick filling.
For another example where moisture management matters, see our guide to keeping madeleines moist.
Storage and Make-Ahead Tips
Because this cake contains cream cheese and plenty of whipped cream, keep it refrigerated rather than treating it like an unfrosted shelf-stable cake.
Cover it carefully so the exposed cake does not dry out or absorb refrigerator odors.
For the best texture, make the chocolate layers one day ahead. Cool them fully, wrap them well, and assemble the cake the following day.
You can also prepare the whole cake the evening before serving. In fact, the overnight chilling time can make slicing easier.
For longer storage, freezing the undecorated chocolate cake layers is preferable to freezing the finished whipped-cream decoration.
Simple Variations
Once you are comfortable with the base recipe, small changes can create a different dessert without losing its signature appearance.
Try:
- Dark chocolate instead of semisweet chocolate in the ganache.
- Mini chocolate chips for a more delicate decoration.
- Espresso powder in the cake for a stronger mocha note.
- Vanilla bean paste in the filling for visible vanilla flecks.
- Chocolate curls instead of chocolate chips.
- Fresh strawberries served beside each slice.
Keep additions restrained. The appeal of this cake comes from the simple contrast of chocolate cake, vanilla cream, and chocolate ganache.
For a fruit-and-chocolate direction, our strawberry-filled chocolate cake guide provides another combination to try.
Frequently Asked Questions
Can I make Chocolate Vanilla Cream Dream Cake the day before?
Yes. It is actually a good make-ahead dessert. Assemble and refrigerate it overnight. Add delicate decorative cream swirls closer to serving if you want them looking especially fresh.
Can I use water instead of coffee?
Yes. Replace the coffee with the same amount of hot water. The cake will still work. Coffee simply gives the chocolate flavor more depth.
Why is my chocolate cake batter so thin?
The thin consistency is intentional. Hot liquid increases the batter’s fluidity. Do not try to correct it by adding more flour.
Can I use milk chocolate for the ganache?
You can, but it will taste sweeter and may behave differently because milk chocolate contains different proportions of cocoa solids, sugar, and milk ingredients. Semisweet chocolate gives this rich cake better balance.
Why does the cake need so much chilling time?
The center is unusually thick. Chilling firms the cream and makes the tall cake easier to cut without squeezing the filling out.
Can I make this cake without cream cheese?
You could use a stabilized whipped-cream filling, but it would no longer be this exact recipe. Cream cheese gives the center much of the structure needed for such a thick layer.
What cocoa powder should I use?
Natural unsweetened cocoa is my first choice for this formula. It gives a classic chocolate-cake flavor and works naturally with the baking soda in the recipe.
How do I get clean cake slices?
Chill the cake thoroughly. Use a long, sharp knife warmed in hot water and dried before cutting. Clean the blade after every slice.
Print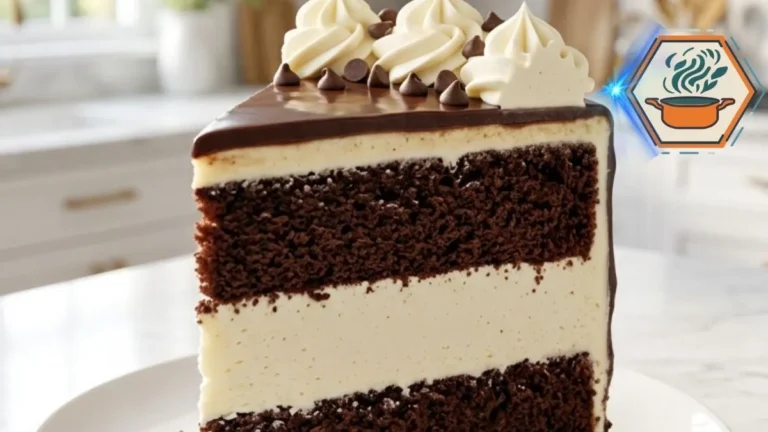
Chocolate Vanilla Cream Dream Cake
A tall Chocolate Vanilla Cream Dream Cake made with moist cocoa cake layers, a generous vanilla cream cheese filling, glossy semisweet chocolate ganache, piped vanilla cream swirls, and chocolate chips. Chilling the cake between stages helps create the clean dark-and-light layers that make every slice stand out.
- Total Time: 1 hour 15 minutes*
- Yield: 12 slices
Ingredients
1. Prepare the pans
Preheat the oven to 350°F (175°C). Position a rack in the center.
Grease two 8-inch round cake pans. Line the bottoms with parchment paper, then lightly grease the parchment.
2. Mix the dry ingredients
In a large bowl, whisk together the flour, sugar, cocoa powder, baking powder, baking soda, and salt.
Break up any visible cocoa lumps before adding the wet ingredients.
3. Add the wet ingredients
Add the eggs, milk, vegetable oil, and vanilla.
Mix on low speed until the ingredients are combined. Scrape the bottom and sides of the bowl.
4. Add the hot coffee
Slowly pour in the hot coffee while mixing on low speed.
Mix only until the batter is uniform.
The batter should be quite thin. This is normal. Do not add extra flour.
5. Bake
Divide the batter equally between the two prepared pans.
For the most even layers, weigh the filled pans with a kitchen scale and adjust the batter as needed.
Bake for 28–33 minutes.
Begin checking at 28 minutes. A toothpick inserted into the center should come out with a few moist crumbs or clean, but never coated in liquid batter.
6. Cool completely
Leave the cakes in their pans for about 10 minutes.
Turn them onto wire racks and remove the parchment.
Allow them to cool completely. Depending on room temperature, this can take 60–90 minutes.
Never put vanilla cream onto a warm cake.
7. Prepare the vanilla filling
Beat the softened cream cheese until smooth.
Add the sifted powdered sugar and vanilla. Beat until creamy and free of lumps.
In a separate chilled bowl, whip the cold heavy cream until firm peaks form.
Fold about one-third of the whipped cream into the cream cheese mixture to lighten it.
Gently fold in the remaining whipped cream.
Refrigerate for 20–30 minutes before assembling the cake.
8. Level the cakes
If necessary, trim the domed tops with a long serrated knife.
The layers need to sit flat because the vanilla filling is intentionally thick.
9. Assemble
Place the first chocolate cake layer on a cake board or serving plate.
Spread the vanilla cream into a thick, even layer.
Place the second cake layer on top and press very lightly.
If the filling starts moving outward, refrigerate the cake immediately for 20–30 minutes before continuing.
For a finish close to the reference appearance, keep the majority of the vanilla cream between the chocolate layers rather than creating an equally thick cream layer on top.
Chill the assembled cake for 30–45 minutes.
10. Make the ganache
Place the finely chopped semisweet chocolate in a heatproof bowl.
Heat 3/4 cup heavy cream until steaming and small bubbles begin appearing around the edges. Do not vigorously boil it.
Pour the cream over the chocolate.
Wait 2 minutes.
Stir slowly from the center outward until smooth and glossy.
Let the ganache cool until thickened but still spreadable.
Never spread hot ganache directly onto the chilled cream.
11. Cover the top
Spread the cooled ganache over the chilled cake in a smooth, generous layer.
Return the cake to the refrigerator while preparing the decoration.
12. Make the vanilla swirls
Whip 3/4 cup cold heavy cream with the powdered sugar and vanilla until firm peaks form.
Transfer to a piping bag fitted with a large open-star tip.
Pipe large cream rosettes or swirls across the top.
13. Decorate
Scatter semisweet chocolate chips over and between the vanilla swirls.
Keep some chocolate ganache visible between the decorations to preserve the dark-and-light contrast.
14. Chill
Refrigerate the finished cake for at least 2 hours before slicing.
For particularly clean layers, 3–4 hours of refrigeration is even better.
15. Slice
Dip a sharp knife into hot water and wipe it completely dry.
Cut one slice.
Clean, warm, and dry the knife again before making the next cut.
This prevents chocolate crumbs and cream from smearing across the contrasting layers.
Instructions
Important Recipe Notes
- Use full-fat block cream cheese, not whipped cream cheese or a tub-style spread.
- Heavy whipping cream should be cold before whipping.
- The cake layers must be completely cool before assembly.
- Do not add extra flour because the chocolate batter looks thin.
- Hot coffee deepens the cocoa flavor. Hot water can be substituted 1:1.
- Do not overmix after adding the flour.
- Do not overwhip the heavy cream. Stop at firm peaks.
- Chill the filling before assembly if your kitchen is warm.
- Level domed cakes before stacking.
- The ganache must cool before it touches the vanilla cream.
- Refrigerating the assembled cake is essential because it contains cream cheese and whipped cream.
- For the visual style in the reference image, the center cream layer should remain substantially thicker than the cream directly beneath the ganache.
- For clean slices, refrigerate thoroughly and use a warm, dry knife.
Food-safety note: Do not taste raw cake batter containing uncooked flour and eggs.
Notes
Important Recipe Notes
- Use full-fat block cream cheese, not whipped cream cheese or a tub-style spread.
- Heavy whipping cream should be cold before whipping.
- The cake layers must be completely cool before assembly.
- Do not add extra flour because the chocolate batter looks thin.
- Hot coffee deepens the cocoa flavor. Hot water can be substituted 1:1.
- Do not overmix after adding the flour.
- Do not overwhip the heavy cream. Stop at firm peaks.
- Chill the filling before assembly if your kitchen is warm.
- Level domed cakes before stacking.
- The ganache must cool before it touches the vanilla cream.
- Refrigerating the assembled cake is essential because it contains cream cheese and whipped cream.
- For the visual style in the reference image, the center cream layer should remain substantially thicker than the cream directly beneath the ganache.
- For clean slices, refrigerate thoroughly and use a warm, dry knife.
Food-safety note: Do not taste raw cake batter containing uncooked flour and eggs.
- Prep Time: 45 minutes
- Cook Time: 30 minutes
- Category: Dessert
- Method: Baking
- Cuisine: American-inspired
A Cake Worth Waiting For
The hardest part of making this Chocolate Vanilla Cream Dream Cake may simply be waiting for it to chill.
That waiting time has a purpose. The chocolate layers settle. The thick vanilla center firms. The ganache sets. When the knife finally passes through the cake, those separate elements reveal the dramatic layers that make this dessert special.
It is rich without relying on chocolate alone. The cocoa cake brings depth. The pale vanilla cream breaks up that intensity. Ganache adds a silky finish, while whipped rosettes and chocolate chips make the top look festive without requiring advanced decorating skills.
Most importantly, the recipe becomes far more reliable when you respect the details that are easy to overlook: cool the cakes completely, keep the whipping cream cold, use block cream cheese, chill the filling, cool the ganache, and refrigerate the assembled cake before cutting it.
Those small steps are what turn a good chocolate-and-vanilla cake into a tall, cleanly layered dessert that looks as impressive on the plate as it does before the first slice is cut.