
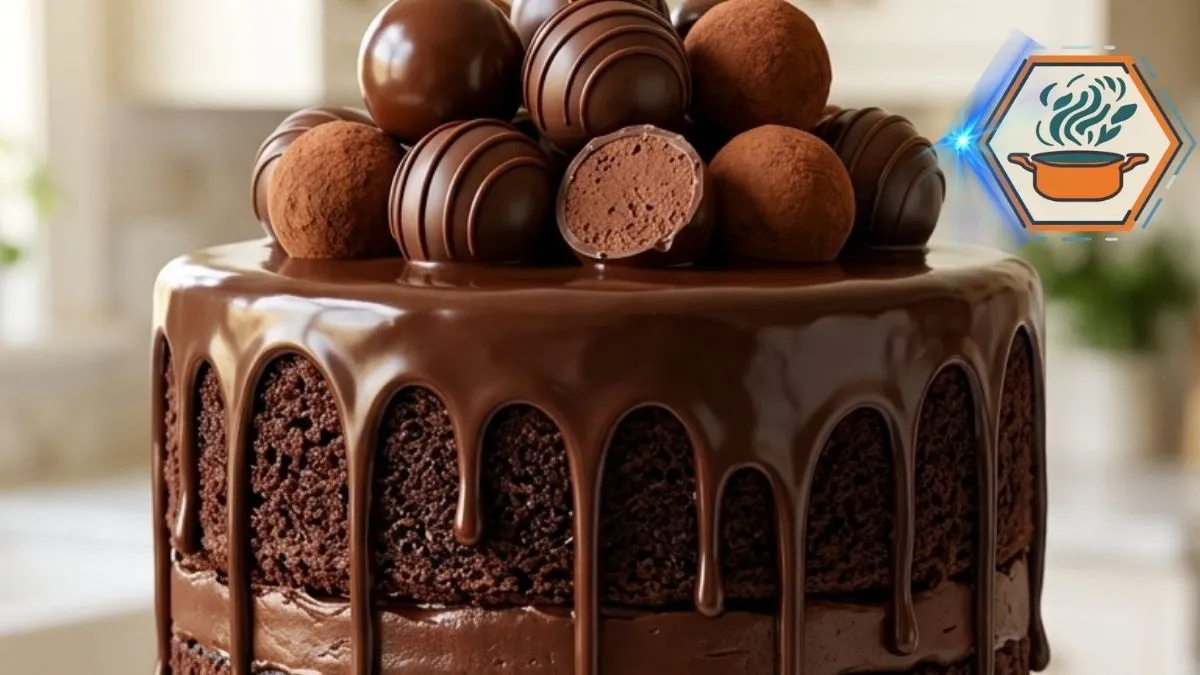
The first thing you notice about a Velvet Truffle Cascade Cake is the chocolate. It falls from the top in thick, glossy drips. Then come the truffles, piled casually in the center. But the real surprise waits inside. Cut the first slice and you reach two dark, soft cake layers held together by a creamy chocolate fudge filling.
This is the kind of cake that looks as though it came from a pastry shop. Yet the method is surprisingly approachable when each part is made at the right temperature. A good chocolate layer cake is less about complicated decoration and more about controlling moisture, mixing, cooling, and ganache consistency. King Arthur Baking also recommends 350°F for many 9-inch chocolate cake layers and uses brewed coffee in several chocolate cake formulas.
Coffee may sound unusual if you have never added it to cake batter. It does not mean the finished dessert needs to taste like a cup of coffee. Here, it supports the dark cocoa flavor and provides liquid for a soft batter. Similar combinations of cocoa and brewed coffee appear in established chocolate cake recipes.
The result we are aiming for is very specific: dark cake, a thick center of fudge, a smooth ganache crown, long irregular drips, and round chocolate truffles on top.
Affiliate disclosure: As an Amazon Associate I earn from qualifying purchases. This article may contain affiliate links to kitchen tools I find useful for preparing this recipe.
jump to
Why This Velvet Truffle Cascade Cake Works
There is a moment with every layer cake when it stops looking like separate components and starts looking special.
For this cake, that moment comes when the ganache reaches the edge.
You gently push a little chocolate over the side. One drip travels halfway down and stops. Another goes farther. A third barely moves. That variation creates the dramatic cascade rather than a perfectly uniform curtain of chocolate.
The interior matters just as much.
Vegetable oil gives the chocolate layers a soft texture, while milk adds richness. Cocoa supplies the main chocolate character. Hot coffee brings additional liquid and helps create the thin batter associated with very moist chocolate cakes.
This is not unusual for chocolate layer cake. King Arthur notes that some chocolate cake batters are thin and recommends checking doneness by looking for a springy center and using a toothpick or thin knife.
The cake is then given three more forms of chocolate:
- whipped cocoa fudge filling
- semisweet chocolate ganache
- homemade chocolate truffles
That is what gives each bite several textures instead of making the dessert feel like one solid block of chocolate.
Ingredients
For more reliable results, weigh the flour, cocoa, sugar, and chocolate when you can. Small measuring differences can have a surprisingly large effect on cake texture.
For the dark chocolate cake
- 2 cups (about 240 g) all-purpose flour
- 1¾ cups (about 350 g) granulated sugar
- ¾ cup (about 64 g) unsweetened cocoa powder
- 2 teaspoons baking powder
- 1½ teaspoons baking soda
- ½ teaspoon fine salt
- 2 large eggs, preferably at room temperature
- 1 cup (240 ml) whole milk
- ½ cup (120 ml) neutral vegetable oil
- 2 teaspoons vanilla extract
- 1 cup (240 ml) hot freshly brewed coffee
For the chocolate fudge filling
- ¾ cup (170 g) unsalted butter, softened
- ⅔ cup (about 57 g) unsweetened cocoa powder
- 3 cups (about 360 g) powdered sugar, sifted
- ⅓ cup (80 ml) heavy cream, plus a little extra if required
- 1 teaspoon vanilla extract
- Pinch of fine salt
For the glossy chocolate ganache
- 10 ounces (283 g) semisweet chocolate, finely chopped
- 1 cup (240 ml) heavy cream
- 1 tablespoon (14 g) unsalted butter
For the homemade truffles
- 6 ounces (170 g) semisweet chocolate, finely chopped
- ⅓ cup (80 ml) heavy cream
- 2 tablespoons cocoa powder
- 2 ounces (57 g) melted semisweet chocolate, for decorating
Important: use real semisweet chocolate that melts smoothly for the ganache. Finely chopping it also allows the hot cream to melt it more evenly.
Equipment You’ll Need
You do not need professional pastry equipment.
The most useful tools are:
- two 9-inch round cake pans
- parchment paper
- two large mixing bowls
- whisk
- flexible silicone spatula
- electric hand mixer or stand mixer
- wire cooling rack
- offset spatula
- cake stand or serving plate
- small saucepan
- kitchen scale, preferably
- serrated knife, if the layers need leveling
How to Make the Chocolate Cake Layers
Start by placing an oven rack near the center. Preheat the oven to 350°F (175°C).
Grease two 9-inch round pans lightly.
Now add an important step that is easy to overlook: line the bottoms with parchment rounds. Grease the parchment lightly as well.
This greatly reduces the risk of a soft chocolate layer sticking when you turn it out.
In a large bowl, whisk together:
- flour
- sugar
- cocoa
- baking powder
- baking soda
- salt
Break up every visible cocoa lump.
In another bowl, whisk the eggs, whole milk, vegetable oil, and vanilla until combined.
Pour the wet mixture into the dry ingredients. Stir just until most of the dry streaks disappear.
Now slowly pour in the hot coffee while whisking gently.
Do not panic when the batter becomes thin. Chocolate cake formulas made with coffee can naturally produce a relatively loose batter.
Do not continue beating simply because the batter looks thinner than traditional butter cake batter.
Divide it evenly between your prepared pans. A kitchen scale makes this particularly easy.
Bake for approximately 28 to 33 minutes.
Start checking around 28 minutes because ovens differ.
The layers are ready when:
- the center springs back lightly when touched
- a toothpick inserted near the center comes out clean or with a few moist crumbs
- the cake no longer looks wet in the center
Similar 9-inch chocolate layer cakes commonly bake in roughly this range at 350°F, although the exact time depends on the formula and oven.
Let the cakes rest in their pans for about 10 minutes. Carefully loosen the edges and turn the layers onto wire racks.
Remove the parchment.
Then wait.
Do not fill a warm cake.
This is one of the most important details in the entire recipe. Warm layers soften butter-based filling and can turn assembly into a sliding mess.
Make the Silky Chocolate Fudge Filling
The filling should be creamy enough to spread but firm enough to support the upper cake layer.
Beat the softened butter for about 2 minutes until creamy.
Sift in the cocoa powder and part of the powdered sugar. Start mixing on low speed so the dry ingredients stay in the bowl.
Gradually add the remaining powdered sugar.
Add the cream, vanilla, and salt.
Beat until fluffy.
If the filling feels too stiff, add heavy cream one teaspoon at a time.
If it feels too loose, add a little sifted powdered sugar.
You want a consistency that holds soft peaks and stays where you spread it.
For another lesson on building consistently moist cakes, readers can also see our banana bread preparation guide, where ingredient handling and moisture are equally important.
Build the Cake Before Adding Ganache
Place the first completely cooled layer on your cake stand.
If it has developed a large dome, level it gently with a serrated knife. Do not remove more cake than necessary.
Spread the fudge filling over the layer, stopping slightly short of the outer edge.
Set the second layer on top.
Press very gently.
If you press hard, the filling will bulge out.
For a cleaner, more stable finish, chill the assembled cake for approximately 20 to 30 minutes before adding the ganache.
That small pause makes the next stage much easier.
How to Make Thick Glossy Ganache
Here lies the visual secret of the Velvet Truffle Cascade Cake.
Finely chop 10 ounces of semisweet chocolate and place it in a heatproof bowl.
Heat the heavy cream until steaming and just beginning to simmer around the edge. It does not need a vigorous boil.
Pour the hot cream over the chocolate.
Leave it untouched for 2 minutes.
Then begin stirring gently from the center. Gradually widen your circles until the mixture becomes smooth and glossy.
Stir in the tablespoon of butter.
Now comes the step that determines whether you get dramatic drips or thin chocolate streams:
Do not immediately pour the hot ganache onto the cake.
Hot ganache can be much too fluid. It may rush down the sides and pool around the base.
Let it cool and thicken.
The precise waiting time depends on your chocolate and room temperature, so judge the texture rather than relying only on a timer.
The One-Drip Test
Take a spoonful of ganache and make one test drip on the back of the chilled cake.
Watch it.
If it races to the bottom, the ganache is still too warm or thin.
Wait several more minutes.
If it barely moves, it has become too thick. Gently warm a small amount or the bowl very briefly and stir again.
The ideal drip should travel slowly and stop naturally somewhere down the side.
Once that happens, you are ready.
Spoon ganache around the outer edge. Create different drip lengths deliberately. Some can be short. Others can fall much farther.
Then add ganache to the center and spread it carefully toward the edges with an offset spatula.
If you enjoy working with caramelized toppings as well as chocolate finishes, our guide to mastering caramelized sugar covers another useful dessert technique.
Make the Chocolate Truffles
The truffles turn a good drip cake into the striking cake shown in our inspiration.
Place 6 ounces of finely chopped semisweet chocolate in a bowl.
Heat ⅓ cup heavy cream until steaming.
Pour it over the chocolate and wait about 2 minutes.
Stir until completely smooth.
Cover and chill until the mixture is firm enough to scoop and roll. Depending on your refrigerator and chocolate, this may take roughly 1 to 2 hours.
Scoop small portions.
Roll them quickly between your palms. If the chocolate starts becoming sticky, return it to the refrigerator.
For the visual finish, make several styles:
- roll some truffles in cocoa powder
- leave some smooth
- coat some with melted chocolate
- drizzle thin lines of melted chocolate over others
This mix of finishes makes the top look much more natural and interesting.
How to Recreate the Cascade Look
Do not arrange the truffles in a perfect circle.
Instead, gather them near the center and slightly toward one side.
Vary their size a little.
Place smooth glossy truffles beside cocoa-coated ones. Add a few with fine chocolate stripes.
The cake itself should remain mostly unfrosted around the sides so the dark crumb remains visible beneath the ganache cascade.
That contrast is essential.
You want to see:
dark porous cake → chocolate filling → dark cake → glossy ganache.
It gives the dessert its dramatic layered appearance without complicated piping.
Mistakes That Can Ruin a Chocolate Drip Cake
Adding ganache while the cake is warm
This can soften the filling and make the whole cake unstable.
Pouring very hot ganache
The chocolate can run straight to the bottom instead of forming defined drips.
Measuring too much flour
Packing flour tightly into measuring cups can produce a heavier cake. A scale is the easiest way to avoid this.
Overbaking
Chocolate cake can hide signs of dryness because its color makes browning difficult to judge. Start testing at the early end of the baking window.
Skipping the parchment
A beautifully baked layer is no help if part of its bottom remains stuck inside the pan.
Overmixing after adding flour
Mix only as much as necessary to create an even batter.
Decorating before the layers cool
Patience matters. Warm cake and chocolate decoration are a bad combination.
If baking texture interests you, our article on the secret to crunchy cookies explains how small changes in ingredients and technique can also alter texture dramatically.
How to Store Velvet Truffle Cascade Cake
Because this cake contains heavy-cream ganache and truffles, refrigeration is the safer practical choice for longer holding.
Place the cake in a covered cake carrier or airtight container so it does not absorb refrigerator odors or dry out.
For the best eating texture, take individual slices out of the refrigerator before serving and give them a little time to lose their refrigerator chill. The filling and ganache will soften and the chocolate flavor will become more noticeable.
For neat slices, use a long sharp knife.
Warm the blade under hot water, dry it thoroughly, then cut. Wipe the blade between slices.
It takes a few extra seconds, but those clean layers are worth it.
Serving Ideas
This cake is already rich, so it does not need much beside it.
Try it with:
- fresh raspberries or strawberries
- unsweetened coffee
- espresso
- a small spoonful of lightly whipped cream
- cold milk
- a few fresh berries on the plate
For another fruit-and-chocolate pairing idea, see our guide to what strawberry puree is made of.
Frequently Asked Questions
What makes Velvet Truffle Cascade Cake moist?
The recipe combines whole milk, vegetable oil, eggs, and hot coffee. Oil remains liquid at room temperature, which helps the crumb retain a soft mouthfeel. Avoid overbaking the layers, since even a good batter can become dry when left in the oven too long.
Does coffee make chocolate cake taste like coffee?
Not necessarily. In this quantity, the goal is a deeper dark-chocolate profile rather than an obvious coffee-flavored cake. Coffee is also used as the liquid in established cocoa-based chocolate cake recipes.
Why are my chocolate drips running to the bottom?
Your ganache is probably too fluid. It may still be too warm. Let it cool until it thickens, then test one drip before decorating the rest of the cake.
Why won’t my ganache drip at all?
It has likely cooled too much. Warm it very gently, stir well, and repeat the test.
Can I make the cake layers in advance?
Yes. Cool them fully before wrapping them well. King Arthur notes that unfrosted cake layers can also be wrapped and frozen for longer advance preparation.
Can I use water instead of coffee?
Yes, although the flavor will be slightly different. Water is an accepted alternative in several cocoa-based chocolate cake formulas.
Can I use chocolate chips for the ganache?
Finely chopped baking chocolate is my preferred choice here because predictable melting matters for the drip consistency. If you substitute another chocolate, expect the ganache thickness to change and rely on the one-drip test before covering the cake.
How do I stop the layers from sliding?
Cool the cake completely. Keep the filling thick rather than runny. Do not overfill the center, and chill the assembled layers for about 20 to 30 minutes before applying the ganache.
Print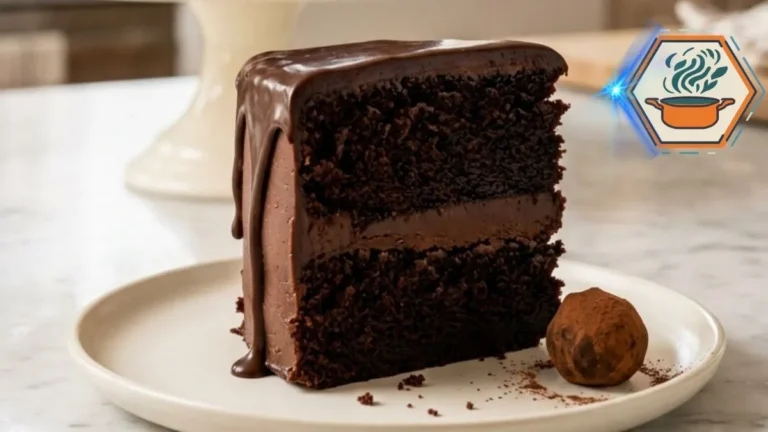
Velvet Truffle Cascade Cake
A tall, moist dark chocolate layer cake filled with fluffy chocolate fudge and topped with glossy semisweet chocolate ganache, dramatic cascading drips, and homemade chocolate truffles. A rich celebration cake with an impressive finish and approachable homemade techniques.
- Total Time: 3 hours 15 minutes, approximately
- Yield: 12 servings
Ingredients
For the Chocolate Cake
- 2 cups (240 g) all-purpose flour
- 1 3/4 cups (350 g) granulated sugar
- 3/4 cup (64 g) unsweetened cocoa powder
- 2 teaspoons baking powder
- 1 1/2 teaspoons baking soda
- 1/2 teaspoon fine salt
- 2 large eggs, room temperature
- 1 cup (240 ml) whole milk, room temperature
- 1/2 cup (120 ml) neutral vegetable oil
- 2 teaspoons vanilla extract
- 1 cup (240 ml) hot brewed coffee
For the Chocolate Fudge Filling
- 3/4 cup (170 g) unsalted butter, softened
- 2/3 cup (57 g) unsweetened cocoa powder
- 3 cups (360 g) powdered sugar, sifted
- 1/3 cup (80 ml) heavy cream, plus more if needed
- 1 teaspoon vanilla extract
- Pinch of fine salt
For the Chocolate Ganache
- 10 oz (283 g) semisweet chocolate, finely chopped
- 1 cup (240 ml) heavy cream
- 1 tablespoon (14 g) unsalted butter
For the Chocolate Truffles
- 6 oz (170 g) semisweet chocolate, finely chopped
- 1/3 cup (80 ml) heavy cream
- 2 tablespoons unsweetened cocoa powder, for coating
- 2 oz (57 g) semisweet chocolate, melted, for coating or drizzling
Instructions
- Prepare the oven and pans. Preheat the oven to 350°F (175°C). Lightly grease two 9-inch round cake pans. Line the bottoms with parchment rounds and lightly grease the parchment.
- Combine the dry ingredients. In a large bowl, whisk the flour, sugar, cocoa powder, baking powder, baking soda, and salt. Break up any cocoa lumps.
- Add the wet ingredients. Add the eggs, milk, vegetable oil, and vanilla. Mix on low speed or whisk until combined. Do not overmix.
- Add the coffee. Slowly pour in the hot brewed coffee while stirring. The batter will become thin. This is expected.
- Bake. Divide the batter evenly between the prepared pans. Bake for 28–33 minutes, or until the centers spring back lightly and a toothpick inserted near the center comes out clean or with a few moist crumbs.
- Cool completely. Let the cakes cool in their pans for about 10 minutes. Turn them onto wire racks, remove the parchment, and allow them to cool completely before filling.
- Prepare the fudge filling. Beat the softened butter until creamy. Gradually beat in the cocoa powder and sifted powdered sugar. Add the heavy cream, vanilla, and salt. Beat until smooth and fluffy. Add extra cream 1 teaspoon at a time only if the filling is too stiff.
- Fill the cake. Level the cooled layers if necessary. Place one layer on a cake stand. Spread the fudge filling evenly over it, stopping slightly short of the edge. Place the second layer on top and press very gently.
- Chill the assembled cake. Refrigerate for 20–30 minutes. This helps keep the layers stable when the ganache is added.
- Prepare the ganache. Place the finely chopped chocolate in a heatproof bowl. Heat the cream until steaming and just beginning to simmer around the edges. Pour it over the chocolate. Leave untouched for 2 minutes, then stir gently from the center outward until smooth. Stir in the butter.
- Cool the ganache. Allow the ganache to cool until it becomes thick enough to form slow drips. Test one drip on the back of the chilled cake. It should travel slowly and stop naturally rather than immediately reaching the bottom.
- Create the cascade. Spoon small amounts of ganache around the edge, varying the length of the drips. Spread the remaining ganache over the top.
- Make the truffle mixture. Put 6 oz chopped chocolate in a heatproof bowl. Heat 1/3 cup cream until steaming, pour it over the chocolate, and wait 2 minutes. Stir until smooth. Chill until firm enough to scoop and roll, usually about 1–2 hours.
- Shape and decorate the truffles. Roll the chilled mixture into small balls. Coat some in cocoa powder. Coat or drizzle others with melted semisweet chocolate.
- Finish the cake. Arrange the truffles in a loose cluster on top of the ganache. Keep different textures and sizes visible for the cascading truffle appearance.
Notes
- Do not fill warm cake layers. The fudge filling can soften and cause the layers to slide.
- The chocolate batter is supposed to be relatively thin after adding the coffee.
- For the cleanest release, use parchment paper on the bottom of both pans.
- Measure flour by weight when possible. Too much flour can make chocolate cake dense or dry.
- Do not pour very hot ganache over the cake.
- Always perform a single-drip test before decorating the whole cake.
- If the ganache reaches the bottom immediately, let it cool longer.
- If the ganache barely moves, warm it very gently and stir again.
- Chill the filled cake for 20–30 minutes before decorating.
- For clean slices, warm a sharp knife, wipe it dry, and clean it between cuts.
- Exact truffle chilling time varies with the chocolate, cream, refrigerator temperature, and size of the container.
- Prep Time: 45 minutes
- Time: 2 hours chilling/cooling, approximately
- Cook Time: 30 minutes
- Category: Dessert
- Method: Baking
- Cuisine: American-style
The Final Slice
The best moment comes after all that waiting.
Your knife passes through the glossy ganache. It meets the first dark layer, crosses the thick chocolate filling, and finally reaches the second soft layer.
From the outside, the Velvet Truffle Cascade Cake looks dramatic. From the inside, it is surprisingly straightforward: moist chocolate cake, creamy fudge, ganache, and truffles.
The secret is not complicated pastry work. It is timing.
Cool the layers completely. Keep the filling stable. Let the ganache reach the right consistency. Test one drip before committing to the whole cake.
Those small details turn a basic chocolate layer cake into the tall, glossy, truffle-covered centerpiece we wanted from the beginning.