
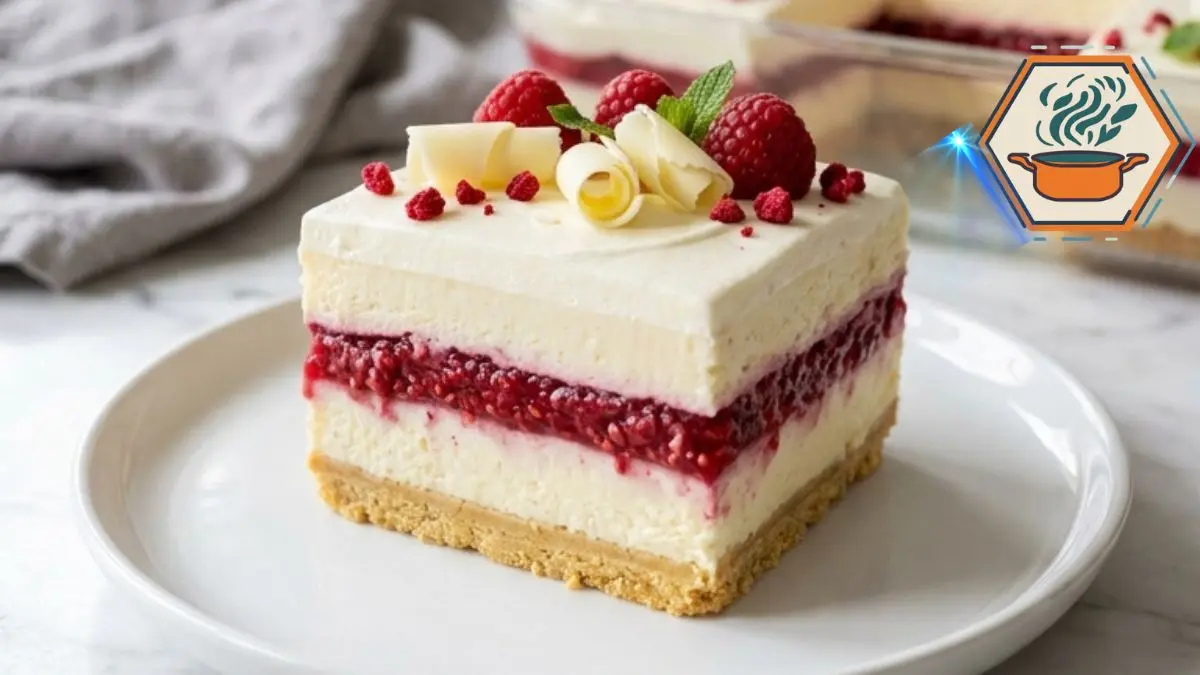
There are desserts that disappear from the table within minutes, and then there are desserts that everyone remembers long after the last bite. White Chocolate Raspberry Cheesecake Lush belongs to the second category. Its beautiful layers, creamy texture, buttery cookie crust, and vibrant raspberry filling make it a dessert that looks impressive while remaining surprisingly simple to prepare.
I first made this recipe for a family gathering when I wanted something elegant without turning on the oven. The goal was simple: create a dessert that looked like it came from a bakery but could easily be made at home. The result exceeded every expectation. Every guest wanted the recipe before leaving, and it has since become one of my favorite make-ahead desserts for holidays and celebrations.
Whether you’re preparing dessert for Easter, Mother’s Day, Valentine’s Day, birthdays, bridal showers, baby showers, or a summer barbecue, this no-bake cheesecake lush delivers a perfect balance of creamy white chocolate and fresh raspberry flavor.
JUMP TO
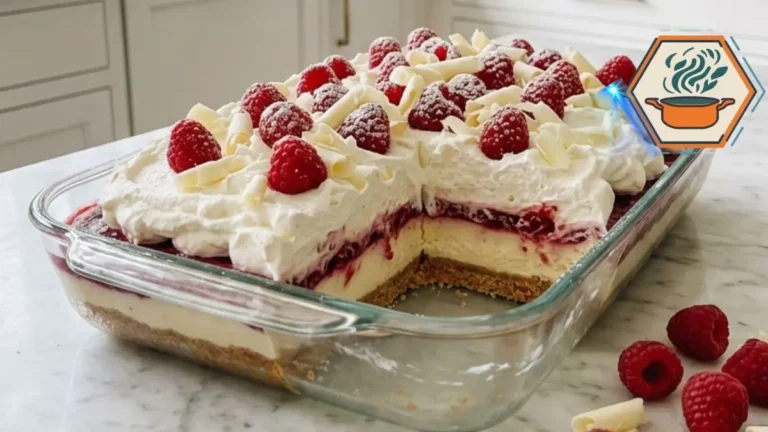
White Chocolate Raspberry Cheesecake Lush
This White Chocolate Raspberry Cheesecake Lush is a rich no-bake layered dessert made with a buttery vanilla cookie crust, silky white chocolate cheesecake filling, homemade raspberry sauce, fluffy whipped topping, and elegant white chocolate curls. Perfect for holidays, birthdays, potlucks, bridal showers, baby showers, Easter, Mother’s Day, Valentine’s Day, and summer gatherings.
- Total Time: 40 minutes + 6 hours chilling
- Yield: 15 squares
Ingredients
Cookie Crust
- 2½ cups (250 g) finely crushed vanilla sandwich cookies or vanilla wafers
- ½ cup (113 g) unsalted butter, melted
- 1 tbsp granulated sugar
- ¼ tsp fine sea salt
White Chocolate Cheesecake Layer
- 16 oz (454 g) full-fat cream cheese, softened
- 1 cup (120 g) powdered sugar
- 8 oz (226 g) premium white chocolate, melted and cooled
- 1 tsp pure vanilla extract
- 8 oz (226 g) whipped topping
Raspberry Layer
- 2 cups fresh raspberries
- ⅓ cup granulated sugar
- 1 tbsp fresh lemon juice
- 1 tbsp cornstarch
- 1 tbsp cold water
Topping
- 8 oz whipped topping
- White chocolate curls
- Fresh raspberries
- Freeze-dried raspberry powder
- Fresh mint leaves (optional)
Instructions
1. Prepare the crust
Finely crush the cookies.
Mix with melted butter, sugar and salt until evenly coated.
Press firmly into a lightly greased 9×13-inch baking dish using the bottom of a measuring cup.
Refrigerate for 20–30 minutes.
2. Make the raspberry filling
Combine raspberries, sugar and lemon juice in a saucepan.
Cook over medium heat.
Mix cornstarch with cold water.
Pour into the berries.
Cook 3–5 minutes until thick.
Transfer to a bowl.
Cool completely.
3. Melt the white chocolate
Microwave at 50% power in 20-second intervals.
Stir between each interval.
Cool for 10–15 minutes before using.
4. Prepare the cheesecake filling
Beat softened cream cheese for 3 minutes.
Add powdered sugar.
Mix until smooth.
Pour in cooled white chocolate.
Add vanilla.
Fold in whipped topping using a silicone spatula.
5. Assemble
Spread half of the cheesecake filling.
Add the cooled raspberry layer.
Spread remaining cheesecake filling.
Top with whipped topping.
Smooth with an offset spatula.
6. Chill
Cover tightly.
Refrigerate at least 6 hours.
For best slices, refrigerate overnight.
7. Decorate
Before serving, garnish with
- white chocolate curls
- fresh raspberries
- freeze-dried raspberry crumbs
- mint leaves
Slice with a warm knife.
Serve cold.
Notes
Kitchen Tips
✔ Use full-fat cream cheese only.
✔ White chocolate must be cooled before mixing.
✔ Cool raspberry filling completely.
✔ Press the crust firmly.
✔ Refrigerate overnight whenever possible.
✔ Clean the knife between slices for bakery-style squares.
✔ Decorate just before serving.
- Prep Time: 30 minutes
- Cook Time: 10 minutes
- Category: Dessert
- Method: No-bake
- Cuisine: American
- Diet: Vegetarian
Why You’ll Love This White Chocolate Raspberry Cheesecake Lush
This dessert offers everything people love in a cheesecake without the stress of baking.
Some of its best qualities include:
- No oven required.
- Easy to prepare ahead of time.
- Beautiful layered presentation.
- Rich but refreshing flavor.
- Perfect balance between sweet and tart.
- Great for feeding a crowd.
- Easy to slice after chilling overnight.
The creamy white chocolate filling melts in your mouth while the homemade raspberry layer adds freshness that keeps every bite light and balanced.
If you enjoy creamy layered desserts, you may also like our Milk Bar Pie Guide:
https://recipesmind.com/milk-bar-pie-guide/
Ingredients You’ll Need
For the Cookie Crust
- 2½ cups finely crushed vanilla sandwich cookies or vanilla wafers
- ½ cup unsalted butter, melted
- 1 tablespoon granulated sugar
- Pinch of fine salt
Why Add Sugar and Salt?
Many recipes skip these two ingredients, but they make a noticeable difference.
The small amount of sugar helps the crust hold together while creating a slightly crisp texture after chilling.
A pinch of salt balances the sweetness and enhances the buttery cookie flavor.
For the White Chocolate Cheesecake Layer
- 16 oz full-fat cream cheese, softened
- 1 cup powdered sugar
- 8 oz high-quality white chocolate
- 1 teaspoon pure vanilla extract
- 8 oz whipped topping
Always choose full-fat cream cheese. Reduced-fat versions contain more moisture and produce a softer filling that doesn’t hold clean slices.
Use baking-quality white chocolate instead of candy melts for the richest flavor.
Raspberry Filling
- 2 cups fresh raspberries
- ⅓ cup granulated sugar
- 1 tablespoon lemon juice
- 1 tablespoon cornstarch
- 1 tablespoon water
The cornstarch should first be mixed with the water before being added to the saucepan. This prevents lumps and creates a perfectly smooth raspberry filling.
Decoration
- Whipped topping
- Fresh raspberries
- White chocolate curls
- Freeze-dried raspberry crumbs
- Fresh mint leaves
These simple decorations recreate the elegant bakery-style appearance shown in the finished dessert.
Kitchen Equipment
You don’t need special equipment.
Prepare:
- 9×13-inch baking dish
- Mixing bowls
- Electric mixer
- Silicone spatula
- Saucepan
- Measuring cups
- Offset spatula
- Food processor or rolling pin for crushing cookies
Step-by-Step Instructions
Step 1: Prepare the Cookie Crust
Crush the cookies until they resemble fine sand. Avoid large chunks, as they prevent the crust from holding together.
Mix the crumbs with:
- melted butter
- sugar
- salt
Every crumb should look evenly coated.
Press the mixture firmly into the baking dish using the bottom of a measuring cup.
Take your time during this step.
A well-compacted crust is the foundation of every successful cheesecake lush.
Refrigerate for at least 20 minutes.
Step 2: Make the Raspberry Filling
Place the raspberries, sugar, and lemon juice into a saucepan over medium heat.
Stir gently while the berries soften.
Mix the cornstarch with one tablespoon of water before adding it to the fruit.
Continue stirring for about five minutes until the mixture thickens into a glossy sauce.
Remove from the heat.
Transfer the filling to a shallow bowl.
Allow it to cool completely before assembling the dessert.
Warm filling can melt the cheesecake layer and ruin the beautiful presentation.
Step 3: Melt the White Chocolate Correctly
White chocolate burns easily.
Microwave it using 20-second intervals.
Stir after every interval.
Stop heating as soon as the last small pieces begin melting.
The residual heat will finish the job.
Allow the chocolate to cool for about 10 to 15 minutes.
It should feel slightly warm but never hot.
This is one of the most important secrets to preventing lumps in the cheesecake filling.
Step 4: Prepare the Cheesecake Filling
Beat the softened cream cheese for about three minutes until completely smooth.
Scrape down the sides of the bowl several times.
Add:
- powdered sugar
- vanilla extract
Continue mixing until creamy.
Slowly pour in the cooled white chocolate while mixing on low speed.
Finally, gently fold in the whipped topping.
Do not overmix after adding the whipped topping.
Gentle folding keeps the filling light and fluffy.
Step 5: Assemble the Layers
Spread half of the cheesecake mixture over the chilled crust.
Use an offset spatula to create an even surface.
Carefully spoon the cooled raspberry filling across the cheesecake.
Leave a small border around the edges to prevent the raspberry filling from leaking when sliced.
Spread the remaining cheesecake mixture on top.
Finish with an even layer of whipped topping.
Smooth the surface carefully for the cleanest presentation.
Step 6: Chill
Cover the dessert with plastic wrap.
Refrigerate for at least six hours.
For the best texture, chill overnight.
The longer chilling time allows the layers to firm up and makes slicing much easier.
Decorating Like a Bakery
Right before serving, decorate with:
- white chocolate curls
- fresh raspberries
- freeze-dried raspberry powder
- fresh mint
Arrange the decorations mostly along the center of the dessert for a clean and elegant finish.
Avoid decorating too early, as fresh raspberries can release moisture after several hours.
Expert Tips for Perfect Results
Small details often make the difference between an average dessert and one that looks professionally made.
Use Room Temperature Cream Cheese
Cold cream cheese creates tiny lumps that never fully disappear.
Let it sit at room temperature for about one hour before mixing.
Cool the Raspberry Filling Completely
This is one of the biggest mistakes beginners make.
Even slightly warm filling can soften the cheesecake layer and cause the colors to blend together.
Don’t Rush the Chilling Time
Although six hours is enough, overnight refrigeration produces cleaner slices and a creamier texture.
Use Good White Chocolate
High-quality white chocolate melts smoothly and delivers a richer flavor.
Avoid products made primarily with vegetable oils.
Clean the Knife Between Slices
Dip a sharp knife into hot water.
Dry it with a towel before every cut.
This simple trick creates beautiful bakery-style squares every time.
How to Store White Chocolate Raspberry Cheesecake Lush
Store leftovers covered in the refrigerator for up to four days.
Because this dessert contains dairy, avoid leaving it at room temperature for more than two hours.
For longer storage, freeze individual portions for up to two months.
Wrap each slice tightly before freezing.
Thaw overnight in the refrigerator before serving.
The texture remains remarkably creamy even after freezing.
Variations to Try
Once you’ve mastered the classic recipe, it’s easy to customize.
Some delicious variations include:
- Strawberry White Chocolate Cheesecake Lush
- Mixed Berry Cheesecake Lush
- Blackberry White Chocolate Version
- Blueberry Cheesecake Lush
- Lemon Raspberry Cheesecake Lush
- Oreo White Chocolate Cheesecake Lush
- Chocolate Cookie Crust Version
- Gluten-Free Version using gluten-free vanilla cookies
Each variation keeps the same creamy texture while introducing a new flavor profile.
Final Thoughts
If you’re searching for a dessert that combines elegance, simplicity, and unforgettable flavor, White Chocolate Raspberry Cheesecake Lush deserves a place in your recipe collection.
Its buttery vanilla cookie crust, silky white chocolate cheesecake filling, homemade raspberry layer, and fluffy whipped topping create a beautiful contrast of flavors and textures in every bite. Best of all, it can be prepared a day in advance, making it an excellent choice for holidays, family dinners, and celebrations when you want to spend more time with your guests than in the kitchen.
Once you serve these creamy, perfectly layered squares, don’t be surprised if everyone asks for the recipe. It has all the qualities of a bakery-style dessert with the convenience of a homemade no-bake favorite that you’ll enjoy making again and again.