
This post contains affiliate links. As an Amazon Associate I earn from qualifying purchases.
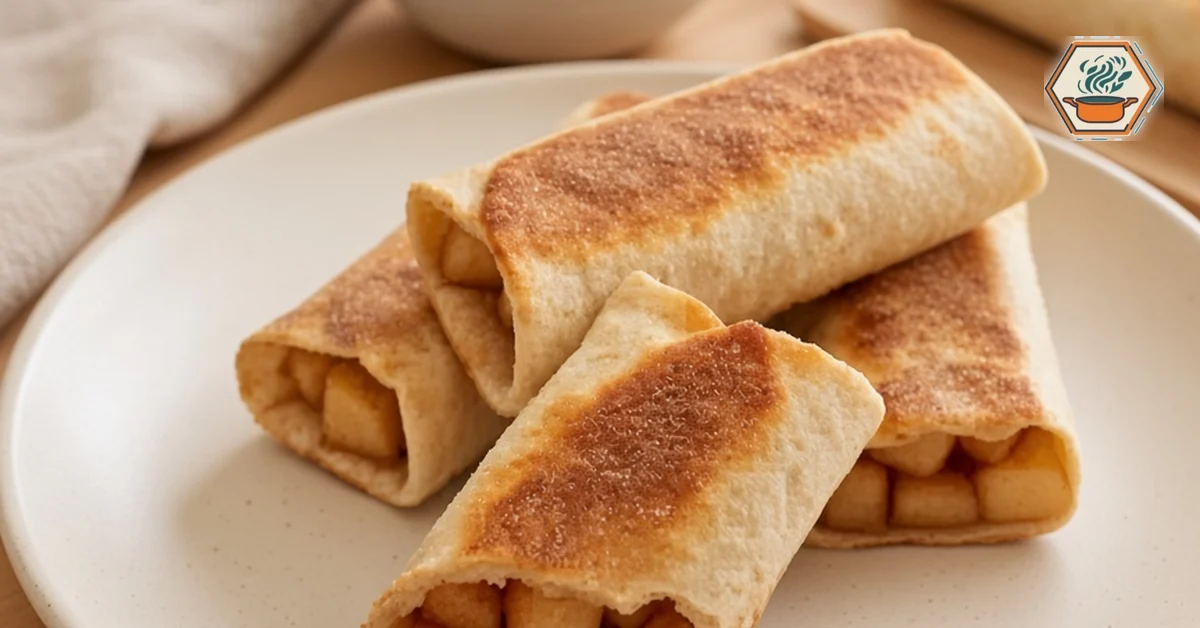
Cinnamon sugar apple pie roll-ups bring the best parts of a warm apple dessert into a hand-held treat. Each one wraps tender cinnamon apples in a golden tortilla, then gets a light coating of cinnamon sugar. You get a crisp outside, a soft apple center, and a familiar bakery-style aroma without making pie dough. They’re a fun option for a weekend treat, a fall gathering, or a dessert when you want something warm but don’t want a complicated baking project.
The secret is not an unusual ingredient. It’s the order of the steps. Cook the apples first, let the excess moisture thicken, cool the filling slightly, and then roll the tortillas snugly. If the filling is too wet or too hot, the wrappers can turn soft and split. For practical guidance on fruit fillings, see King Arthur Baking’s guide to pie thickeners, which explains why apples often need less starch than juicier fruits. A little patience at this stage makes assembly much easier.
Food handling matters, too, especially when you’re preparing dessert ahead for a family gathering. Keep cooked leftovers refrigerated promptly, and avoid leaving perishable fillings on the counter for extended periods. FoodSafety.gov’s food-safety guidance recommends refrigerating perishable foods within two hours, or one hour when temperatures are above 90°F. The recipe below gives practical make-ahead and storage suggestions, as well as several ways to crisp the finished rolls.
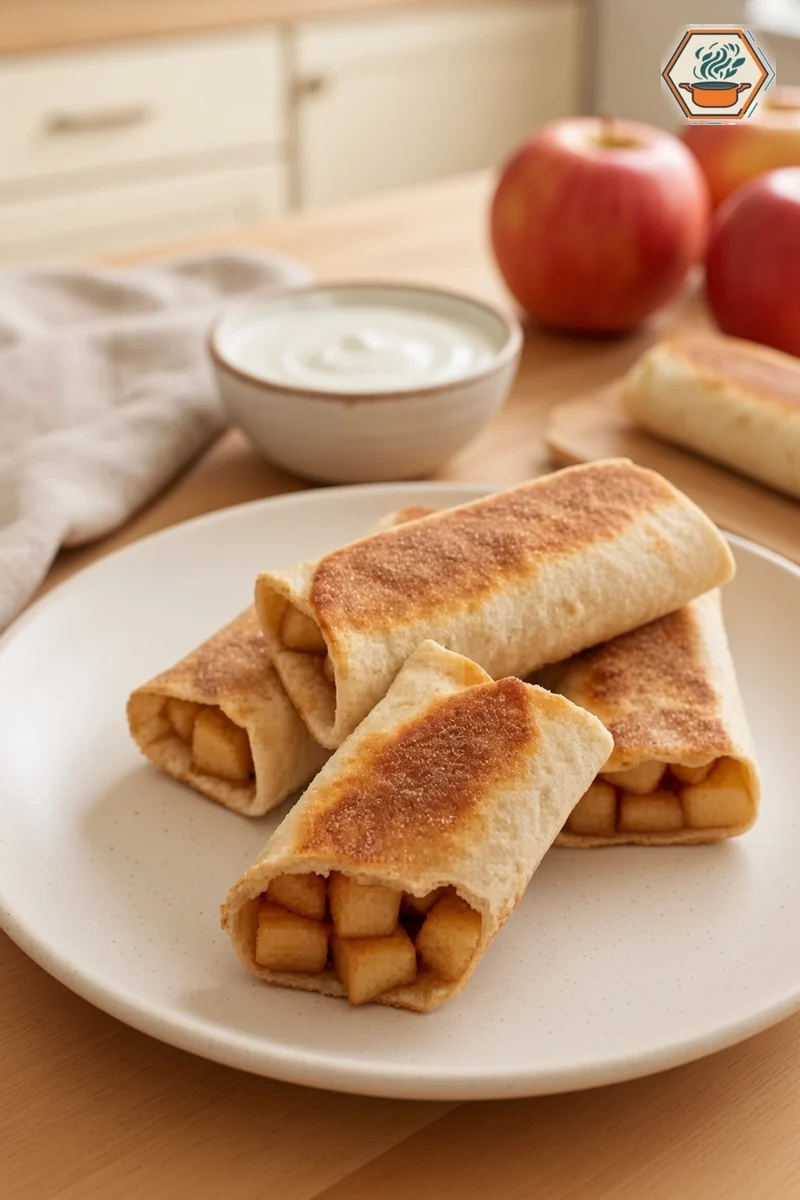
Photos in this post are illustrative AI-assisted images, not photos from a kitchen test. This recipe is an editorial formulation; times and yields are planning estimates rather than kitchen-tested results.
Quick table of contents
- What makes these roll-ups work
- Ingredients and the best apples
- Equipment and timing
- Step-by-step skillet method
- Oven and air-fryer options
- Common mistakes and fixes
- Variations and serving ideas
- Make-ahead, storage, and reheating
- Frequently asked questions
Why this dessert works
A traditional apple pie has a buttery crust and a fruit filling that must bake together. This shortcut uses a flour tortilla as the wrapper. It is not the same as flaky pastry, and that’s part of the appeal. When the tortilla is lightly buttered and toasted, its surface becomes pleasantly crisp while remaining flexible enough to hold the apples. A cinnamon-sugar finish gives each bite a warm, sweet crunch.
The apple filling is the heart of the recipe. Cooking the fruit before wrapping gives you control over tenderness. You can taste the mixture, adjust the sweetness, and let excess liquid evaporate before it reaches the tortilla. This is useful because different apple varieties release different amounts of moisture. Very soft apples may become a puree, while firmer varieties hold distinct little pieces. Neither is necessarily wrong, but a filling with some texture is easier to enjoy inside a roll-up.
These treats also suit smaller households. Make a full batch for guests, or cook a few and refrigerate the rest of the filling for another day. Kids can help mix the cinnamon sugar or spoon cooled filling onto tortillas, while adults handle the hot skillet and any cutting. The result looks festive without requiring special pastry skills.
Print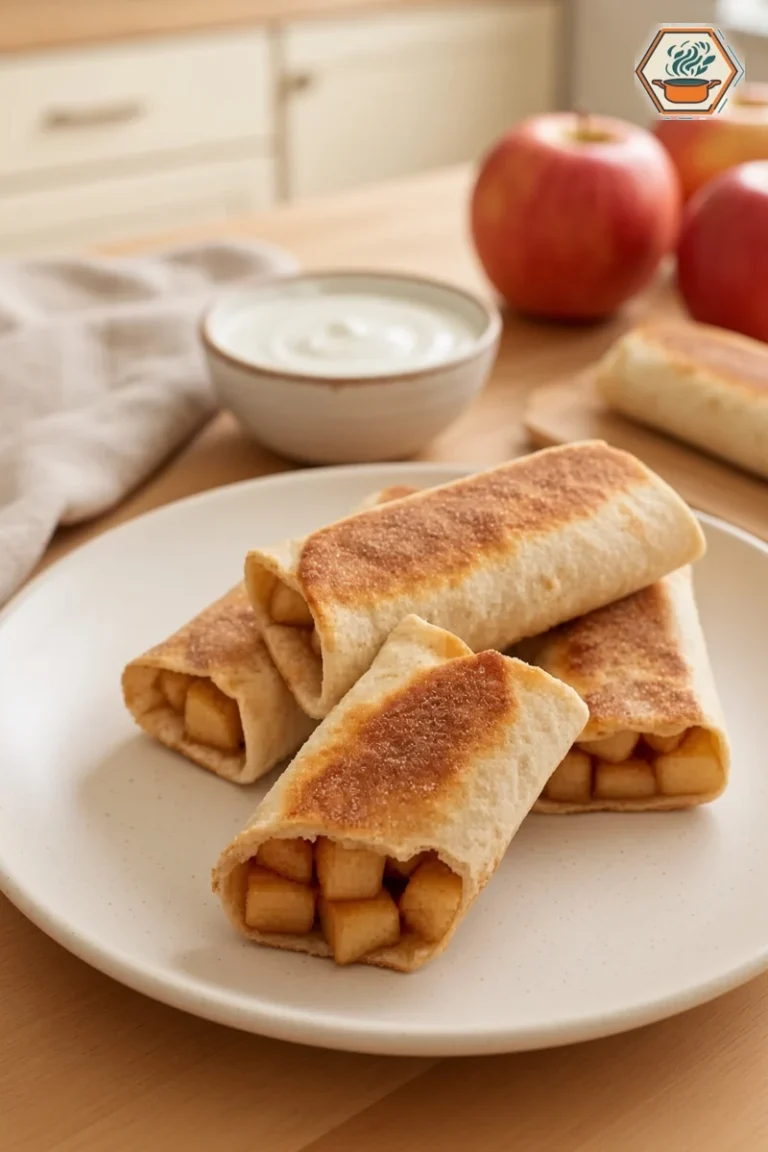
Cinnamon Sugar Apple Pie Roll-Ups
Warm cinnamon apples wrapped in golden, lightly buttered flour tortillas and finished with cinnamon sugar. Skillet method, plus oven and air-fryer alternatives.
- Total Time: 52 minutes
- Yield: 8 small rolls (4 servings of 2)
Ingredients
- 3 medium apples (about 3 cups diced after preparation)
- 8 soft 6-inch flour tortillas
- 2 tablespoons unsalted butter, for filling
- 3 tablespoons light brown sugar
- 1 teaspoon ground cinnamon, for filling
- 1 teaspoon lemon juice
- Pinch of salt
- 1 teaspoon cornstarch mixed with 1 tablespoon cold water, only if needed
- 1 tablespoon melted unsalted butter, for brushing
- 3 tablespoons granulated sugar
- 1 teaspoon ground cinnamon, for coating
- Optional: 1/4 teaspoon vanilla, pinch nutmeg, chopped toasted nuts, caramel for serving
Instructions
- Wash, core, and finely dice apples. Combine coating sugar with coating cinnamon in a separate bowl.
- Melt 2 tbsp butter over medium heat. Add apples, brown sugar, 1 tsp cinnamon, lemon juice, and salt. Cook 8–12 minutes until tender and juices are syrupy.
- If watery, stir in cornstarch mixed with cold water and cook 1–2 minutes until thickened. Remove from heat; cool about 10 minutes.
- Warm tortillas briefly if stiff. Spoon about 2 generous tablespoons filling onto each. Fold sides in and roll snugly.
- Brush lightly with melted butter. Toast seam-side down in a medium-low to medium skillet; turn until golden all around, about 3–6 minutes per batch.
- While warm, lightly coat with cinnamon sugar. Rest about 5 minutes; serve warm, checking that centers are not too hot.
Notes
- Timing: total time includes about 15 minutes of inactive time (10 minutes cooling the filling + 5 minutes resting the finished rolls). Browning time depends on how many rolls fit in your pan.
- Cooking times are estimates for an editorial formulation, not measured kitchen-test results.
- Oven alternative: 400°F (205°C) for about 12–16 minutes.
- Air fryer: 350°F (175°C) for about 6–9 minutes.
- Do not add cornstarch unless the filling remains watery. Do not overfill.
- Refrigerate promptly and use leftovers within 3–4 days. Reheat thoroughly to 165°F (74°C).
- Vegetarian when your tortillas and toppings are vegetarian (some flour tortillas contain lard); check product labels.
- Prep Time: 15 minutes
- Cooling and resting: 15 minutes
- Cook Time: 22 minutes
- Category: Dessert
- Method: Stovetop
- Cuisine: American
- Diet: Vegetarian
Ingredients for eight roll-ups
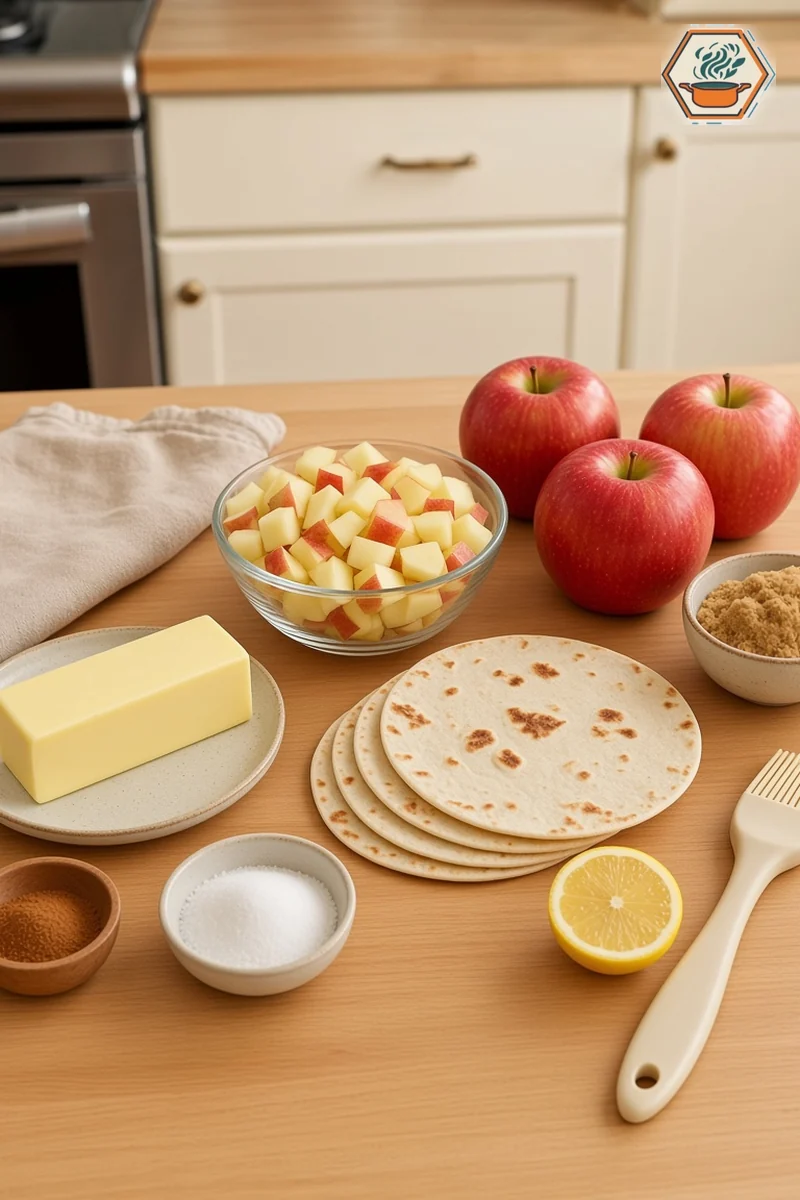
Essential ingredients
- 3 medium apples, about 1 pound before peeling and coring; aim for roughly 3 cups of small diced pieces.
- 8 small flour tortillas, approximately 6 inches across. Choose soft, fresh tortillas that bend without cracking.
- 2 tablespoons unsalted butter for cooking the apples.
- 3 tablespoons light brown sugar for the apple filling, adjusted to apple sweetness.
- 1 teaspoon ground cinnamon for the filling.
- 1 teaspoon lemon juice to brighten the apples.
- 1 teaspoon cornstarch mixed with 1 tablespoon cold water, only if the cooked apples release more liquid than can evaporate easily.
- 1 tablespoon unsalted butter, melted, for brushing the tortillas before or after toasting as appropriate.
- 3 tablespoons granulated sugar plus 1 teaspoon cinnamon for the finishing coating.
- A small pinch of salt to balance sweetness.
Optional ingredients
A quarter teaspoon of vanilla extract adds a rounded dessert flavor. A pinch of nutmeg can make the filling taste more like holiday apple pie. A little finely grated lemon zest offers brightness. Chopped toasted pecans or walnuts can add crunch, but avoid them when serving anyone with a nut allergy. A spoonful of raisins can work if you enjoy a sweeter, chewier filling. If you want a caramel note, drizzle a little caramel sauce on the plate just before serving rather than inside the tortilla, where excess sauce can cause leaks.
For a less sweet finish, use half the coating mixture and dust the rolls lightly. You can also serve them without any coating and offer cinnamon sugar at the table. A scoop of vanilla ice cream or a spoonful of plain Greek yogurt can be pleasant alongside warm rolls, though neither is needed for the recipe itself.
Which apples are best?
Granny Smith apples are tart and relatively firm. They are a good choice if you like a bright filling that holds its shape. Honeycrisp apples offer a crisp bite and a sweeter flavor. Braeburn or Pink Lady apples can also work well. Gala apples tend to taste sweet and mild, though they may soften more quickly. You can mix a tart apple with a sweet apple for balance.
Choose apples that feel firm and have no spoiled spots. Wash them under running water before peeling or cutting. Remove the core and seeds, then cut the flesh into small pieces, roughly one-quarter inch across. Smaller pieces are easier to roll and help every bite contain apples. Very large chunks can push through the tortilla and make the roll hard to close.
If your apples are especially juicy, cook the filling a little longer before adding starch. If the mixture still looks watery, add the small cornstarch slurry and cook until the liquid visibly thickens. The goal is a glossy coating, not a stiff pudding. King Arthur Baking’s apple pie guidance also shows how cinnamon, lemon, and a little thickener support a balanced fruit filling.
Kitchen equipment
You need a cutting board, a sharp knife, a vegetable peeler if you prefer peeled apples, a medium skillet or saucepan for the filling, a spoon or silicone spatula, a small bowl for cinnamon sugar, and a large nonstick or well-seasoned skillet for browning the rolls. A pastry brush is handy for applying a thin layer of butter, but the back of a spoon works in a pinch. Tongs or a heat-safe spatula make turning easier.
Optional tools, if you are shopping: none of these is required, and the tools you already own will work. A GIR Premium Silicone Spatula (Ultimate, 11-inch) is a heat-resistant option for stirring the apple filling, OXO Good Grips 9-Inch Tongs with Silicone Heads can turn the rolls without scratching a nonstick surface, and the T-fal Ultimate Hard Anodized Nonstick 12-Inch Fry Pan with Lid is roomy enough to brown several rolls in one batch (note that this pan is not induction-compatible).
A thermometer is not required for this recipe. You are looking for apples that are tender and a tortilla exterior that is evenly golden, rather than a specific internal temperature. Keep a plate ready for the finished rolls, and place it away from the hot stove. If you’re using an air fryer, check that the basket can hold the rolls in one layer without crowding.
There is no need to buy a specialty apple slicer, a stand mixer, or a deep fryer. An apple corer is optional if you already own one. A small offset spatula can help spread the filling, but an ordinary spoon is enough. Choose the tools you already have before adding more equipment to your shopping list.
Timing and yield
This editorial formulation makes 8 small roll-ups, usually enough for four people at two each, or eight modest dessert portions. Allow 15 minutes for preparation, approximately 12 minutes to cook the apple filling, 10 minutes for the filling to cool enough to handle, 8 to 12 minutes to brown the rolls in batches, and 5 minutes for a brief rest before serving. That is approximately 50 to 55 minutes elapsed, depending on your pan size and the apples. The actual hands-on time is around 30 to 35 minutes. These are planning estimates, not verified results from a kitchen test.
If your skillet fits only two rolls at a time, the browning stage may take longer. If the apples are diced very small, they may soften faster. Watch the food rather than relying on the clock alone. The finished rolls are best when warm, but the filling should not be so hot that it burns your mouth.
How to make cinnamon sugar apple pie roll-ups
Step 1: Prepare the apples
Wash the apples and pat them dry. Peel them if you prefer a smooth filling. Leaving thin, clean peels on can add color and texture, but some varieties have tougher skins. Remove the cores and dice the fruit into small, even pieces. Measure about three cups of diced apples. If you have a little more, save the extra for oatmeal or a snack instead of overstuffing the tortillas.
Measure the brown sugar, cinnamon, lemon juice, and salt before turning on the stove. Stir the granulated sugar and the remaining cinnamon together in a separate shallow bowl for later. Keeping the coating separate prevents you from accidentally adding all the sugar to the apple filling.
Step 2: Cook the apple filling
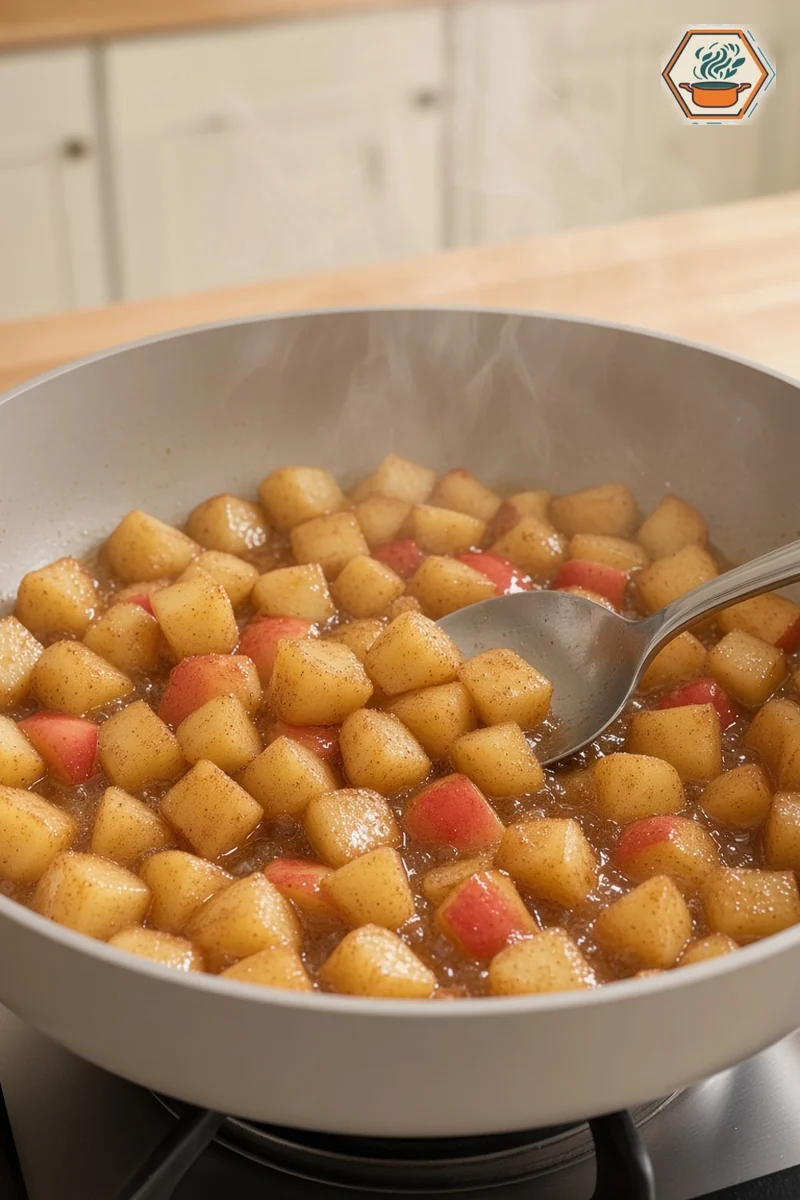
Melt two tablespoons of butter in a medium skillet over medium heat. Add the diced apples, brown sugar, one teaspoon cinnamon, lemon juice, and a pinch of salt. Stir gently so the apples are coated. Cook for about 8 to 12 minutes, stirring every minute or two, until the apples are tender but still hold their shape.
At first, the mixture may look dry. Then the apples will release moisture and the sugar will dissolve. Continue cooking until the liquid becomes lightly syrupy. If you see a pool of thin juice after the apples are tender, stir together one teaspoon cornstarch and one tablespoon cold water. Add this slurry to the bubbling filling and cook for another minute or two, stirring, until it thickens. Do not sprinkle dry cornstarch directly onto the hot fruit; it may clump.
Taste a cooled spoonful. Add a tiny pinch of cinnamon or a few drops of lemon juice if needed. Do not taste straight from the hot pan, since sugary fruit can cause burns. Remove the pan from the heat when the apples are soft and the filling no longer runs freely across the skillet.
Step 3: Let the filling cool briefly
Transfer the filling to a shallow bowl or plate and let it cool for about 10 minutes, stirring once or twice. It should still be warm but not steaming heavily. This short pause helps prevent the tortillas from becoming soggy and makes them safer to handle. If you are preparing the filling well in advance, cool it promptly and refrigerate it rather than leaving it on the counter for a long period.
Step 4: Soften and fill the tortillas
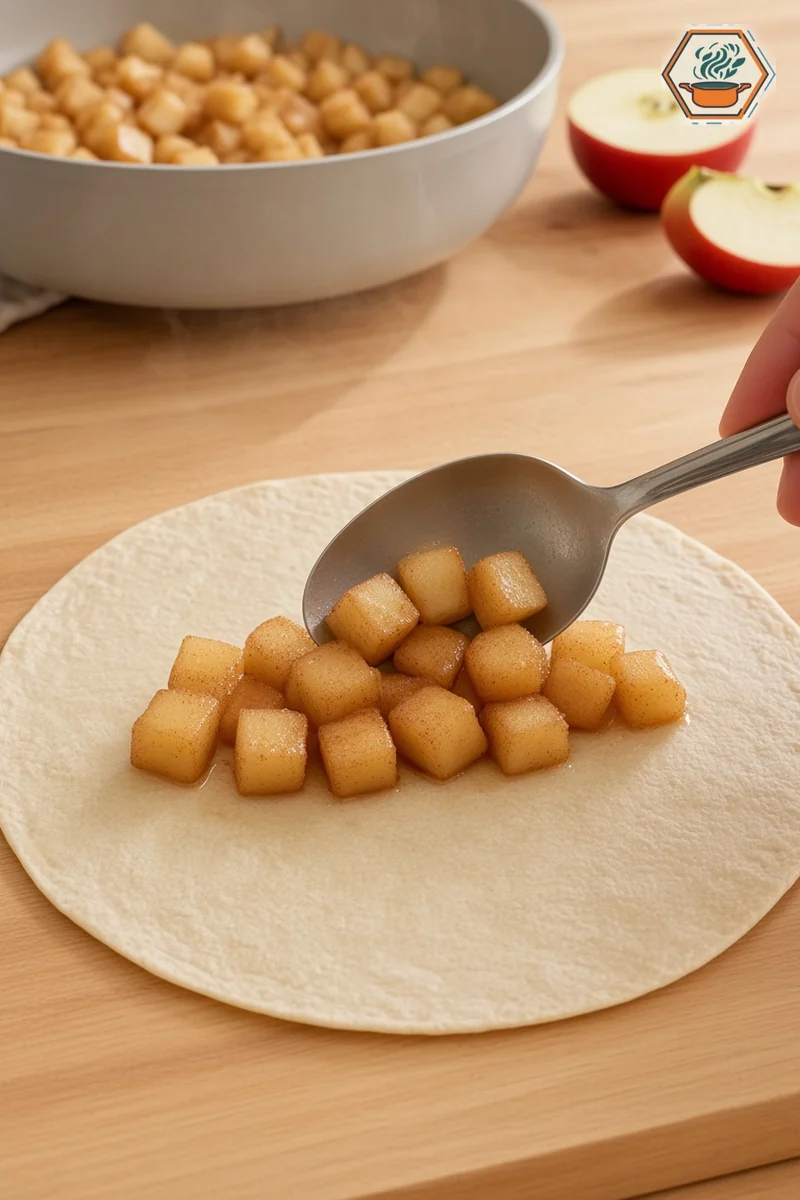
Lay one tortilla on a clean cutting board. If it feels stiff, warm it briefly in a dry skillet over low heat or according to its package directions until it bends easily. Place about two generous tablespoons of filling in a short line slightly below the center, leaving space around the edges. Resist adding extra filling. Overstuffed rolls tend to split or leak during cooking.
Fold the left and right sides inward over the ends of the filling. Bring the lower edge up and over the apples, then roll snugly toward the top. Set the roll seam-side down. Repeat with the remaining tortillas. If the filling seems to slide out, use less and make the end folds tighter. A small amount of leftover filling is better than eight broken rolls.
Step 5: Brown the rolls
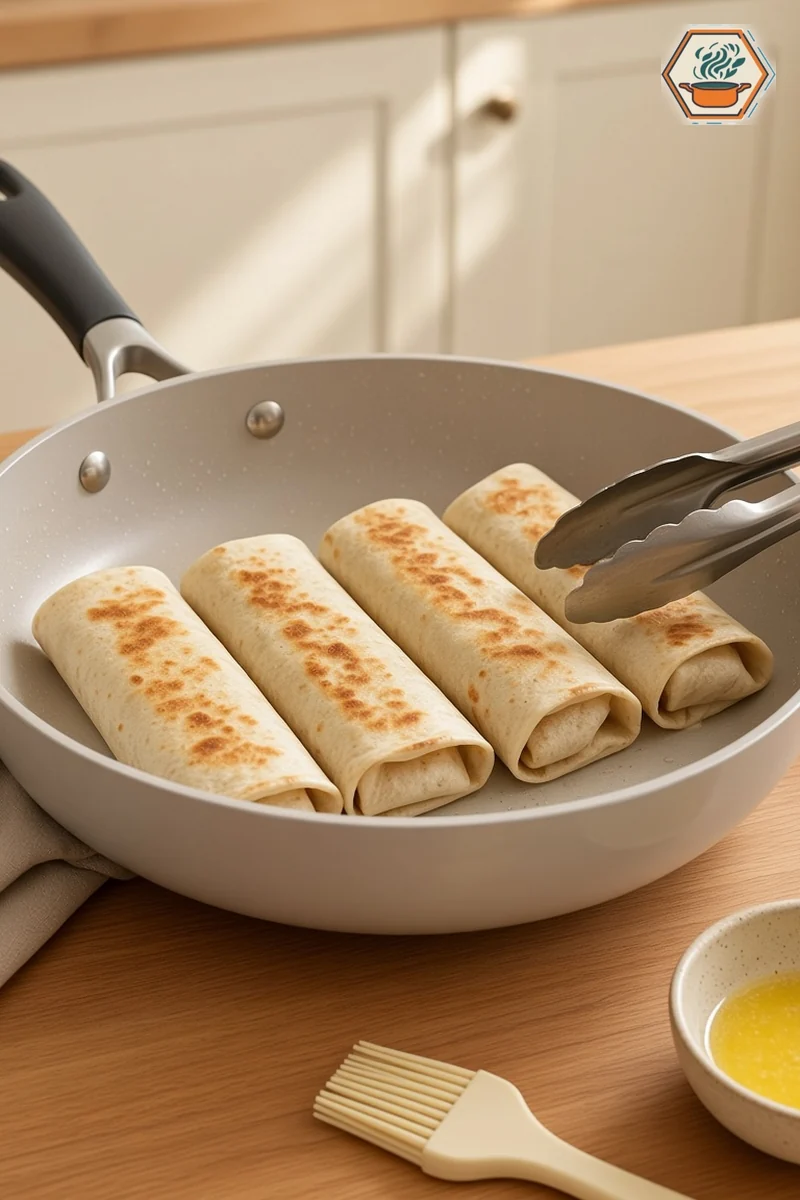
Heat a large nonstick skillet over medium-low to medium heat. Brush the outside of each roll lightly with melted butter. Place a few rolls seam-side down in the skillet, leaving space between them. Cook until the seam sets and the underside becomes golden, about 1 to 2 minutes. Turn carefully with tongs and continue browning the other sides, usually another 2 to 4 minutes in total per batch.
Reduce the heat if the tortilla darkens too quickly. The apples are already cooked, so the purpose of this stage is to toast the wrapper and warm the filling. You do not need to deep-fry the rolls or add a large amount of oil. A thin coating of butter is enough for color and flavor. Transfer each browned roll to a plate when the outside looks crisp and evenly golden.
Step 6: Add the cinnamon sugar
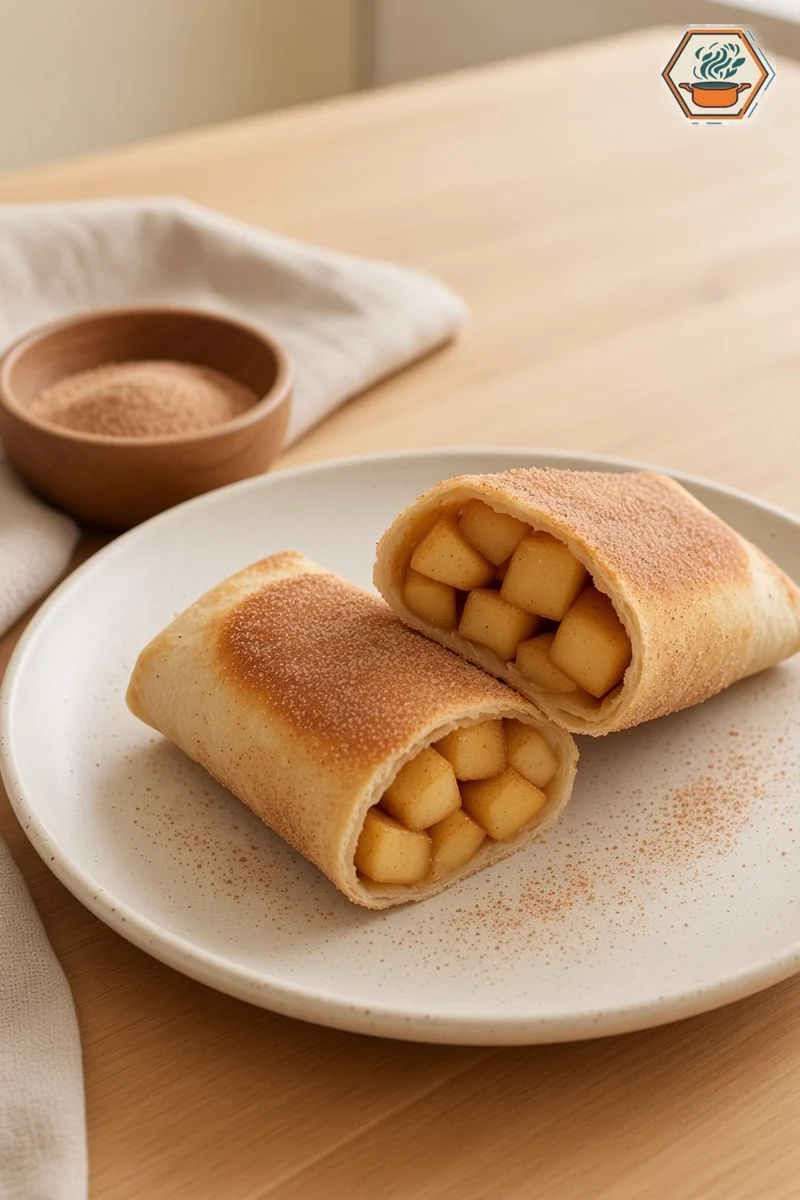
While the rolls are still warm, brush with the smallest amount of extra melted butter if the surface is too dry for sugar to stick. Roll or sprinkle them in the prepared cinnamon-sugar mixture. Turn gently to coat the sides. If you prefer a lighter finish, dust with a spoon rather than rolling every side through the sugar. Do not add sugar directly to a very hot, empty skillet; it can scorch rapidly and leave a bitter taste.
Step 7: Rest and serve
Let the finished rolls stand for about five minutes before serving. The centers can remain hotter than the tortilla exterior. Slice one on the diagonal to show the apple filling, or serve whole with a fork and napkin. A little vanilla ice cream, yogurt, or a modest caramel drizzle can make the plate feel special. Serve promptly for the best crisp texture.
Can you bake these instead?
Yes. For a hands-off alternative, preheat the oven to 400°F (205°C). Place the assembled rolls seam-side down on a parchment-lined baking sheet. Brush lightly with melted butter. Bake for approximately 12 to 16 minutes, turning once if needed, until the tortillas are golden and crisp. Oven performance varies, so begin checking early. Add cinnamon sugar after baking while the surfaces are still lightly buttery. The oven method is useful for a larger batch because the rolls can cook at the same time.
Do not expect the oven version to taste exactly like a skillet-toasted roll. The heat surrounds the tortilla rather than browning it directly against a pan, so the surface may be drier and more evenly crisp. If you want a softer middle, avoid baking longer than necessary. If the ends open, place the rolls seam-side down and keep the filling portions modest.
Air fryer option
For an air fryer, preheat to 350°F (175°C) if your model recommends preheating. Lightly brush the rolls with butter and arrange them seam-side down in a single layer. Cook for approximately 6 to 9 minutes, checking halfway through and turning only if needed. Different air fryers brown at different rates, and small tortillas can darken quickly. Work in batches if the basket is small. Coat with cinnamon sugar after cooking.
Avoid loose parchment paper in an empty air fryer; circulating air can lift it toward the heating element. Follow your appliance manual. Do not crowd the basket or stack the rolls, since blocked airflow can leave damp spots. A few minutes of attention near the end can make the difference between golden and overly dark.
Common mistakes and how to avoid them
The filling is watery
Apples release moisture as they cook. If the liquid is still thin, give it more time to reduce. Add a small cornstarch slurry only if needed. Let the filling cool slightly before assembly. A runny filling will soak into the tortilla, making the roll soft instead of crisp. Avoid adding extra juice or syrup just because the pan looks dry at the beginning.
The tortillas tear
Cold or stale tortillas can crack when folded. Use fresh, flexible tortillas and warm them briefly before rolling. Do not pull too tightly around the filling. A snug wrap is helpful, but a forced wrap can split. Small tortillas work well only when the filling portions stay small. For a larger dessert, use a larger tortilla and adjust the amount of filling rather than cramming more into a six-inch wrapper.
The outsides burn before they crisp
The heat is probably too high. Brown the rolls over medium-low to medium heat and turn as soon as the surface becomes golden. Sugar and butter can brown quickly, especially in a thin skillet. Since the filling is already cooked, there is no reason to leave the rolls on high heat. If you smell burning, lift the pan off the heat briefly and reduce the burner setting.
The cinnamon sugar will not stick
The tortillas may be too dry. Brush them lightly with melted butter just before coating. Do not soak them. Too much butter makes the sugar clump and the exterior greasy. A thin, even coating gives a pleasant finish without hiding the apple flavor.
The rolls open while cooking
Start seam-side down and let that surface toast before turning. Fold the sides inward before rolling. Avoid large chunks of apple near the ends. If a roll still opens, turn it gently with a spatula and serve it on a plate; the flavor is not ruined by an imperfect shape.
Easy flavor variations
Apple and pecan
Fold one or two tablespoons of finely chopped toasted pecans into the cooled filling. The nuts add crunch and a roasted flavor. Keep pieces small so the tortillas still close. Clearly identify the nuts when serving guests, and skip them entirely for anyone with an allergy.
Apple and raisin
Add a tablespoon or two of raisins during the last few minutes of apple cooking. They will soften in the warm juices. This variation is sweeter, so consider reducing the brown sugar slightly. Golden raisins work as well as dark raisins.
Maple cinnamon
Replace a small portion of the brown sugar with pure maple syrup, then cook long enough for the added liquid to reduce. Start with one tablespoon, not a large pour. Too much syrup can make the filling runny. Maple flavor is particularly appealing during fall breakfasts and holiday gatherings, though these rolls are still a dessert.
Less-sweet apple rolls
Use naturally sweet apples and reduce the brown sugar in the filling. You can also dust only one side of each finished roll with cinnamon sugar. The filling will taste more fruit-forward. Remember that reducing sugar changes sweetness, not the need to cook off excess moisture.
Apple and pear
Replace one apple with a firm pear. Pears can soften faster and release additional juice, so dice them evenly and watch the skillet. The flavor is mellow and aromatic. Cook until the fruit holds together rather than turning to sauce.
Mini party bites
Cut larger tortillas into manageable sections before assembly, or use smaller tortillas and less filling. Secure the shape through careful folding rather than sharp toothpicks that guests might overlook. Serve the finished rolls on a platter with small plates. Mini portions are convenient at a potluck but can dry out more quickly, so watch the cooking time.
When to serve them
These rolls suit a casual Sunday dessert, a cozy movie night, a school-break treat, or an autumn get-together. Their familiar cinnamon-apple flavor also works on a Thanksgiving dessert table as a smaller alternative to pie. If serving at a gathering, make the apple filling earlier in the day and crisp the rolls shortly before guests arrive. This gives you less work during the busiest part of the evening.
For a family-style presentation, stack the warm rolls loosely on a platter and place a small bowl of cinnamon sugar nearby. Avoid piling them tightly while they are steaming, because trapped moisture can soften the exterior. If you’re bringing them to a neighbor, let them cool slightly before covering. They may lose some crispness in transit, but a brief reheating can help.
For brunch, pair a small roll with fruit and coffee or tea. For an after-dinner dessert, serve one or two with a scoop of ice cream. If you like contrasting flavors, a spoonful of plain yogurt can balance the sweetness. You do not need elaborate garnishes. A clean diagonal cut showing the tender apples is often the most inviting presentation.
Make-ahead tips
The best part to prepare in advance is the apple filling. Cook it, transfer it to a shallow container, cool it promptly, and refrigerate it. The next day, warm the filling just enough to loosen it if necessary, then let it return to a comfortable handling temperature before assembling. Cold filling can also be used if it is thick enough to spoon, although the centers may need a little more time to warm during the final browning.
You can assemble the rolls ahead for a short period, but the tortillas will gradually absorb moisture. If crispness matters most, keep the filling and tortillas separate until you are ready to cook. For a party, set out the prepared filling, tortillas, melted butter, and cinnamon sugar in separate bowls, then assemble a batch just before serving.
Storing leftovers safely
Let the cooked rolls stop steaming, then refrigerate them in a covered container within two hours of cooking. If the room or outdoor temperature exceeds 90°F, use the one-hour guideline. Store the rolls in a shallow container so they cool promptly. For quality, aim to eat them within 3 to 4 days, although they are crispiest on the day they are made. The FoodSafety.gov storage guidance advises using cooked leftovers within four days.
Keep the cinnamon sugar separate if you expect leftovers, since it may dissolve against a moist surface. Refrigerated rolls will soften as they sit. That is normal and does not mean they were made incorrectly. Reheat them until thoroughly hot; for leftovers, FoodSafety.gov advises reheating to 165°F (74°C). A skillet or oven can restore some surface crispness better than a microwave. If reheating in a skillet, use moderate heat and turn often so the tortilla does not scorch.
Can you freeze them?
You can freeze cooked, cooled rolls, but expect some texture loss when they thaw. Wrap each roll individually, then place the wrapped pieces in a freezer-safe bag or container. Label the package with the date. For best eating quality, try using them within about one to two months; this is a quality suggestion, not a food-safety cutoff. Thaw in the refrigerator and reheat thoroughly in the oven or air fryer. Add fresh cinnamon sugar after reheating if the original coating has dissolved.
Freezing the filling by itself is another option. Portion the cooked apples into small containers so you can thaw only what you need. If the thawed filling looks watery, heat it briefly in a skillet to evaporate excess moisture before assembling fresh tortillas. Do not refreeze a filling that has been mishandled or left warm for extended periods.
Ingredient swaps and dietary notes
Flour tortillas contain wheat, so this recipe is not gluten-free as written. Some gluten-free tortillas may work, but their flexibility and browning behavior vary. Warm them gently and test one before assembling the full batch. Butter contains milk. A neutral cooking oil or suitable plant-based butter alternative may be used for a dairy-free variation, though the flavor and browning may differ. Always check tortilla and topping labels when cooking for someone with allergies.
Brown sugar gives the filling a mild caramel flavor. White sugar can replace it if that is what you have, but the taste will be slightly different. Fresh lemon juice is helpful but not essential; its acidity balances the sweet apples. Ground cinnamon is the main spice. Apple pie spice can stand in for cinnamon if you prefer a more complex blend, but check the ingredients because some blends include cloves or allspice that can become strong in a small dessert.
Frequently asked questions
Can I make apple pie roll-ups without frying?
Yes. Bake them at 400°F until golden, or cook them in an air fryer at 350°F in a single layer. Both methods use a light butter coating rather than deep-frying. Cooking times depend on the appliance and tortilla size, so watch for golden color and a crisp exterior.
Do I need to peel the apples?
No. Thin apple peels can stay on if you enjoy a little extra texture. Wash the fruit well and dice it small. Peel apples with thick or tough skins if you want a smoother filling. The main goal is an evenly cooked mixture that is easy to roll.
What kind of tortillas work best?
Small, soft flour tortillas are the simplest option. They bend easily and toast to a pleasant golden finish. Corn tortillas are more likely to crack and have a different flavor, so they are not a direct substitute. If using another type, test one roll before preparing the entire batch.
Can I use canned apple pie filling?
Yes, as a shortcut, but choose a filling with small apple pieces and drain or reduce any excess syrup. Chop large pieces so they fit. Canned filling may already contain a lot of sugar and spices, so skip the extra filling sugar and adjust the cinnamon coating to taste.
Why are my roll-ups soggy?
The most common reasons are wet filling, wrapping while the apples are very hot, or stacking the rolls while they steam. Cook down the fruit juices, cool the filling briefly, toast in a single layer, and serve soon after browning. If the rolls were refrigerated, reheat them in a dry-heat appliance rather than relying only on a microwave.
Can I prepare these the night before?
Prepare the apple filling the night before and refrigerate it promptly. Keep the tortillas separate. Assemble and brown the rolls close to serving time for the best texture. Fully assembled uncooked rolls may soften in the refrigerator because the wrapper absorbs moisture.
How do I keep the filling from leaking?
Use small diced apples and only a modest spoonful of filling. Fold the sides inward, roll snugly, and cook seam-side down first. If the filling is runny, thicken or reduce it before assembly. Large apple chunks and overfilling are common causes of leaks.
Can children help make this recipe?
Yes, with age-appropriate tasks. Children can stir cooled cinnamon sugar, count tortillas, and help spoon cooled apple filling. An adult should handle the knife, hot fruit, stove, and skillet. Warn everyone that sugary fillings can stay very hot even when the tortilla feels comfortable to touch.
How many roll-ups should I serve per person?
For a small dessert, one or two six-inch rolls per person is a reasonable starting point. If you are serving ice cream or several other desserts, one may be enough. For a party, make a few extras and serve them in small portions. Actual serving sizes depend on appetite and the size of the tortillas.
Can I reduce the sugar?
Yes. Start with sweet apples, reduce the brown sugar in the filling, and apply a lighter cinnamon-sugar coating. The texture may change slightly, but the rolls can still brown nicely. Taste the cooked apples before assembly so you can adjust the balance without guessing.
More RecipesMind ideas
If you enjoy simple treats made with tortillas, see creative ways to use tortillas in pastry recipes and how to put tortillas in the oven. For apple dessert technique, why cornstarch matters in apple pie is a helpful companion. For another cozy apple treat, try caramel apple blondies. If you’re planning a larger fall dessert spread, try pumpkin pecan waffles or browse more ideas on the RecipesMind home page.
Final serving note
A good apple roll-up does not need to look perfectly identical to the next one. Aim for tender apples, a filling that stays inside the tortilla, a golden wrapper, and a light cinnamon-sugar finish. Serve the rolls warm enough to smell the cinnamon but cool enough to enjoy comfortably. The simple method makes it easy to adjust the sweetness, apple variety, and cooking style to suit your household.