
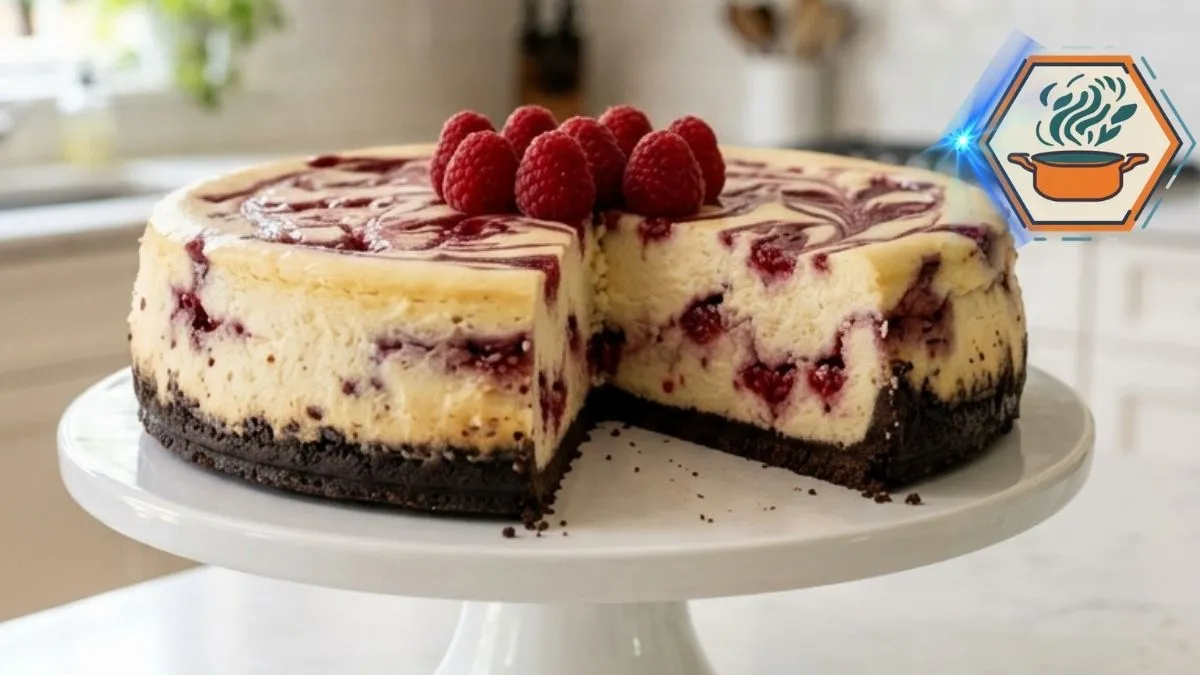
The first thing I notice when I cut into a Raspberry Swirl Chocolate Crust Cheesecake is not the pretty top. It is what appears inside. A pale, creamy slice reveals deep red raspberry ribbons, while a thin dark chocolate crust holds everything together. Each forkful moves from tangy berry to vanilla cheesecake and finally to chocolate cookie crumbs.
That contrast is exactly what this recipe is built around. Raspberry swirl cheesecakes are often made in a 9-inch springform pan, and established versions also rely on gentle mixing and careful cooling for a smooth result. Martha Stewart’s current raspberry-swirl cheesecake, for example, uses a 9-inch cake and raspberry puree, while other tested versions bake the dessert at 325°F. If you enjoy learning the small techniques that make desserts more dependable, you can also browse the RecipesMind home page.
The method below adds several details that short recipes often leave unexplained. The raspberry sauce is cooked and thickened before it reaches the batter. The chocolate base is prebaked. The cheesecake is baked gently in a water bath and then cooled slowly. Those details matter because the goal is not simply a cheesecake that tastes good. We want a tall cheesecake with a dense yet creamy interior and clear ruby-red ribbons.
Affiliate disclosure: As an Amazon Associate I earn from qualifying purchases. This article may contain affiliate links to kitchen tools I find useful for preparing this recipe.
JUMP TO
Why This Raspberry Cheesecake Works
Chocolate and raspberry naturally bring different flavors to the plate. The cookie base is dark, rich, and slightly bitter. The cheesecake is mild and creamy. Raspberry adds acidity and fruitiness that cuts through the richness.
There is also a visual reason for keeping the components separate.
Instead of mixing raspberry puree throughout the entire filling, we add it in small spoonfuls. A skewer then pulls the sauce into narrow ribbons. This leaves most of the filling pale while creating pockets of stronger raspberry flavor.
The crust also stays relatively thin. A very thick chocolate base can overpower the fruit.
Finally, this is a make-ahead dessert. Refrigerating it overnight gives the filling time to firm before slicing. Land O’Lakes similarly recommends chilling its raspberry cheesecake for eight hours or overnight.
Ingredients You’ll Need
This recipe makes one 9-inch cheesecake, about 12 generous servings.
Chocolate Cookie Crust
- 2 cups finely crushed chocolate sandwich cookies
- 5 tablespoons unsalted butter, melted
- 1 tablespoon granulated sugar
- 1/8 teaspoon fine salt
The extra sugar is useful when the cookies you choose are less sweet. If your sandwich cookies contain a generous amount of sweet cream filling, you can omit it.
The important detail is texture. Process the cookies into very fine crumbs. Large pieces create gaps and make clean slices harder to achieve.
Raspberry Swirl
- 2 cups fresh or frozen raspberries
- 1/3 cup granulated sugar
- 1 tablespoon fresh lemon juice
- 2 teaspoons cornstarch
- 1 tablespoon cold water
Frozen raspberries work well, but they can release more liquid. Do not thaw them and pour that liquid directly into the cheesecake.
Instead, cook the fruit into a concentrated sauce.
Vanilla Cheesecake Filling
- 32 ounces full-fat block cream cheese, softened
- 1 1/4 cups granulated sugar
- 1 cup full-fat sour cream, room temperature
- 1 tablespoon vanilla extract
- 4 large eggs, room temperature
- 2 tablespoons all-purpose flour
- 1/4 teaspoon fine salt
Garnish
- 6 to 8 fresh raspberries
Keep the garnish restrained. A small group of raspberries in the center lets the marbled surface remain visible.
Equipment That Makes the Recipe Easier
A 9-inch springform pan is the most important piece of equipment. The removable ring lets you release the chilled cheesecake without turning it upside down.
You can compare suitable pans here: 9-inch springform pans on Amazon.
You will also need a roasting pan large enough to hold the springform pan. It becomes the water bath during baking. Here are roasting pans for a cheesecake water bath on Amazon.
A fine-mesh strainer is helpful if you want smooth raspberry ribbons without many seeds. See fine-mesh strainers on Amazon.
Finally, keep a thin skewer or knife nearby for marbling.
Step 1: Prepare the Pan Correctly
Preheat the oven to 325°F (165°C).
Lightly grease the bottom of a 9-inch springform pan. Cut a parchment circle to fit the base.
Because we are using a water bath, protect the outside of the springform pan carefully. Wrap the bottom and sides in two or three layers of heavy-duty aluminum foil.
Do not leave seams below the expected water level.
This small detail can save the crust. Springform pans are not necessarily watertight, so an exposed seam can allow water into the cookie base.
Step 2: Build a Firm Chocolate Cookie Crust
Process the chocolate sandwich cookies until they resemble fine crumbs.
Combine them with the melted butter, salt, and optional sugar.
The mixture should resemble damp sand. Pick up a spoonful and squeeze it. It should hold together without releasing liquid butter.
Pour the crumbs into the prepared pan.
Press them into an even layer across the bottom. A flat-bottomed measuring cup works better than fingertips because it applies even pressure.
Do not compact the crumbs with extreme force. You want a firm crust, not a hard cookie disk.
Bake for 8 to 10 minutes.
The crust should smell toasted and look set.
Remove it from the oven and allow it to cool while you prepare the remaining components. Prebaking is worth the extra few minutes because it helps establish the base before the wet cheesecake batter is added.
Step 3: Make the Raspberry Sauce
Put the raspberries, sugar, and lemon juice into a small saucepan.
Cook over medium heat for about 5 to 7 minutes, stirring regularly.
As the berries soften, gently crush them with the back of a spoon.
In a small bowl, combine the cornstarch with one tablespoon of cold water. Stir until completely smooth.
Pour this slurry into the hot raspberries while stirring.
Cook for about another minute.
The sauce should become glossy and lightly thickened. It should fall from a spoon slowly rather than behaving like raspberry juice.
This matters.
A thin puree can spread through the batter and muddy the pale filling. A slightly thicker sauce is easier to control and produces more defined raspberry streaks.
For a smoother result, push the warm sauce through a fine-mesh sieve. This removes most of the seeds.
Then cool the sauce completely.
Never spoon hot raspberry sauce into cheesecake batter. It can soften the cream cheese mixture and make the swirl less predictable.
Step 4: Make a Smooth Vanilla Cheesecake Filling
Place the softened cream cheese in a large mixing bowl.
Beat it on low to medium-low speed until smooth.
Add the sugar gradually and mix just until the mixture looks creamy. Scrape the bottom and sides of the bowl.
Now add the sour cream, vanilla, flour, and salt.
Mix briefly.
The flour provides a little additional structure, but this should still taste and feel like cheesecake rather than cake.
Room-temperature ingredients make this stage easier. Cold cream cheese tends to remain lumpy, which encourages you to beat the batter longer than necessary.
If you frequently make cheesecake, an instant-read thermometer can also be useful in the kitchen. Browse instant-read kitchen thermometers on Amazon.
Step 5: Add the Eggs Without Whipping the Batter
Add the four eggs one at a time.
Use low speed.
After each egg goes into the bowl, mix only until the yellow streaks disappear. Then add the next.
Stop the mixer as soon as the final egg is incorporated.
This is one of the most important parts of the recipe.
You are not trying to whip volume into the batter. Too much incorporated air can make cheesecake expand dramatically in the oven. It may then sink or crack as it cools.
If needed, finish the final few turns by hand with a silicone spatula.
Step 6: Create Raspberry Ribbons Inside the Cheesecake
Pour approximately half of the vanilla filling over the cooled chocolate crust.
Smooth it gently.
Drop small spoonfuls of the cooled raspberry sauce over the filling. Do not cover the entire layer.
Run a thin knife or skewer through the sauce with a few loose curves.
Stop early.
Too much swirling mixes the raspberry and vanilla together. The goal is visible ribbons rather than pink cheesecake.
Pour the remaining vanilla batter over the first layer.
Spoon more raspberry sauce across the surface in irregular dots and ribbons.
Draw the skewer through them using loose S-shaped movements.
You can learn a similar principle of controlled sugar work in our guide to mastering caramelized sugar: visual dessert techniques usually improve when you make deliberate movements instead of repeatedly working the surface.
Reserve any unused raspberry sauce for serving.
Step 7: Bake the Cheesecake in a Water Bath
Place the foil-wrapped springform pan inside the roasting pan.
Carefully pour hot water into the outer pan. Aim for roughly halfway up the side of the springform pan.
Transfer everything to the oven.
Bake at 325°F for approximately 65 to 80 minutes.
Do not judge doneness by waiting for the entire cheesecake to become rigid.
The outer area should look set. The center should still move slightly when the pan is nudged. It should wobble as one soft area rather than ripple like liquid batter.
Published raspberry cheesecake methods use this same general visual cue. Land O’Lakes, for instance, describes baking until the cheesecake is set about two inches from the edge.
Step 8: Cool It Slowly
When the cheesecake reaches that stage, turn off the oven.
Crack the oven door and leave the cheesecake inside for one hour.
The gradual temperature change is intentional.
After one hour, remove the cheesecake from the water bath. Carefully remove the foil.
Place the pan on a cooling rack.
Allow it to reach room temperature, then cover it and refrigerate it for at least six hours.
For the texture shown in this recipe, overnight chilling is better.
Do not remove the springform ring while the cheesecake is warm.
How to Get a Clean, Bakery-Style Slice
Once thoroughly chilled, run a thin knife around the inside edge of the pan if necessary.
Release the springform ring.
Transfer the cheesecake carefully to a serving plate or cake stand.
Add six to eight fresh raspberries near the center.
For clean slices, fill a tall container with hot water. Dip a sharp knife into the water, then dry it.
Make one cut.
Clean and warm the blade again before making the next cut.
It takes longer, but it keeps raspberry and chocolate crumbs from smearing across the pale filling.
You should see three clear visual elements in each slice:
- a thin, dark chocolate base
- a tall vanilla cheesecake layer
- irregular raspberry ribbons running through the cream
Common Cheesecake Mistakes
The crust falls apart
The crumbs may be too coarse or there may not be enough melted butter. Grind the cookies finely and test the mixture by squeezing some between your fingers before putting it into the pan.
Water gets into the crust
The springform pan was not sufficiently protected. Use multiple foil layers and keep the foil seams above the water.
The raspberry swirl disappears
The sauce was probably too thin, too warm, or over-swirled.
Cool it completely and thicken it enough that it can sit briefly on the batter before sinking.
The filling has lumps
The cream cheese was likely too cold.
Use softened full-fat block cream cheese and scrape the bowl several times before adding the eggs.
The cheesecake cracks
Cracking can have several causes, including overmixing, excessive baking, or rapid temperature changes.
A crack does not make the cheesecake inedible, but gentle mixing and gradual cooling help produce the smooth appearance we want.
Serving and Storage
This cheesecake is rich, so relatively narrow slices work well.
Serve it cold or allow an individual slice to sit briefly before eating if you prefer a softer texture.
A spoonful of reserved raspberry sauce can accompany the slice, but avoid covering the top. The marbled design is already the main decoration.
Keep leftovers covered and refrigerated. USDA food-storage guidance lists cheesecake at up to seven days refrigerated and about three months frozen. For best homemade quality, however, I prefer serving this cheesecake within the first few days.
For another fruit-forward dessert idea, see our guide to what strawberry puree is made of. You can also read how to make fruit puree if you want to understand how fruit consistency changes dessert sauces.
Frequently Asked Questions
Can I use frozen raspberries for raspberry swirl cheesecake?
Yes. Fresh and frozen raspberries both work. Frozen berries may release more liquid, which is why cooking and thickening the sauce before adding it to the cheesecake is important.
Do I need a water bath for cheesecake?
For this recipe, I recommend it. The moist, gentle baking environment helps the tall filling cook gradually. Protect the springform pan carefully so water does not reach the crust.
Why is my raspberry swirl turning the cheesecake pink?
You probably swirled it too much or used a sauce that was too thin. Use small spoonfuls of cold, thickened raspberry sauce and make only a few passes with the skewer.
How do I know when cheesecake is finished baking?
Look at the movement in the center. The edges should be set while the middle retains a gentle wobble. It should not look liquid.
Can I make Raspberry Swirl Chocolate Crust Cheesecake ahead of time?
Yes. In fact, it is an excellent make-ahead dessert because it benefits from a long chill. Bake it the day before serving and refrigerate it overnight.
Can I freeze raspberry cheesecake?
Yes. Chill it completely first. You can freeze the whole cheesecake or individual slices in suitable airtight wrapping. USDA storage guidance gives cheesecake a freezer storage period of about three months.
Why does cheesecake need room-temperature ingredients?
Softened cream cheese blends more easily with sugar, sour cream, and eggs. That means less mixing is needed to produce a smooth batter.
What makes this chocolate crust hold together?
Very fine cookie crumbs, enough melted butter, even compression, and a short prebake all contribute. Let the prebaked crust cool before adding the filling.
Print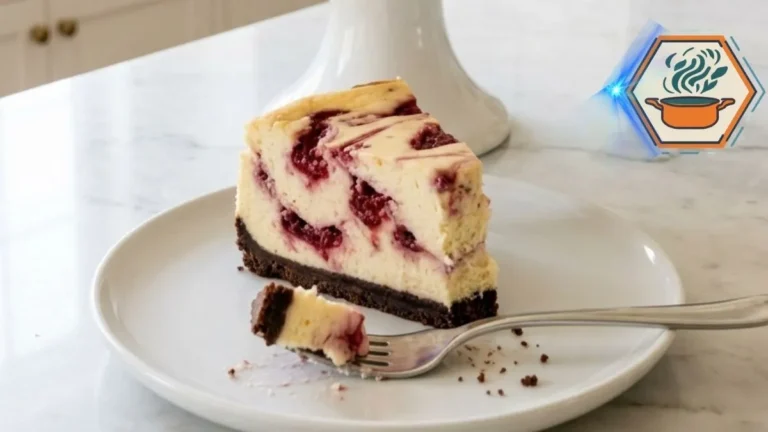
Raspberry Swirl Chocolate Crust Cheesecake
A tall and creamy vanilla cheesecake with a crisp chocolate cookie crust and homemade raspberry sauce swirled through the filling and over the top. The cheesecake is gently baked in a water bath, slowly cooled, and chilled overnight for clean slices, a dense creamy center, and distinct ruby-red raspberry ribbons.
- Total Time: 9 hours
- Yield: 12 slices
Ingredients
Chocolate Cookie Crust
2 cups finely crushed chocolate sandwich cookies
5 tablespoons unsalted butter, melted
1 tablespoon granulated sugar, optional if the cookies are already very sweet
1/8 teaspoon fine salt
Raspberry Swirl
2 cups fresh or frozen raspberries
1/3 cup granulated sugar
1 tablespoon fresh lemon juice
2 teaspoons cornstarch
1 tablespoon cold water
Vanilla Cheesecake Filling
32 ounces full-fat block cream cheese, softened to room temperature
1 1/4 cups granulated sugar
1 cup full-fat sour cream, at room temperature
1 tablespoon vanilla extract
4 large eggs, at room temperature
2 tablespoons all-purpose flour
1/4 teaspoon fine salt
Garnish
6–8 fresh raspberries
Instructions
1. Preheat the oven to 325°F (165°C). Lightly grease a 9-inch springform pan and line the bottom with a round of parchment paper.
2. Wrap the outside bottom and sides of the springform pan with 2–3 layers of heavy-duty aluminum foil. Keep the foil seams above the expected water level to reduce the chance of water reaching the crust.
3. Make the crust. Combine the finely crushed chocolate sandwich cookies, melted butter, optional sugar, and salt. Stir until all the crumbs are evenly moistened. The mixture should hold together when squeezed.
4. Transfer the crumbs to the prepared pan. Press them firmly and evenly over the bottom with the flat base of a measuring cup. Do not compact them excessively.
5. Bake the crust for 8–10 minutes at 325°F (165°C). Remove from the oven and let it cool while preparing the raspberry sauce and filling.
6. Make the raspberry sauce. Add the raspberries, 1/3 cup sugar, and lemon juice to a small saucepan. Cook over medium heat for 5–7 minutes, stirring frequently and gently crushing the berries as they soften.
7. In a small bowl, mix the cornstarch with 1 tablespoon cold water until completely smooth. Stir it into the raspberry mixture.
8. Cook for about 1 additional minute, stirring constantly, until the sauce becomes glossy and lightly thickened.
9. For smoother raspberry ribbons, press the sauce through a fine-mesh sieve to remove most of the seeds. Let the sauce cool completely before adding it to the cheesecake.
10. Prepare the filling. Beat the softened cream cheese on low to medium-low speed just until smooth. Add the sugar and mix until creamy, scraping the bottom and sides of the bowl as needed.
11. Add the sour cream, vanilla extract, flour, and salt. Mix on low speed just until combined.
12. Add the eggs one at a time on low speed. Stop mixing as soon as each egg disappears into the batter. Do not whip the batter or deliberately add air.
13. Pour approximately half of the cheesecake batter over the cooled chocolate crust.
14. Drop small spoonfuls of completely cooled raspberry sauce over the batter. Drag a thin knife or skewer through the sauce a few times to create loose ribbons. Do not over-swirl.
15. Carefully add the remaining cheesecake batter. Spoon more raspberry sauce over the surface in irregular dots and ribbons.
16. Pass a clean skewer through the raspberry sauce with a few loose S-shaped movements to create the marbled top. Stop before the raspberry and vanilla mixtures blend together.
17. Place the foil-wrapped springform pan inside a large roasting pan.
18. Carefully pour hot water into the roasting pan until it reaches approximately halfway up the outside of the springform pan. Do not splash water into the cheesecake.
19. Bake at 325°F (165°C) for approximately 65–80 minutes. The outer portion should look set while the center still has a gentle wobble when the pan is lightly nudged. The center should not look liquid.
20. Turn off the oven. Crack the oven door open and leave the cheesecake inside for 1 hour to cool gradually.
21. Remove the cheesecake from the water bath and carefully remove the foil. Place the pan on a cooling rack and allow the cheesecake to cool to room temperature.
22. Cover and refrigerate for at least 6 hours. For the firm, creamy texture and clean slices intended for this recipe, chill overnight.
23. Once completely chilled, carefully release the springform ring. Transfer the cheesecake to a serving plate or cake stand.
24. Garnish the center with 6–8 fresh raspberries.
25. For clean slices, dip a sharp knife into hot water and wipe it completely dry. Cut one slice, clean the blade, and repeat before every cut.
Notes
Use full-fat block cream cheese rather than whipped cream cheese or cream cheese spread.
Bring the cream cheese, sour cream, and eggs to room temperature before mixing. This makes it easier to produce a smooth batter without excessive mixing.
Process the chocolate cookies into fine crumbs. Large crumbs can make the finished crust fragile.
The optional tablespoon of sugar in the crust can be omitted when using very sweet filled chocolate sandwich cookies.
The raspberry sauce must be completely cool before it is swirled into the cheesecake.
The finished raspberry sauce should be lightly thickened rather than watery. Excess liquid can spread through the filling and reduce the definition of the raspberry ribbons.
Do not overmix after adding the eggs. Excess air can cause the cheesecake to rise more during baking and then sink or crack during cooling.
Do not over-swirl the raspberry sauce. A few deliberate passes produce clearer red ribbons. Too much swirling creates a uniformly pink filling.
Springform pans are not always watertight. Wrap the pan carefully before placing it in the water bath.
Do not wait for the center to become completely firm in the oven. A small, gentle wobble in the center is expected.
Cool the cheesecake gradually and refrigerate it overnight whenever possible before slicing.
For neat slices, use a warm, clean, dry knife and clean it between every cut.
Store the cheesecake covered in the refrigerator at 40°F (4.4°C) or below.
- Prep Time: 40 minutes
- Additional Time / Chilling Time: 7 hours minimum, preferably overnight
- Cook Time: 1 hour 20 minutes
- Category: Dessert
- Method: Baking
- Cuisine: American
A Dessert Worth Waiting Overnight For
The hardest part of this Raspberry Swirl Chocolate Crust Cheesecake may simply be leaving it in the refrigerator until the next day.
But that wait has a purpose.
Once chilled, the cheesecake becomes firm enough to reveal the design hidden inside. The knife passes through pale vanilla cream, catches ruby raspberry ribbons, and finally reaches the dark chocolate cookie crust.
That first slice is where all the careful details become visible.
Keep the raspberry sauce thick. Keep the batter mixing gentle. Give the cheesecake time to bake and cool gradually. Then let the refrigerator finish the job overnight.
The result is a dessert in which chocolate, vanilla, and raspberry each remain distinct—and every slice reveals a slightly different swirl.