
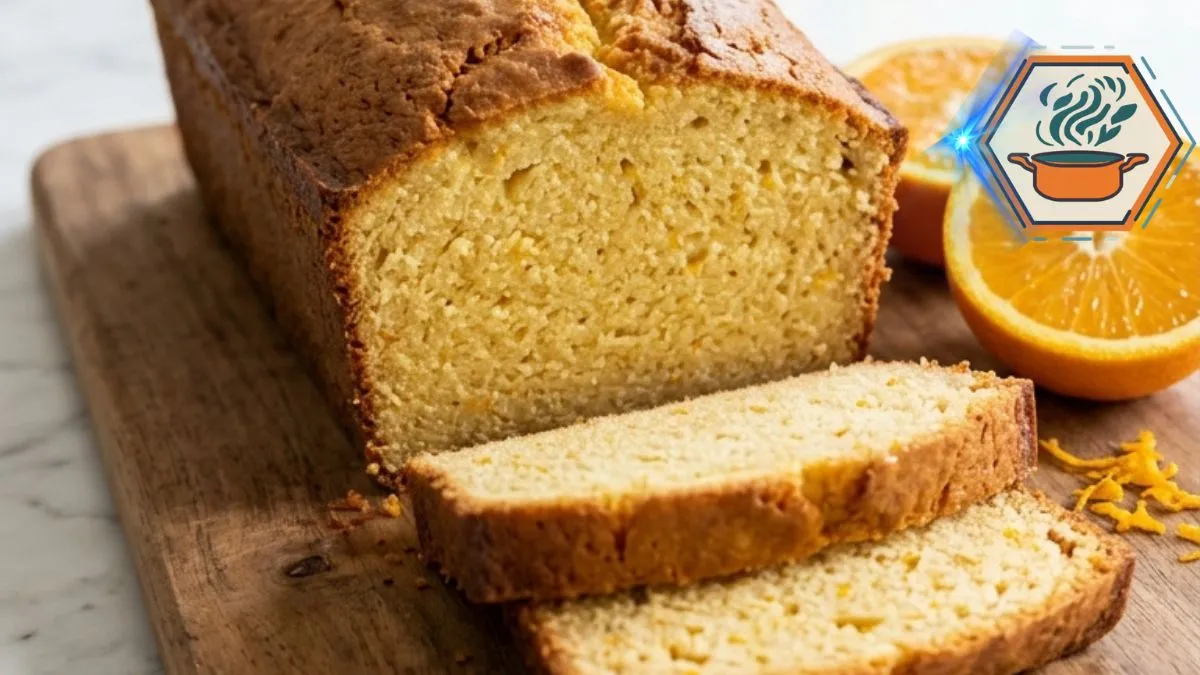
The first time you make orange bread in a blender, the best moment comes before you even cut the loaf. The kitchen starts to smell like fresh orange zest and warm cake. Then the top turns deep golden brown. After cooling, the first slice reveals a soft yellow-orange crumb under a thin, slightly crisp crust.
This recipe turns that experience into something surprisingly simple. Most of the wet mixture is prepared right in the blender. Fresh orange provides both juice and aromatic zest, while oil keeps the crumb tender. If you enjoy simple fruit-based baking, you can also read our banana bread preparation guide for more ideas about getting a moist quick bread without making it heavy. For food-safety guidance when baking with eggs, the USDA Food Safety and Inspection Service recommends thoroughly cooking egg-containing foods.
The method is easy, but a good loaf still depends on small details. Measuring the flour correctly matters. So does choosing a sweet, thin-skinned orange and knowing when to stop blending. Most importantly, the loaf needs enough time to bake through before its beautiful crust tricks you into taking it out too early. King Arthur Baking’s quick-bread doneness guide explains why checking the center of a quick bread is more dependable than judging its surface alone.
Affiliate disclosure: As an Amazon Associate I earn from qualifying purchases. This article may contain affiliate links to kitchen tools I find useful for preparing this recipe.
JUMP TO
Why This Orange Bread in Blender Works
This is a quick bread, so there is no yeast and no waiting for dough to rise. Baking powder provides the lift.
The blender handles the orange, eggs, sugar, and oil. This creates a smooth citrus base in seconds. The flour is treated more gently afterward.
That last detail matters.
Once flour becomes hydrated, vigorous mixing can make a tender quick bread tougher. For that reason, this recipe does not ask you to run the finished flour-heavy batter in a powerful blender for several minutes. Blend the orange mixture first. Add it to the dry ingredients and fold only until the flour disappears.
You get:
- A soft and moist center
- Fresh orange aroma
- A rich golden top
- A lightly crisp outer edge
- No yeast
- No stand mixer
- Simple supermarket ingredients
The result sits somewhere between breakfast bread and orange cake. It is sweet enough to eat alone but not so heavily frosted that it feels like a layer cake.
Ingredients You Will Need
For one 9 x 5-inch loaf, about 10 slices:
- 1 medium seedless orange, about 5 to 6 oz or 140 to 170 g
- 2 large eggs, at room temperature
- 3/4 cup granulated sugar, 150 g
- 1/2 cup neutral vegetable oil, 120 ml
- 1 teaspoon pure vanilla extract
- 1 3/4 cups all-purpose flour, 210 g
- 2 teaspoons baking powder
- 1/2 teaspoon fine salt
- 1 tablespoon finely grated orange zest, taken from the orange before cutting
- 1 tablespoon coarse or granulated sugar for the top, optional
That final spoonful of sugar is small, but useful. It helps create the lightly crisp, sparkling top that makes the loaf in our reference so inviting.
Choosing the right orange
Use a fresh orange with fragrant skin. Because some zest goes into the bread, wash the fruit well and dry it before zesting.
Avoid including thick pieces of white pith. Orange zest contains the aromatic oils you want. Too much white pith can introduce unwanted bitterness.
A fine grater makes removing only the colored outer layer much easier. A Microplane-style citrus zester on Amazon is useful here and for many other baking recipes.
Equipment
You do not need a long list of tools:
- Countertop blender
- 9 x 5-inch loaf pan
- Large mixing bowl
- Whisk
- Silicone spatula
- Fine citrus zester
- Parchment paper
- Cooling rack
A standard blender is ideal because the liquid ingredients need only a short blending time. If you are shopping for one, you can compare countertop blenders on Amazon.
For the shape shown in our finished loaf, use a traditional rectangular loaf pan rather than a round cake pan. You can find 9 x 5-inch loaf pans on Amazon.
How to Prepare the Orange
This step decides whether your bread tastes bright or bitter.
Wash and dry the orange first. Finely grate about 1 tablespoon of the colored zest. Set it aside.
Then peel the orange. Remove excess white pith and any seeds. Separate the flesh into chunks.
Why not simply throw an entire unpeeled orange into the blender?
Some blender recipes do exactly that, especially with thin-skinned citrus. But orange skins vary greatly in thickness and bitterness. Removing most of the pith makes this recipe more predictable for readers using different orange varieties.
You still get plenty of citrus character from the fresh flesh and measured zest.
How to Make Orange Bread in a Blender
1. Prepare the oven and pan
Preheat your oven to 350°F (175°C).
Grease a 9 x 5-inch loaf pan lightly. Line it with parchment paper, leaving some paper above the two long sides. Those overhanging edges make it easier to lift out the baked loaf.
Do not skip the preheating period. Baking powder starts working once the batter becomes wet. You want the prepared loaf to enter a properly heated oven without sitting on the counter for a long time.
2. Blend the citrus mixture
Place these ingredients in the blender:
- Prepared orange flesh
- Orange zest
- Eggs
- Sugar
- Oil
- Vanilla
Blend for about 20 to 30 seconds, or until smooth and evenly combined.
Stop once the orange has broken down. There is no advantage to blending it for several minutes.
The mixture should look creamy and pale orange.
3. Mix the dry ingredients separately
In a large bowl, whisk together:
- All-purpose flour
- Baking powder
- Salt
Whisk for about 20 seconds so the baking powder is distributed throughout the flour.
Pour the blended orange mixture into the bowl.
4. Fold instead of beating
Use a silicone spatula to fold the wet and dry ingredients together.
Scrape along the bottom and sides of the bowl. Stop as soon as you can no longer see dry pockets of flour.
A few small lumps are fine.
Do not keep stirring until the batter looks perfectly polished. Excess mixing can work against the tender texture we want.
If you are interested in another simple fruit loaf with very few ingredients, see our 3-ingredient banana bread guide.
5. Fill the loaf pan
Transfer the batter to the prepared pan.
Smooth the surface lightly with your spatula. Do not press it down.
For a more pronounced golden crust, sprinkle 1 tablespoon of sugar evenly over the surface.
This creates a delicate sweet crust rather than a thick, hard shell.
6. Bake
Place the loaf on the center rack.
Bake at 350°F (175°C) for approximately 50 to 60 minutes.
Start checking around the 48-minute mark because ovens and loaf pans behave differently.
The loaf is approaching doneness when:
- The top is rich golden brown.
- The center has risen.
- The surface feels set.
- A thin knife inserted into the center has no raw batter attached.
- The loaf begins to pull very slightly from the sides.
If the surface becomes dark before the center finishes baking, loosely cover the top with aluminum foil and continue baking.
For greater accuracy, use an instant-read thermometer. Quick breads are commonly fully baked around 200°F to 205°F (93°C to 96°C) in the center. A thermometer is especially useful because a quick bread can look beautifully browned while still containing wet batter in the middle.
A simple digital instant-read food thermometer on Amazon can also be used for many other kitchen tasks.
7. Let it cool
This is the hardest part when your kitchen smells like oranges.
Leave the bread in its pan for about 10 to 15 minutes.
Then use the parchment to lift it onto a cooling rack.
Allow it to cool for at least 45 to 60 minutes before slicing.
Cutting a quick bread immediately can compress its hot interior and make the center appear wetter or gummier than it really is. Cooling gives the crumb time to set.
The Secret to a Golden, Lightly Crisp Crust
The original inspiration looks simple, but achieving that attractive surface requires more than putting batter in an oven.
First, use enough sugar in the batter. Sugar contributes sweetness, moisture, and browning.
Second, do not bake at a temperature that is too low. 350°F gives this loaf enough heat to develop color while the middle cooks.
Third, the optional sugar sprinkled over the raw batter gives the surface extra texture.
Finally, do not cover the loaf too early. Foil protects an already-browned surface, but covering the pan from the beginning reduces direct browning.
The finished top should be golden brown rather than pale. King Arthur Baking notes that color, aroma, feel, and other physical signs can all help bakers judge when bread is finished.
Common Orange Bread Mistakes
The bread tastes bitter
Too much white pith is usually the first thing to check.
Use the orange flesh plus measured zest rather than large amounts of thick peel. Also remove all seeds before blending.
The middle is gummy
Several things can cause this:
- Too much orange
- Too much flour packed into the measuring cup
- Incorrect pan size
- Oven temperature running low
- Removing the loaf too early
- Cutting it while very hot
A kitchen scale is the easiest way to measure the flour consistently.
The loaf is dense
Check the age of your baking powder. Also make sure the batter goes into the oven soon after mixing.
Do not substitute baking soda for baking powder in the same quantity. They are different leavening agents and cannot always be exchanged directly.
The bread is dry
The most likely cause is overbaking.
Begin checking before the maximum baking time. Remember that a dark metal pan may brown baked goods differently from glass or lighter metal pans.
The oil in this recipe is intentional. It helps the loaf stay soft even after it has cooled.
How to Serve Orange Blender Bread
My favorite moment is still that first thick slice.
Serve it plain while the citrus aroma is strongest. You can also add:
- A thin layer of salted butter
- Orange marmalade
- Greek yogurt
- Fresh berries
- Honey
- A light dusting of powdered sugar
For breakfast, pair a slice with coffee or tea and fresh fruit.
For brunch, cut the loaf into thinner slices and serve it beside yogurt, berries, eggs, and other breakfast dishes.
And if citrus has made you want to keep baking with fruit, our guide to using pineapple in baking covers another fruit that can bring both moisture and flavor to baked recipes.
How to Store It
Let the loaf cool completely before storing it.
Once cool, place it in an airtight container or wrap it well. For the best texture, keep it at room temperature for about 2 days.
For longer storage, refrigerate it in a well-sealed container. Bring a slice closer to room temperature before serving for a softer texture.
You can also freeze individual slices. Wrap them carefully, place them in a freezer-safe container or bag, and freeze. Individual portions are convenient because you can remove only what you need.
Do not seal the loaf while it is still hot. Trapped steam can soften the crust and make the surface sticky.
Can You Add Chocolate or Nuts?
Yes.
Once you know the basic recipe, try folding in about 1/2 cup of:
- Dark chocolate chips
- Chopped walnuts
- Chopped pecans
- Dried cranberries
Add these after the wet and dry mixtures have almost come together.
Do not blend nuts or chocolate with the orange mixture unless you intentionally want them finely processed. Folding them in keeps distinct pieces throughout each slice.
Frequently Asked Questions
Can you make orange bread in a blender?
Yes. A blender quickly breaks down the orange flesh and combines it with the eggs, sugar, oil, zest, and vanilla. For a tender loaf, it is better to fold this liquid mixture into the flour rather than aggressively blending all the flour for a long time.
Can I put a whole orange in the blender?
Some recipes use an entire thin-skinned orange. However, the peel and especially the white pith can taste bitter. For a more predictable result, this recipe uses peeled orange flesh plus a measured amount of zest.
Why is my orange bread bitter?
The most common citrus-related causes are excess pith, unusually bitter peel, or blended seeds. Zest only the colored surface and remove seeds and thick white pith.
How do I know when orange bread is done?
Look for a golden, set top and test the center. A thin knife should come out without raw batter. For a more objective check, a digital thermometer inserted into the center of a quick bread can help; King Arthur reports a typical finished range of about 200°F to 205°F for quick breads.
Why did my orange bread sink in the middle?
An underbaked center is one possible cause. Other possibilities include too much liquid, incorrect leavening measurements, or opening the oven repeatedly before the loaf has developed enough structure.
Can I use orange juice instead of a fresh orange?
You can make orange-flavored quick breads with juice, but it changes this particular formula. Fresh orange flesh contributes more than liquid. It also adds pulp and solids, so replacing it cup-for-cup with juice may make the batter too wet.
Should orange bread be refrigerated?
For short storage, a fully cooled plain loaf can be kept tightly covered at room temperature. Refrigeration is useful when you want to keep it longer. If you add a perishable dairy-based frosting or filling, refrigeration becomes more important.
Print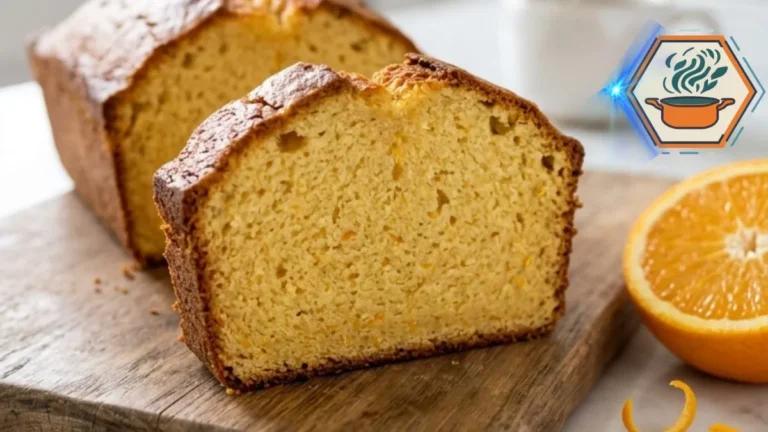
Orange Bread in Blender
This easy Orange Bread in Blender combines fresh orange, eggs, sugar, and oil for a tender citrus loaf with a golden, lightly crisp crust. The wet ingredients come together quickly in a blender before being gently folded into the flour for a soft crumb.
- Total Time: 1 hour 15 minutes (using 60 minutes cook time; cooling time excluded)
- Yield: 1 loaf, about 10 slices
Ingredients
1 medium seedless orange (about 5–6 oz / 140–170 g)
1 tablespoon finely grated orange zest
2 large eggs, room temperature
3/4 cup (150 g) granulated sugar
1/2 cup (120 ml) neutral vegetable oil
1 teaspoon pure vanilla extract
1 3/4 cups (210 g) all-purpose flour
2 teaspoons baking powder
1/2 teaspoon fine salt
1 tablespoon granulated or coarse sugar for topping, optional
Instructions
1. Preheat the oven to 350°F (175°C). Lightly grease a 9 x 5-inch loaf pan and line it with parchment paper.
2. Wash and dry the orange. Finely grate 1 tablespoon of zest. Peel the orange, remove the thick white pith and all seeds, then separate the flesh into chunks.
3. Add the orange flesh, orange zest, eggs, 3/4 cup sugar, oil, and vanilla to a blender.
4. Blend for 20–30 seconds, or just until the mixture is smooth and evenly combined. Do not blend longer than necessary.
5. In a large mixing bowl, whisk the flour, baking powder, and salt for about 20 seconds.
6. Pour the blended orange mixture into the dry ingredients.
7. Fold gently with a silicone spatula until no dry pockets of flour remain. Do not overmix. A few small lumps are fine.
8. Pour the batter into the prepared loaf pan and gently smooth the top.
9. For a lightly crisp golden crust, sprinkle 1 tablespoon of granulated or coarse sugar evenly over the batter. This step is optional.
10. Bake on the center rack at 350°F (175°C) for about 50–60 minutes. Begin checking at approximately 48 minutes.
11. The loaf is ready when the top is golden brown, the center is set, and a thin knife inserted into the middle comes out without raw batter. For an additional check, the center should be around 200–205°F (93–96°C).
12. If the top becomes too dark before the center is baked, loosely cover it with aluminum foil and continue baking.
13. Cool in the pan for 10–15 minutes. Lift the loaf onto a wire rack using the parchment paper.
14. Cool for at least 45–60 minutes before slicing.
Notes
Use a sweet, fresh orange with fragrant skin.
Remove the thick white pith because too much pith may make the loaf bitter.
Do not replace the fresh orange with the same volume of orange juice. Juice changes the liquid-to-solid ratio of the recipe.
Measure flour by weight when possible. Use 210 g for the most repeatable result.
Do not blend the flour aggressively with the wet ingredients. Folding the flour in by hand helps maintain a tender crumb.
The optional tablespoon of sugar on top helps produce the lightly crisp, golden crust.
Oven temperatures vary. Begin checking the loaf before the full 60-minute baking time.
Let the bread cool before slicing. Cutting it while very hot can make the crumb appear gummy.
Store completely cooled bread in an airtight container at room temperature for about 2 days. For longer storage, refrigerate or freeze individual slices.
- Prep Time: 15 minutes
- Cook Time: 50–60 minutes
- Category: Breakfast
- Method: Baking
- Cuisine: American
A Simple Loaf Worth Making Again
What begins with one orange and a blender becomes a loaf with a golden top, soft citrus-colored center, and the smell of fresh orange throughout the kitchen.
The biggest lesson is that simple recipes still depend on details.
Use the right amount of fruit. Remove bitter pith. Measure the flour carefully. Blend the wet ingredients briefly. Fold in the flour gently. Bake until the center is truly finished. Then give the bread time to cool before making that first cut.
Those few choices turn a vague six-ingredient idea into an orange bread in blender recipe you can actually repeat.
And when you finally slice it, you get exactly what you were waiting for: a tender yellow-orange crumb, a browned edge, and fresh citrus flavor in every bite.