
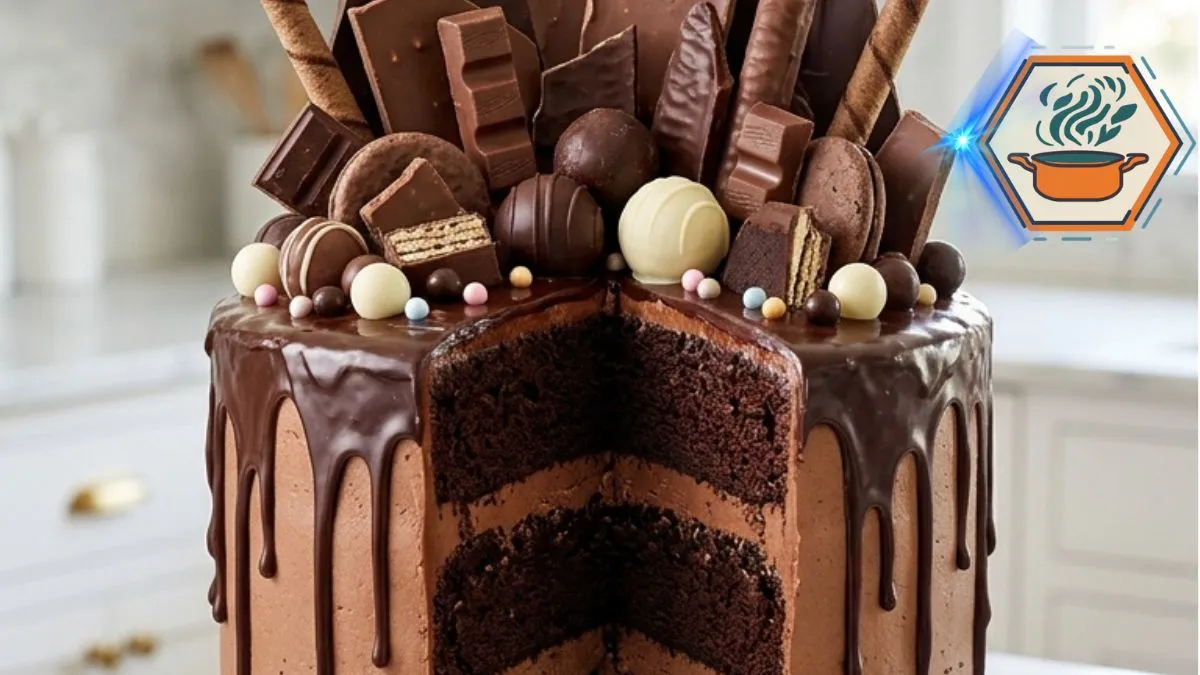
Some cakes are meant to be sliced. This one is meant to be admired first.
The moment this Chocolate Candy Explosion Cake reaches the table, everyone starts looking at the top. One person wants the truffle. Someone else has already claimed the wafer stick. And there is almost always a debate over who gets the biggest dark chocolate shard.
Under that playful chocolate crown sits the part that matters most: three moist chocolate cake layers, generous chocolate buttercream, and a dark, glossy ganache drip.
The cake looks ambitious. Yet you do not need professional pastry training to make it. The secret is to treat it as several small jobs rather than one giant decorating project.
Bake the layers. Cool them. Make a stable frosting. Stack and chill. Test the ganache. Then build the chocolate crown.
Coffee is also intentional here. King Arthur Baking notes that coffee can deepen chocolate flavor, and its chocolate cake recipes use brewed coffee or water alongside cocoa.
If you enjoy learning the small details that change a cake, RecipesMind’s guide to the difference between butter cakes is another useful read.
Affiliate disclosure: As an Amazon Associate I earn from qualifying purchases. This article may contain affiliate links to kitchen tools I find useful for preparing this recipe.
JUMP TO
Why This Chocolate Candy Explosion Cake Works
A tall chocolate cake needs more than a good decoration.
It needs structure.
The cake layers must remain moist after chilling. The buttercream must be soft enough to eat but firm enough to hold three layers. The ganache needs to flow without melting the frosting. And the decorations need support so the tallest chocolate pieces do not fall over.
That is why this recipe uses vegetable oil in the sponge. It creates a soft crumb that holds up well after the cake has been chilled for decorating.
Buttermilk contributes moisture and acidity. Cocoa gives us the chocolate base, while hot coffee brings another roasted flavor to the cake.
The final batter will be thin. Don’t panic and add more flour. Thin chocolate cake batter is not automatically a mistake; King Arthur’s moist chocolate cake instructions similarly note a thin batter and bake three 8-inch layers at 350°F.
Then there is the decoration.
Instead of throwing candy randomly over the top, we create height in stages. Large shards go in first. Medium pieces build the middle. Truffles, chocolate balls, white chocolate pieces, and small decorations fill the remaining spaces.
That is what creates the explosion effect without making the cake look messy.
Ingredients for Chocolate Candy Explosion Cake
This recipe makes one tall three-layer 8-inch cake. Expect roughly 12 to 16 celebration-size servings.
For the chocolate cake
- 2 cups (240 g) all-purpose flour
- 1¾ cups (350 g) granulated sugar
- ¾ cup (about 65–75 g) unsweetened cocoa powder
- 2 teaspoons baking soda
- 1 teaspoon baking powder
- ½ teaspoon fine salt
- 2 large eggs, room temperature
- 1 cup (240 ml) buttermilk, room temperature
- ½ cup (120 ml) neutral vegetable oil
- 2 teaspoons vanilla extract
- 1 cup (240 ml) hot brewed coffee
Use hot coffee, but it does not need to be aggressively boiling.
If you do not want coffee in the recipe, use hot water instead. The chocolate character will be slightly different, but water is also used as an alternative in established chocolate cake formulas.
For the chocolate buttercream
- 1½ cups (340 g) unsalted butter, softened
- 4½ cups (540 g) powdered sugar
- ¾ cup (about 65–75 g) unsweetened cocoa powder
- ⅓ to ½ cup (80–120 ml) heavy cream
- 2 teaspoons vanilla extract
- ¼ teaspoon fine salt
That small amount of salt is intentional. It helps balance the sweetness of a frosting containing more than four cups of powdered sugar.
For the ganache
- 8 oz (225 g) semisweet chocolate, finely chopped
- ¾ cup (180 ml) heavy cream
For the chocolate explosion
Aim for different shapes, colors, and heights:
- Large homemade dark chocolate shards
- Milk chocolate shards
- Chocolate wafer sticks
- 6–8 chocolate truffles
- Chocolate-covered cookies
- White chocolate balls or pieces
- Broken chocolate squares
- Mini chocolate balls
- Chocolate curls
- A small amount of pastel sugar pearls
You do not need an exact number of decorations. Stop when the top looks full but you can still see sections of ganache.
One Piece of Equipment That Makes This Cake Much Easier
You can make the cake with a hand mixer.
But this is one recipe where a sturdy stand mixer can genuinely earn its counter space.
There is a lot of frosting. The butter needs several minutes of beating, followed by powdered sugar, cocoa, cream, and another mixing stage. Holding a hand mixer through all of that works, but it becomes tiring.
If you regularly make layer cakes, cookies, bread dough, whipped cream, or large batches of frosting, a 5-quart stand mixer is the type of purchase that serves far more than this single recipe.
See 5-quart stand mixers on Amazon
This is not required equipment. If you already own a good hand mixer, use it.
That distinction matters. A useful kitchen tool should solve a problem rather than appear in a recipe simply because there is a link attached to it.
How to Bake Moist, Even Chocolate Layers
Preheat a conventional oven to 350°F (175°C).
Grease three 8-inch round cake pans. Cut parchment circles to fit the bottoms and place one inside each pan.
Lightly grease the parchment.
Do not rely only on buttering the pan. This is a moist cake, and parchment gives you much better insurance when turning out the layers.
Whisk together the flour, sugar, cocoa, baking soda, baking powder, and salt.
Spend a few seconds breaking up visible cocoa lumps.
In another bowl, whisk the eggs, buttermilk, oil, and vanilla.
Pour the wet ingredients into the dry mixture.
Mix only until the major dry patches disappear.
Now slowly pour in the hot coffee while stirring.
The batter becomes loose and glossy. That is the texture you want.
Getting three layers the same size
This small step makes the finished cake look much more professional.
Weigh the empty mixing bowl before starting, or transfer the finished batter to a clean bowl on a kitchen scale. Determine the batter weight, then divide it by three.
Put approximately the same weight into each pan.
Bake for 25–30 minutes.
Check early rather than automatically leaving the cake for the full 30 minutes. The center should spring back gently, and a toothpick inserted near the middle should come out without wet batter.
A few moist crumbs are fine.
Remove the pans from the oven and leave them for about 10 minutes.
Turn the cakes carefully onto cooling racks. Peel away the parchment.
Now leave them alone until completely cool.
Warm cake and buttercream are not friends.
How to Make Rich Chocolate Buttercream
Your butter should be soft enough to indent with a finger, but it should not look shiny or partially melted.
Beat the butter for about 3–4 minutes.
Sift the powdered sugar and cocoa powder.
Yes, sifting adds another step. It is worth doing here. Dry cocoa lumps become frustrating once they are trapped inside finished buttercream.
Add the sugar and cocoa gradually at low speed.
Pour in ⅓ cup heavy cream, followed by the vanilla and salt.
Beat until light and creamy.
Now judge the consistency rather than blindly adding the remaining cream.
Lift some frosting with a spatula.
It should spread without tearing the cake, but it should also hold a soft peak.
If it is too firm, add heavy cream one tablespoon at a time.
Do not pour in the full ½ cup automatically. Very soft frosting can cause a tall cake to shift or bulge between layers.
Build the Cake Without Sliding Layers
If your cakes have noticeable domes, level them with a serrated knife.
Do not remove more cake than necessary.
Place the first layer on a sturdy cake board or serving plate.
Spread about ¾ cup of buttercream over it.
Place the second cake layer on top and look at the cake from eye level. If it tilts, fix it now rather than hoping the next layer will straighten it.
Add another layer of buttercream.
Finish with the third sponge.
Spread a very thin layer of frosting over the top and sides.
This is the crumb coat.
Its job is to trap loose crumbs. It does not need to look beautiful.
Chill the cake for 20–30 minutes, or until the frosting feels firm.
Why a turntable becomes useful here
If you make decorated cakes regularly, this is the point where a heavy rotating cake stand can make a noticeable difference.
Instead of repeatedly stopping and turning the plate by hand, you keep the scraper relatively steady while rotating the cake. It is particularly helpful on tall cakes because you can inspect every side without handling the cake board repeatedly.
A heavy-duty rotating cake turntable, preferably with a stable non-slip base, is a more useful long-term purchase than a large bundle filled with decorating gadgets you may never use.
See heavy-duty rotating cake turntables on Amazon
Apply the final buttercream layer.
Smooth it as much as you like, but don’t chase absolute perfection. The reference cake has a slightly handcrafted chocolate finish that works beautifully beneath the dramatic topping.
How to Make Glossy Chocolate Ganache Drips
Now we reach the part that can transform the cake in minutes.
Finely chop the semisweet chocolate and put it into a heatproof bowl.
Heat the heavy cream until steaming, with small bubbles appearing around the edges.
Do not keep boiling it.
Pour the hot cream over the chopped chocolate.
Leave it untouched for 2–3 minutes.
Then stir slowly from the center outward until the mixture becomes smooth and glossy.
Do not immediately pour it over the cake.
A beautiful drip depends heavily on consistency.
The frosted cake should be cold and firm. The ganache should remain fluid, but it should no longer be so hot that it softens the buttercream on contact.
The one-drip test
Take a teaspoon of ganache.
Make one test drip on the back of the chilled cake.
Watch it.
If it shoots to the bottom, stop. Your ganache is too fluid or too warm.
If it barely moves, it has become too thick.
If it travels slowly and stops partway down the side, you are ready.
This single test can save the entire finish.
For bakers who work with chocolate often, a fast digital thermometer can be useful beyond this recipe. It can also serve for caramel, bread, meat, frying oil, and other temperature-sensitive kitchen jobs.
See fast digital kitchen thermometers on Amazon
You do not need one to make the cake. Visual consistency and a test drip still matter more than chasing one magic temperature.
Create drips of different lengths around the edge.
Then spread a thin layer of ganache over the top.
Don’t make every drip identical. The irregular pattern is part of the visual style.
If you want to get more comfortable working with cooked sugar and dessert finishes, see our guide to mastering caramelizing sugar.
How to Create the Chocolate Explosion
This is the fun part.
It is also where planning makes a big difference.
Think of the top of the cake as a small stage. The tallest pieces belong toward the back and center. The smallest details stay closer to the front.
Start with homemade chocolate shards
Melt dark or milk chocolate gently.
Spread it over parchment in a thin but sturdy layer. Avoid making it paper-thin, because tall pieces need enough thickness to stand upright.
Let it set until firm.
Break or cut it into irregular geometric pieces.
You want several heights.
Place the tallest dark chocolate shards first, while the top ganache is still slightly soft.
Angle some pieces left and others right.
Do not arrange them like a fence.
Next, insert the wafer sticks.
Then place the largest truffles around the base of the shards. These visually connect the tall decorations with the surface of the cake.
Add broken chocolate squares and chocolate-covered cookies.
Use white chocolate pieces and mini balls to create contrast against all that brown.
Finish with a few pastel sugar pearls.
The word few matters.
The pearls are an accent, not the main decoration.
A Better Pan Set Can Matter More Than Another Decorating Gadget
If your three cake layers consistently bake at different heights, decorating tools will not fix the underlying problem.
Matching pans help.
For someone who regularly makes layer cakes, a quality three-piece 8-inch anodized aluminum cake pan set can be a more useful investment than buying another collection of piping tips.
The goal is simple: three pans with matching dimensions and good heat conduction so the batter can be divided and baked under similar conditions.
See 3-piece 8-inch cake pan sets on Amazon
Again, there is no reason to replace pans that already bake evenly. This recommendation is mainly useful if you currently bake one layer at a time or use mismatched pans.
How to Keep Tall Chocolate Shards From Falling
The original version of this cake can fail at the final step if the frosting is too warm.
Keep the frosted cake chilled before decorating.
Insert the largest shards first while the ganache is tacky enough to help hold them.
Do not push a giant shard deeply into the cake.
If it feels unstable, use a shorter piece or move it closer to the center. Smaller truffles and chocolate pieces can then fill the visual gaps around its base.
This approach produces the dramatic height seen in the reference cake without turning the top into an unstable pile.
How to Get a Clean First Slice
Everyone has been staring at the cake.
Now someone has to cut it.
Use a long, sharp knife. Warm the blade with hot water, then wipe it completely dry.
Cut straight down through the chocolate crown and cake.
Wipe the blade before making the next cut.
The clean slice reveals what all those decorations were hiding: three dark chocolate layers separated by smooth bands of chocolate buttercream.
For another chocolate-centered dessert idea, you can also save this strawberry-filled chocolate cake.
Make-Ahead and Storage Tips
The cake layers can be baked ahead, cooled completely, and wrapped well before decorating.
That can actually make the project less stressful. Instead of baking, cooling, frosting, making ganache, and decorating in one marathon session, split the work across two days.
For the finished cake, keep it well protected so the cut surfaces do not dry out and so the frosting does not absorb refrigerator odors.
USDA guidance lists frosted cakes and layered tortes as foods that can be kept refrigerator-cold, with a relatively short refrigerated storage period.
For the best eating texture, let a refrigerated buttercream cake lose some of its chill before serving, while still following appropriate food-storage practices for your ingredients and environment.
Be aware of condensation too. Moving cold chocolate decorations directly into a hot, humid room can leave moisture on their surfaces.
Common Chocolate Explosion Cake Mistakes
My cake is dry.
It may have baked too long, or too much flour may have been added. Weighing the flour removes a common source of inconsistency.
My cake sank.
Check your leavening ingredients, avoid opening the oven too early, and make sure the center is baked before removing the pans.
My buttercream is full of cocoa lumps.
Sift the cocoa and powdered sugar before adding them.
The layers are sliding.
The frosting may be too warm or too loose. Chill the assembled cake before continuing.
I can see crumbs in the final frosting.
Use a thin crumb coat and chill it before adding the final buttercream layer.
My ganache melted the frosting.
The ganache was probably too warm, the cake too warm, or both.
Every drip reached the cake board.
Your ganache was too fluid. Let it thicken before continuing.
My chocolate shards keep falling.
Shorten the pieces, move them closer to the center, and work on a chilled cake.
The top looks like a pile of candy.
Create height first. Then add medium pieces. Finish with the smallest chocolates. Do not cover every inch.
FAQs About Chocolate Candy Explosion Cake
What is a Chocolate Candy Explosion Cake?
It is a decorated chocolate layer cake topped with an abundant arrangement of chocolates and candy. This version combines three moist chocolate layers, chocolate buttercream, semisweet ganache drips, shards, wafers, truffles, chocolate pieces, and small contrasting decorations.
Can I make the cake the day before a party?
Yes. In fact, splitting the work across two days can make assembly much easier. Bake and cool the layers first, then decorate closer to serving.
Why put hot coffee in chocolate cake?
Coffee can deepen the perception of chocolate and add roasted notes. King Arthur Baking specifically describes coffee as a natural chocolate enhancer.
Will the cake taste strongly of coffee?
It should still read primarily as chocolate. If you dislike coffee or want to avoid caffeine, use hot water instead.
Why is my chocolate cake batter so thin?
The coffee adds substantial liquid. A loose batter is expected for this style of moist cocoa cake. Do not add extra flour simply to make it resemble a thick butter-cake batter.
Can I use Dutch-process cocoa?
I would not make that substitution automatically in this exact formula. Natural and Dutch-process cocoa differ in acidity, and this recipe contains baking soda. For the most predictable result, use the cocoa type specified.
What chocolate should I use for the drip?
Semisweet chocolate works well here because the cake and buttercream are already sweet. It creates a darker contrast and a balanced chocolate finish.
How do I know when ganache is ready to drip?
Test it on the back of the cold cake. It should travel slowly down the side and stop before reaching the bottom. Adjust the consistency before decorating the visible side.
Can I decorate the cake without homemade chocolate shards?
Yes. Chocolate bars, truffles, wafers, cookies, and other chocolate pieces can still create an impressive top. The shards, however, provide much of the dramatic height seen in this particular design.
How do I transport this cake?
Transport the cake cold on a sturdy cake board inside a tall cake box. For a long journey, the safest visual option is often to transport very tall or fragile chocolate decorations separately and add them at the destination.
Print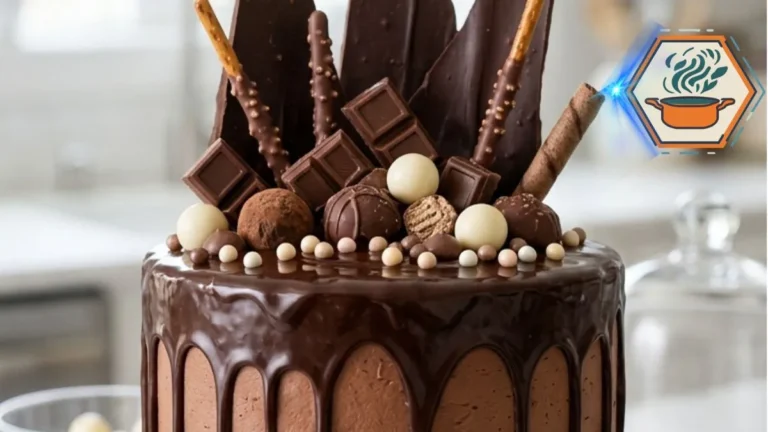
Chocolate Candy Explosion Cake
A tall, moist three-layer chocolate cake filled and covered with chocolate buttercream, finished with glossy semisweet ganache drips and a dramatic crown of chocolate shards, truffles, wafers, cookies, and chocolate candies.
- Total Time: 1 hour 45 minutes active/prep + cook, plus approximately 1½–2 hours cooling and chilling time.
- Yield: 1 three-layer 8-inch cake, about 16 slices
Ingredients
Chocolate Cake
- 2 cups (240 g) all-purpose flour
- 1¾ cups (350 g) granulated sugar
- ¾ cup (70 g) unsweetened cocoa powder
- 2 teaspoons baking soda
- 1 teaspoon baking powder
- ½ teaspoon fine salt
- 2 large eggs, room temperature
- 1 cup (240 ml) buttermilk, room temperature
- ½ cup (120 ml) neutral vegetable oil
- 2 teaspoons vanilla extract
- 1 cup (240 ml) hot brewed coffee
Chocolate Buttercream
- 1½ cups (340 g) unsalted butter, softened
- 4½ cups (540 g) powdered sugar
- ¾ cup (70 g) unsweetened cocoa powder
- ⅓–½ cup (80–120 ml) heavy cream
- 2 teaspoons vanilla extract
- ¼ teaspoon fine salt
Chocolate Ganache
- 8 oz (225 g) semisweet chocolate, finely chopped
- ¾ cup (180 ml) heavy cream
Chocolate Decoration
- Dark chocolate shards
- Milk chocolate shards
- 4–6 chocolate wafer sticks
- 6–8 chocolate truffles
- Chocolate-covered cookies
- White chocolate pieces or balls
- Chocolate squares
- Mini chocolate balls
- Chocolate curls, optional
- Small amount of pastel sugar pearls
Instructions
- Preheat a conventional oven to 350°F (175°C). Grease three 8-inch round cake pans. Line the bottoms with parchment and lightly grease the parchment.
- Whisk flour, sugar, cocoa powder, baking soda, baking powder, and salt in a large bowl. Break up any cocoa lumps.
- In another bowl, whisk eggs, buttermilk, vegetable oil, and vanilla. Add the wet mixture to the dry ingredients and mix just until combined.
- Slowly stir in the hot coffee. The batter will be thin. This is normal. Do not compensate by adding extra flour.
- Divide the batter equally among the three prepared pans. For the most even layers, weigh the batter and divide its total weight by three.
- Bake for 25–30 minutes, checking from 25 minutes. A toothpick inserted into the center should come out without wet batter. A few moist crumbs are fine.
- Cool in the pans for about 10 minutes. Turn onto cooling racks, remove the parchment, and cool completely before frosting.
- For the buttercream, beat softened butter for 3–4 minutes until creamy. Sift together powdered sugar and cocoa. Add them gradually to the butter at low speed.
- Add ⅓ cup heavy cream, vanilla, and salt. Beat until fluffy. Add more cream one tablespoon at a time only if needed. The frosting should spread easily while remaining firm enough to support the layers.
- Level noticeable domes from the cooled cakes with a serrated knife. Place the first layer on a cake board. Spread about ¾ cup buttercream over it. Repeat with the second layer, then add the final cake layer.
- Cover the entire cake with a thin crumb coat. Refrigerate for 20–30 minutes, or until firm.
- Apply the final chocolate buttercream layer. Smooth the sides while keeping a slightly rustic finish. Chill again while preparing the ganache.
- Place finely chopped semisweet chocolate in a heatproof bowl. Heat heavy cream until steaming and small bubbles form around the edge. Do not vigorously boil it.
- Pour the cream over the chocolate. Leave for 2–3 minutes, then stir gently until smooth and glossy. Let it cool and thicken slightly.
- Make one test drip on the back of the cold cake. If it runs straight to the bottom, wait longer. If it barely moves, gently warm the ganache. Once correct, create irregular drips around the cake and spread a thin layer over the top.
- Add the tallest chocolate shards toward the back and center while the ganache is still slightly tacky. Add wafer sticks at different angles.
- Arrange truffles, cookies, chocolate squares, and medium pieces around the shards. Fill smaller gaps with chocolate balls and white chocolate pieces. Finish with only a few pastel sugar pearls.
- Chill briefly if the decorations or frosting become unstable. Before serving, allow the buttercream to lose some refrigerator firmness for a softer eating texture.
Notes
- Use room-temperature eggs and buttermilk.
- The cake batter is intentionally thin.
- Never frost warm cake layers.
- Chill the crumb-coated cake before applying the final frosting.
- Chill the finished buttercream before adding ganache.
- Always perform a single test drip before covering the cake.
- Add large chocolate decorations first and small pieces last.
- If a tall shard feels unstable, replace it with a shorter one rather than forcing it deeply into the cake.
- Decoration quantities are flexible and directly affect nutrition values.
- Hot water can replace coffee if desired.
- For cleaner slices, warm a sharp knife with hot water, dry it completely, and wipe it between cuts.
- Prep Time: 1 hour 15 minutes
- Cook Time: 25–30 minutes
- Category: Dessert
- Method: Baking
- Cuisine: American
The Moment Everyone Has Been Waiting For
When the finished Chocolate Candy Explosion Cake reaches the table, people see the decoration first.
Dark shards rise from the center. Wafers lean between them. Truffles and chocolate squares fill the gaps. Small white pieces break up the darker tones. Glossy ganache travels down the sides in uneven drips.
Then comes the first slice.
The knife passes through the chocolate crown and reveals three moist, dark layers with creamy chocolate buttercream between them.
That contrast is what makes the cake work.
It looks wild on top but remains structured underneath.
And none of the individual techniques requires perfection.
Bake even layers. Cool them fully. Keep the buttercream stable. Chill the crumb coat. Test one ganache drip before doing the rest. Build the decorations from large to small.
Most importantly, do not try to make every shard, drip, or truffle perfectly symmetrical.
This cake is supposed to look generous and playful.
By the time it reaches the table, the hardest decision should no longer belong to the baker.
It belongs to everyone else:
Who gets the biggest piece of chocolate?