
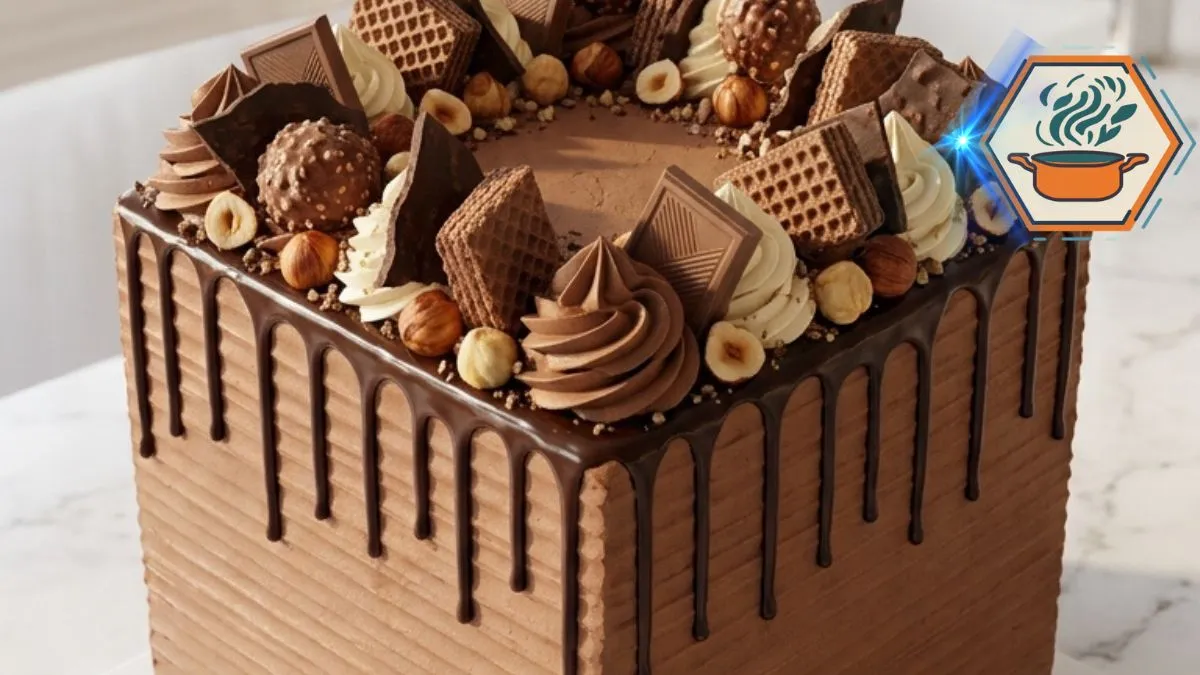
There is a moment at almost every celebration when conversation slows and everyone looks toward the dessert table. This Chocolate Hazelnut Celebration Cake was made for that moment. It is tall, square, deeply chocolatey, and covered with glossy ganache drips. Toasted hazelnuts, crisp wafer pieces, chocolate-hazelnut bites, milk chocolate squares, and small vanilla swirls turn the top into a dessert centerpiece.
The beauty is not only on the outside. Cut through the cake and you find four moist chocolate layers separated by a soft chocolate-hazelnut cream. Hot coffee helps bring out the cocoa flavor while vegetable oil keeps the crumb tender. Thin chocolate cake batter is normal for this style of cake; King Arthur Baking’s chocolate cake guide also notes a thin batter and uses coffee or water in its chocolate cake.
This cake does require patience, but none of the individual steps are difficult. The secret is giving each component enough time to cool or chill before moving forward. Because the filling contains cream cheese and whipped cream, the finished cake also needs refrigeration. The USDA refrigeration guidance recommends keeping refrigerators at 40°F (4°C) or below and not leaving perishable foods above that temperature for more than two hours.
Affiliate disclosure: As an Amazon Associate I earn from qualifying purchases. This article may contain affiliate links to kitchen tools I find useful for preparing this recipe.
JUMP TO
Chocolate Hazelnut Celebration Cake
A tall four-layer square chocolate cake filled with creamy chocolate-hazelnut filling and covered with chocolate buttercream. Glossy ganache drips, toasted hazelnuts, crisp wafer pieces, chocolate-hazelnut bites, milk chocolate squares, and chocolate and vanilla swirls create a rich celebration cake with contrasting textures.
- Total Time: About 4 hours 35 minutes
- Yield: 1 tall 9-inch square cake, about 20 servings
Ingredients
Chocolate Cake
- 2 1/2 cups (300 g) all-purpose flour
- 3/4 cup (64 g) unsweetened cocoa powder
- 2 cups (400 g) granulated sugar
- 2 teaspoons baking powder
- 1 1/2 teaspoons baking soda
- 1/2 teaspoon fine salt
- 3 large eggs, room temperature
- 1 cup (240 ml) whole milk, room temperature
- 1/2 cup (120 ml) neutral vegetable oil
- 2 teaspoons vanilla extract
- 1 cup (240 ml) hot brewed coffee or hot water
Chocolate-Hazelnut Filling
- 1 cup (240 ml) cold heavy whipping cream
- 8 oz (226 g) full-fat cream cheese, softened
- 3/4 cup chocolate-hazelnut spread
- 1/2 cup (60 g) powdered sugar, sifted
Chocolate Buttercream
- 1 1/2 cups (340 g) unsalted butter, softened
- 4 1/2 cups (540 g) powdered sugar, sifted
- 3/4 cup (64 g) unsweetened cocoa powder
- Up to 1/2 cup (120 ml) heavy cream
- 2 teaspoons vanilla extract
- Pinch of fine salt
Chocolate Ganache
- 8 oz (226 g) semi-sweet chocolate, finely chopped
- 3/4 cup (180 ml) heavy cream
Decoration
- 3/4 to 1 cup toasted hazelnuts, whole and halved
- Chocolate-covered hazelnut bites, as needed
- Chocolate wafer pieces, as needed
- Milk chocolate squares, as needed
- Reserved chocolate buttercream
- About 1/2 cup vanilla buttercream
Instructions
- Preheat the oven to 350°F (175°C). Grease two 9-inch square cake pans. Line the bottoms with parchment and lightly grease the parchment.
- Whisk the flour, cocoa powder, sugar, baking powder, baking soda, and salt in a large bowl.
- In another bowl, whisk the eggs, milk, oil, and vanilla. Add to the dry ingredients and mix just until combined.
- Slowly mix in the hot coffee or hot water. The batter will be relatively thin. This is normal.
- Divide the batter evenly between the prepared pans. Bake for 30–35 minutes, or until a tester inserted near the center comes out without wet batter.
- Cool in the pans for 10–15 minutes. Turn onto cooling racks, remove the parchment, and cool completely.
- For easier cutting, chill the cakes for 30–60 minutes. Using a long serrated knife, split each square cake horizontally to make four layers.
- Make the filling. Whip the cold heavy cream to soft-to-medium peaks. In another bowl, beat the cream cheese until smooth. Beat in the chocolate-hazelnut spread and powdered sugar. Gently fold in the whipped cream. Chill for 15–20 minutes if the filling feels too soft.
- Make the chocolate buttercream. Beat the softened butter until creamy. Gradually add the sifted powdered sugar and cocoa. Add the vanilla, salt, and enough heavy cream to produce a smooth but firm frosting.
- Put the first cake layer on a square cake board. Pipe a chocolate buttercream dam around the edge. Spread chocolate-hazelnut filling inside the dam. Repeat with the remaining layers.
- Chill the stacked cake for 20–30 minutes.
- Apply a thin crumb coat of chocolate buttercream. Chill for another 20–30 minutes.
- Apply the final chocolate buttercream coat. Create subtle horizontal ridges around all four sides with an offset spatula or cake scraper. Chill for at least 30 minutes.
- Make the ganache. Place the chopped chocolate in a heatproof bowl. Heat the cream until steaming and beginning to simmer around the edges. Pour it over the chocolate. Rest for 2 minutes, then stir gently until smooth.
- Let the ganache cool until thick enough to drip slowly. Test one drip on the back of the chilled cake. If it runs straight to the bottom, allow the ganache to cool longer.
- Add ganache around the upper edge, creating drips of different lengths. Spread a thin layer over the top.
- Toast the hazelnuts at 350°F (175°C) for 7–9 minutes. Cool completely.
- Pipe alternating chocolate and vanilla swirls around the top. Decorate with toasted hazelnuts, chocolate-covered hazelnut bites, wafer pieces, and milk chocolate squares.
- Refrigerate until firm. For cleaner slices, cut with a sharp knife warmed in hot water and wiped dry between cuts.
Notes
- Do not cut warm cake layers. Chilled layers are much easier to split.
- The hot coffee strengthens the chocolate flavor but should not make the finished cake taste strongly of coffee.
- Do not add extra flour because the batter appears thin.
- Keep the heavy cream cold before whipping.
- A buttercream dam helps prevent the hazelnut filling from squeezing out.
- Chill the cake before applying ganache.
- Always test one ganache drip before decorating the entire cake.
- Let toasted hazelnuts cool completely before adding them to buttercream.
- Add some wafer pieces shortly before serving if you want them especially crisp.
- Because the filling contains cream cheese and whipped cream, keep the finished cake refrigerated at 40°F (4°C) or below.
- For the reference-photo appearance, keep the decoration abundant and slightly irregular rather than perfectly symmetrical.
- Prep Time: 1 hour 30 minutes
- Additional/Chilling Time: 2 hours 30 minutes
- Cook Time: 30–35 minutes
- Category: Dessert
- Method: Baking
- Cuisine: American
Why This Chocolate Hazelnut Celebration Cake Works
The first bite has several textures at once. The cake is soft. The filling is creamy. The frosting is rich. Toasted hazelnuts add crunch, while wafer pieces give a light crispness.
That contrast is important. A cake made only from chocolate sponge and chocolate frosting can taste heavy after a few bites. Hazelnut, vanilla, wafers, and toasted nuts break up that richness.
Coffee also has a useful role. The finished cake does not need to taste strongly of coffee. Instead, it supports the cocoa and gives the chocolate a deeper character.
The decoration may look elaborate, but it is built from simple elements. You do not need professional pastry skills. Work in stages and chill the cake whenever the frosting becomes too soft.
If you enjoy decorated chocolate desserts, our strawberry-filled chocolate cake guide is another useful idea for special occasions.
Ingredients
Chocolate Cake
- 2½ cups (about 300 g) all-purpose flour
- ¾ cup (about 64 g) unsweetened cocoa powder
- 2 cups (400 g) granulated sugar
- 2 teaspoons baking powder
- 1½ teaspoons baking soda
- ½ teaspoon fine salt
- 3 large eggs, preferably at room temperature
- 1 cup (240 ml) whole milk, at room temperature
- ½ cup (120 ml) neutral vegetable oil
- 2 teaspoons vanilla extract
- 1 cup (240 ml) hot brewed coffee or hot water
Use unsweetened cocoa rather than hot chocolate powder. Dutch-process cocoa gives a darker appearance, while natural cocoa can give a slightly brighter chocolate flavor.
Chocolate-Hazelnut Filling
- 1 cup (240 ml) cold heavy whipping cream
- 8 oz (226 g) full-fat cream cheese, softened
- ¾ cup chocolate-hazelnut spread
- ½ cup (60 g) powdered sugar, sifted
The heavy cream should remain cold until whipping. The cream cheese should be softened enough to beat smoothly. This temperature difference matters.
Chocolate Buttercream
- 1½ cups (340 g) unsalted butter, softened
- 4½ cups (540 g) powdered sugar, sifted
- ¾ cup (64 g) unsweetened cocoa powder
- ½ cup (120 ml) heavy cream, added gradually
- 2 teaspoons vanilla extract
- Pinch of salt
Do not pour all the cream into the frosting immediately. Start with about half and add more until the buttercream becomes smooth but still firm enough to hold the tall cake.
Chocolate Ganache
- 8 oz (226 g) semi-sweet chocolate, finely chopped
- ¾ cup (180 ml) heavy cream
Decorations
- ¾ to 1 cup toasted whole and halved hazelnuts
- Chocolate-covered hazelnut bites
- Chocolate wafer pieces
- Milk chocolate squares
- Reserved chocolate buttercream
- About ½ cup vanilla buttercream
The exact amount of decoration can vary. The goal is the abundant but slightly irregular appearance shown in the finished cake.
Equipment You Will Need
Two straight-sided 9-inch square pans make it much easier to reproduce the tall square shape.
Useful tools include:
- Two 9-inch square cake pans
- A long serrated knife or cake leveler
- A small offset spatula
- A cake decorating turntable
- Parchment paper
- Cooling racks
- Electric hand mixer or stand mixer
- Piping bags and star piping tips
- Digital kitchen scale, if available
Affiliate note: replace the four Amazon URLs above with your Amazon Associates tracking links before publication.
How to Make the Chocolate Cake
Heat the oven to 350°F (175°C). Grease two 9-inch square cake pans. Line the bottoms with parchment paper, then lightly grease the parchment.
Do not skip the parchment. These layers are moist and can stick when removed from the pans.
In a large bowl, whisk together the flour, cocoa powder, sugar, baking powder, baking soda, and salt. Break apart every visible cocoa lump.
In another bowl, whisk the eggs, milk, vegetable oil, and vanilla until blended.
Pour the wet mixture into the dry ingredients. Mix at low speed just until no dry pockets remain.
Slowly pour in the hot coffee while mixing on low. The batter will become noticeably thinner. That is expected. Do not add extra flour to thicken it.
Divide the batter evenly between the prepared pans. A kitchen scale is helpful here because equal amounts of batter produce layers that bake at a similar rate.
Bake for 30 to 35 minutes.
Start checking around 30 minutes. A toothpick inserted near the center should come out clean or with a few moist crumbs rather than wet batter. The center should also spring back gently when touched.
Let the cakes sit in their pans for about 10 to 15 minutes. Turn them onto cooling racks and remove the parchment.
Cool completely before cutting.
How to Turn Two Cakes Into Four Even Layers
This is one of the details that can decide whether the final cake looks tall and neat or unstable.
A warm cake is too fragile to split cleanly.
Once completely cool, wrap each cake and chill it for 30 to 60 minutes. Chilled cake produces fewer crumbs and is easier to cut.
Place one layer on a flat surface. Mark the halfway point around all four sides with the tip of a serrated knife.
Cut a shallow guide around the cake first. Then gradually work the knife toward the center rather than cutting straight through from one side.
Repeat with the second cake.
You now have four square chocolate layers.
Make the Chocolate-Hazelnut Filling
Pour the cold heavy cream into a clean bowl. Whip until it reaches soft to medium peaks. Stop before it becomes stiff or grainy.
In a second bowl, beat the softened cream cheese until completely smooth.
Add the chocolate-hazelnut spread and sifted powdered sugar. Beat until creamy.
Fold about one-third of the whipped cream into the hazelnut mixture to loosen it. Fold in the rest gently.
The filling should be airy but strong enough to stay between the layers.
If it feels very soft, refrigerate it for 15 to 20 minutes before assembly.
Make the Chocolate Buttercream
Beat the softened butter for 3 to 4 minutes until creamy and slightly lighter.
Sift the powdered sugar and cocoa. Add them gradually with the mixer running at low speed.
Add vanilla, salt, and about half of the heavy cream.
Beat until smooth. Add the remaining cream one tablespoon at a time only if needed.
For this cake, slightly firm buttercream is better than loose frosting. It has to support four layers and provide a clean surface for the ganache.
If you frequently bake celebration desserts, learning how different ingredients affect structure can make a noticeable difference. Our guide to the difference between butter cakes covers more baking basics.
Stack the Cake Without Squeezing Out the Filling
Place the first cake layer on a square cake board or serving plate.
Pipe a border of chocolate buttercream around its outer edge. This creates a small dam that helps hold the softer hazelnut filling inside.
Spread an even layer of chocolate-hazelnut filling inside that border.
Add the second cake layer and repeat.
Continue until all four layers are stacked. Place the flattest layer on top, with its smooth side facing upward.
Check the cake from every side. Correct any leaning now.
Refrigerate for about 20 to 30 minutes before applying the outer frosting.
The Crumb Coat Is Worth the Extra Step
Spread a very thin layer of chocolate buttercream over the top and all four sides.
This is the crumb coat. It catches loose chocolate crumbs before the final frosting goes on.
Chill for 20 to 30 minutes, or until the coating feels firm.
Add a thicker final coat of chocolate buttercream. Smooth it with a bench scraper or offset spatula.
For the same handmade appearance as the reference cake, gently run the spatula horizontally around the sides. Create thin, subtle ridges rather than a perfectly polished finish.
Chill again for at least 30 minutes before adding ganache.
This cold surface is one of the most important details for controlled chocolate drips.
How to Get Glossy Ganache Drips
Finely chop the semi-sweet chocolate and place it in a heatproof bowl.
Heat the cream until steaming and just beginning to simmer around the edges. Do not aggressively boil it.
Pour the cream over the chocolate. Leave it untouched for 2 minutes.
Stir slowly from the center outward until smooth and glossy.
Now wait.
Hot ganache poured onto buttercream can melt the frosting and run to the bottom of the cake. Let the ganache cool until it is fluid but no longer hot.
Test one drip on the back edge of the cold cake.
If it races downward, wait a few more minutes. If it barely moves, gently warm the ganache.
Once the consistency is right, place small amounts around the top edge, allowing some drips to remain short and others to run farther down. Then spread a thin layer across the top.
Recreating the Decorated Top
Toast the hazelnuts at 350°F (175°C) for 7 to 9 minutes. Let them cool before placing them on frosting.
Toasting gives the nuts a stronger aroma and a crisper bite.
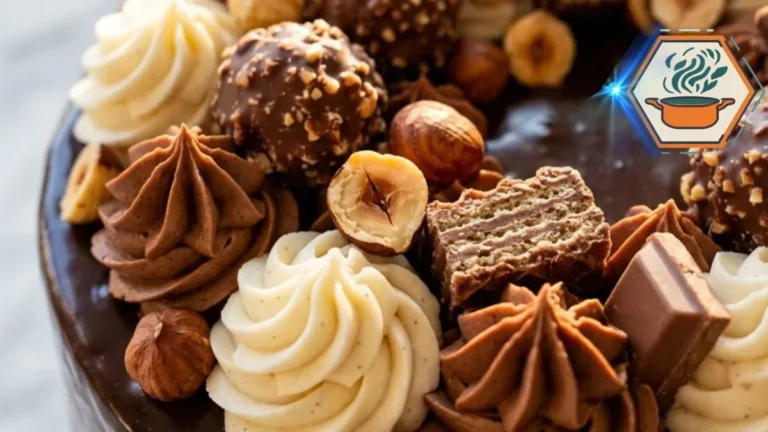
Pipe alternating chocolate and vanilla swirls around the perimeter. Use different sizes rather than making every swirl identical.
Arrange the decorations between them:
- Whole toasted hazelnuts
- Hazelnut halves with their cut surfaces visible
- Chocolate-covered hazelnut bites
- Broken chocolate wafer bars
- Milk chocolate squares
- Small pieces of chocolate
- Extra chocolate buttercream swirls
Keep the center generously decorated but not completely hidden.
The goal is a rich, handmade arrangement rather than perfect symmetry. Some wafer pieces can stand at an angle. Chocolate squares can lean against frosting swirls. Scatter hazelnuts through the gaps.
For another lesson in working with sugar-based dessert finishes, see our guide to mastering caramelized sugar.
How to Cut Clean Slices
After decorating, refrigerate the cake until firm.
For cleaner slices, use a long sharp knife. Dip the blade in hot water, wipe it completely dry, and make one cut.
Clean and warm the knife again before the next cut.
Because this is a tall four-layer cake, modest slices are usually enough. Depending on how it is cut, a 9-inch square cake can serve roughly 16 to 20 people.
For the best texture, let an individual slice sit briefly at room temperature before eating. The buttercream becomes softer and the chocolate flavor becomes more noticeable.
Storage and Make-Ahead Tips
Because this cake contains a cream cheese and whipped-cream filling, keep it refrigerated at 40°F (4°C) or below. USDA guidance also advises refrigerating perishable foods promptly rather than leaving them at room temperature for more than two hours.
For the best texture, make the cake layers one day ahead. Cool them completely, wrap them well, and refrigerate them.
The filling and buttercream can also be prepared in advance and refrigerated. Bring the buttercream toward a workable temperature and beat it again before frosting.
The fully assembled cake is best within about 2 to 3 days for texture and decoration quality.
Wafer decorations gradually soften in the refrigerator. If maximum crunch matters, add some of the wafer pieces closer to serving time.
Common Mistakes to Avoid
Cutting warm cake layers: They can tear, crumble, or break. Cool and briefly chill them first.
Making the filling too loose: Whip the cream correctly and chill the filling when needed.
Skipping the buttercream dam: A tall cake can push soft filling toward the edges.
Skipping the crumb coat: Chocolate crumbs can become trapped in the visible frosting.
Adding ganache while hot: It can melt the buttercream.
Adding ganache to a warm cake: Cold frosting gives you far more control over the drips.
Overfilling between layers: More filling does not always mean a better cake. Thick filling makes tall cakes less stable.
Using warm hazelnuts: Let toasted nuts cool fully before placing them on buttercream.
FAQs About Chocolate Hazelnut Celebration Cake
Can I make Chocolate Hazelnut Celebration Cake ahead of time?
Yes. Baking the chocolate layers a day before decorating can actually make assembly easier. Wrap the cooled layers well and refrigerate them. Assemble and decorate the cake the following day.
Can I use hot water instead of coffee?
Yes. Hot water works. Coffee adds depth to the cocoa flavor, but it is not required.
Why is my chocolate cake batter so thin?
The batter contains a full cup of hot liquid, so it should look thinner than many traditional butter cake batters. Do not compensate by adding extra flour. Thin chocolate cake batters are also used in established baking formulas.
How do I stop the filling from coming out between the layers?
Use a ring of firm chocolate buttercream around the edge of each layer before adding the softer filling. Keep the filling inside that border and chill the cake after stacking.
Why did my ganache run all the way down the cake?
It was probably too warm or too thin. Let it cool and test a single drip before decorating the entire edge.
Can I make this cake without hazelnuts?
You can leave the whole nuts off the decoration, but a chocolate-hazelnut spread still contains hazelnuts. For a truly nut-free cake, you need a suitable nut-free chocolate filling and must check every chocolate and wafer product for allergen statements and cross-contact warnings.
Should Chocolate Hazelnut Celebration Cake be refrigerated?
Yes. The filling contains cream cheese and whipped cream, so the finished cake should be refrigerated. Keep it covered to protect it from refrigerator odors and drying.
What makes this cake good for a birthday or celebration?
It combines the visual impact of a tall layer cake with several textures. The glossy drips, piped swirls, toasted nuts, wafers, and chocolate pieces make it feel festive before the first slice is cut.
A Cake Made for the Center of the Table
A good celebration cake should give people a reason to gather around it.
This Chocolate Hazelnut Celebration Cake does exactly that. Four dark chocolate layers give it height. Chocolate-hazelnut cream adds softness. Firm buttercream keeps the structure neat. Ganache creates those dramatic drips, while toasted hazelnuts and wafers bring the crunch that a rich chocolate cake needs.
The most important lesson is not to rush the cold stages. Cool the cakes before splitting them. Chill the filling when it feels soft. Set the crumb coat before the final frosting. Chill the frosted cake before testing the ganache.
Then have fun with the top.
A hazelnut can sit slightly off-center. A wafer can lean against a chocolate swirl. One ganache drip can be longer than the next. Those small differences give the finished square cake the inviting, generous appearance that makes people want to cut into it.
And when that first slice comes out, the decoration finally reveals what it was hiding: four chocolate layers, creamy hazelnut filling, and enough chocolate and crunch to make the cake worthy of the celebration.