
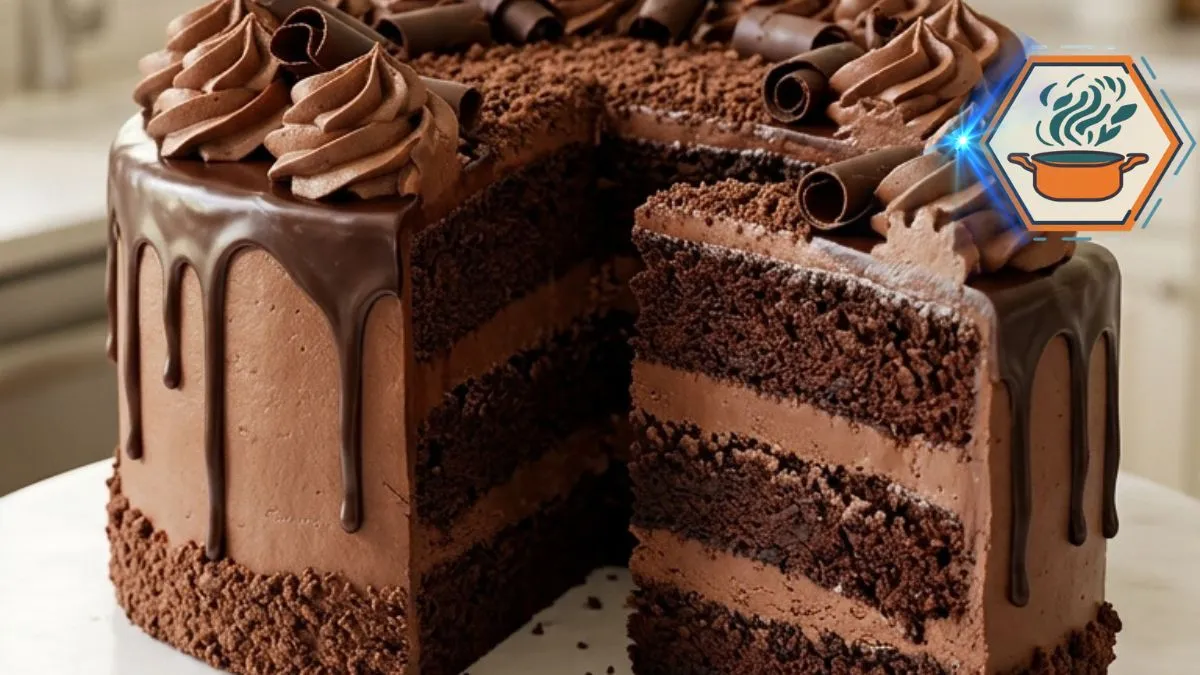
Some cakes are made for an ordinary afternoon. This Triple-Layer Chocolate Fudge Cake is made for the moment everyone stops talking and looks at the dessert table.
The first thing you notice is its height. Three dark chocolate cake layers sit beneath thick ribbons of chocolate buttercream. A glossy ganache falls naturally over the edge. Chocolate rosettes circle the top, while fine shavings fill the center. Cut into it, and the contrast becomes even better: dark, moist cake against smooth chocolate filling.
The secret is not one difficult baking trick. It comes from getting several small details right. Hot coffee deepens the cocoa flavor. Oil keeps the crumb tender. Proper cooling keeps the buttercream stable. Chilling the assembled cake makes the final ganache drip much easier to control.
If you want to learn more about cocoa and chocolate in baking, King Arthur Baking is a useful baking reference. For food handling and storage guidance, you can also consult the USDA.
This recipe walks through every stage, including the details that are easy to miss.
Affiliate disclosure: As an Amazon Associate I earn from qualifying purchases. This article may contain affiliate links to kitchen tools I find useful for preparing this recipe.
JUMP TO
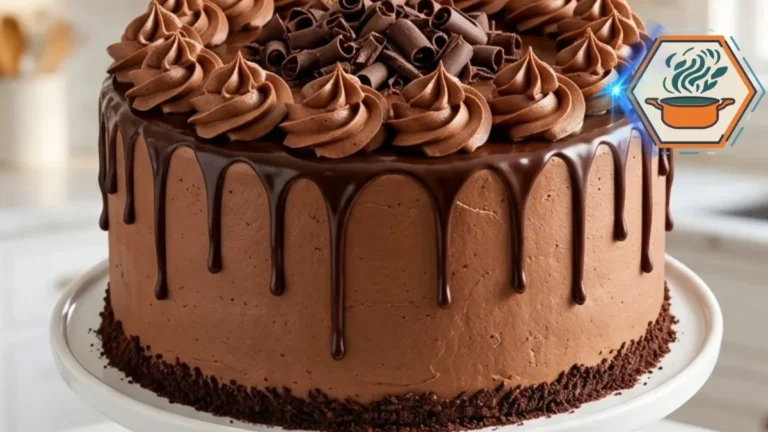
Triple-Layer Chocolate Fudge Cake
A tall three-layer chocolate fudge cake with moist dark chocolate layers, silky chocolate buttercream, glossy dark chocolate ganache drips, piped chocolate rosettes, chocolate shavings, and a crunchy chocolate crumb border.
- Total Time: About 2 hours 15 minutes
- Yield: 14–16 slices
Ingredients
Chocolate Cake
- 2 cups (240 g) all-purpose flour
- 3/4 cup (65–75 g) unsweetened cocoa powder
- 1 3/4 cups (350 g) granulated sugar
- 2 teaspoons baking powder
- 1 1/2 teaspoons baking soda
- 1/2 teaspoon fine salt
- 3 large eggs, room temperature
- 1 cup (240 ml) whole milk, room temperature
- 1/2 cup (120 ml) neutral oil
- 2 teaspoons vanilla extract
- 1 cup (240 ml) hot freshly brewed coffee
Chocolate Buttercream
- 1 1/2 cups (340 g) unsalted butter, softened but not melted
- 4 1/2 cups (540 g) powdered sugar
- 3/4 cup (65–75 g) unsweetened cocoa powder
- 1/2 cup (120 ml) heavy cream, plus more only if needed
- 2 teaspoons vanilla extract
- 1/4 teaspoon fine salt
Chocolate Ganache Drip
- 6 oz (170 g) dark or semisweet chocolate, finely chopped
- 1/2 cup (120 ml) heavy cream
Finishing
- 2–3 oz (55–85 g) dark chocolate for shavings
- About 1 cup fine chocolate cake crumbs or finely chopped chocolate
Instructions
- Preheat the oven to 350°F (175°C). Grease three 8-inch round cake pans. Line the bottoms with parchment paper and lightly grease the parchment.
- Whisk the flour, cocoa powder, sugar, baking powder, baking soda, and salt in a large bowl. Break apart any cocoa lumps.
- In a second bowl, whisk the eggs, milk, oil, and vanilla until combined.
- Add the wet mixture to the dry ingredients. Mix gently until most flour streaks disappear.
- Slowly pour in the hot coffee while mixing on low. The finished batter will be quite thin. This is expected.
- Divide the batter evenly between the three prepared pans. Weighing the batter gives the most evenly sized layers.
- Bake for 25–30 minutes. Begin checking at 25 minutes. A toothpick inserted into the center should come out with a few moist crumbs but no wet batter.
- Cool in the pans for about 10 minutes. Turn onto wire racks, remove the parchment, and allow the layers to cool completely.
- For the buttercream, beat the softened butter for 2–3 minutes. Gradually add powdered sugar and cocoa. Add vanilla, salt, and enough heavy cream to produce a smooth frosting that is still firm enough to hold a piped rosette.
- Level any domed cake layers if necessary. Place the first layer on the serving plate or cake board. Spread with buttercream. Add the second layer, another layer of buttercream, then the final cake layer.
- Cover the cake with a thin crumb coat. Refrigerate for 20–30 minutes.
- Apply the final chocolate buttercream coat. Smooth the top and sides. Reserve enough buttercream for the rosettes. Chill the cake again until the exterior is firm.
- Place the finely chopped chocolate in a heatproof bowl. Heat the heavy cream until steaming but not vigorously boiling. Pour it over the chocolate and leave undisturbed for 2–3 minutes.
- Stir slowly until smooth and glossy. Allow the ganache to cool until fluid but no longer hot.
- Test one drip on the back of the chilled cake. If it runs immediately to the bottom, wait longer. If it barely moves, warm the ganache very gently.
- Once the consistency is correct, make irregular drips around the cake. Spread a thin layer of ganache over the top.
- Pipe large chocolate rosettes around the upper perimeter. Fill the center with chocolate shavings.
- Press fine chocolate cake crumbs or finely chopped chocolate around the bottom edge.
- Chill briefly before slicing. Warm a long sharp knife in hot water, wipe it completely dry, and cut in one smooth motion. Clean and warm the knife between slices.
- For the best texture, allow each slice to sit at room temperature for about 10–15 minutes before eating
Notes
- Do not add extra flour because the batter looks thin. The loose consistency is intentional.
- Use room-temperature eggs and milk for more even mixing.
- Do not frost warm cake layers.
- Chill the crumb-coated cake before the final frosting.
- The cake should be cold before adding the ganache.
- Always test one ganache drip before decorating the entire cake.
- Hot ganache can soften or melt buttercream.
- For three visually even layers, weigh the batter before dividing it.
- Coffee deepens the chocolate character. Hot water can replace it if necessary.
- A small amount of leftover cake can be crumbled for the bottom border.
- The listed finishing quantities may leave a little extra depending on how heavily the cake is decorated.
- Prep Time: 45 minutes
- Additional/Chilling Time: 1 hour
- Cook Time: 25–30 minutes
- Category: Dessert
- Method: Baking
- Cuisine: American
Why This Triple-Layer Chocolate Fudge Cake Works
A tall chocolate cake needs more than good flavor. It also needs structure.
The three layers must remain soft without becoming too fragile to stack. The frosting needs enough body to hold each layer in place. The ganache needs to flow down the sides without running all the way to the cake stand.
This recipe balances those elements.
The cake uses neutral oil rather than relying only on butter. Oil stays liquid at room temperature, which helps give the crumb a soft mouthfeel.
Hot coffee is another important ingredient. It adds liquid to the batter while supporting the darker notes of cocoa. The finished cake should taste intensely chocolatey rather than strongly of coffee.
Finally, three separate 8-inch pans create the tall appearance shown in the finished cake. Baking three individual layers also means you do not need to slice one thick cake horizontally.
For another rich dessert idea, see our strawberry filled chocolate cake.
Ingredients You’ll Need
For the Chocolate Cake
- 2 cups (240 g) all-purpose flour
- 3/4 cup (65–75 g) unsweetened cocoa powder
- 1 3/4 cups (350 g) granulated sugar
- 2 teaspoons baking powder
- 1 1/2 teaspoons baking soda
- 1/2 teaspoon fine salt
- 3 large eggs, at room temperature
- 1 cup (240 ml) whole milk, at room temperature
- 1/2 cup (120 ml) neutral oil
- 2 teaspoons vanilla extract
- 1 cup (240 ml) hot freshly brewed coffee
Use a neutral-tasting oil such as canola, sunflower, or vegetable oil.
The coffee should be hot but does not need to be boiling. If you prefer not to use coffee, hot water will still produce a cake, although the chocolate flavor may taste less deep.
For the Chocolate Buttercream
- 1 1/2 cups (340 g) unsalted butter, softened
- 4 1/2 cups (540 g) powdered sugar, sifted if lumpy
- 3/4 cup (65–75 g) unsweetened cocoa powder
- 1/2 cup (120 ml) heavy cream, plus a little more if needed
- 2 teaspoons vanilla extract
- 1/4 teaspoon fine salt
The butter should be soft enough to beat easily but not greasy or partly melted. Around 65–68°F (18–20°C) works well.
For the Chocolate Ganache Drip
- 6 oz (170 g) dark or semisweet chocolate, finely chopped
- 1/2 cup (120 ml) heavy cream
Finely chopping the chocolate matters. Smaller pieces melt faster and reduce the chance of finding unmelted chunks in the ganache.
For the Chocolate Finish
- 2–3 oz dark chocolate for shavings
- About 1 cup finely crumbled chocolate cake or finely chopped chocolate
The crumbs around the bottom are not only decorative. They add texture and help recreate the rich chocolate border seen on this style of cake.
Equipment That Makes the Recipe Easier
You will need three 8-inch round cake pans, parchment paper, mixing bowls, a whisk or mixer, cooling racks, a long serrated knife, piping bags, and a large star piping tip.
Using three pans of the same size helps the layers bake at roughly the same rate. If you need a set, you can browse 8-inch round cake pans on Amazon.
A rotating cake stand is also useful when smoothing the sides. It is not essential, but it makes decorating a tall cake much easier. You can see cake decorating turntables on Amazon.
How to Make the Chocolate Cake Layers
Heat the oven to 350°F (175°C). Place a rack near the center.
Grease three 8-inch round pans. Line each bottom with a parchment circle. Lightly grease the parchment as well.
This small preparation step matters. A moist chocolate cake can stick easily, and damaged edges make stacking harder.
In a large bowl, whisk together the flour, cocoa powder, sugar, baking powder, baking soda, and salt.
Break up every visible cocoa lump.
In another bowl, whisk the eggs, milk, oil, and vanilla until evenly combined.
Pour the wet mixture into the dry ingredients. Mix on low speed or whisk gently until most dry streaks disappear.
Now slowly pour in the hot coffee.
Do not be alarmed when the batter becomes thin. A relatively fluid chocolate batter is normal for cakes made with hot coffee.
Stop mixing as soon as everything looks uniform. Excess mixing after the flour is hydrated can make the crumb less tender.
Divide the batter equally among the three pans. For the most even layers, weigh the filled pans or weigh the batter before dividing it.
Bake for 25–30 minutes.
Begin checking around 25 minutes. Insert a toothpick into the center. It should emerge with a few moist crumbs, but not liquid batter.
Avoid repeatedly opening the oven during the first part of baking. A sudden drop in heat can interfere with the rise.
Let the cakes cool in their pans for about 10 minutes. Carefully loosen the edges and turn each layer onto a cooling rack.
Remove the parchment.
Then wait.
The layers must be completely cool before buttercream touches them. Even slightly warm cake can soften the frosting and cause a tall stack to shift.
Make the Silky Chocolate Buttercream
Beat the softened butter for 2–3 minutes until creamy and lighter in texture.
Add the powdered sugar gradually. Mixing it in several additions gives you more control and creates less mess.
Add the cocoa powder, vanilla, salt, and about half of the cream.
Beat on low at first. Increase to medium once the dry ingredients are incorporated.
Continue adding cream, one tablespoon at a time, until the frosting is smooth but still firm enough to hold a piped rosette.
If it feels loose, do not immediately add lots of powdered sugar. First check the temperature. Warm buttercream often needs a short chill rather than extra sugar.
An offset spatula is especially useful for filling layers and smoothing the exterior. You can browse offset cake spatulas on Amazon.
Stack the Three Chocolate Layers
If your cakes have noticeable domes, level them carefully with a long serrated knife.
Place the first cake layer on a cake board or serving plate.
Spread an even layer of chocolate buttercream over the top. Keep it thick enough to create the visible chocolate stripe between layers, but leave a small margin near the edge.
Place the second cake layer on top. Check it from several angles before adding more frosting.
Repeat with buttercream and add the third cake layer.
Apply a thin coat of buttercream over the entire cake. This first coating traps loose crumbs.
Chill for 20–30 minutes, or until the exterior feels firm.
Add the final buttercream coat. Smooth the top and sides while keeping enough frosting aside for the large rosettes.
For more baking ideas and kitchen guides, visit RecipesMind.
How to Make a Glossy Chocolate Ganache Drip
Place the finely chopped chocolate in a heatproof bowl.
Heat the heavy cream until it is steaming and just beginning to show tiny bubbles around the edge. Do not aggressively boil it.
Pour the hot cream over the chocolate.
Leave it untouched for 2–3 minutes. Then stir slowly from the center outward until the mixture becomes smooth and glossy.
Now comes one of the most important details: do not immediately pour hot ganache over buttercream.
Let the ganache cool until it remains fluid but no longer feels hot.
The cake should also be chilled.
Test one drip on the back of the cake. Spoon a small amount near the edge and watch how far it travels.
If it races to the bottom, the ganache is too warm or too thin. Wait a few minutes.
If it barely moves, gently warm it for a few seconds.
Once the test drip looks right, add irregular drips around the perimeter. Then spread a thin layer of ganache across the top.
This test prevents an entire cake from being covered by a ganache that is too fluid.
Create the Chocolate Rosettes and Crumb Border
Transfer the remaining buttercream to a piping bag fitted with a large open-star tip.
Pipe large rosettes around the top perimeter. Keep them similar in size while allowing each swirl to retain its shape.
If you need decorating supplies, browse large star piping tips and bags on Amazon.
Add fine dark chocolate shavings to the open center.
Finally, press chocolate cake crumbs or finely chopped chocolate around the bottom few inches of the cake.
This final border gives the cake another chocolate texture and creates the dramatic finished appearance.
The Secret to a Clean, Dramatic Slice
A tall layer cake can taste wonderful and still look messy when cut.
Chill the decorated cake until the buttercream and ganache are firm.
Fill a tall container with hot water. Dip a long, sharp knife into the water, then wipe it completely dry.
Make one smooth downward cut.
Clean the blade. Warm it again. Dry it. Make the next cut.
This takes extra time, but it creates much cleaner edges between the dark cake and chocolate buttercream.
Once plated, let the slice stand at room temperature for about 10–15 minutes. The buttercream will soften and become silkier.
Common Problems and How to Fix Them
The cake is dry. It may have baked too long. Start checking before the maximum baking time. Measuring flour by weight also reduces the risk of adding too much.
The layers slide. The cakes or buttercream may be too warm. Chill the assembled cake before applying the final coat.
The frosting is too stiff. Add heavy cream one tablespoon at a time.
The frosting is too soft. Chill it briefly. If the butter was overly warm, adding more sugar alone may make the frosting unnecessarily sweet.
The ganache runs to the bottom. It is probably too warm. Let it cool longer and test another drip.
The ganache will not drip. It may have cooled too much. Warm it very gently.
The cake tears when frosting. Apply a thin crumb coat first and chill it before adding the final buttercream layer.
Make-Ahead and Storage Tips
The cake layers can be prepared before decorating.
Once completely cool, wrap each layer tightly so it does not dry out. You can then assemble the cake later.
A fully decorated cake can also be refrigerated. Keep it covered so it does not absorb refrigerator odors.
Before serving, give individual slices a little time at room temperature. Cold buttercream is firmer, while slightly softened buttercream has a smoother texture.
For longer storage, individual undecorated or suitably wrapped cake portions can be frozen. Thaw them while wrapped to reduce surface condensation.
Why Hot Coffee Belongs in Chocolate Cake
Coffee and chocolate share roasted, bitter flavor notes. In this recipe, coffee works in the background rather than turning the dessert into a coffee cake.
It also provides the hot liquid needed for the cocoa-rich batter.
If you are serving someone who avoids coffee, replace it with the same volume of hot water. The cake will still work, although its flavor profile will change slightly.
Serving Ideas
This cake is rich, so modest slices are usually enough.
Serve it with:
- Fresh raspberries or strawberries
- Unsweetened coffee
- Cold milk
- A small spoonful of lightly whipped cream
- Fresh berries with little or no added sugar
For the strongest visual presentation, serve the whole cake first and cut it at the table.
Frequently Asked Questions
Can I make this chocolate fudge cake without coffee?
Yes. Replace the coffee with an equal amount of hot water. Coffee supports the cocoa flavor, but it is not required for the structure of the cake.
Why is my chocolate cake batter so thin?
The cup of hot coffee adds significant liquid. A fluid batter is expected here. Do not add extra flour simply because it looks thinner than a traditional butter cake batter.
Can I bake the recipe in two pans?
The recipe was designed around three 8-inch layers. Changing the number or size of pans changes the batter depth and therefore the baking time. For the tall appearance shown here, three matching 8-inch pans are the better choice.
Can I make the cake one day ahead?
Yes. In fact, separating baking and decorating into two sessions can make the process easier. Cool the layers fully and wrap them well before storing.
How do I stop chocolate ganache from melting buttercream?
Start with a chilled buttercream-covered cake and let the ganache cool before applying it. Always make one test drip before decorating the entire perimeter.
How do I get clean layers when cutting?
Chill the cake first. Use a long sharp knife warmed in hot water and wiped completely dry. Clean and warm the knife again between cuts.
What makes this cake fudgy?
The combination of cocoa, oil, milk, eggs, sugar, and a high-moisture batter creates a rich chocolate crumb. Thick chocolate buttercream and dark chocolate ganache make each bite feel even richer.
Final Baking Notes
A beautiful Triple-Layer Chocolate Fudge Cake is really a sequence of small decisions.
Measure carefully. Prepare the pans properly. Do not overbake the layers. Let them cool fully. Keep the buttercream firm enough for stacking. Chill the cake before the final finish. Test the ganache before committing to the drip.
Then take your time with the details.
Pipe the rosettes high. Scatter fine chocolate shavings across the center. Press chocolate crumbs around the bottom edge. Chill the finished cake before making that first dramatic cut.
The result is exactly what a celebration chocolate cake should offer: three moist dark layers, thick chocolate filling, silky buttercream, glossy ganache, and enough texture on top to make every slice look special.