
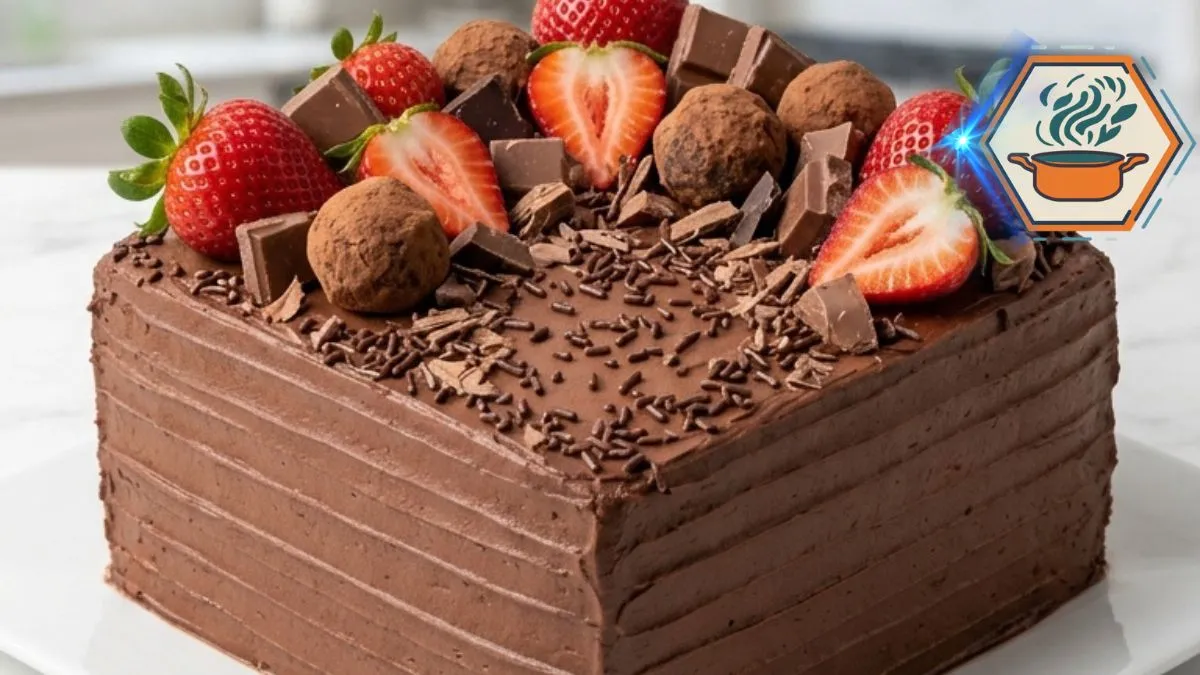
There is a moment when a homemade cake stops looking like an ordinary dessert and becomes the center of the table. This Chocolate Strawberry Truffle Cake is made for that moment. It is tall, square, deeply chocolatey, and covered with soft swirls of chocolate frosting. Fresh red strawberries, round chocolate truffles, chunky milk chocolate, and tiny chocolate sprinkles give the top an abundant finish without making it look overly formal.
The best part is that the cake is still practical for a home baker. You do not need complicated piping or professional decorating tools. What matters most is getting the chocolate cake moist, letting the layers cool fully, making the frosting thick enough to hold its shape, and keeping the strawberries dry. Good technique makes a much bigger difference than perfect decoration. King Arthur Baking also offers useful baking resources and cake techniques for home bakers who want to learn more about ingredient measurements and cake preparation.
Fresh strawberries need a little extra care because they bring moisture to a frosted cake. Wash the berries under clean running water and dry them very well before decorating. The FDA provides additional food-safety guidance for fresh produce. For this cake, the berries should be completely dry before they touch the frosting.
Affiliate disclosure: As an Amazon Associate I earn from qualifying purchases. This article may contain affiliate links to kitchen tools I find useful for preparing this recipe.
JUMP TO
Chocolate Strawberry Truffle Cake
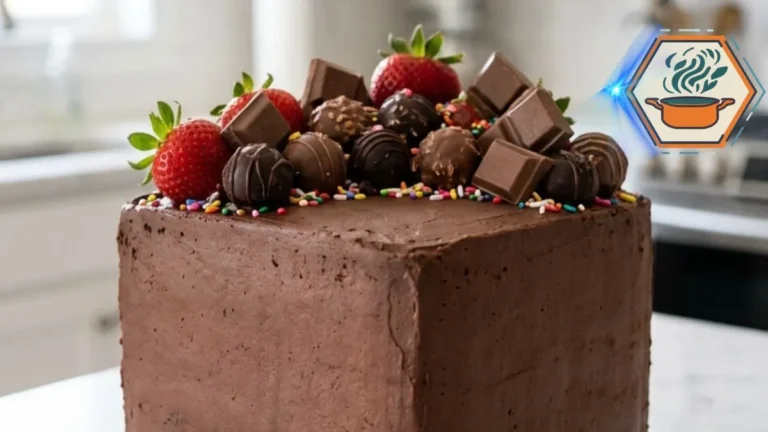
A tall, moist chocolate layer cake covered with creamy chocolate frosting and topped with fresh strawberries, chocolate truffles, milk chocolate chunks, and chocolate sprinkles.
- Total Time: About 2 hours 45 minutes
- Yield: 12 servings
Ingredients
Chocolate Cake
- 2 1/4 cups (270 g) all-purpose flour
- 1 3/4 cups (350 g) granulated sugar
- 3/4 cup (64 g) unsweetened cocoa powder
- 2 teaspoons baking powder
- 1 teaspoon baking soda
- 1/2 teaspoon fine salt
- 3 large eggs, room temperature
- 1 cup (240 ml) whole milk, room temperature
- 1/2 cup (120 ml) neutral vegetable oil
- 2 teaspoons vanilla extract
- 3/4 cup (180 ml) very hot water
Chocolate Frosting
- 1 1/2 cups (340 g) unsalted butter, softened
- 3/4 cup (64 g) unsweetened cocoa powder
- 4 cups (480 g) powdered sugar, sifted
- 1/2 cup (120 ml) heavy cream, plus more only if needed
- 2 teaspoons vanilla extract
- 6 oz (170 g) semi-sweet chocolate, melted and cooled
- 1 pinch fine salt
Decoration
- 1 1/2 cups fresh strawberries, thoroughly dried
- 8–10 chocolate truffles
- 4 oz (115 g) milk chocolate, broken into chunky pieces
- 1/4 cup chocolate sprinkles
Instructions
- Preheat the oven to 350°F (175°C). Grease two 8-inch square cake pans. Line the bottoms with parchment paper and lightly grease the parchment.
- Whisk the flour, sugar, cocoa powder, baking powder, baking soda, and salt in a large mixing bowl until evenly combined.
- Add the eggs, milk, vegetable oil, and vanilla. Mix on low speed, then medium-low, just until smooth. Scrape the bottom and sides of the bowl.
- Slowly mix in the hot water. The batter will become quite thin. Do not add extra flour. Divide evenly between the two prepared pans.
- Bake for 25–30 minutes, or until a toothpick inserted near the center comes out clean or with a few moist crumbs.
- Cool the cakes in their pans for 10–15 minutes. Turn them onto wire racks, remove the parchment, and cool completely before frosting.
- Melt the semi-sweet chocolate for the frosting. Let it cool until fluid but no longer warm.
- Beat the softened butter for 2–3 minutes. Add cocoa powder. Gradually beat in the powdered sugar, alternating with the heavy cream.
- Beat in vanilla, salt, and cooled melted chocolate. Continue until the frosting is thick, fluffy, and spreadable.
- Place one cake layer on a square serving plate or cake board. Level it if necessary. Spread an even layer of chocolate frosting over the top and add the second cake layer.
- Apply a thin crumb coat over the entire cake. Refrigerate for 20–30 minutes.
- Cover the chilled cake with the remaining frosting. Use an offset spatula to form subtle horizontal ridges around all four sides and broad, natural swirls across the top.
- Wash and completely dry the strawberries. Keep some whole and cut several in half lengthwise.
- Arrange the strawberries, chocolate truffles, and irregular milk-chocolate chunks across the upper portion of the cake. Keep the arrangement abundant but slightly asymmetrical. Scatter chocolate sprinkles over the exposed frosting.
- Refrigerate for approximately 30 minutes before slicing. For clean slices, use a sharp knife warmed with hot water and wiped dry between cuts.
Notes
- The cake batter is intentionally thin after adding hot water.
- Do not frost warm cake layers.
- Melted chocolate must cool before being incorporated into the butter frosting.
- The crumb coat is important for the clean brown exterior shown in the finished cake.
- Strawberries must be thoroughly dry before touching the frosting.
- Add fresh strawberries as close to serving as practical for their best appearance.
- For the reference appearance, use two 8-inch square pans, not round pans.
- Keep the final frosting textured rather than perfectly polished.
- The decoration should remain slightly irregular rather than symmetrical.
- Refrigerate leftovers because of the fresh fruit and cream-containing frosting.
- Prep Time: 45 minutes
- Additional/Chill Time: 1 hour 30 minutes
- Cook Time: 25–30 minutes
- Category: Dessert
- Method: Baking
- Cuisine: American-inspired
Why You’ll Love This Chocolate Strawberry Truffle Cake
Imagine bringing a plain chocolate cake to the table. It can taste wonderful, but visually, it is familiar.
Now picture that same chocolate cake built into two thick square layers. Cover it with creamy chocolate frosting. Leave soft horizontal marks from the spatula around the sides. Then pile glossy strawberries, chocolate truffles, and irregular pieces of milk chocolate across the top.
That small change turns dessert into a celebration cake.
The flavor combination also makes sense. Cocoa brings depth and a slight bitterness. Strawberries add fresh sweetness and acidity. The buttercream is creamy, while the truffles and chocolate chunks provide firmer bites.
The result has several textures in every slice.
If you enjoy learning the little details that make homemade cakes better, RecipesMind also has a guide to the difference between butter cake and other cakes.
Ingredients You’ll Need
For the Chocolate Cake
- 2 1/4 cups (270 g) all-purpose flour
- 1 3/4 cups (350 g) granulated sugar
- 3/4 cup (64 g) unsweetened cocoa powder
- 2 teaspoons baking powder
- 1 teaspoon baking soda
- 1/2 teaspoon fine salt
- 3 large eggs, at room temperature
- 1 cup (240 ml) whole milk, at room temperature
- 1/2 cup (120 ml) neutral vegetable oil
- 2 teaspoons vanilla extract
- 3/4 cup (180 ml) very hot water
For the Chocolate Frosting
- 1 1/2 cups (340 g) unsalted butter, softened
- 3/4 cup (64 g) unsweetened cocoa powder
- 4 cups (480 g) powdered sugar, sifted
- 1/2 cup (120 ml) heavy cream, plus a little more if needed
- 2 teaspoons vanilla extract
- 6 ounces (170 g) semi-sweet chocolate, melted and cooled
- Pinch of fine salt
For the Decoration
- 1 1/2 cups fresh strawberries
- 8 to 10 chocolate truffles
- 4 ounces (115 g) milk chocolate, broken into irregular chunks
- 1/4 cup chocolate sprinkles
Equipment
For the shape shown in this recipe, use:
- Two 8-inch square cake pans, ideally about 2 inches deep
- Parchment paper
- Large and medium mixing bowls
- Whisk
- Electric hand mixer or stand mixer
- Flexible spatula
- Offset spatula
- Wire cooling rack
- Cake board or flat serving plate
The square pans matter. Round pans will produce a perfectly good cake, but they will not give you the tall, straight-sided appearance pictured here.
Before You Start
A few small preparations prevent most cake problems.
Bring the eggs and milk close to room temperature. Cold ingredients can make the batter harder to combine evenly.
Cut parchment squares to fit the bottoms of both pans. Lightly grease the pans, add the parchment, then grease the parchment.
Position a rack near the center of the oven and preheat it to 350°F (175°C).
Finally, measure everything before mixing.
Once baking soda and baking powder meet the wet ingredients, you want to get the batter into the oven without a long delay.
How to Make the Chocolate Cake
1. Combine the Dry Ingredients
Place the flour, sugar, cocoa powder, baking powder, baking soda, and salt in a large bowl.
Whisk thoroughly.
Do not rush this part. Cocoa and leavening agents can form small clumps. Mixing the dry ingredients first helps distribute them throughout the batter.
2. Add the Wet Ingredients
Add the eggs, whole milk, vegetable oil, and vanilla.
Mix on low speed at first so the flour and cocoa stay in the bowl. Increase to medium-low and mix only until the batter looks even.
Scrape the bottom and sides with a spatula.
3. Add the Hot Water
Slowly pour in the hot water while mixing on low.
The batter will become noticeably thin.
That is normal. Do not add extra flour.
The hot liquid helps the cocoa disperse through the batter and creates the loose consistency intended for this recipe.
Stop mixing once everything is evenly combined.
4. Divide the Batter
Divide the batter evenly between the prepared square pans.
For layers that bake to similar heights, weighing the filled pans is more accurate than estimating by eye.
Gently tap each pan on the counter once or twice to release large air pockets.
5. Bake
Bake for approximately 25 to 30 minutes.
Start checking near 25 minutes because ovens vary.
Insert a wooden pick into the center. It should come out clean or with a few moist crumbs. Wet batter means the cake needs more time.
Avoid repeatedly opening the oven during the first part of baking. A sudden drop in heat can interfere with the cake’s rise.
Cooling Is Not Optional
Place the pans on a rack for about 10 to 15 minutes after baking.
Carefully run a thin knife around the edges if needed. Turn the cakes out and remove the parchment.
Allow both layers to cool completely on wire racks.
This can take one to two hours.
Never frost a warm cake. Warmth melts buttercream and can cause the layers to slide.
For easier assembly, you can wrap the completely cooled layers and refrigerate them for about 30 minutes.
Make the Creamy Chocolate Frosting
This frosting creates the soft milk-chocolate-colored finish seen on the cake.
First, melt the semi-sweet chocolate gently. A microwave works well in short intervals. Stir frequently.
Then let the chocolate cool until it is no longer warm to the touch. It must remain fluid, but hot chocolate can melt the softened butter.
Beat the butter for about 2 to 3 minutes until creamy and lighter in texture. An electric hand mixer makes this step quicker and helps create an even, fluffy texture.
Add the cocoa powder and beat on low.
Gradually add the sifted powdered sugar, alternating with small amounts of heavy cream. Starting slowly keeps powdered sugar from flying out of the bowl.
Add vanilla and a small pinch of salt.
Pour in the cooled melted chocolate.
Beat until the frosting looks fluffy, smooth, and spreadable.
Check the Consistency
Lift some frosting with your spatula.
It should hold a soft peak without running off.
If it feels too stiff, add heavy cream one teaspoon at a time.
If it is too loose, add a small amount of sifted powdered sugar. If the kitchen is warm, chilling it for 10 to 15 minutes can also help.
Do not add large amounts of liquid at once.
How to Assemble the Cake
Place the first cooled cake layer on a flat serving plate or cake board.
If either layer has a pronounced dome, carefully level the top with a serrated knife. A level base keeps a tall cake from leaning.
Spread a generous but even layer of chocolate frosting over the first cake.
Keep the filling slightly away from the outer edge. The weight of the second layer will push it outward.
Position the second square layer directly on top.
Check the cake from the front and sides before continuing.
The Crumb Coat Makes a Big Difference
One important detail missing from many short cake recipes is the crumb coat.
Spread a very thin layer of frosting over the top and sides. This first coating catches loose cake crumbs.
It does not need to look pretty.
Refrigerate the cake for 20 to 30 minutes, until the coating feels firm.
Now add the final, thicker layer of frosting.
This simple extra step makes it much easier to create a clean chocolate exterior without dark cake crumbs showing through.
For another decorated chocolate dessert idea, see our strawberry-filled chocolate cake.
Create the Homemade Frosting Texture
Do not try to make every surface perfectly smooth.
The pictured cake has a handmade finish.
Spread a generous layer of frosting over the top. Cover all four sides.
Use an offset spatula to create soft horizontal ridges around the sides. Work around the square gradually.
Across the top, make broad curved strokes.
The goal is controlled imperfection. You want texture, not messy frosting.
Prepare the Strawberries Correctly
This detail matters more than it seems.
Wash the strawberries first. Then pat each berry thoroughly dry with paper towels or a clean kitchen towel.
Let them air-dry briefly if any moisture remains around the leaves.
Water sitting on the fruit can drip onto the frosting and damage the finish.
Keep several strawberries whole with their green tops attached. Slice a few lengthwise to expose their bright red centers.
For the closest visual result, use strawberries of slightly different sizes rather than identical berries.
Decorate Like the Picture
The decorations should look abundant but not perfectly symmetrical.
Start near the back and center portion of the cake.
Place several whole strawberries first. Add the chocolate truffles between them.
Push chunky pieces of milk chocolate into the frosting at different angles. Some should stand almost upright, while others can lean against berries or truffles.
Add strawberry halves with the cut sides facing outward.
Fill small gaps with additional truffles or chocolate pieces.
Finally, scatter chocolate sprinkles lightly over the exposed frosting.
Do not cover every inch.
Leaving visible swirls of chocolate frosting keeps the cake from looking overcrowded.
For a natural homemade appearance, avoid arranging the berries in an exact circle or grid.
Chill Before Slicing
Refrigerate the assembled cake for about 30 minutes before cutting.
This firms the frosting and makes the layers easier to slice neatly.
For clean servings, use a long sharp knife. Dip it in hot water, wipe it dry, and make one cut. Clean the blade before the next cut.
This is especially helpful when cutting through thick chocolate frosting.
Common Mistakes to Avoid
The cake is dry
The most likely cause is overbaking.
Begin checking before the maximum baking time. Remove the layers once a tester shows moist crumbs rather than waiting until the cake becomes firm and dry.
The frosting is sliding
The cake may still be warm, the melted chocolate may have been added while hot, or the frosting may be too soft.
Cool the cake completely and chill it briefly before assembly.
Cake crumbs appear in the final frosting
Use the crumb coat.
That thin first coating traps crumbs before the decorative frosting is applied.
The strawberries make the frosting wet
The berries were probably not completely dry.
Wash them in advance and remove all surface moisture before decorating.
The layers slide sideways
Too much filling can make a tall cake unstable.
Use an even layer between the cakes and chill the assembled layers before applying the final frosting.
Make-Ahead Tips
You can bake the chocolate layers one day before decorating.
Cool them completely, wrap them tightly, and keep them chilled. Make the frosting and assemble the cake the following day.
For the freshest appearance, add the strawberries closer to serving time.
Chocolate truffles and chocolate chunks can be added earlier.
If you love fruit-based desserts, our guide to what strawberry puree is made of is another useful reference for working with strawberries.
How to Store Chocolate Strawberry Truffle Cake
Because this cake contains fresh strawberries and a frosting made with heavy cream, store the finished cake covered in the refrigerator.
For the best texture, take individual slices out shortly before serving so the cake and butter-based frosting can lose some of their refrigerator firmness.
Fresh strawberry decorations are at their best early, so this is not a cake I would decorate with berries several days ahead.
If you know you will have leftovers, decorate only part of the top with strawberries and add more fresh fruit when serving.
Easy Variations
Once you know the basic method, you can make small changes.
- Use dark chocolate chunks for a less sweet finish.
- Add chocolate-covered strawberries for a more dramatic top.
- Use bittersweet chocolate in the frosting for deeper cocoa flavor.
- Add a very thin layer of strawberry preserves beneath the filling frosting.
- Replace some truffles with chocolate curls or shards.
Keep one principle in mind: strawberries and chocolate should remain the dominant flavors.
Frequently Asked Questions
Can I make Chocolate Strawberry Truffle Cake the day before?
Yes. Bake and frost the cake ahead, then refrigerate it. For the best-looking finish, add fresh strawberries closer to serving.
Can I use frozen strawberries?
Fresh strawberries are much better for the decoration. Frozen berries soften and release liquid after thawing, which can make the frosting wet. Some strawberry-truffle recipes do use fresh fruit inside the cake, while others treat the fruit mainly as a topping, so moisture control is especially important.
Why is my chocolate cake batter so thin?
The thin texture is intentional. The recipe contains hot water, oil, and milk. Do not compensate by adding extra flour.
Can I use round cake pans?
Yes, if your goal is flavor rather than the exact appearance. To recreate the tall square cake shown here, use two 8-inch square pans.
What chocolate is best for the frosting?
Semi-sweet chocolate gives a rich chocolate flavor without making the frosting excessively sweet. Let melted chocolate cool before beating it into the butter mixture.
How do I keep strawberries from making my cake soggy?
Dry them thoroughly after washing and add the fresh decoration close to serving time. Do not place wet berries directly on buttercream.
Do I really need a crumb coat?
For this cake, it is worth the extra 20 to 30 minutes. Chocolate cake produces visible crumbs. A chilled crumb coat gives you a much cleaner final frosting layer.
How do I get the same rustic look?
Use an offset spatula instead of trying to create perfectly smooth sides. Make horizontal frosting marks around the cake. Then cluster strawberries, truffles, and irregular chocolate chunks mainly across the upper center and back. Keep the arrangement slightly uneven.
Final Baking Notes
A memorable Chocolate Strawberry Truffle Cake does not depend on complicated pastry techniques.
It depends on details.
Bake the layers only until done. Cool them fully. Let melted chocolate cool before it touches the buttercream. Use a crumb coat. Dry every strawberry. Chill the cake before slicing.
Then let the decoration stay a little imperfect.
That is what gives this cake its charm.
When the finished square cake reaches the table, the first thing people see is the contrast: soft chocolate frosting, glossy red strawberries, textured truffles, and chunky pieces of chocolate.
Then comes the first slice.
Under all those decorations is what matters most: moist chocolate cake, creamy frosting, rich cocoa, and the fresh bite of strawberry.
It looks like a celebration cake, but it still tastes unmistakably homemade.