
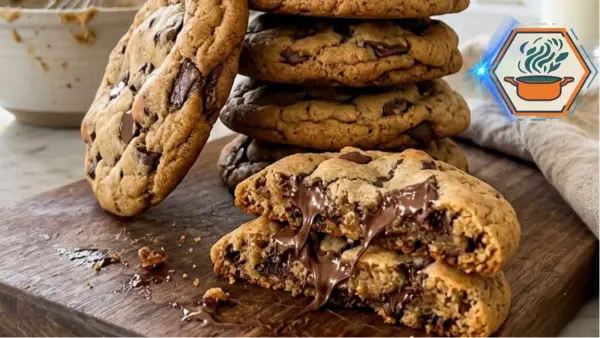
There is something special about pulling apart a warm chocolate chip cookie and watching the melted chocolate stretch between the two halves. The edges are golden. The middle is thick and tender. Chocolate appears in almost every bite. These soft and chewy chocolate chip cookies are designed to give you exactly that experience.
The ingredient list may look simple, but great cookies depend on details that are easy to miss. Butter temperature matters. The balance between brown and white sugar matters. Even the way you measure flour can change the final texture. For more baking inspiration, you can browse the recipes and practical guides at RecipesMind.
Cookie texture also has some useful science behind it. Brown sugar helps cookies stay moist and chewy, while baking time changes how soft or crisp they become. King Arthur Baking provides a useful guide to chocolate chip cookie texture that explains how small ingredient changes affect the finished cookie.
This recipe fills in all the details that a short social-media recipe can leave out. You will get exact measurements, dough consistency cues, chilling instructions, baking temperatures, and signs that tell you when the cookies are actually done.
Affiliate disclosure: As an Amazon Associate I earn from qualifying purchases. This article may contain affiliate links to kitchen tools I find useful for preparing this recipe.
JUMP TO
Soft and Chewy Chocolate Chip Cookies
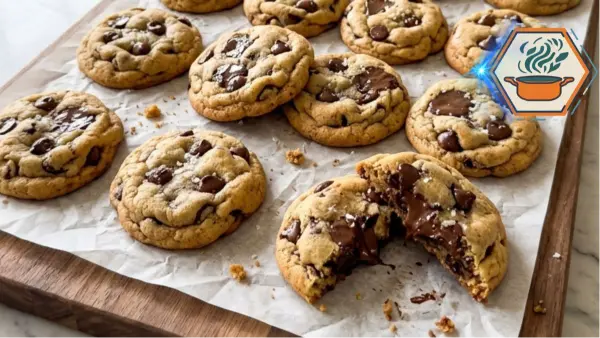
Thick soft and chewy chocolate chip cookies with lightly crisp golden edges, tender centers, and plenty of melted chocolate in every bite.
- Total Time: 1 hour 10–12 minutes
- Yield: 16 large cookies
Ingredients
1/2 cup (113 g) unsalted butter, softened but still slightly cool; 3/4 cup (150 g) packed light brown sugar; 1/4 cup (50 g) granulated sugar; 1 large egg, room temperature; 2 tsp pure vanilla extract; 1 3/4 cups (210 g) all-purpose flour; 1/2 tsp baking soda; 1/2 tsp fine salt; 1 1/4 cups (210 g) semisweet chocolate chips or chopped chocolate; flaky sea salt, optional
Instructions
- Add the softened butter, brown sugar, and granulated sugar to a large mixing bowl. Beat for 2–3 minutes until creamy and slightly lighter in color.
- Add the egg and vanilla. Beat until smooth, then scrape down the sides and bottom of the bowl.
- In a separate bowl, whisk together the all-purpose flour, baking soda, and salt.
- Add the dry ingredients to the butter mixture. Mix only until no visible streaks of flour remain. Do not overmix.
- Fold in the chocolate chips or chopped chocolate. Reserve a small handful for topping.
- Cover the dough and refrigerate for at least 45 minutes. For thicker cookies, chill for 1–2 hours.
- Preheat the oven to 350°F (175°C). Line a light-colored baking sheet with parchment paper.
- Portion the dough into approximately 50–55 g balls. Shape each portion slightly taller than it is wide. Place them 2–3 inches apart.
- Press several reserved chocolate pieces into the tops.
- Bake on the center rack for 10–12 minutes, one tray at a time. The edges should be lightly golden and set while the centers remain soft.
- Leave the cookies on the baking sheet for 5–10 minutes. Transfer them carefully to a cooling rack.
- Serve slightly warm for the softest center and melted chocolate texture.
Notes
- Do not melt the butter. Softened but slightly cool butter helps control spreading.
- For the thick appearance shown in the recipe imagery, use 50–55 g of dough per cookie.
- Weigh the flour whenever possible. Too much flour makes cookies dry and dense.
- Do not skip the 45-minute chill.
- A combination of semisweet chocolate chips and chopped chocolate creates both defined chips and larger melted pockets.
- Do not flatten the dough balls before baking.
- Bake one tray at a time on the center rack for more consistent results.
- Remove the cookies when the edges are set but the centers still appear soft. They continue setting on the hot pan.
- Allow them to rest before moving them, or the warm centers may break.
- Never taste the uncooked dough. Raw flour and raw eggs can carry harmful bacteria.
- Prep Time: 15 minutes
- Additional/Chill Time: 15 minutes
- Cook Time: 10–12 minutes
- Category: Dessert
- Method: Baking
- Cuisine: American
The Cookie I Wanted to Recreate
Picture a stack of warm cookies sitting on a wooden board. They are thick rather than flat. The edges have turned golden brown, but the centers still look soft.
Then you pick one up.
When you break it open, the center bends before it separates. Melted chocolate stretches from one half to the other.
That is the target for this recipe.
The goal is not a thin, crunchy cookie. It is also not a pale, cake-like cookie. We want a classic chocolate chip cookie with crisp-looking edges, a soft interior, plenty of chocolate, and enough structure to hold everything together.
Getting there requires more than mixing flour, butter, sugar, eggs, vanilla, and chocolate chips.
The small ingredients matter too.
Salt balances the sweetness. Baking soda affects browning and spread. Brown sugar helps create chewiness. Chilling gives the dough time to firm up so the cookies do not immediately spread into thin discs.
Those details turn a basic ingredient list into a repeatable recipe.
Why These Soft and Chewy Chocolate Chip Cookies Work
The texture comes from balancing fat, sugar, flour, moisture, and baking time.
This version uses both brown sugar and granulated sugar. Brown sugar brings moisture and a deeper caramel-like flavor. Granulated sugar helps the edges spread and become lightly crisp.
We also use softened butter rather than hot melted butter. It should be soft enough to mix easily but not greasy or partially melted.
Then comes the flour.
Too little flour can produce cookies that spread too far. Too much can make them dense and dry. Measuring by weight is the most reliable option.
Finally, we chill the dough.
This is an easy step to skip when you want cookies immediately. It is worth the wait. Cooler dough spreads more slowly when it enters the oven, which helps create the thick shape shown in the finished cookies.
Ingredients
For about 16 large cookies, you will need:
- 1/2 cup (113 g) unsalted butter, softened but still slightly cool
- 3/4 cup (150 g) packed light brown sugar
- 1/4 cup (50 g) granulated sugar
- 1 large egg, at room temperature
- 2 teaspoons pure vanilla extract
- 1 3/4 cups (210 g) all-purpose flour
- 1/2 teaspoon baking soda
- 1/2 teaspoon fine salt
- 1 1/4 cups (210 g) semisweet chocolate chips or chopped chocolate
- Flaky sea salt for the tops, optional
Why Brown Sugar Is Important
If you want a chewy center, do not replace all the brown sugar with white sugar.
Brown sugar holds moisture well. That moisture contributes to the soft, bendable center people associate with chewy cookies.
It also adds a mild molasses flavor. That deeper sweetness works especially well with semisweet or dark chocolate.
Why Add Salt?
Salt may seem unnecessary in a sweet cookie, but leaving it out can make the flavor seem flat.
A small amount balances the sugar, butter, vanilla, and chocolate.
If you use salted butter, reduce the added salt slightly.
Chocolate Chips or Chopped Chocolate?
Both work.
Chocolate chips hold their shape well and give you distinct pockets of chocolate.
Chopped chocolate creates irregular pieces. Some remain chunky while smaller fragments melt into the dough.
For the dramatic melted center seen in thick bakery-style cookies, try using a mixture of semisweet chips and roughly chopped chocolate.
Equipment You Will Need
You do not need professional bakery equipment.
Have these items ready:
- Large mixing bowl
- Medium bowl
- Hand mixer or stand mixer
- Silicone spatula
- A light-colored aluminum baking sheet, such as the Nordic Ware Naturals Baker’s Half Sheet, for even, consistent baking
- Parchment paper
- Cookie scoop
- Cooling rack
- A digital kitchen scale for accurate flour measurements; I like the simple Escali Primo for weighing baking ingredients
A scale is especially useful for flour. A packed measuring cup can contain considerably more flour than a lightly filled one.
How to Make Soft and Chewy Chocolate Chip Cookies
1. Prepare the Butter
Take the butter out of the refrigerator before baking.
You want softened butter, not melted butter.
Press it gently with a finger. It should leave an indentation while still offering a little resistance.
If the butter looks shiny or greasy, it is probably too warm.
2. Cream the Butter and Sugars
Place the softened butter, brown sugar, and granulated sugar in a large bowl.
Beat them for about 2 to 3 minutes.
The mixture should become creamy and slightly lighter in color.
Do not rush this stage. Proper mixing distributes the sugar through the fat and helps create a consistent cookie.
3. Add the Egg and Vanilla
Add the egg and vanilla.
Beat until smooth.
Scrape the bottom and sides of the bowl with a spatula. Mix again briefly so there are no streaks of unmixed butter.
4. Combine the Dry Ingredients
In another bowl, whisk together:
- Flour
- Baking soda
- Salt
Mixing these ingredients separately helps distribute the baking soda evenly.
5. Add the Flour
Add the dry ingredients to the butter mixture.
Mix on low speed or fold with a spatula.
Stop as soon as you no longer see obvious streaks of dry flour.
Overmixing after the flour goes in can make the cookies firmer than intended.
The dough should be thick, soft, and scoopable. It should not look like cake batter.
6. Add Plenty of Chocolate
Fold in the chocolate chips or chopped chocolate.
Save a small handful.
Those extra pieces can be pressed into the tops of the dough balls before baking. This gives the finished cookies visible pools and pieces of chocolate.
7. Chill the Dough
Cover the bowl and refrigerate the dough for at least 45 minutes.
For even thicker cookies, chill it for 1 to 2 hours.
You can also refrigerate the dough overnight for a convenient make-ahead option.
Cold dough is especially helpful if your kitchen is warm or your butter became very soft during mixing.
8. Preheat the Oven
Preheat your oven to 350°F (175°C).
Line a baking sheet with parchment paper.
Give the oven enough time to reach the correct temperature before the cookies go in.
9. Shape the Cookies
Portion the dough into approximately 50 to 55 g pieces. A sturdy cookie scoop makes portioning faster and less messy, but use a kitchen scale when you want every cookie to be close to the same weight.
Roll them gently into rough balls.
For thicker cookies, make the dough balls slightly taller rather than pressing them flat.
Place them about 2 to 3 inches apart.
Press a few reserved chocolate pieces into each top.
10. Bake
Bake one tray at a time on the center rack for approximately 10 to 12 minutes.
Watch the cookies rather than relying only on the timer.
They are ready when:
- The edges are lightly golden.
- The tops no longer look completely wet.
- The centers still appear soft.
- The cookies have spread but remain thick.
Do not wait for the centers to become dark brown.
They continue cooking from the heat of the baking sheet after leaving the oven.
11. Let Them Set
Leave the cookies on the hot baking sheet for about 5 to 10 minutes.
This step is important.
A warm cookie may seem too soft when it first leaves the oven. As it sits, its structure firms while the center stays tender.
Transfer the cookies to a wire rack after they can be moved without falling apart.
The Secret to That Thick, Gooey Center
The dramatic cookie pull comes from several small choices working together.
First, use enough chocolate. A cookie with only a few chips cannot produce rich melted pockets throughout the center.
Second, do not make tiny cookies. Larger portions naturally create a greater contrast between the baked exterior and soft middle.
Third, chill the dough.
And most importantly, do not overbake.
The cookie should look slightly softer in the center than you think it should when you remove it from the oven.
That does not mean serving raw dough. It means allowing the residual heat of the pan to finish setting the cookie.
For food safety, avoid eating unbaked cookie dough because raw flour and raw eggs can carry harmful bacteria.
How to Get Crisp Golden Edges
A soft cookie can still have a delicate crust.
The key is balancing the two sugars and giving the cookies enough oven time for the outer edge to brown.
For better edges:
- Use both brown and granulated sugar.
- Fully preheat the oven.
- Leave space between dough balls.
- Bake on parchment rather than crowding the tray.
- Keep the dough cold before baking.
- Let the cookies rest briefly on the hot pan.
If you love learning how texture changes in baked treats, our guide to the secret to crunchy cookies goes deeper into the factors behind crispness.
Common Mistakes to Avoid
Cookies Spread Too Much
The butter may have been too warm.
The dough may also have needed more chilling time.
Warm dough begins spreading almost immediately in the oven. Refrigerate the remaining dough before baking another tray.
Cookies Stay in Thick Balls
Too much flour is a common cause.
For the most consistent result, weigh 210 g rather than packing flour into a measuring cup.
If you use cups, loosen the flour first. Spoon it gently into the cup and level the top without pressing it down.
Cookies Are Dry
The most likely causes are too much flour or too much baking time.
Remember that cookies continue setting after they leave the oven.
Cookies Are Hard the Next Day
Store them as soon as they are fully cool.
Exposure to air gradually removes moisture.
An airtight container is much better than leaving cookies uncovered on a plate.
Cookies Are Pale
Check your oven temperature.
An oven thermometer can help if your oven runs cooler than the temperature shown on its display.
Also make sure you included both the granulated sugar and baking soda specified in the recipe.
Can You Make the Dough Ahead?
Yes.
Prepare the dough, cover it well, and refrigerate it.
For longer storage, portion it into balls and freeze them on a tray until firm. Transfer the frozen portions to a freezer-safe container or bag.
You can then bake only a few cookies when you want them.
Frozen dough portions may need a little extra baking time.
How to Store the Cookies
Allow the cookies to cool completely before storing them.
Keep them in an airtight container at room temperature for several days.
For longer storage, freeze the baked cookies.
Place parchment between layers if necessary so the cookies do not stick together.
Let frozen cookies thaw at room temperature. A few seconds of gentle reheating can bring back the warm, melty-chocolate texture.
Easy Variations
Once you understand the base recipe, small changes can create a different cookie without changing the method completely.
Try:
- Milk chocolate chunks for a sweeter cookie
- Dark chocolate for a stronger cocoa flavor
- Chopped toasted pecans or walnuts
- A small pinch of flaky sea salt on top
- A mixture of chocolate chips and chopped chocolate
- A little cinnamon for a warmer flavor
Keep the total amount of add-ins reasonable. Too many heavy additions can prevent the dough from holding together properly.
What Makes This Recipe Beginner-Friendly?
There are no complicated pastry techniques here.
The important parts are easy to recognize once you know what to look for.
Your butter should be soft but not greasy.
Your finished dough should be thick enough to scoop.
Your dough balls should go into the oven cold.
And your baked cookies should have golden edges with softer-looking centers.
Those visual signs are often more useful than blindly following a timer.
That is what turns a recipe from a list of ingredients into something you can repeat successfully.
Frequently Asked Questions
What makes chocolate chip cookies soft and chewy?
Brown sugar, sufficient moisture, controlled flour measurement, chilled dough, and careful baking all contribute to a soft and chewy texture. Removing the cookies while the centers are still soft also prevents them from becoming dry.
Should I chill chocolate chip cookie dough?
For this recipe, yes. Chilling helps firm the butter and reduces excessive spreading. It is particularly useful when making thick cookies.
Why did my chocolate chip cookies turn out flat?
Your butter may have been too warm, the dough may not have been chilled enough, or the flour measurement may have been too low. A hot baking sheet can also make a new batch spread faster.
Can I use melted butter?
Not for this exact method. The ingredient ratios and mixing technique were designed around softened butter. Melted butter changes the dough consistency and can increase spreading unless other parts of the recipe are adjusted.
Can I use only white sugar?
You can make cookies with white sugar, but they will not have the same texture or flavor. Brown sugar plays an important role in the moist, chewy center of this recipe.
How do I know when the cookies are done?
Look at the edges. They should be set and lightly golden. The center should look soft but not liquid. Allow the cookies to remain on the baking sheet for several minutes after baking.
Why are my cookies cakey instead of chewy?
Too much flour, excessive mixing, or changes to the moisture balance can make cookies more cake-like. Accurate measurements are particularly important.
Can I freeze chocolate chip cookie dough?
Yes. Portion the dough first, freeze the individual balls until firm, then store them in a freezer-safe container. This makes it easy to bake small batches later.
How do I get melted chocolate in the middle?
Use plenty of chocolate chips or, for larger molten pockets, combine chips with chopped chocolate. Serve the cookies while slightly warm for the most noticeable melted texture.
Final Baking Notes
The difference between an ordinary cookie and a memorable one is often found in details that barely appear in the ingredient list.
Use butter at the right temperature. Measure the flour carefully. Include brown sugar for moisture and chew. Chill the dough before baking. Give each cookie enough room on the tray.
Then watch the edges.
When they turn lightly golden but the middle still looks soft, take the tray out.
Wait a few minutes before picking one up.
Then break it in half while it is still warm.
The outside should hold its shape. The center should remain tender and packed with chocolate. And when those melted pieces pull apart between the two halves, you have the soft and chewy chocolate chip cookies this recipe was designed to create.