
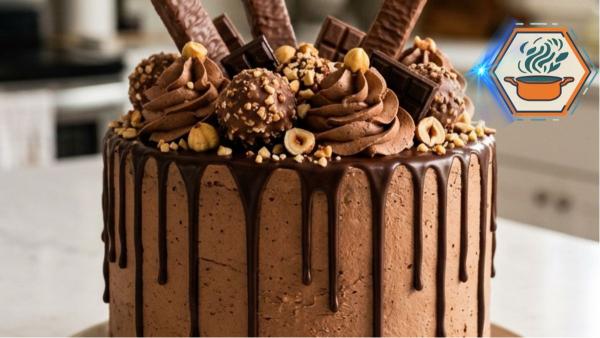
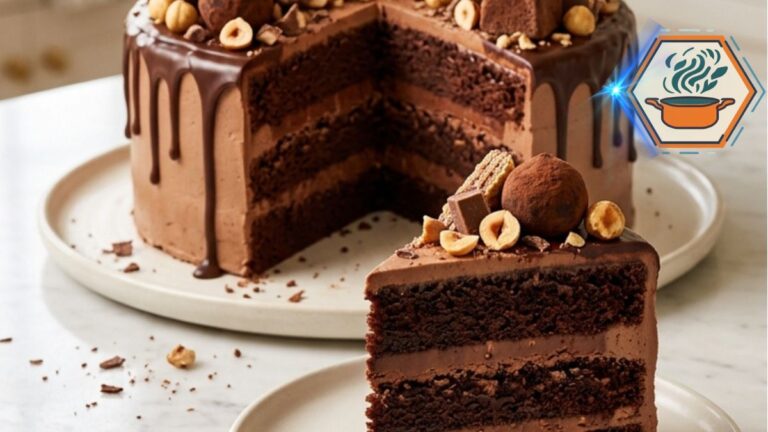
Some birthday cakes taste good but disappear into the background. This Chocolate Hazelnut Celebration Cake does the opposite. It arrives at the table tall, dark, glossy, and covered with chocolate treats. Then you cut the first slice. Inside are three deep chocolate layers separated by thick chocolate-hazelnut frosting. The contrast between soft cake, creamy filling, toasted nuts, crisp wafers, and chocolate truffles makes every bite different.
The cake looks like something you might order from a bakery, but every part can be made at home. The secret is not complicated decoration. It is timing. The cake layers must cool fully. The frosting needs the right consistency. The ganache must cool before it touches the cake. Even professional-looking layer cakes depend on these small details. King Arthur Baking’s baking guides are a useful resource for learning more about core cake-baking methods.
Chocolate and hazelnut are also a classic celebration-cake pairing. Similar cakes appear in established baking collections, although methods and designs vary widely. BBC Good Food’s chocolate and hazelnut celebration cake, for example, uses a very different brownie-style base and ganache finish. Our version focuses instead on a tall three-layer chocolate cake with creamy hazelnut frosting, controlled chocolate drips, toasted hazelnuts, truffles, wafers, and chocolate pieces.
Affiliate disclosure: As an Amazon Associate I earn from qualifying purchases. This article may contain affiliate links to kitchen tools I find useful for preparing this recipe.
JUMP TO
Chocolate Hazelnut Celebration Cake
| A tall, moist three-layer chocolate cake filled with creamy chocolate-hazelnut buttercream, finished with glossy chocolate ganache, toasted hazelnuts, crisp wafers, chocolate pieces, and truffles. |
- Total Time: About 2 hours 45 minutes
- Yield: 12–14 slices
Ingredients
Chocolate Cake
- 2 cups (240 g) all-purpose flour
- 1 3/4 cups (350 g) granulated sugar
- 3/4 cup (64 g) unsweetened cocoa powder
- 2 teaspoons baking soda
- 1 teaspoon baking powder
- 1/2 teaspoon fine salt
- 2 large eggs, room temperature
- 1 cup (240 ml) buttermilk, room temperature
- 1/2 cup (120 ml) neutral vegetable oil
- 2 teaspoons vanilla extract
- 1 cup (240 ml) hot freshly brewed coffee
Chocolate-Hazelnut Buttercream
- 1 1/2 cups (340 g) unsalted butter, softened
- 1 cup (about 300 g) chocolate-hazelnut spread
- 4 cups (480 g) powdered sugar
- 1/2 cup (43 g) unsweetened cocoa powder
- 1/3–1/2 cup (80–120 ml) heavy cream
- 1 teaspoon vanilla extract
- Pinch of fine salt
Chocolate Ganache
- 8 oz (227 g) semisweet chocolate, finely chopped
- 3/4 cup (180 ml) heavy cream
Decoration
- Chocolate-hazelnut truffles
- Chocolate-covered wafer pieces
- Chocolate bar pieces
- Whole toasted hazelnuts
- Chopped toasted hazelnuts
- Chocolate curls or crisp chocolate sprinkles
Instructions
- Preheat the oven to 350°F (175°C). Grease three 8-inch round cake pans. Line the bottoms with parchment paper and lightly grease the parchment.
- In a large bowl, whisk together flour, sugar, cocoa powder, baking soda, baking powder, and salt. Break up any visible cocoa lumps.
- In a separate bowl, whisk the eggs, buttermilk, oil, and vanilla. Add the wet ingredients to the dry mixture and stir until just combined.
- Gradually pour in the hot coffee while mixing on low speed or whisking gently. The batter will be thin. This is expected. Do not add extra flour.
- Divide the batter evenly among the three pans. Bake for 25–30 minutes, or until a toothpick inserted in the center comes out with a few moist crumbs and no wet batter.
- Cool in the pans for about 10 minutes. Turn onto cooling racks, remove the parchment, and cool completely before assembling.
- For the frosting, beat softened butter for 2–3 minutes until fluffy. Beat in the chocolate-hazelnut spread. Gradually add powdered sugar and cocoa. Add vanilla and salt. Beat in heavy cream a little at a time until the frosting is thick, smooth, and spreadable.
- Level the cooled cakes if necessary. Place the first layer on a serving plate or cake board. Cover with an even layer of frosting. Repeat with the second layer, then add the third layer.
- Apply a thin crumb coat over the cake. Refrigerate for 15–20 minutes. Cover with the remaining frosting and smooth the top and sides. Chill for another 20–30 minutes.
- For the ganache, place finely chopped chocolate in a heatproof bowl. Heat the cream until steaming but not vigorously boiling. Pour it over the chocolate and leave undisturbed for 2 minutes. Stir slowly until smooth and glossy.
- Allow the ganache to cool and thicken slightly. Test one drip on the chilled cake. If it runs to the bottom immediately, let the ganache cool longer.
- Spoon ganache around the top edge to create drips of different lengths. Spread a thin amount across the top.
- Pipe generous chocolate-hazelnut frosting swirls over the top. Decorate with truffles, wafer pieces, chocolate pieces, toasted hazelnuts, chopped hazelnuts, and chocolate curls.
- For cleaner slices, chill briefly before cutting. Use a sharp knife warmed in hot water and wiped dry between cuts.
Notes
- Do not thicken the cake batter with extra flour. A fluid batter is expected after adding the coffee.
- All three cake layers must be completely cool before frosting.
- Room-temperature eggs and buttermilk mix more evenly into the batter.
- The frosting should be firm enough to support three layers. Add heavy cream gradually.
- Chill the frosted cake before adding ganache.
- Always make one test drip before covering the cake edge.
- For the crunchy texture shown in the finished cake, rely on toasted hazelnuts, crisp wafers, truffles, and chocolate pieces, rather than overbaking the cake to create a hard crust.
- Add wafer decorations closer to serving when possible so they remain crisp.
- Exact baking time varies by oven and pan material.
- The cake contains wheat/gluten, dairy, eggs, and tree nuts. Commercial chocolate spreads, wafers, truffles, and chocolate should also be checked for their own allergen statements.
- Prep Time: 45 minutes
- Additional/Chill Time: 1 hour 30 minutes
- Cook Time: 25–30 minutes
- Category: Dessert
- Method: Baking
- Cuisine: American
Why This Chocolate Hazelnut Cake Works
The first forkful tells you what makes this cake special.
You get moist chocolate sponge first. Then comes smooth frosting with a clear roasted-hazelnut flavor. The dark chocolate ganache adds richness without becoming the entire frosting.
Finally, the toppings add the texture that the soft cake needs.
That last point matters.
Trying to bake the cake until it develops a hard crust can leave the layers dry. Instead, keep the sponge tender and create crunch with:
- Toasted hazelnuts
- Crisp chocolate-covered wafers
- Chocolate-hazelnut truffles
- Chocolate bar pieces
- Fine chocolate curls or sprinkles
This also helps reproduce the abundant homemade appearance shown in the finished cake.
Hot coffee is another important part of the batter. It adds liquid and strengthens the chocolate character without making the finished cake taste like a cup of coffee. The batter will look unusually thin. That is normal for this recipe, so resist the temptation to add extra flour.
Ingredients
For the Chocolate Cake Layers
You will need:
- 2 cups all-purpose flour
- 1 3/4 cups granulated sugar
- 3/4 cup unsweetened cocoa powder
- 2 teaspoons baking soda
- 1 teaspoon baking powder
- 1/2 teaspoon fine salt
- 2 large eggs, at room temperature
- 1 cup buttermilk, at room temperature
- 1/2 cup neutral vegetable oil
- 2 teaspoons vanilla extract
- 1 cup hot freshly brewed coffee
Use unsweetened cocoa rather than sweetened drinking chocolate.
Buttermilk gives the batter acidity and moisture. Vegetable oil also helps the layers stay soft after refrigeration.
For the Chocolate-Hazelnut Buttercream
Prepare:
- 1 1/2 cups unsalted butter, softened
- 1 cup chocolate-hazelnut spread
- 4 cups powdered sugar, sifted if lumpy
- 1/2 cup unsweetened cocoa powder
- 1/3 to 1/2 cup heavy cream
- 1 teaspoon vanilla extract
- 1 pinch fine salt
The butter should be soft enough to beat but not greasy or partially melted.
Add the cream gradually. You may not need the full amount.
The finished frosting should hold a piped swirl while still spreading easily across the cake.
For the Chocolate Ganache Drip
You need:
- 8 ounces semisweet chocolate, finely chopped
- 3/4 cup heavy cream
Finely chopping the chocolate helps it melt evenly when the hot cream is added.
For the Crunchy Decorations
For a finish close to the pictured cake, gather:
- Chocolate-hazelnut truffles
- Chocolate-covered wafer fingers or pieces
- Small chocolate bar pieces
- Whole toasted hazelnuts
- Chopped toasted hazelnuts
- Chocolate curls, flakes, or crisp chocolate sprinkles
Do not skip the toasted hazelnuts if you want a noticeable crunchy element.
Toast raw hazelnuts at about 350°F (175°C) for roughly 8–10 minutes, watching them closely. Let them cool before they touch the frosting.
Equipment You Will Need
Three 8-inch round cake pans give this cake its tall three-layer appearance. Using three matching pans also helps the layers bake at a similar rate and makes the finished cake easier to stack.
You will also need:
- Parchment paper
- Large mixing bowls
- Whisk
- Electric hand mixer or stand mixer
- Cooling racks
- Offset spatula
- Cake board or flat serving plate
- Piping bag
- Large star piping tip
- Small spoon or squeeze bottle for the ganache
- Serrated knife or cake leveler, if needed
Three equal pans make the process easier because all layers can bake at the same time.
How to Make the Chocolate Cake
Heat the oven to 350°F (175°C).
Grease three 8-inch round pans. Place a circle of parchment paper in the bottom of each pan. Lightly grease the parchment as well.
This extra step is worth doing. A tall celebration cake needs intact layers.
In a large bowl, whisk together the flour, sugar, cocoa powder, baking soda, baking powder, and salt.
Break up every visible cocoa lump.
In another bowl, whisk the eggs, buttermilk, vegetable oil, and vanilla.
Pour the wet mixture into the dry ingredients. Mix just until combined.
Now gradually pour in the hot coffee.
The batter will become quite fluid. Do not add more flour to thicken it.
Mix only until the batter looks even.
Divide the batter equally between the three prepared pans. A digital kitchen scale makes this much easier because you can give each pan nearly the same amount of batter. Even portions produce layers of similar height and make the finished cake easier to stack.
Bake for approximately 25–30 minutes.
Start checking near 25 minutes because ovens vary.
Insert a toothpick into the center. You are looking for a few moist crumbs rather than raw liquid batter.
Avoid baking until the layers feel hard. Overbaking is one of the easiest ways to lose the moist texture we want.
Leave the cakes in their pans for about 10 minutes.
Carefully turn them onto cooling racks and remove the parchment.
Let them cool completely before frosting.
Warm cake and buttercream are a bad combination. Even slightly warm layers can soften the butter and make a tall cake slide.
If you enjoy learning why small ingredient changes affect texture, our guide to using pineapple in baking covers another useful side of home baking.
Make the Chocolate-Hazelnut Frosting
Place the softened butter in a large mixing bowl.
Beat it for about 2–3 minutes until lighter and fluffy.
Add the chocolate-hazelnut spread. Beat again until the color is even.
Add the powdered sugar gradually. Adding all of it at once can create a cloud of sugar and makes it harder to judge the texture.
Mix in the cocoa powder, vanilla, and salt.
Start adding heavy cream one tablespoon at a time.
Stop when the frosting becomes smooth and easy to spread but still holds its shape.
If it is too stiff, add a little more cream.
If it becomes too soft, chill it briefly before using it. Avoid adding large amounts of powdered sugar unless necessary because that can make the frosting overly sweet.
How to Assemble a Tall, Stable Cake
If your cake layers have large domes, carefully level them with a serrated knife.
Place the first layer on a cake board or serving plate.
Spread a generous, even layer of chocolate-hazelnut frosting over it.
Add the second cake layer.
Repeat with another layer of frosting.
Place the final cake layer on top.
A useful trick is to place the last layer upside down. The flat bottom of the cake becomes the top, giving you a cleaner surface for frosting.
Spread a thin coat of frosting over the entire cake.
This is the crumb coat. It traps loose chocolate crumbs.
Refrigerate the cake for about 15–20 minutes.
Then apply the remaining frosting more generously over the sides and top.
Smooth it with a small offset spatula or cake scraper. An offset spatula makes it easier to spread the frosting without dragging your fingers through the surface. Do not worry about making it look factory-perfect.
Chill the frosted cake for another 20–30 minutes before adding the ganache.
This is one of the most important steps in the recipe.
How to Make Thick Chocolate Ganache Drips
Put the finely chopped semisweet chocolate in a heatproof bowl.
Heat the heavy cream until it is steaming and hot but not aggressively boiling.
Pour it over the chocolate.
Do nothing for 2 minutes.
That short rest allows the heat to begin melting the chocolate.
Then stir slowly from the center outward until the mixture becomes smooth and glossy.
Now wait.
Freshly prepared ganache is often too warm and thin for a drip cake.
If you pour it straight over cold buttercream, it can race down the sides and collect at the bottom.
Let the ganache cool until it has thickened slightly but still flows from a spoon. Ganache is also commonly made by pouring hot cream over chopped chocolate and allowing the mixture to come together before use.
Test One Drip First
Do not immediately cover the whole cake.
Place a small amount of ganache near the back edge of the chilled cake.
Watch what happens.
If the drip stops partway down the side, the consistency is right.
If it shoots to the plate, wait a few more minutes.
If it barely moves, the ganache has become too thick. Warm it very gently.
Once the test drip behaves correctly, spoon ganache around the top edge.
Vary the amount slightly so some drips are shorter and others longer. This creates the natural appearance shown in the cake photo.
Spread a thin layer of remaining ganache across the top.
Decorating the Cake Like the Finished Version
Wait until the ganache has settled before adding heavy decorations.
Transfer some chocolate-hazelnut frosting to a piping bag fitted with a large star piping tip. A wide star tip creates the generous chocolate swirls that give the finished cake its bakery-style appearance.
Pipe several generous swirls around the top.
Keep enough room between them for the chocolates.
Now add:
- Chocolate-hazelnut truffles
- Angled chocolate wafer pieces
- Small rectangles or chunks of chocolate
- Whole toasted hazelnuts
- Chopped toasted hazelnuts
- Chocolate curls or crisp sprinkles
The decorations should look abundant rather than perfectly symmetrical.
Stand some wafer pieces upright or at an angle. Place truffles close to frosting swirls so they are supported. Scatter a few hazelnuts into the smaller gaps.
For another celebration dessert idea, see our strawberry filled chocolate cake.
The Secret to Getting Both Moist and Crunchy Textures
A common mistake is thinking a cake like this needs a crisp outer cake crust.
It does not.
The contrast should come from separate textures.
Keep the cake moist. Keep the buttercream creamy. Keep the ganache soft enough to cut. Then use toasted nuts, wafers, and chocolate pieces for crunch.
Add the wafers fairly close to serving time when possible. Once exposed to moist frosting and refrigeration for a long period, wafer decorations can gradually lose some of their crisp texture.
Toast the hazelnuts before decorating. Toasting gives them a stronger aroma and a more noticeable crunch.
This combination gives each slice several layers of texture without sacrificing the tender crumb.
Common Mistakes to Avoid
Overmixing the Batter
Once the flour is wet, mix only as much as needed. Excess mixing can affect the final texture.
Adding Flour Because the Batter Looks Thin
The batter is supposed to be thin after the coffee goes in.
Frosting Warm Cake Layers
Wait until they are completely cool.
Using Soft Buttercream for a Tall Cake
The frosting between layers must be firm enough to support the cake.
Pouring Hot Ganache Over the Cake
This can melt the buttercream and produce uncontrolled drips.
Skipping the Test Drip
One small test can save the appearance of the whole cake.
Overloading One Side
Truffles and chocolate bars have weight. Spread them around the top rather than putting every heavy decoration in one place.
Make-Ahead Plan
A celebration cake becomes much easier when you split the work across two days.
Day one: Bake the chocolate layers. Cool them fully. Wrap each layer well and keep them ready for assembly.
Day two: Prepare the frosting, fill and coat the cake, chill it, make the ganache, and decorate.
This approach also gives the cake layers plenty of time to cool.
If baking projects are your favorite part of the kitchen, you may also like our guide to keeping madeleines moist and these tips for fixing dry madeleines.
How to Cut Clean Slices
This is a tall, rich cake, so small slices are enough.
For neat layers, use a long sharp knife.
Dip the blade in hot water and wipe it dry. Make one cut. Clean the knife before cutting again.
This prevents thick frosting and ganache from smearing across every layer.
The first slice is usually the hardest to remove. After that, the three chocolate layers and two bands of hazelnut filling should be clearly visible.
FAQs
What does a Chocolate Hazelnut Celebration Cake taste like?
It combines dark cocoa flavor with sweet, nutty chocolate-hazelnut frosting. Ganache makes the chocolate flavor deeper, while toasted hazelnuts and wafers provide crunch.
Why put hot coffee in chocolate cake?
Coffee works particularly well in cocoa-based cake batter because it contributes liquid and roasted flavor notes. In this recipe, it helps create a rich chocolate profile without making coffee the main flavor.
Can I make this cake without coffee?
Yes. You can replace the hot coffee with hot water. The cake will still work, although its flavor may be slightly less complex.
Why is my chocolate cake batter so thin?
That is expected. This recipe contains buttermilk, oil, eggs, and a full cup of hot coffee. Do not compensate by adding extra flour.
How do I stop ganache from running down the entire cake?
Let both components reach the right condition. The frosted cake should be cold, and the ganache should be cooled and slightly thickened. Always make one test drip before continuing.
Can I make the cake layers ahead?
Yes. Baking the layers in advance can actually make assembly less stressful. Cool them completely before wrapping them carefully.
Do hazelnuts need to be toasted?
The cake can technically be decorated with untoasted nuts, but toasted hazelnuts provide a stronger flavor and crisper texture.
Can I use only two cake pans?
You can adapt the recipe, but baking time and layer thickness will change. Three 8-inch pans are recommended for the tall three-layer appearance described here.
What can I use instead of chocolate-hazelnut truffles?
Use chocolate balls, pralines, chocolate-covered hazelnuts, wafer pieces, or chunks from your favorite chocolate bar. Keep the decorations similar in size if you want the same visual balance.
How do I keep the layers from sliding?
Cool the cakes completely. Use frosting that is thick enough to hold its shape. Do not overfill between layers, and chill the assembled cake before applying ganache.
A Celebration Cake Worth the Extra Steps
There is a moment when this cake finally comes together.
The three layers are stacked. The chocolate frosting has been smoothed around the sides. The ganache has stopped exactly where each drip should end. Then the truffles, wafers, chocolate pieces, and toasted hazelnuts go on top.
Suddenly, what started as three ordinary cake pans looks like a true birthday centerpiece.
Yet the beauty of this Chocolate Hazelnut Celebration Cake is not just on the outside.
Cut through the ganache and you reach soft chocolate cake, creamy hazelnut filling, and little bursts of crunch from the decorations. Each part has a purpose.
Take your time with the cooling stages. Keep the sponge moist rather than chasing a hard crust. Toast the hazelnuts. Chill the frosting before the drip. Test the ganache on one small section first.
Those details make the difference between a cake that merely sounds impressive and one you can confidently put on the table.
For more home-baking ideas, techniques, and recipes, visit RecipesMind.