
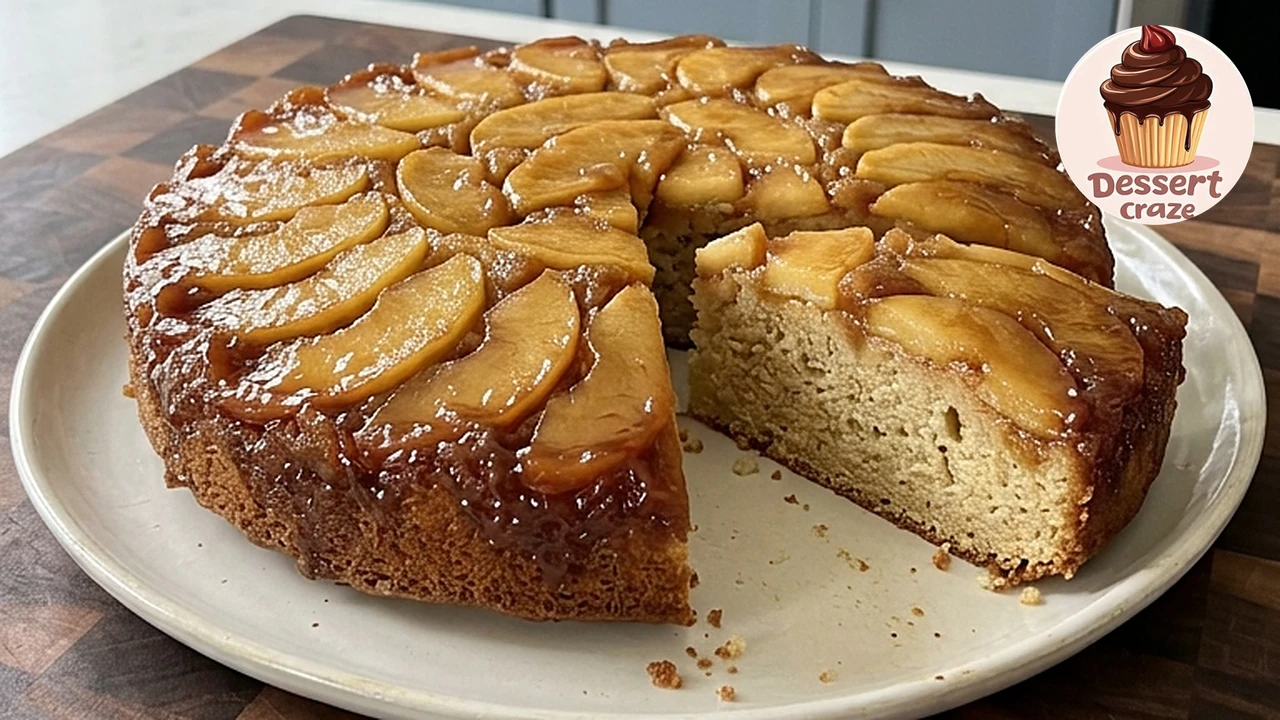
This caramel apple upside-down cake is the kind of dessert that looks far fancier than it is. A quick butter and brown sugar caramel goes into the bottom of a round cake pan, thin apple slices are arranged on top, and a soft cinnamon cake batter covers everything. After baking, you flip it onto a plate, and the apples come out on top in a glossy, golden pattern.
It is an old-fashioned American classic for a reason. There is no frosting to make, no layers to stack, and no mixer marathon. The caramel bakes right into the top of the cake, the apples turn tender, and the crumb underneath stays light and buttery. The Dessert Craze page asked whether you would enjoy a warm slice with your afternoon coffee; this cake is about as good a match for a cup of coffee as any dessert gets.
Below you will find the full recipe with exact quantities for 8 slices, step-by-step photos, how to tell when it is done, how to flip it cleanly, and how to store leftovers. For more apple desserts, try our caramel apple blondies or the apple cinnamon crumb cream cake.
Affiliate Disclosure: As an Amazon Associate I earn from qualifying purchases. Product links in this article may earn a commission at no additional cost to you.
What’s in This Post
- Why This Caramel Apple Upside-Down Cake Works
- Ingredients You’ll Need
- Helpful Tools
- How to Make Caramel Apple Upside-Down Cake
- How to Tell When It’s Done
- Timing at a Glance
- Tips for the Best Results
- Serving Ideas
- Storage and Make-Ahead
- FAQ
Why This Caramel Apple Upside-Down Cake Works
- The caramel is foolproof. It is just butter and brown sugar melted together for 2 to 3 minutes. There is no candy thermometer and no risk of burning sugar the way there is with a dry caramel.
- Peeled, thin apples cook evenly. Without the skins, the slices soften fully in the oven and melt into the caramel instead of turning chewy.
- The batter is a classic creamed butter cake. Beating the butter and sugar first traps air, so the cake rises well even with a layer of fruit underneath.
- Cinnamon ties it together. One teaspoon in the dry ingredients gives the crumb a gentle warmth that tastes like apple pie without being too strong.
- A solid pan keeps the caramel in. The caramel is liquid while it bakes, so a one-piece metal pan holds it in, where a springform pan could let it leak out.
Ingredients You’ll Need
Everything here is a pantry staple. Measure the flour by spooning it into the cup and leveling it off, or weigh it, so the cake does not turn out dry.
For the caramel apple topping
- 3 medium apples, peeled, cored, and thinly sliced
- ½ cup (100 g) packed light brown sugar
- ¼ cup (57 g) unsalted butter
For the cake
- 1½ cups (190 g) all-purpose flour
- ¾ cup (150 g) granulated sugar
- ½ cup (113 g) unsalted butter, softened
- 2 large eggs
- ½ cup (120 ml) whole milk
- 1 tsp vanilla extract
- 1½ tsp baking powder
- 1 tsp ground cinnamon
- ¼ tsp salt
Apples: use firm baking apples such as Granny Smith or Honeycrisp. Granny Smith brings tartness to balance the caramel; Honeycrisp is sweeter and stays juicy. Both hold their shape in the oven.
Butter: the cake butter should be soft enough that a finger leaves a dent, but not greasy or melted. Room-temperature eggs and milk also blend more smoothly into the creamed butter.
Brown sugar: it goes only in the caramel. The cake itself uses granulated sugar, which keeps the crumb light in color so it contrasts with the dark caramel top.
Helpful Tools
You do not need anything special, but a few tools make this cake easier and more reliable.
- A solid 9-inch round metal cake pan. A one-piece pan with 2-inch sides, such as the Fat Daddio’s Anodized Aluminum Round Cake Pan, 9 x 2 Inch, has room for the caramel, the apples, and the batter, and its solid bottom keeps the caramel from leaking.
- A good peeler. Three apples go fast with a sharp swivel peeler like the OXO Good Grips Swivel Peeler.
- An apple corer. The OXO Good Grips Apple Corer removes the core in one twist, so you can slice even rings or half-moons.
- A hand mixer. Creaming butter and sugar by hand works, but a mixer such as the Hamilton Beach 6-Speed Electric Hand Mixer gets it light and fluffy in a couple of minutes.
- An offset spatula. The Wilton Angled Frosting Spatula, 9 Inch spreads thick batter over the apples without pushing them out of place.
- Long oven mitts. You flip a hot pan of caramel onto a plate, so cover your wrists with mitts such as the HOMWE Silicone Oven Mitts.
You will also need a small saucepan for the caramel, two mixing bowls, a whisk, a thin knife, and a large, flat serving plate that is wider than the pan.
How to Make Caramel Apple Upside-Down Cake
Before you start: peel, core, and thinly slice the apples so they are ready the moment the caramel goes into the pan. Aim for even slices, roughly ⅛ to ¼ inch thick, so they all soften at the same rate.
Step 1: Prepare the oven and pan
Preheat the oven to 350°F (175°C). Lightly grease a 9-inch round metal cake pan. Use a solid pan, not a springform pan, to prevent caramel leaks.
Step 2: Make the caramel
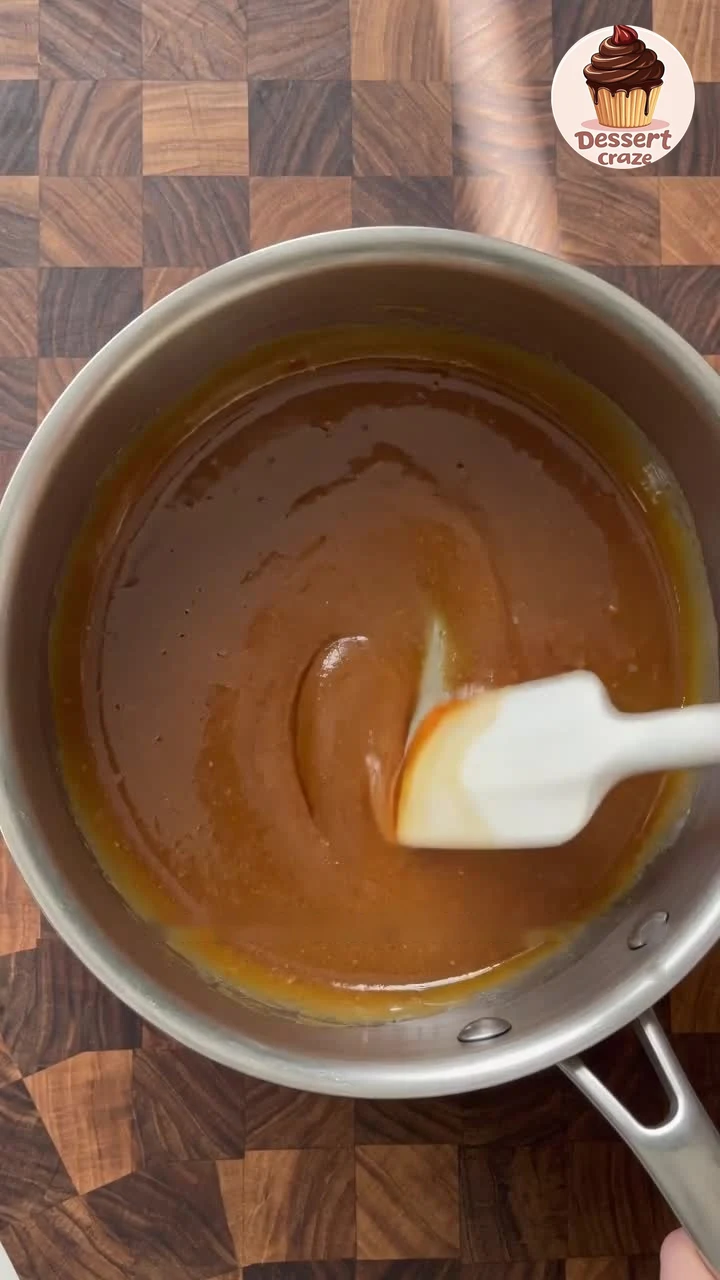
In a small saucepan over medium-low heat, melt the ¼ cup butter with the brown sugar. Stir until smooth, about 2 to 3 minutes. It should look glossy and come together into one smooth sauce. Pour it evenly into the prepared cake pan and tilt the pan so it covers the bottom.
Step 3: Arrange the apples
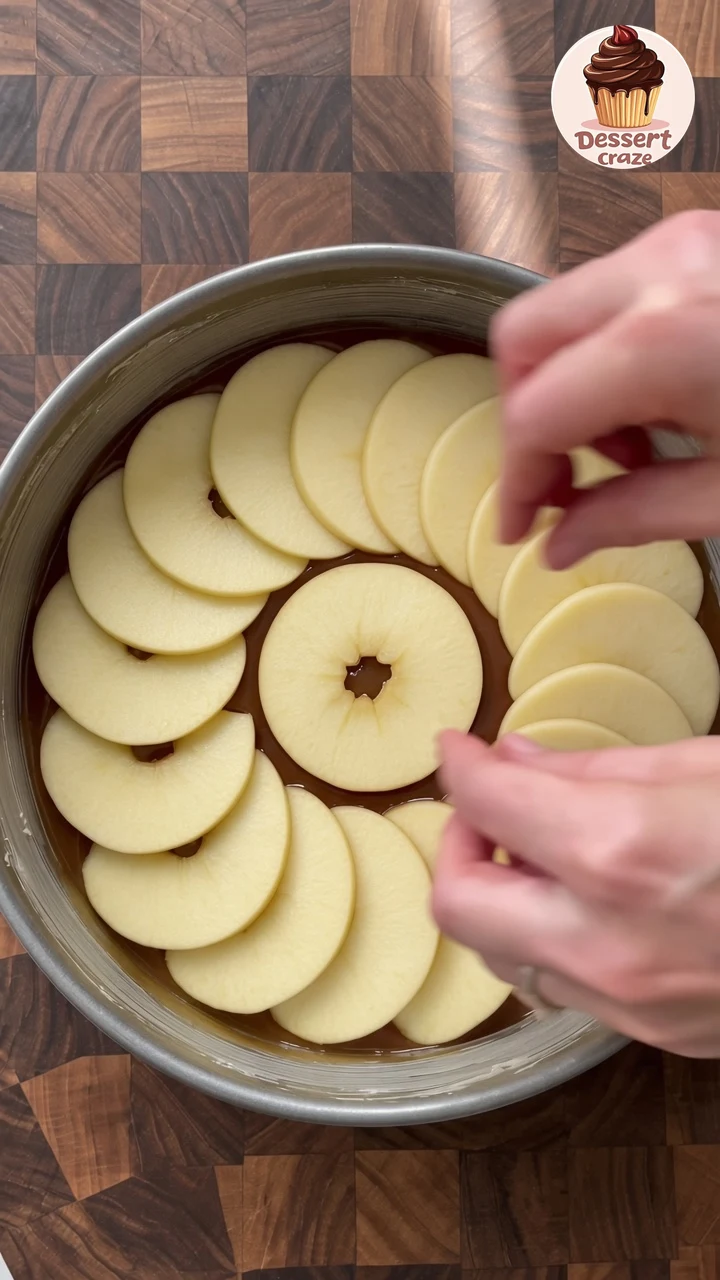
Place the thin apple slices in overlapping circles over the caramel, covering the bottom of the pan. Start at the outside edge and work your way in. Whatever pattern you make here becomes the top of the cake, so take a minute to make it neat.
Step 4: Make the cake batter
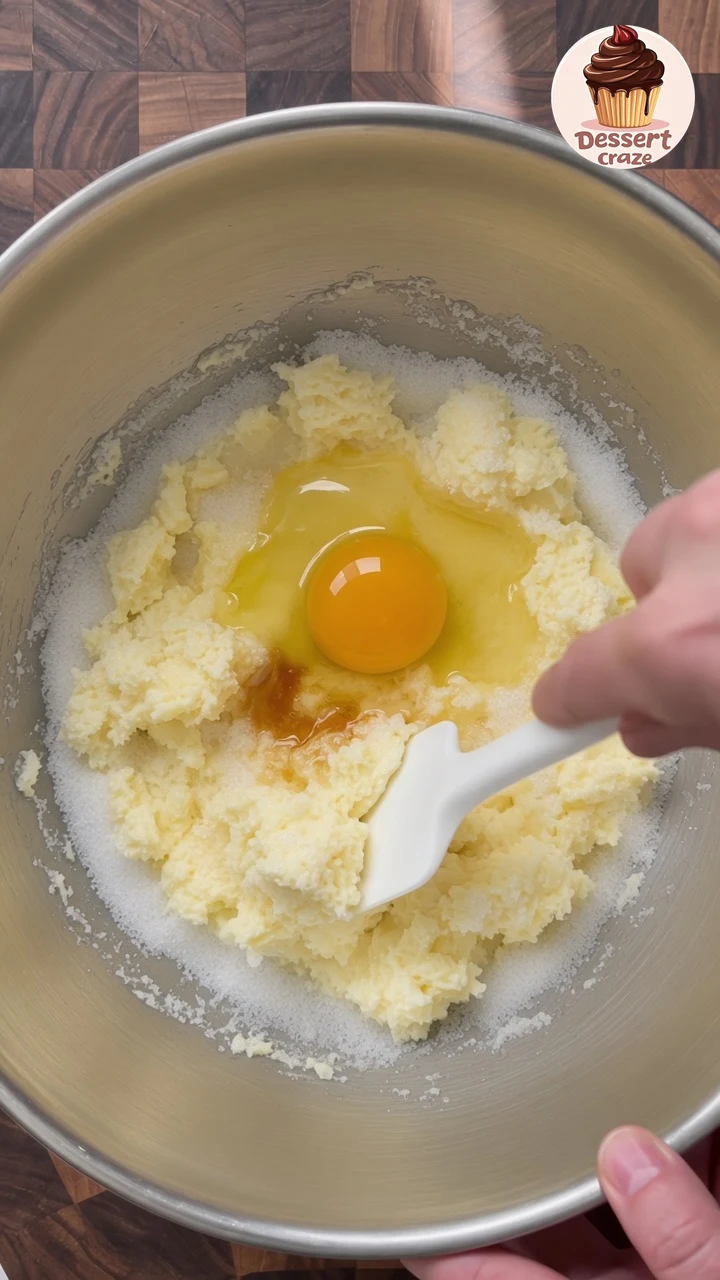
In a large bowl, beat the softened butter and granulated sugar until light and creamy, about 2 to 3 minutes with a hand mixer on medium speed. Add the eggs one at a time, beating after each until blended, then mix in the vanilla.
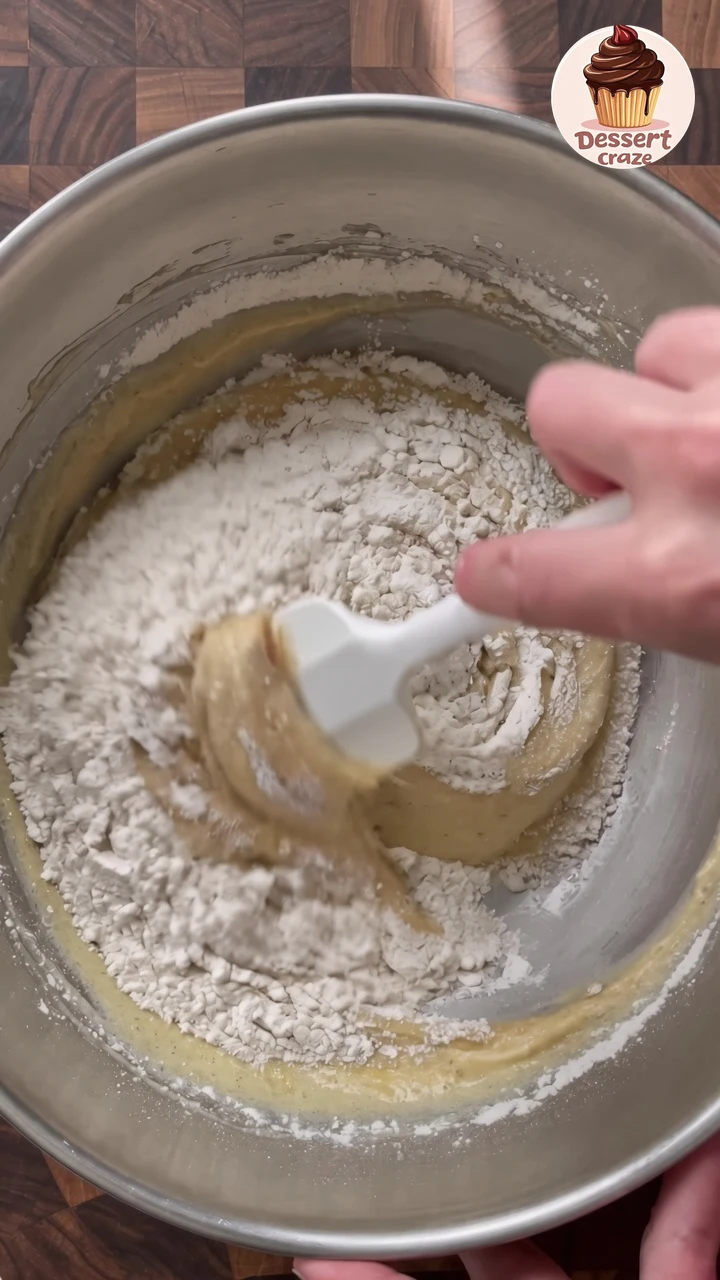
Step 5: Add the dry ingredients
In another bowl, whisk the flour, baking powder, cinnamon, and salt. Add this to the butter mixture in batches, alternating with the milk. A simple pattern is one third of the flour, half the milk, another third of the flour, the rest of the milk, and the last of the flour. Mix gently on low speed or by hand until just combined. Stop as soon as you no longer see dry flour.
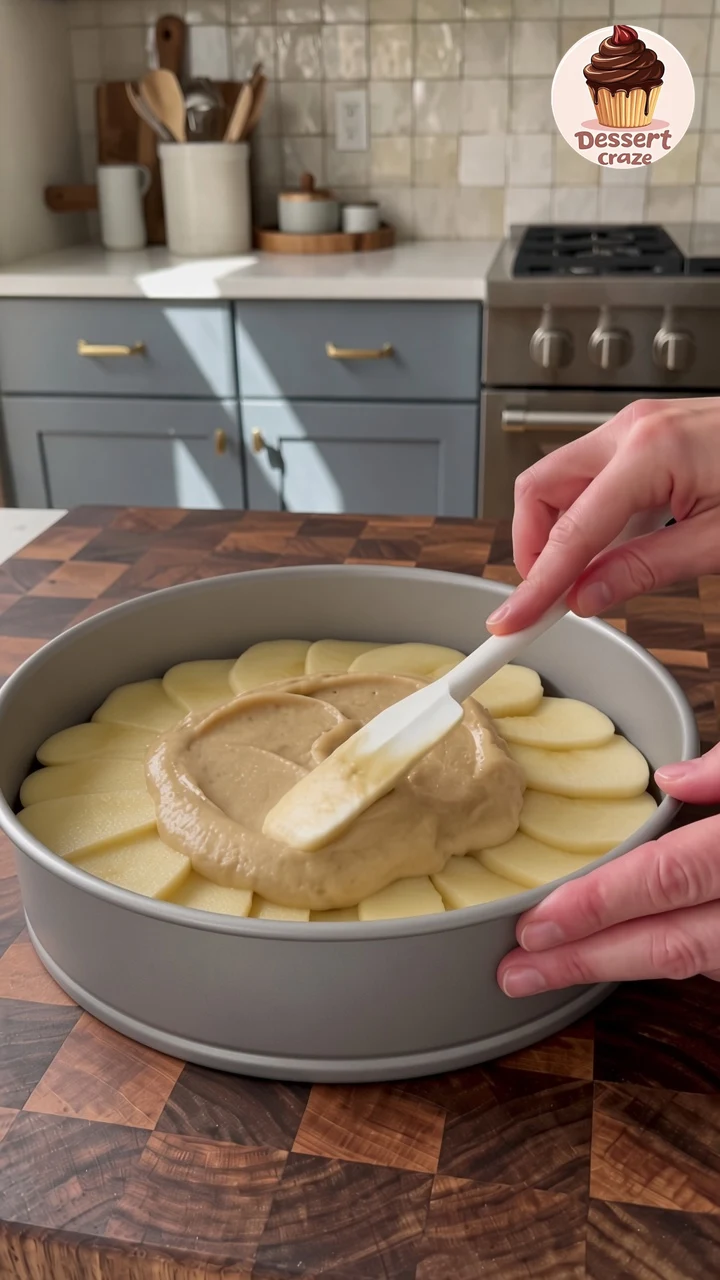
Step 6: Assemble
Carefully spoon the batter over the apple layer in several dollops, then spread it evenly without disturbing the apples. Working from the dollops outward with an offset spatula keeps the slices in place.
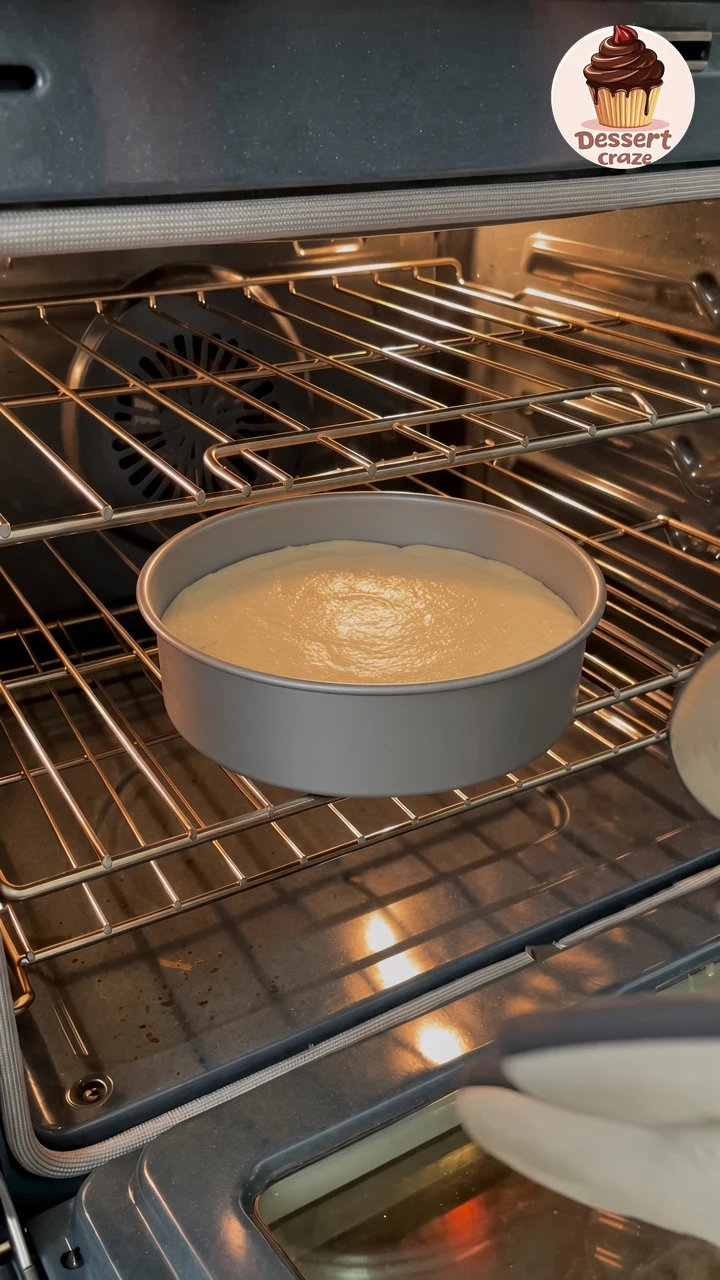
Step 7: Bake
Bake for 40 to 50 minutes, until the top is golden and a toothpick inserted into the center comes out clean or with a few moist crumbs. Set the pan on the center rack. If you are nervous about drips, you can set a baking sheet on the rack below.
Step 8: Cool and invert
Let the cake rest in the pan for 10 minutes. Run a thin knife around the edge, place a large serving plate over the pan, and, wearing oven mitts, carefully invert it in one confident motion. Lift the pan straight up. If any apples remain in the pan, gently return them to the cake.
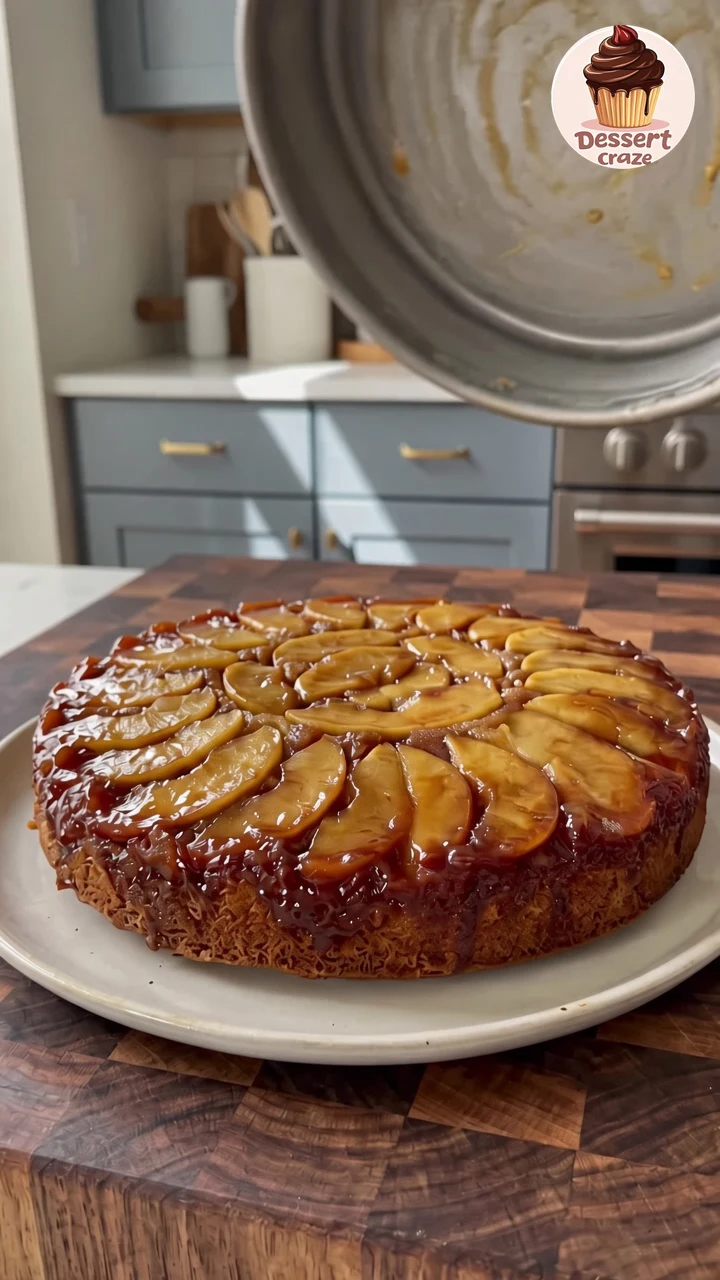
Step 9: Serve
Allow the cake to cool for another 5 minutes. Cut it into 8 slices and enjoy warm or at room temperature.
How to Tell When It’s Done
The recipe gives a range of 40 to 50 minutes because ovens, pans, and apples vary. Start checking at 40 minutes. The cake is ready when:
- the top is evenly golden and the center no longer looks wet;
- a toothpick in the center comes out clean or with a few moist crumbs, not wet batter;
- the caramel at the edges is bubbling.
A dark pan or a hot oven will bake faster, so check it early. If the top is browning before the center is set, lay a sheet of foil loosely over the pan for the remaining time.
Timing at a Glance
| Stage | Time |
|---|---|
| Active prep (apples, caramel, batter) | 25 minutes |
| Bake | 40 to 50 minutes |
| Rest in the pan before inverting | 10 minutes |
| Cool after inverting | 5 minutes |
| Ready to serve | About 1 hour 20 minutes to 1 hour 30 minutes |
The recipe card uses 45 minutes, the middle of the bake range, so its total reads 1 hour 25 minutes.
Tips for the Best Results
- Use firm baking apples such as Granny Smith or Honeycrisp. Soft varieties can turn to mush under the batter.
- Slice the apples evenly so they soften at the same rate.
- Do not overmix the batter. Once the flour goes in, mix only until combined, or the cake can turn tough.
- Invert while the caramel is still warm so the apples release easily. If you wait until the cake is fully cool, the caramel sets and holds the apples in the pan.
- Use oven mitts when flipping the warm pan. The caramel is hot enough to burn.
- Choose a plate with a little lip, so any caramel that runs off the cake stays on the plate.
Serving Ideas
This cake is lovely on its own, especially with a cup of coffee or tea in the afternoon. For dessert, add a scoop of vanilla ice cream or a spoonful of lightly sweetened whipped cream to each warm slice. A little extra caramel from the plate spooned over the top is never a bad idea. If you like caramel and apples together, our caramel apple cheesecake bars are another crowd-pleaser.
Storage and Make-Ahead
Store leftover slices covered in the refrigerator for up to 4 days. Warm slices gently before serving, either for a few seconds in the microwave or in a low oven, so the caramel softens again.
Because the cake contains butter, eggs, and milk, do not leave it out for more than 2 hours. The USDA’s guidance on leftovers recommends refrigerating within 2 hours and using refrigerated leftovers within 3 to 4 days.
Make-ahead: this cake is at its best the day it is baked, while the caramel is soft. You can bake it a day ahead, chill it covered, and warm it gently before serving.
FAQ
Can I use a springform pan?
It is not recommended. The caramel is liquid while it bakes and can leak through the seam of a springform pan. Use a solid, one-piece 9-inch round metal cake pan.
Do I have to peel the apples?
For this recipe, yes. Peeled slices soften evenly and blend into the caramel. Skins can stay tough and curl as they bake.
What are the best apples for upside-down cake?
Firm baking apples such as Granny Smith or Honeycrisp. They hold their shape and balance the sweet caramel.
What if some apples stick to the pan?
It happens. Lift them out with a small spatula and press them back into place on the cake while the caramel is still warm.
Why rest the cake for only 10 minutes before flipping?
That short rest lets the cake set enough to hold together, while the caramel is still warm and loose enough to release the apples.
Why did my cake turn out dry?
Usually from too much flour or overbaking. Spoon and level the flour or weigh it, and start checking at 40 minutes.
Can I use an 8-inch pan?
This recipe is written for a 9-inch pan. A smaller pan makes a thicker cake that needs a longer bake and could overflow, so stick with 9 inches.
Print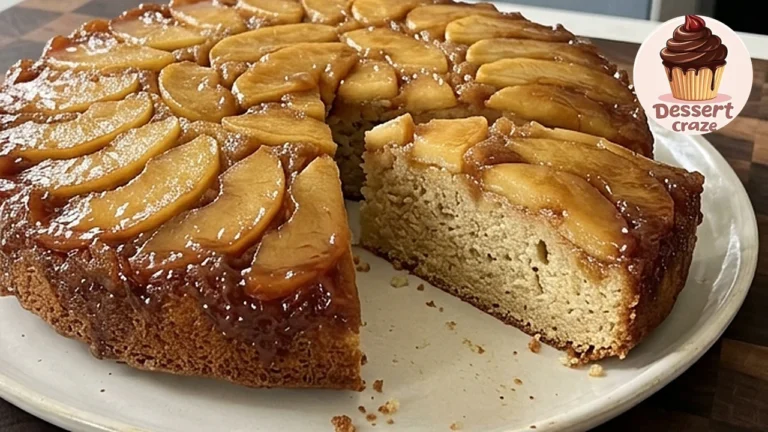
Old-Fashioned Caramel Apple Upside-Down Cake
Soft homemade cinnamon cake topped with tender, buttery caramelized apple slices. A quick brown sugar caramel and peeled apples bake under the batter, then the cake is flipped for a glossy apple top. Makes 8 slices.
- Total Time: 1 hour 25 minutes
- Yield: 8 slices
Ingredients
For the Caramel Apple Topping
- 3 medium apples, peeled, cored, and thinly sliced
- ½ cup (100 g) packed light brown sugar
- ¼ cup (57 g) unsalted butter
For the Cake
- 1½ cups (190 g) all-purpose flour
- ¾ cup (150 g) granulated sugar
- ½ cup (113 g) unsalted butter, softened
- 2 large eggs
- ½ cup (120 ml) whole milk
- 1 tsp vanilla extract
- 1½ tsp baking powder
- 1 tsp ground cinnamon
- ¼ tsp salt
Instructions
- Prepare: Preheat oven to 350°F (175°C). Lightly grease a 9-inch round metal cake pan. Use a solid pan, not a springform pan, to prevent caramel leaks. Have the apples peeled, cored, and thinly sliced before you start the caramel.
- Make the caramel: In a small saucepan over medium-low heat, melt ¼ cup butter with brown sugar. Stir until smooth, about 2–3 minutes. Pour evenly into the prepared cake pan.
- Arrange apples: Place thin apple slices in overlapping circles over the caramel, covering the bottom of the pan.
- Make the cake batter: In a large bowl, beat softened butter and granulated sugar until light and creamy. Add eggs one at a time, then mix in vanilla.
- Add dry ingredients: In another bowl, whisk flour, baking powder, cinnamon, and salt. Add to the butter mixture in batches, alternating with milk. Mix gently until just combined.
- Assemble: Carefully spoon the batter over the apple layer and spread evenly without disturbing the apples.
- Bake: Bake for 40–50 minutes, until golden and a toothpick inserted into the center comes out clean or with a few moist crumbs. Start checking at 40 minutes.
- Cool and invert: Let the cake rest in the pan for 10 minutes. Run a thin knife around the edge, place a large serving plate over the pan, and carefully invert (use oven mitts). Lift the pan straight up. If any apples remain in the pan, gently return them to the cake.
- Serve: Allow to cool for another 5 minutes. Cut into 8 slices and enjoy warm or at room temperature.
Notes
- Timing: 25 minutes prep + 40–50 minutes baking (45 minutes used for the card) + 15 minutes cooling (10 in the pan, 5 after inverting) = about 1 hour 25 minutes until ready to serve (1 hour 20 minutes to 1 hour 30 minutes depending on bake time).
- Use firm baking apples such as Granny Smith or Honeycrisp, and slice them evenly so they soften at the same rate.
- Don’t overmix the cake batter.
- Invert while the caramel is still warm so the apples release easily. Use oven mitts when flipping the warm pan.
- Store covered in the refrigerator for up to 4 days. Warm slices gently before serving. Don’t leave the cake at room temperature for more than 2 hours.
- Nutrition is an estimate calculated from standard ingredient values, per 1/8 of the cake; it is not lab-tested.
- Prep Time: 25 minutes
- Cooling: 15 minutes
- Cook Time: 45 minutes
- Category: Dessert
- Method: Baking
- Cuisine: American
- Diet: Vegetarian
Looking for more apple baking? Try our apple fritter bread.