
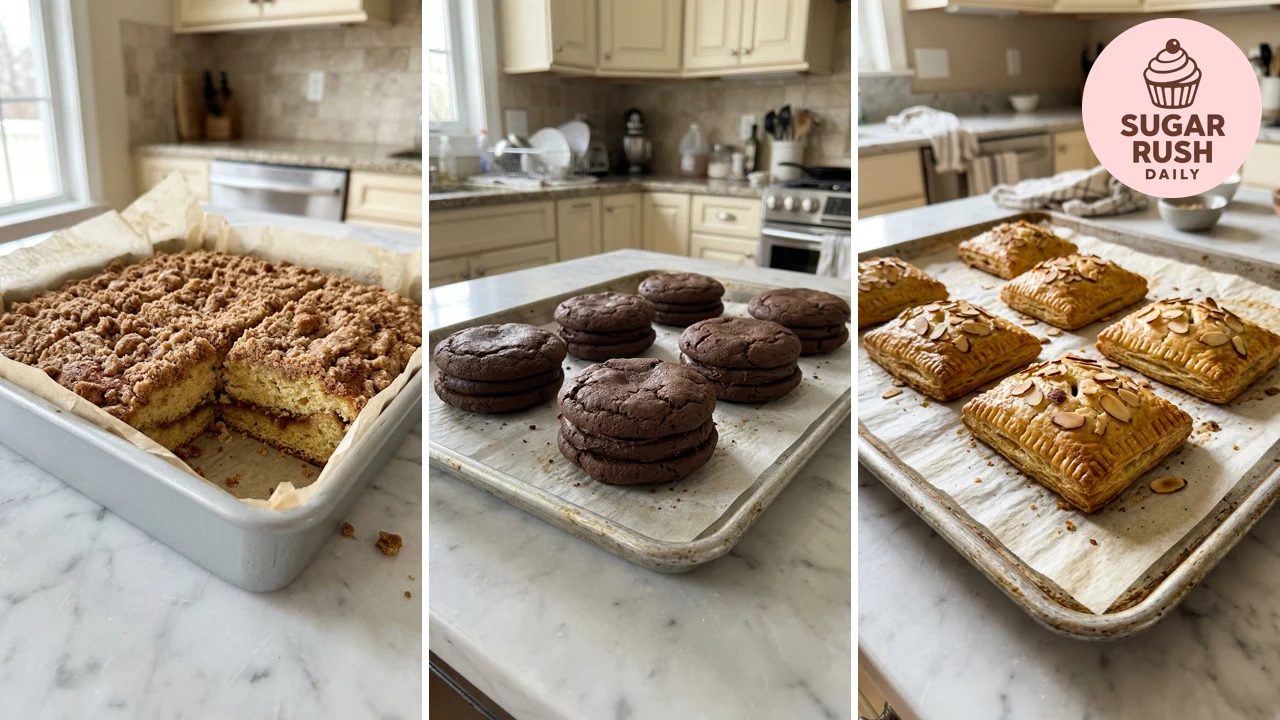
These homemade afternoon desserts give you three different ways to make a coffee break feel special: old-fashioned apple butter crumb cake, thick chocolate fudge cream sandwich cookies, and golden honey almond pastry pockets. Choose cinnamon crumbs, a rich chocolate center, or crisp pastry with a soft almond filling.
The ideas come from the Sugar Rush Daily post showing all three finished treats in a familiar home kitchen. The written versions below supply the quantities, pan sizes, cooling time, and storage details that a short Reel cannot show. Each dessert has its own printable recipe card so you can make one without committing to the whole trio.
These are researched editorial interpretations of the supplied visual concepts, not claims of a kitchen-tested batch. The images illustrate the intended appearance. Exact height, spreading, and baking time depend on your ingredients and equipment; follow the texture checks alongside the timing estimates.
Three Homemade Afternoon Desserts at a Glance
| Dessert | Batch | Planning time to serve | Best reason to choose it |
|---|---|---|---|
| Apple butter crumb cake | 9 squares | About 2 hours 45 minutes | A tender cake with cinnamon crumbs and a fruit ribbon. |
| Chocolate fudge cream cookies | 12 sandwiches | About 2 hours 35 minutes | A thick chocolate filling between soft cocoa cookies. |
| Honey almond pastry pockets | 6 pockets | About 2 hours 5 minutes | Crisp layers with a baked almond-honey center. |
The totals include the preliminary softening, chilling, cooling, or thawing described in each card. They are estimates, not measured test times. Package-specific pastry thawing or a slow-setting ganache can extend the schedule.
Helpful Baking Tools
Affiliate Disclosure: As an Amazon Associate I earn from qualifying purchases. Product links may earn a commission at no additional cost to you.
- A 9-inch square metal pan suits the crumb cake. The recipe is written for that size rather than a smaller pan.
- A rimmed baking sheet gives the cookies and pastry pockets room to bake. The linked example is a two-pack; cool sheets before adding more cookie dough.
- Parchment paper lines the cake pan and baking sheets. Leave handles on the cake lining so you can lift it after cooling.
- An electric hand mixer creams the softened butter and sugar; a stand mixer you already own also works.
- A digital kitchen scale is useful for matching the cookie portions and measuring flour and chocolate by weight.
- A medium cookie scoop helps portion similar-size cookies. Weigh the first portion against the card rather than assuming every rounded scoop is identical.
Also gather mixing bowls, a flexible spatula, a small saucepan for the ganache cream, a rolling pin, a cooling rack, and a sharp knife. The links are shopping examples, not claims that these exact tools appear in the source images.
Old-Fashioned Apple Butter Crumb Cake
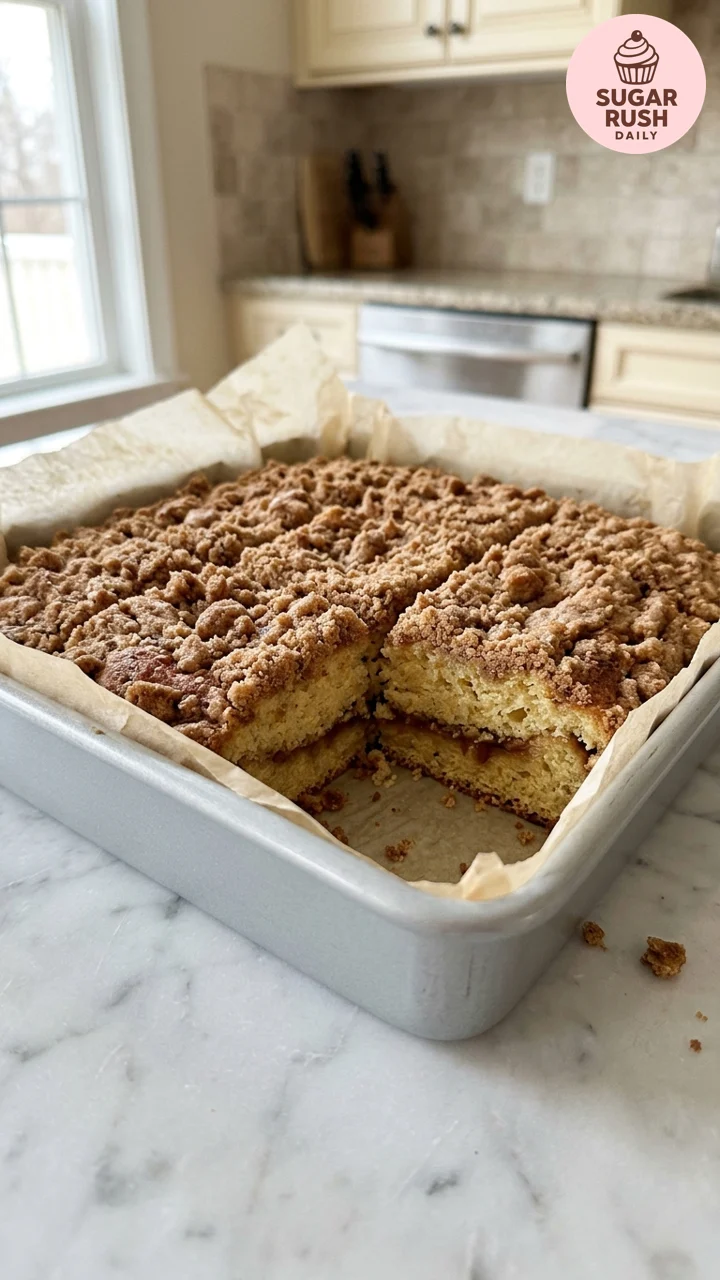
This cake has a thin apple butter ribbon between two layers of tender sour cream batter, with cinnamon crumbs across the top. Apple butter is a thick cooked apple spread; it is not dairy butter flavored with apples. Choose a spoonable, concentrated spread rather than applesauce or thin syrup.
Build the Layers Without Mixing Them Together
Make the crumbs first so they can form clumps while you mix the batter. Cream the softened butter with sugar, add the eggs, then alternate the dry ingredients with the sour cream and milk. Stop mixing once the batter is combined; prolonged beating after adding flour can make the cake less tender.
Spread half the thick batter in the lined pan. Spoon the apple butter in a thin layer, leaving a little space at the edges. Add the remaining batter in small dollops before gently spreading it. Dragging one large mound across the filling is more likely to pull the apple butter into the batter.
Check Cake, Not the Fruit Ribbon
Bake at 350°F until the cake is set, allowing roughly 45–55 minutes. Test a cake section with a skewer, avoiding the moist apple butter layer. Raw batter means more baking; a little fruit on the skewer does not automatically mean the cake is underdone. Protect darkening crumbs loosely with foil if necessary.
Let the cake cool for about an hour before lifting and cutting. The fruit ribbon is softer while warm, and the crumbs are easier to keep in place once the cake settles. The card below lists every ingredient and the complete schedule.
Print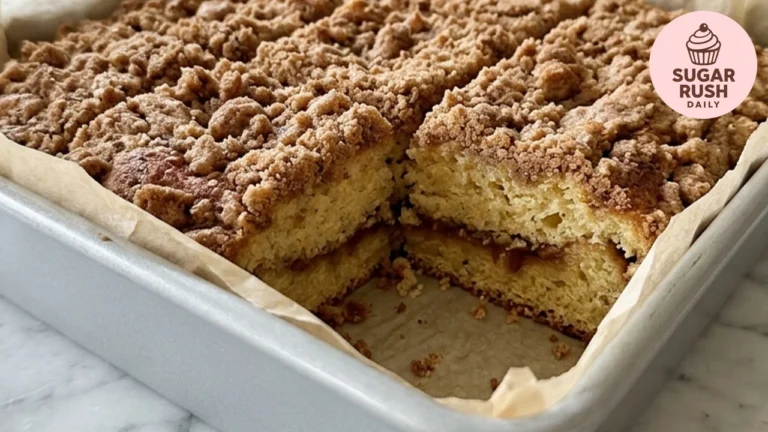
Old-Fashioned Apple Butter Crumb Cake
A tender sour cream coffee cake with a thin apple butter ribbon and cinnamon crumbs, baked in a 9-inch square pan.
- Total Time: 2 hours 45 minutes
- Yield: 9 squares
Ingredients
For the crumb topping:
3/4 cup (90 g) all-purpose flour
1/3 cup (65 g) packed light brown sugar
1 teaspoon ground cinnamon
Pinch fine salt
5 tablespoons (70 g) unsalted butter, melted and cooled slightly
For the cake:
1/2 cup (113 g) unsalted butter, softened
3/4 cup (150 g) granulated sugar
2 large eggs, at room temperature
1 teaspoon alcohol-free vanilla flavoring
2 cups (240 g) all-purpose flour
1 1/2 teaspoons baking powder
1/4 teaspoon baking soda
1/2 teaspoon fine salt
1/2 cup (120 g) sour cream
1/4 cup (60 ml) whole milk
3/4 cup (about 225 g) thick apple butter, stirred
Butter or baking spray for the pan
Instructions
1. Allow about 30 minutes for the butter to soften, checking frequently. Heat the oven to 350°F (175°C). Grease a 9-inch square metal pan at least 2 inches deep and line it with parchment, leaving handles.
2. Mix the crumb flour, brown sugar, cinnamon, and salt. Stir in the melted butter until irregular clumps form. Set aside while making the batter.
3. Beat the softened cake butter and granulated sugar until lighter, about 2 minutes. Beat in the eggs one at a time, then the vanilla, scraping the bowl.
4. Whisk the cake flour, baking powder, baking soda, and salt separately. Stir the sour cream and milk together. Mix the dry ingredients into the butter mixture in three additions, alternating with the sour cream mixture, beginning and ending with dry ingredients. Stop when combined.
5. Spread half the thick batter in the pan. Spoon the apple butter over it in a thin layer, leaving about 1/2 inch at the edges. Dollop the remaining batter evenly over the filling and gently spread to cover without stirring the layers together. Scatter the crumbs over the top.
6. Bake for 45–55 minutes, using 50 minutes for planning. The cake should spring back gently, and a skewer inserted into a cake section, avoiding the apple butter ribbon, should show moist crumbs but no raw batter. If crumbs darken first, tent loosely with foil and continue baking.
7. Cool in the pan on a rack for about 60 minutes before lifting and cutting into 9 squares. A warm apple butter layer is softer than a cooled one. Support the cake when lifting with the parchment.
Notes
Timing: 30 minutes butter softening + 25 minutes preparation + approximately 50 minutes baking + 60 minutes cooling = about 2 hours 45 minutes ready to slice. The 45–55-minute bake range makes the total about 2 hours 40–50 minutes. Add time if the ingredients need longer to soften or the cake needs longer to bake.
Use thick apple butter, not apple-flavored butter, applesauce, or thin apple syrup. This version has no fresh apple chunks. The 9-inch square pan is part of the recipe; a smaller pan can overflow or leave the center underbaked.
Store covered in the refrigerator at 40°F or below for up to 4 days. Freeze individually wrapped portions for up to 2 months for best quality; thaw in the refrigerator. Let a serving lose its chill briefly or warm gently before eating.
Contains wheat, dairy, and eggs. These quantities interpret the supplied Sugar Rush Daily visual concept and have not been kitchen-tested. Times are planning estimates; follow the texture and doneness checks. No alcohol is used. Nutrition has not been calculated.
- Prep Time: 25 minutes
- Cook Time: 50 minutes
- Category: Dessert
- Method: Baking
- Cuisine: American
Chocolate Fudge Cream Sandwich Cookies
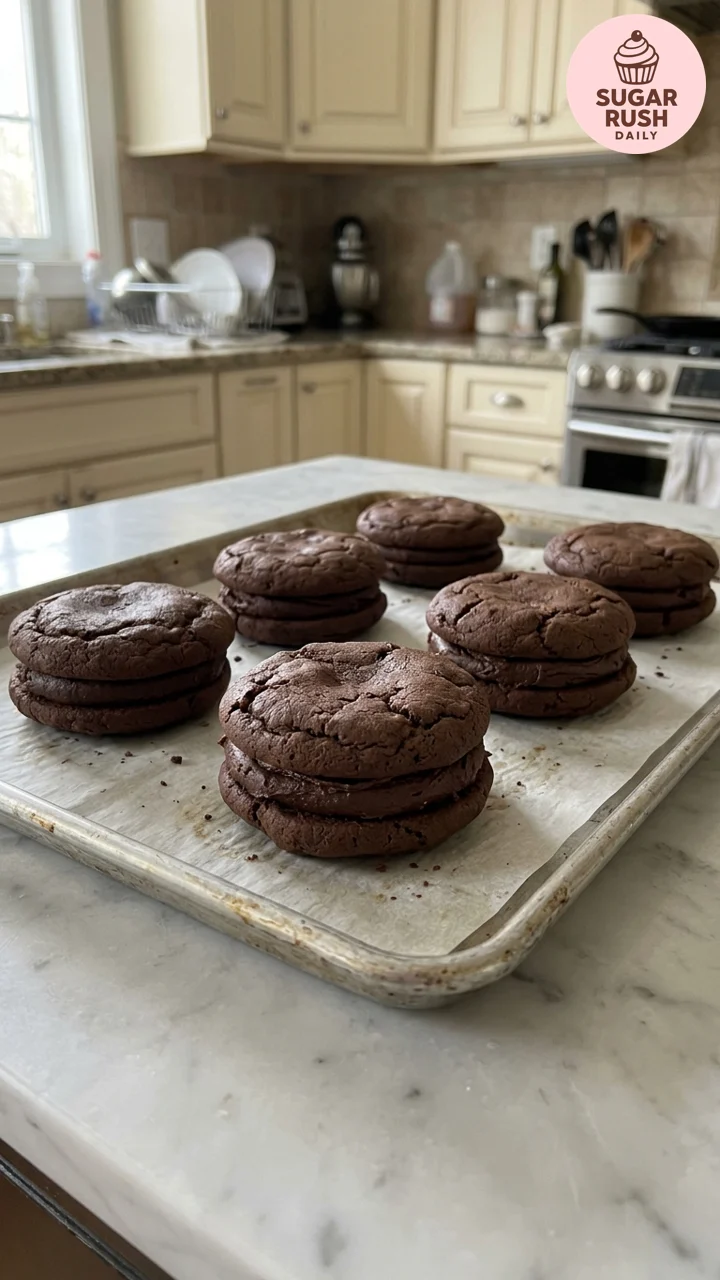
The second treat pairs soft cocoa cookies with a thick chocolate-and-cream filling. This is a ganache-style fudge cream, not raw brownie batter and not ice cream. It should hold a soft mound when spread between completely cooled cookies.
Make the Filling Before the Cookies
Pour steaming cream over finely chopped semisweet chocolate, let it stand briefly, and stir slowly until smooth. A small amount of butter softens the texture. The roughly two-to-one chocolate-to-cream ratio by weight is intended for a thick filling; King Arthur Baking’s ganache guidance explains how the ratio controls firmness.
Let it thicken while making the cookies. Do not substitute milk chocolate or white chocolate at the same ratio, since they set differently. If the filling becomes firm before assembly, let it soften briefly rather than heating it until it runs.
Match the Cookie Sizes and Cool Fully
Divide the dough into 24 portions for 12 sandwiches. Similar portions bake more evenly and make tidier pairs. Bake one tray at a time, keeping the remaining dough chilled, and look for set edges and matte tops rather than a shiny raw center.
Cool the cookies on a rack before filling. Warm cookies can melt the chocolate cream and slide apart. Spread the filling on the flat underside, top with a similar-size cookie, and press lightly. A short refrigerator rest helps the filling settle before serving.
Print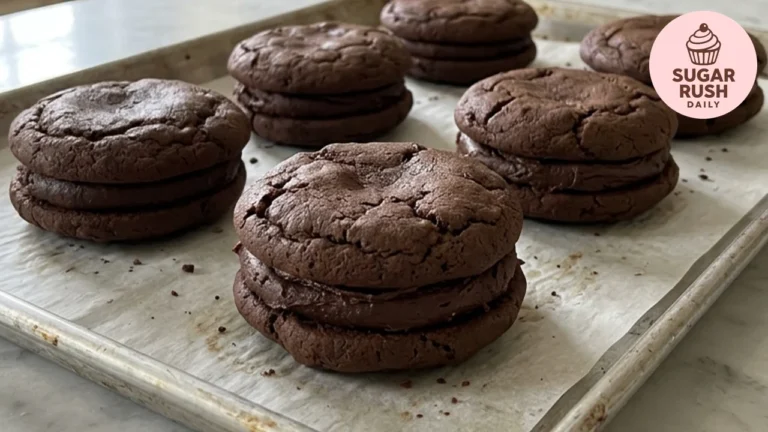
Chocolate Fudge Cream Sandwich Cookies
Soft cocoa cookies sandwiched with a thick semisweet chocolate-and-cream ganache. Cool the cookies and filling before assembly.
- Total Time: 2 hours 35 minutes
- Yield: 12 sandwich cookies
Ingredients
For 24 cookies (12 sandwiches):
1/2 cup (113 g) unsalted butter, softened
3/4 cup (150 g) granulated sugar
1/4 cup (50 g) packed light brown sugar
1 large egg
1 teaspoon alcohol-free vanilla flavoring
1 1/3 cups (160 g) all-purpose flour
1/2 cup (40 g) unsweetened natural cocoa powder
1 teaspoon baking powder
1/4 teaspoon fine salt
2 tablespoons (30 ml) whole milk
For the fudge cream:
8 ounces (225 g) semisweet chocolate, finely chopped (about 55–60% cacao)
1/2 cup (120 ml) heavy whipping cream
1 tablespoon (14 g) unsalted butter, cut into small pieces
Pinch fine salt
Instructions
1. Allow about 30 minutes for the cookie butter to soften. Make the filling first: place the chopped chocolate in a heat-safe bowl. Heat the cream just until steaming with small bubbles at the edges, about 3–5 minutes; do not boil hard. Pour over the chocolate, cover, and wait 3 minutes. Stir slowly from the center until smooth, then stir in the filling butter and salt. Leave in a cool room until thick enough to spread, about 60 minutes, while making the cookies. Refrigerate briefly if needed and stir frequently; do not leave a dairy filling out beyond safe limits.
2. Beat the softened cookie butter with both sugars until lighter. Beat in the egg and vanilla. Whisk the flour, cocoa, baking powder, and salt separately, then mix them into the butter mixture with the milk only until combined. Refrigerate the dough for 20 minutes.
3. Heat the oven to 350°F (175°C). Line two baking sheets with parchment. Divide the dough into 24 equal portions, about 25–27 g each. Space them at least 2 inches apart and flatten lightly into thick disks.
4. Bake one sheet at a time for 11–13 minutes, until the edges are set and the tops look matte with a few cracks, not shiny and raw. Plan for about 24–26 minutes total oven time for both sheets, plus the cream heating, or 30 minutes cook time overall.
5. Cool each batch 5 minutes on its sheet, then transfer to a rack until completely cool, about 25 minutes more. Keep any unbaked dough chilled between batches.
6. Pair similar-size cookies. Spread roughly 1 heaped tablespoon of thick, cooled ganache on the flat side of one cookie, divide the filling evenly among 12 pairs, and gently top with a second cookie. Do not fill warm cookies. Refrigerate the assembled cookies for 15 minutes to settle the filling, then serve or keep chilled.
Notes
Timing: 30 minutes butter softening + 30 minutes active preparation/assembly + 20 minutes dough chilling + 30 minutes cooking (cream heating and two sequential cookie trays) + 30 minutes final cookie cooling + 15 minutes setting = approximately 2 hours 35 minutes. Ganache cooling overlaps dough chilling, baking, and cookie cooling; do not add another hour. Earlier cookie batches also cool while later batches bake. Longer ganache setting or extra oven batches add time.
Use semisweet chocolate bars rather than changing to milk or white chocolate at the same ratio; those need different amounts of cream. The filling should spread like thick frosting, not pour. If too firm, let it soften briefly; if too loose, chill in short intervals and stir.
Refrigerate filled cookies airtight at 40°F or below for up to 4 days. Keep total time out of refrigeration under 2 hours, or under 1 hour above 90°F. Freeze wrapped sandwich cookies up to 1 month for best quality; thaw in the refrigerator. Unfilled cookies can be made one day ahead and kept airtight. Do not eat raw dough.
Contains wheat, dairy, and egg. These quantities interpret the supplied Sugar Rush Daily visual concept and have not been kitchen-tested. Times are planning estimates; follow the texture and doneness checks. No alcohol is used. Nutrition has not been calculated.
- Prep Time: 30 minutes
- Cook Time: 30 minutes
- Category: Dessert
- Method: Baking
- Cuisine: American
Honey Almond Puff Pastry Pockets
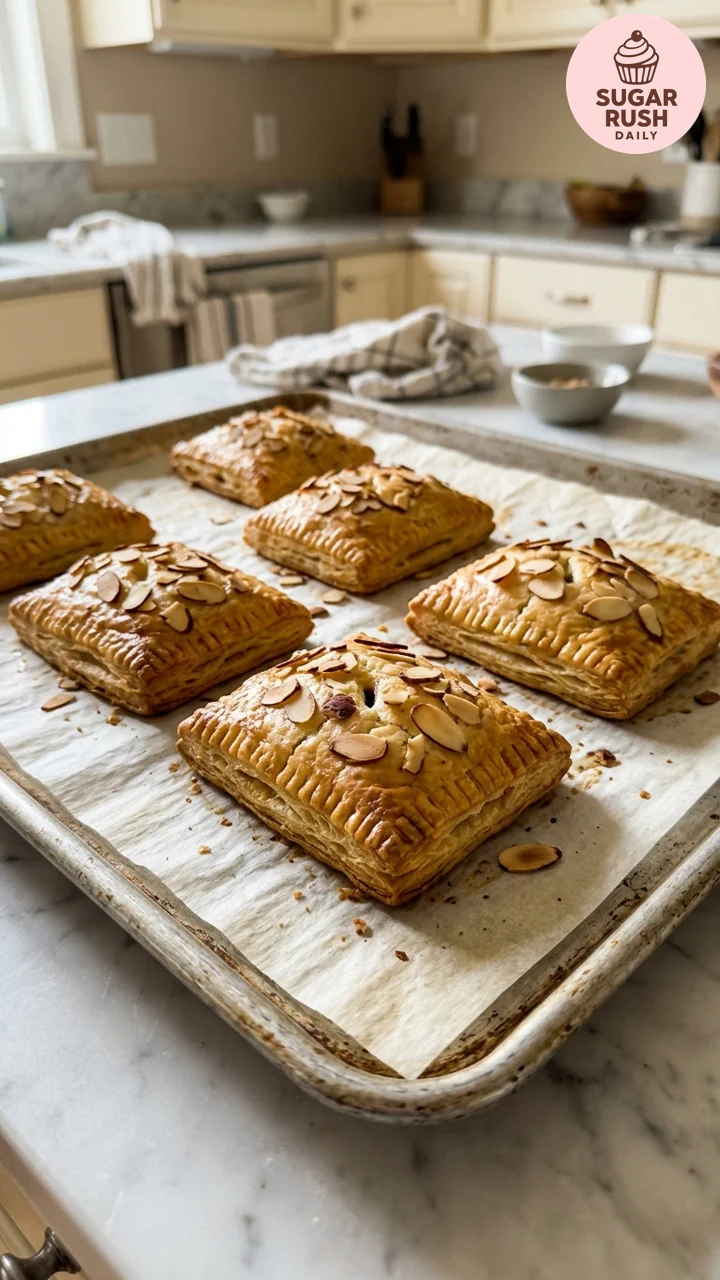
The golden pockets have a baked almond cream inside, with sliced almonds on top and a light honey finish. The filling combines almond flour, butter, honey, a little confectioners’ sugar, and egg. It is not an empty shell filled with loose honey after baking.
Plan Twelve Squares for Six Pockets
Use two pastry sheets. Each is gently rolled to about 12 by 8 inches and cut into six 4-inch squares, giving twelve pieces in all. Six become bases and six become lids. This layout avoids trying to stretch one small sheet into six generous filled pockets.
Divide the almond filling evenly and leave a clean half-inch border. Lightly egg-wash the borders, add the lids, and crimp with a fork. Keep filling away from the seal, cut a small vent in each top, and chill the assembled pastries before baking.
Cold Pastry, Fully Baked Filling
The pastry manufacturer’s handling advice recommends working with thawed pastry while it is still cold. If it becomes sticky or floppy, return it to the refrigerator rather than adding handfuls of flour.
Bake until the bottoms and tops are golden and the layers are cooked through. The egg-based almond filling must be set rather than liquid; check at least 160°F in a pocket’s center. Shield almonds with loose foil if they darken early. Add the final thin honey coating after baking, then allow a short cooling period before eating.
Print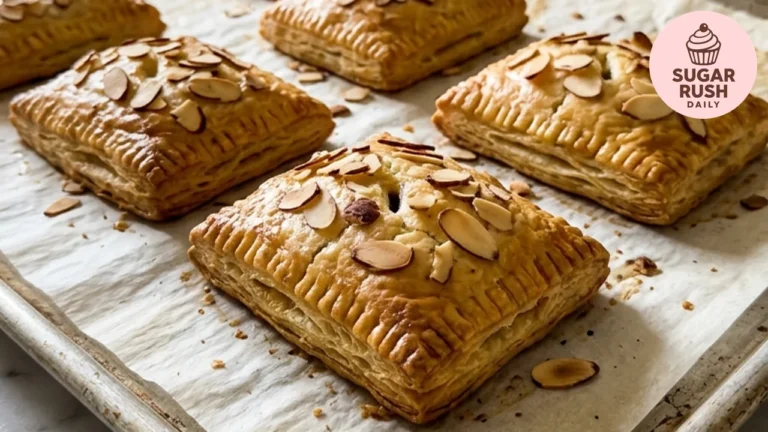
Honey Almond Puff Pastry Pockets
Six golden square puff pastry pockets with a baked almond-honey cream center, sliced almonds, and a light honey finish.
- Total Time: 2 hours 5 minutes
- Yield: 6 pastry pockets
Ingredients
For 6 pastry pockets:
2 frozen puff pastry sheets, about 17.3 ounces (490 g) total
1/4 cup (56 g) unsalted butter, softened
3/4 cup (75 g) finely ground blanched almond flour
2 tablespoons (15 g) confectioners’ sugar
2 tablespoons (42 g) honey, for the filling
1 large egg, for the filling
1 tablespoon (8 g) all-purpose flour
1/2 teaspoon alcohol-free vanilla flavoring
Pinch fine salt
1 additional egg beaten with 1 teaspoon water, for egg wash
1/4 cup (25 g) sliced almonds
1 tablespoon (21 g) honey, for the finish
All-purpose flour, for lightly dusting the work surface
Instructions
1. Thaw both pastry sheets according to the package, allowing about 40 minutes as a planning estimate. Soften the filling butter during this period. The pastry must unfold easily but remain cold; return it to the refrigerator if it becomes warm. Thawing may take longer than 40 minutes depending on the package and method.
2. Beat the softened butter, almond flour, confectioners’ sugar, 2 tablespoons honey, filling egg, flour, vanilla, and salt into a smooth, thick paste. Do not taste this raw egg-and-flour filling. Keep refrigerated while preparing the pastry.
3. On a lightly floured surface, gently roll each sheet to about 12 by 8 inches if needed. Cut each sheet into six 4-inch squares, giving 12 squares in all. Do not roll paper-thin. Arrange 6 squares on a parchment-lined baking sheet with room between them.
4. Divide the filling evenly among these 6 bases, about 2 tablespoons each, leaving a clean 1/2-inch border. Brush the borders lightly with egg wash. Top with the other 6 squares, gently press the borders to seal, and crimp with a fork without crushing the filled centers.
5. Cut a small steam vent in each top. Brush lightly with egg wash and sprinkle with sliced almonds. Refrigerate the assembled pockets for 15 minutes while the oven heats to 400°F (205°C). Discard unused egg wash.
6. Bake for 25–30 minutes, using 30 minutes for planning, until the tops and bottoms are deeply golden and the pastry layers are cooked through. The almond filling must be set, not liquid or raw; an instant-read thermometer in the center of a pocket should reach at least 160°F (71°C). If almonds darken before the pastry is ready, cover loosely with foil and continue.
7. Cool on a rack for 15 minutes. Brush the warm tops lightly with the remaining 1 tablespoon honey, divided among the 6 pockets. Serve warm, taking care with the filling, or cool and refrigerate promptly.
Notes
Timing: 40 minutes pastry thawing (butter softening overlaps) + 25 minutes active preparation + 15 minutes assembled-pastry chilling + approximately 30 minutes baking + 15 minutes cooling = about 2 hours 5 minutes. At a 25-minute bake, allow about 2 hours. Longer package thawing adds to the total. If thawing in the refrigerator, plan that separately according to the package, often about 4 hours.
Use finely ground blanched almond flour, not coarse almond meal. This is a baked almond cream filling, not loose honey inside an empty pastry shell. No almond extract or alcohol is needed. Keep the pastry cold and do not overfill.
Best the day of baking. Refrigerate in a covered container at 40°F or below within 2 hours (1 hour above 90°F) and use within 3 days. Reheat gently in a 325°F oven until warmed through; check early and cover almonds if needed. Freeze baked, cooled pockets up to 1 month for best quality and thaw in the refrigerator. Follow the pastry package for unused-sheet storage.
Contains wheat, dairy, egg, and tree nuts. These quantities interpret the supplied Sugar Rush Daily visual concept and have not been kitchen-tested. Times are planning estimates; follow the texture and doneness checks. No alcohol is used. Nutrition has not been calculated.
- Prep Time: 25 minutes
- Cook Time: 30 minutes
- Category: Dessert
- Method: Baking
- Cuisine: American
Planning and Storing Homemade Afternoon Desserts
You do not need to bake the whole trio at once. The cake is convenient for cutting ahead, the cookies can be filled after their components cool, and the pastries are at their crispest on baking day. Their oven temperatures differ, so finish the 350°F baking before raising the oven to 400°F for the pockets if you choose to make everything.
For the cookies, ganache cooling overlaps dough chilling, baking, and cookie cooling. It is not an extra hour to add to the total. The pastry’s preliminary butter softening overlaps thawing. Follow each card’s timing notes rather than adding every listed task as though none can overlap.
| Item | Refrigerated storage | Best make-ahead approach |
|---|---|---|
| Apple butter crumb cake | Up to 4 days, covered | Bake the day before and cut once cooled. |
| Filled chocolate cookies | Up to 4 days, airtight | Make unfilled cookies a day ahead; fill when cool. |
| Honey almond pastries | Up to 3 days, covered | Bake near serving time for the crispest layers. |
Keep refrigerated foods at 40°F or below. Refrigerate the cream-filled cookies and egg-filled pastries promptly, keeping total room-temperature time under 2 hours, or under 1 hour above 90°F. For general storage practices, see the FDA’s food-storage guidance. Cool the cake before covering so trapped steam does not soften the crumbs.
Do not taste raw cookie dough, cake batter, or almond filling. Both flour and eggs can introduce hazards before cooking; the FDA’s flour safety advice explains why raw flour is not ready to eat. Wash utensils and surfaces before handling finished desserts.
Frequently Asked Questions
Is apple butter the same as applesauce?
No. Apple butter is cooked down into a thicker, more concentrated spread. Applesauce can add too much moisture to the ribbon. Use the specified apple butter rather than treating the names as interchangeable.
Can I use chocolate chips in the fudge cream?
Chopped semisweet baking chocolate is the more predictable choice here. Chips can melt and set differently. If you use them, avoid assuming the filling will need exactly the same cooling time or have exactly the same texture.
Can I replace almond flour with all-purpose flour?
Not in the same amount. Almond flour provides the flavor and richness of the pastry filling; wheat flour absorbs differently. For a nut allergy, choose a separate nut-free recipe rather than trying to adjust this almond filling casually.
Are these three recipes gluten-free or dairy-free?
No. All three contain wheat and dairy, and the written versions contain egg. The almond pastries also contain tree nuts. Check ingredient labels for additional allergens. Substitutions would need separate testing, so no tested special-diet version is claimed.
Do I need to make all three on the same day?
No. Each printable card stands alone with its own ingredients and timing. Choose the cake for a pan of slices, the cookies for individual filled treats, or the pastries when you want crisp layers served warm.
More Sweet Ideas from RecipesMind
For another Sugar Rush Daily trio, see our apple roses, chocolate pudding cake, and maple cookie cups. If a single dessert is easier to plan, our lemon blueberry cream cheese coffee cake offers a different fruit-and-crumb combination. Follow each recipe’s own quantities and cooling schedule.
Serve one favorite with coffee, or put out a small selection and let everyone choose. A cinnamon cake square, a chocolate sandwich cookie, and a warm almond pocket each bring a different texture to the table.