
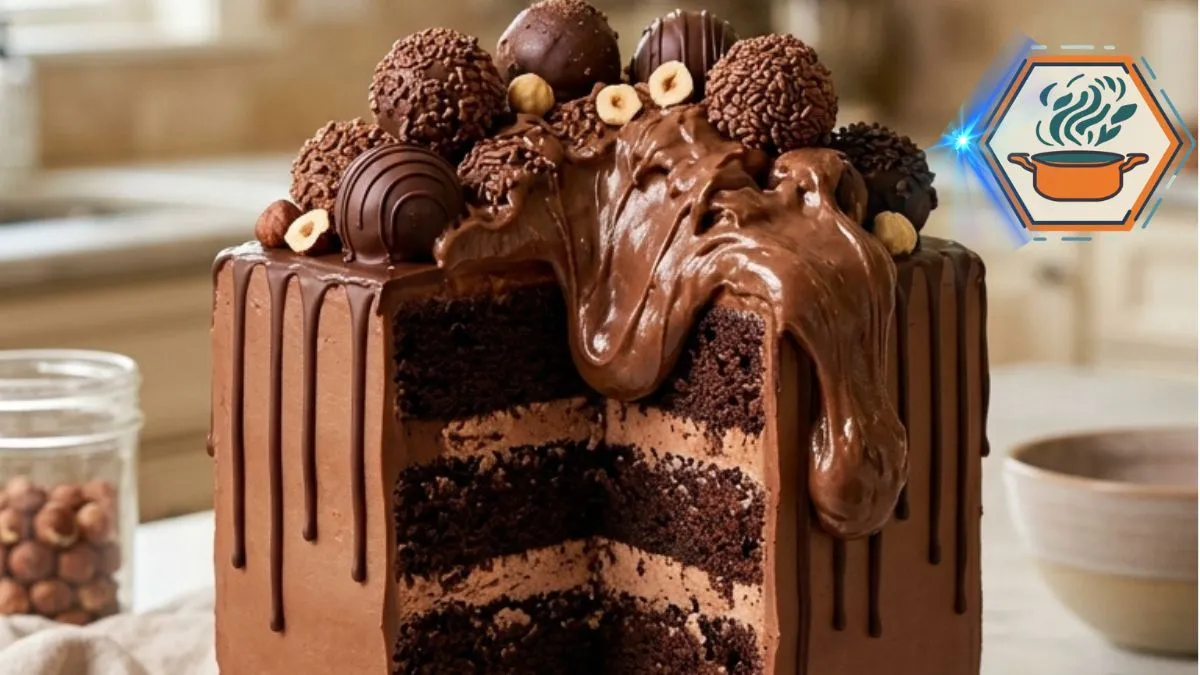
The first thing you notice about this Hazelnut Fudge Avalanche Cake is not the slice. It is the chocolate spilling over the top. A thick ribbon of glossy hazelnut fudge falls down the square cake, while chocolate truffles sit around the edges. Cut into it, and the real reward appears: dark chocolate cake layered with pale, creamy chocolate-hazelnut filling.
This cake looks dramatic, but the method is practical for a home kitchen. The secret is not pouring more chocolate over it. It is controlling temperature and texture at every stage. Cold cake layers support the filling. Ganache creates a stable outer coat. Slightly warmed hazelnut fudge gives you the slow “avalanche” rather than a thin chocolate puddle. For more baking fundamentals, the King Arthur Baking cake guide explains why pan size, ingredient temperature, accurate measurements, and cooling matter when making layer cakes.
Because the filling contains cream cheese and whipped cream, the finished cake should be kept refrigerated. The FDA food storage guidance recommends keeping the refrigerator at or below 40°F (4°C) and limiting the time foods that require refrigeration spend at room temperature.
Affiliate disclosure: As an Amazon Associate I earn from qualifying purchases. This article may contain affiliate links to kitchen tools I find useful for preparing this recipe.v
jump to
Why This Hazelnut Fudge Avalanche Cake Works
There is a reason this cake can hold such a heavy chocolate finish.
The chocolate sponge uses vegetable oil instead of relying only on butter. Oil helps the crumb remain soft when the finished cake is chilled. Buttermilk adds moisture and acidity, while cocoa gives the layers their deep chocolate flavor.
Hot coffee is another useful addition. It strengthens the perception of chocolate without making the finished cake taste like a cup of coffee. Hot water can be used instead if you prefer.
The filling is intentionally lighter than the outside coating. Cream cheese gives it structure. Chocolate-hazelnut spread brings the main flavor, while whipped heavy cream keeps it soft.
Then comes the outer shell.
A semisweet chocolate ganache forms a stable coating around the cold cake. Only after that layer is firm do we add the softer hazelnut fudge.
That order matters.
Ingredients You’ll Need
For the chocolate cake layers:
- 2 1/2 cups (300 g) all-purpose flour
- 2 cups (400 g) granulated sugar
- 3/4 cup (64 g) unsweetened cocoa powder
- 2 teaspoons baking soda
- 1 teaspoon baking powder
- 1/2 teaspoon fine salt
- 3 large eggs, room temperature
- 1 cup (240 ml) buttermilk, room temperature
- 3/4 cup (180 ml) neutral vegetable oil
- 2 teaspoons vanilla extract
- 1 cup (240 ml) hot coffee or hot water
For the chocolate-hazelnut filling:
- 8 oz (226 g) full-fat block cream cheese, softened
- 3/4 cup chocolate-hazelnut spread
- 1/2 cup (60 g) powdered sugar
- 1 cup (240 ml) cold heavy whipping cream
For the ganache:
- 12 oz (340 g) semisweet chocolate, finely chopped
- 1 cup (240 ml) heavy cream
- 1 tablespoon (14 g) unsalted butter
For the hazelnut fudge avalanche:
- 3/4 cup chocolate-hazelnut spread
- 2 to 3 tablespoons warm heavy cream
For the chocolate truffles:
- 1 1/2 cups chocolate cake crumbs
- About 1/2 cup chocolate-hazelnut spread
- 6 oz (170 g) semisweet or milk chocolate, melted
- Chocolate sprinkles
Equipment
You will also need two 8-inch square cake pans about 2 inches deep, parchment paper, mixing bowls, an electric mixer, cooling racks, a serrated knife and an offset spatula.
A kitchen scale is especially useful here. King Arthur Baking recommends weighing baking ingredients for greater accuracy and notes that pan dimensions matter because undersized pans can overflow.
For convenience, these Amazon searches fit naturally with this recipe: 8-inch square cake pans on Amazon, offset cake spatulas on Amazon, digital kitchen scales on Amazon, and wire cooling racks on Amazon.
Step 1: Prepare the Square Cake Pans
Heat the oven to 350°F (175°C). Place a rack near the center.
Grease two 8-inch square pans. Line the bottoms with parchment and lightly grease the parchment.
This small detail makes a difference. King Arthur Baking’s pan-release testing found parchment combined with pan spray particularly reliable for cakes.
Do not substitute smaller pans without checking their capacity. A deep chocolate batter can rise over a pan that is too small.
Step 2: Make the Chocolate Cake Batter
In a large bowl, whisk together the flour, sugar, cocoa powder, baking soda, baking powder, and salt.
Break up every visible cocoa lump.
In another bowl, whisk the eggs, buttermilk, vegetable oil, and vanilla until smooth.
Pour the wet mixture into the dry ingredients. Mix on low speed just until most of the flour disappears.
Now slowly pour in the hot coffee.
The batter will become quite fluid. That is expected. Do not add extra flour because it looks thinner than a traditional butter cake batter.
Scrape the bottom and sides of the bowl once. Mix briefly until evenly combined.
Avoid beating it for several minutes. Once flour is hydrated, unnecessary mixing can make the crumb less delicate.
Step 3: Bake and Cool the Layers
Divide the batter evenly between the prepared pans.
Bake for approximately 28 to 34 minutes.
Start checking at 28 minutes because ovens and pans behave differently.
The cakes are ready when the centers spring back lightly and a toothpick inserted near the middle comes out with a few moist crumbs rather than liquid batter.
Let the layers rest in their pans for about 10 to 15 minutes. Carefully turn them onto cooling racks and remove the parchment.
Cool completely before filling.
Warm layers are one of the fastest ways to ruin this cake. They can soften the cream filling and make the entire structure slide.
For the clean square appearance shown in the finished cake, refrigerate the cooled layers for 30 to 60 minutes before trimming.
Step 4: Make the Silky Hazelnut Filling
Beat the softened cream cheese until smooth.
Add the chocolate-hazelnut spread and powdered sugar. Beat only until evenly combined.
In a separate cold bowl, whip the heavy cream to medium-stiff peaks.
Do not whip it until grainy.
Fold about one-third of the whipped cream into the hazelnut mixture to loosen it. Fold in the remainder gently.
You should have a creamy filling that can hold its shape on a spatula.
If it seems very soft, refrigerate it for 15 to 20 minutes before assembling the cake.
Love working with chocolate fillings? Our strawberry-filled chocolate cake guide offers another way to pair rich chocolate cake with a contrasting center.
Step 5: Build the Tall Square Cake
Level the tops of the chilled cakes with a long serrated knife.
For the tall appearance, each thick baked cake can be carefully split horizontally, giving you four thinner square layers. This detail is important if you want the interior to resemble the tall, multi-layer presentation.
Save the trimmed cake pieces. They will become the truffles.
Place the first layer on a cake board or serving plate.
Spread a controlled layer of hazelnut cream over it, stopping about 1/2 inch from the edge. Add the next cake layer and repeat.
Do not make the filling excessively thick. Too much filling can squeeze out under the weight of the upper layers.
Finish with the final chocolate layer and check the cake from every side.
Refrigerate for 30 to 45 minutes, or until firm.
This chilling period is one of the most important parts of the recipe.
Step 6: Make the Chocolate Ganache
Finely chop the semisweet chocolate and place it in a heat-safe bowl.
Heat the heavy cream until steaming and just approaching a simmer. Do not aggressively boil it.
Pour the hot cream over the chocolate.
Wait for 2 to 3 minutes, then stir slowly from the center outward. Once glossy, stir in the butter.
Let the ganache cool until it becomes thick enough to coat the cake rather than immediately running off it.
Ganache changes dramatically as it cools. If yours looks too liquid, waiting is usually better than adding more chocolate immediately.
Step 7: Create Smooth Chocolate Sides
Apply a thin layer of ganache over the entire chilled cake. This is your crumb coat.
It traps loose chocolate crumbs.
Chill for about 15 to 20 minutes.
Add a second, thicker coat. Smooth the sides with an offset spatula or cake scraper while keeping the corners defined.
Do not chase absolute perfection. Slight handmade texture actually suits this cake.
Return it to the refrigerator until the ganache feels firm.
Step 8: Make the Chocolate Truffles
Those cake scraps now have a purpose.
Crumble them finely into a bowl.
Add the chocolate-hazelnut spread gradually. Although the ingredient list allows up to 1/2 cup, do not add all of it automatically.
Start with several tablespoons.
Mix until a portion pressed in your hand stays together. The mixture should be moist and moldable, not oily.
Roll into balls of slightly different sizes.
Chill for 20 minutes.
Dip or roll each ball in melted chocolate. Before the coating sets, add chocolate sprinkles or fine cake crumbs for the rough, crunchy-looking finish.
Chill until firm.
This variation in size is a small visual detail, but it makes the decoration feel much more natural.
Step 9: Create the Hazelnut Fudge Avalanche
Here comes the signature moment.
Place the chocolate-hazelnut spread in a bowl and add 2 tablespoons of warm heavy cream.
Stir.
Add the final tablespoon only if needed.
The goal is not a chocolate sauce.
You need a slow, thick fudge that folds over itself when lifted with a spoon.
Let it cool slightly if it becomes too loose.
Place most of the fudge toward the center and one side of the chilled cake. Gently encourage a few portions toward the edges.
Allow gravity to form the drips.
Some should be short. A few can travel farther down the cake. This irregularity creates the avalanche appearance.
For another useful chocolate technique, see our guide to mastering caramelized sugar, especially when planning desserts with contrasting crisp and creamy textures.
Arrange the truffles across the top and around the base.
For the dramatic presentation, you can also place a clean, food-safe small jar on its side at the top and spoon some fudge around its opening, creating the illusion that the chocolate has poured from the jar.
The Secret to Getting the Same Dramatic Look
Temperature is the hidden ingredient.
You want:
- Cold cake
- Firm ganache
- Chilled truffles
- Thick but movable fudge
Pour warm, thin topping onto room-temperature ganache and you may lose the defined drips completely.
If your fudge runs straight to the plate, it is too warm or too thin.
If it refuses to move, stir in warm cream one teaspoon at a time.
Test a single drip at the back of the cake before covering the top.
That one test can save the entire finish.
How to Get Clean Slices
After all that work, the first slice deserves some care.
Refrigerate the completed cake until the outer coating is set. Before serving, allow it to stand briefly so the filling and cake lose their refrigerator firmness.
Use a long, sharp knife.
Dip the blade in hot water, wipe it completely dry, then make one cut. Clean and warm the blade again before the next cut.
This reveals the dark cake and lighter hazelnut filling without dragging ganache through every layer.
If rich layered desserts are your favorite, you may also like our guide to what crème brûlée is made of or our Milk Bar Pie guide.
Common Mistakes to Avoid
Adding filling to warm cake: The cream can soften and the layers may slide. Cool the cakes completely first.
Using warm ganache: Thin ganache cannot build those smooth, substantial chocolate sides. Give it time to thicken.
Skipping the crumb coat: Chocolate cake produces many crumbs. A thin first coating makes the final surface much cleaner.
Making the fudge too thin: The topping should crawl rather than pour like syrup.
Overfilling the layers: More filling does not automatically mean a better cake. Thick filling makes a tall cake unstable.
Skipping refrigeration: Chilling between assembly stages is part of the technique, not wasted waiting time.
Storage and Make-Ahead Tips
This cake is actually easier when spread across two days.
Bake the chocolate layers on day one. Once completely cool, wrap them well and refrigerate them.
On day two, prepare the filling, assemble the cake, add the ganache, make the truffles, and finish the avalanche topping.
Because the recipe contains cream cheese and heavy cream, store the finished cake covered in the refrigerator at 40°F (4°C) or below. The FDA advises that foods requiring refrigeration should generally not remain at room temperature for more than two hours, or one hour when temperatures exceed 90°F (32°C).
For the best texture, take out only what you plan to serve and give individual slices a little time to soften before eating.
Frequently Asked Questions
What is a Hazelnut Fudge Avalanche Cake?
It is a tall chocolate layer cake filled with chocolate-hazelnut cream, coated in ganache, and topped with thick hazelnut fudge that deliberately flows over the edges. Chocolate truffles add texture and complete the dramatic finish.
Can I make this cake without coffee?
Yes. Replace the hot coffee with the same amount of hot water. Coffee deepens the chocolate character, but the cake will still work without it.
Can I use two layers instead of four?
Yes. You can leave the two baked cakes whole. However, splitting them gives the finished cake a taller layered appearance and distributes the hazelnut filling through more of each slice.
Why is my hazelnut fudge running down the whole cake?
It is probably too warm or contains too much cream. Let it cool and thicken before trying again. Always test one drip first.
Can I make the chocolate truffles ahead of time?
Yes. Making them in advance can make final assembly much easier. Keep them chilled until you decorate the cake.
Why does my layer cake lean?
Warm cake, excessive filling, uneven layers, or insufficient chilling can all cause leaning. Trim each layer level and chill the assembled cake before applying ganache.
How do I stop a chocolate cake from sticking to a square pan?
Line the bottom with parchment and grease appropriately. Parchment plus pan spray performed particularly well in King Arthur Baking’s cake-pan testing.
Print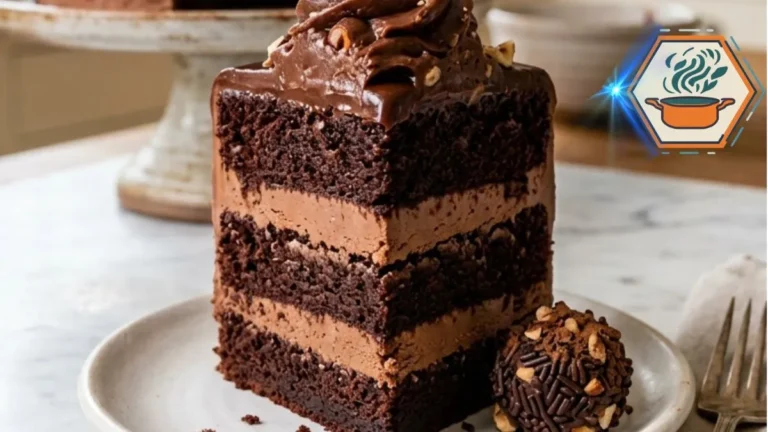
Hazelnut Fudge Avalanche Cake
A tall, rich chocolate layer cake filled with silky chocolate-hazelnut cream, coated with semisweet chocolate ganache, and finished with thick hazelnut fudge drips and homemade chocolate truffles.
- Total Time: About 3 hours 30 minutes
- Yield: 16 servings
Ingredients
Chocolate Cake
- 2 1/2 cups (300 g) all-purpose flour
- 2 cups (400 g) granulated sugar
- 3/4 cup (64 g) unsweetened cocoa powder
- 2 teaspoons baking soda
- 1 teaspoon baking powder
- 1/2 teaspoon fine salt
- 3 large eggs, room temperature
- 1 cup (240 ml) buttermilk, room temperature
- 3/4 cup (180 ml) neutral vegetable oil
- 2 teaspoons vanilla extract
- 1 cup (240 ml) hot coffee or hot water
Chocolate-Hazelnut Filling
- 8 oz (226 g) full-fat block cream cheese, softened
- 3/4 cup (about 225 g) chocolate-hazelnut spread
- 1/2 cup (60 g) powdered sugar
- 1 cup (240 ml) cold heavy whipping cream
Chocolate Ganache
- 12 oz (340 g) semisweet chocolate, finely chopped
- 1 cup (240 ml) heavy cream
- 1 tablespoon (14 g) unsalted butter
Hazelnut Fudge Topping
- 3/4 cup (about 225 g) chocolate-hazelnut spread
- 2–3 tablespoons (30–45 ml) warm heavy cream
Chocolate Truffles
- 1 1/2 cups chocolate cake crumbs
- Up to 1/2 cup chocolate-hazelnut spread
- 6 oz (170 g) semisweet or milk chocolate, melted
- Chocolate sprinkles, as needed
Instructions
- Preheat the oven to 350°F (175°C). Grease two 8-inch square cake pans. Line the bottoms with parchment paper and lightly grease the parchment.
- Whisk the flour, sugar, cocoa powder, baking soda, baking powder, and salt in a large bowl.
- In another bowl, whisk the eggs, buttermilk, oil, and vanilla. Add the wet mixture to the dry ingredients and mix briefly.
- Slowly stir in the hot coffee or hot water. The batter will be relatively thin. This is normal.
- Divide the batter evenly between the prepared pans. Bake for 28–34 minutes, or until the centers spring back lightly and a toothpick comes out without wet batter.
- Cool in the pans for 10–15 minutes. Turn onto cooling racks and cool completely. Chill the layers for about 30 minutes before trimming.
- Beat the softened cream cheese until smooth. Beat in the chocolate-hazelnut spread and powdered sugar.
- In a separate bowl, whip the cold heavy cream to medium-stiff peaks. Gently fold it into the hazelnut mixture. Refrigerate if the filling feels too soft.
- Level the cold cakes. For the tall layered appearance, carefully split each cake horizontally to create four cake layers. Reserve the trimmed cake for the truffles.
- Place the first layer on a cake board. Spread an even layer of hazelnut filling over it, leaving about 1/2 inch around the edge. Repeat and finish with the final cake layer.
- Chill the assembled cake for 30–45 minutes.
- Put the finely chopped semisweet chocolate in a heatproof bowl. Heat 1 cup heavy cream until steaming. Pour it over the chocolate and leave for 2–3 minutes.
- Stir gently until smooth. Stir in the butter. Allow the ganache to cool and thicken before using it.
- Apply a thin crumb coat of ganache. Refrigerate for 15–20 minutes. Add a thicker final coat and smooth the square sides and corners. Chill again until firm.
- For the truffles, crumble the reserved cake scraps. Mix in chocolate-hazelnut spread a little at a time until the crumbs hold together when pressed.
- Roll into small balls. Chill for 20 minutes. Coat with melted chocolate and chocolate sprinkles. Refrigerate until firm.
- For the avalanche topping, combine 3/4 cup chocolate-hazelnut spread with 2 tablespoons warm heavy cream. Add more cream only as needed.
- Test one drip on the back of the cold cake. The fudge should move slowly. If it races down the cake, allow it to cool and thicken.
- Spoon the fudge over the top, allowing several irregular drips to fall naturally over the edges.
- Arrange the chocolate truffles across the top and around the cake. Chill until the decorations and outer coating are stable.
Notes
- Do not assemble the cake while the layers are warm.
- Chill after stacking, after the crumb coat, and before the avalanche topping.
- Use block cream cheese, rather than spreadable cream cheese, for a firmer filling.
- Do not automatically use the entire 1/2 cup of hazelnut spread in the truffles. Add only enough to bind the crumbs.
- The avalanche topping should be thick and slow-moving, not like chocolate syrup.
- Test a single drip on the back before decorating the front.
- For four visible cake layers, split each of the two baked cakes horizontally only after they are completely cold.
- For clean slices, warm a sharp knife in hot water, wipe it dry, cut, then clean it between slices.
- Since the filling contains cream cheese and whipped cream, keep the finished cake refrigerated.
- Prep Time: 1 hour 30 minutes
- Chilling / Additional Time: 1 hour 30 minutes
- Cook Time: 28–34 minutes
- Category: Dessert
- Method: Baking
- Cuisine: American-inspired
A Cake Made for the Center of the Table
The Hazelnut Fudge Avalanche Cake is intentionally excessive in the best possible way. There is soft chocolate cake, airy hazelnut cream, smooth ganache, thick fudge and a final bite of chocolate truffle.
Yet its dramatic appearance comes from control rather than complicated pastry work.
Bake the layers evenly. Cool them fully. Keep the filling stable. Chill after stacking. Let the ganache firm. Most importantly, resist the urge to make the final topping too runny.
Then bring the cake to the table whole.
Give everyone a moment to see those slow chocolate drips and truffles before you cut through the first corner. Once the knife reveals those alternating chocolate and hazelnut layers, the inside finally gets its turn to be as impressive as the outside.