
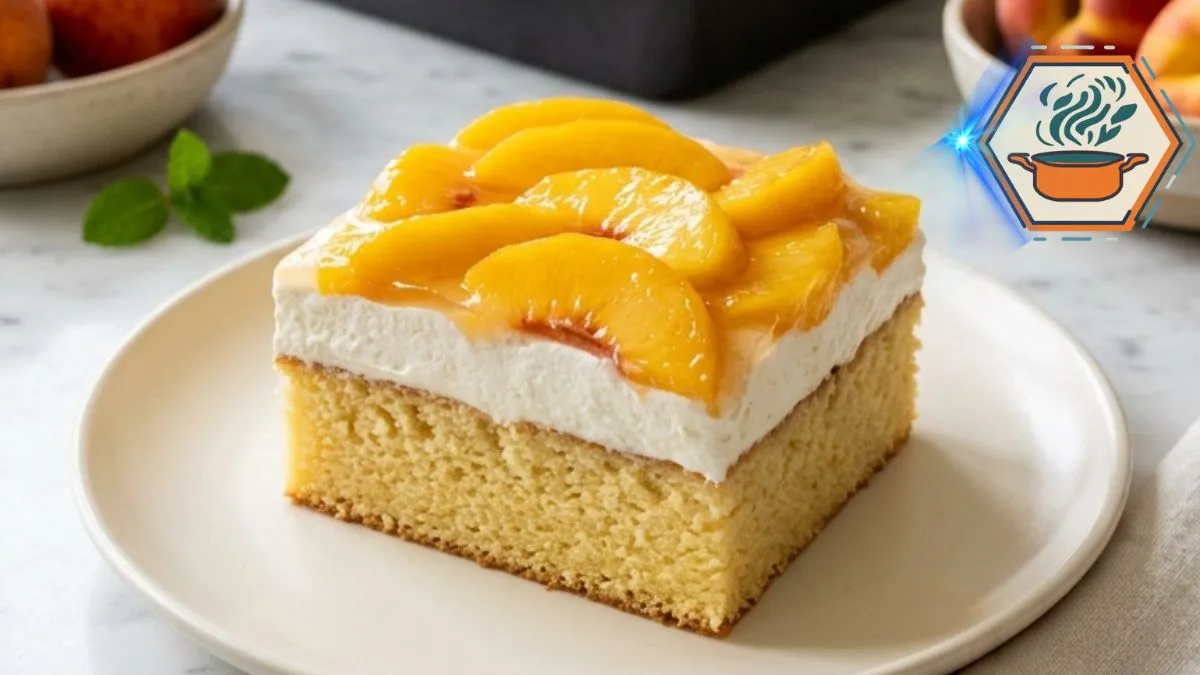
There is something special about bringing a cold cake to the table on a warm summer afternoon. This Peaches & Cream Sheet Cake starts with a soft, golden vanilla cake and finishes with a thick layer of vanilla whipped cream, juicy peach slices, and a light peach glaze. Every square gives you cake, cream, and fruit in the same bite.
Peaches are at their best during summer, which makes this an especially good seasonal dessert. According to the USDA SNAP-Ed peach guide, ripe peaches can be refrigerated and used in many cooked desserts. For this cake, though, keeping the sliced fruit fresh gives the topping its bright color and juicy texture.
The cake also needs to stay cold after the whipped cream and peaches are added. The FDA refrigerator food-safety guidance recommends keeping a refrigerator at 40°F (4°C) or below. That matters here because the topping contains fresh whipped cream.
What I like most about this recipe is the contrast. The vanilla cake is tender but sturdy enough to support the topping. The cream is airy rather than heavy. Then the peaches bring fresh flavor and a little acidity.
The final brush of peach preserves is small but important. It creates the glossy finish you see across the peach slices and adds another touch of peach flavor without covering the fruit in a heavy sauce.
Affiliate disclosure: As an Amazon Associate I earn from qualifying purchases. This article may contain affiliate links to kitchen tools I find useful for preparing this recipe.
JUMP TO
Peaches & Cream Sheet Cake
A soft vanilla sheet cake topped with thick vanilla whipped cream, juicy peach slices, and a light peach preserve glaze. Chill before slicing for clean, creamy layers.
- Total Time: About 4 hours 25 minutes, including cooling and chilling
- Yield: 12 generous squares
Ingredients
Vanilla Cake
- 2 cups (240 g) all-purpose flour
- 2 teaspoons baking powder
- ½ teaspoon fine salt
- ¾ cup (170 g) unsalted butter, softened
- 1¼ cups (250 g) granulated sugar
- 3 large eggs, room temperature
- 2 teaspoons vanilla extract
- ¾ cup (180 ml) whole milk, room temperature
Cream Layer
- 2 cups (480 ml) cold heavy whipping cream
- ½ cup (60 g) powdered sugar
- 1 teaspoon vanilla extract
Peach Topping
- 4 cups sliced fresh peaches, or well-drained canned peaches
- ½ cup peach preserves
- 2 tablespoons water
For the Pan
- Nonstick baking spray or softened butter
- Parchment paper
Instructions
- Preheat the oven to 350°F (175°C). Lightly grease a 9×13-inch baking pan and line the bottom with parchment paper.
- Whisk the flour, baking powder, and salt in a medium bowl. Set aside.
- Beat the softened butter and granulated sugar for 3–4 minutes, until pale and fluffy.
- Add the eggs one at a time, mixing after each addition. Mix in 2 teaspoons vanilla.
- With the mixer on low, add one-third of the dry ingredients. Add half the milk. Repeat, finishing with the remaining flour. Mix only until no dry flour remains.
- Spread the batter evenly in the prepared 9×13-inch pan.
- Bake for 25–30 minutes. The cake is ready when lightly golden, springy in the center, and a toothpick inserted near the center comes out clean or with a few moist crumbs.
- Place the pan on a wire rack and let the cake cool completely before adding the cream. Allow about 60–90 minutes.
- If using canned peaches, drain them thoroughly. Pat fresh or canned peach slices gently with paper towels to remove surface moisture.
- Pour the very cold heavy cream into a chilled bowl. Add powdered sugar and 1 teaspoon vanilla. Beat until firm, smooth peaks form. Do not continue beating once the cream holds its shape.
- Spread the whipped cream over the completely cooled cake in a thick, even layer.
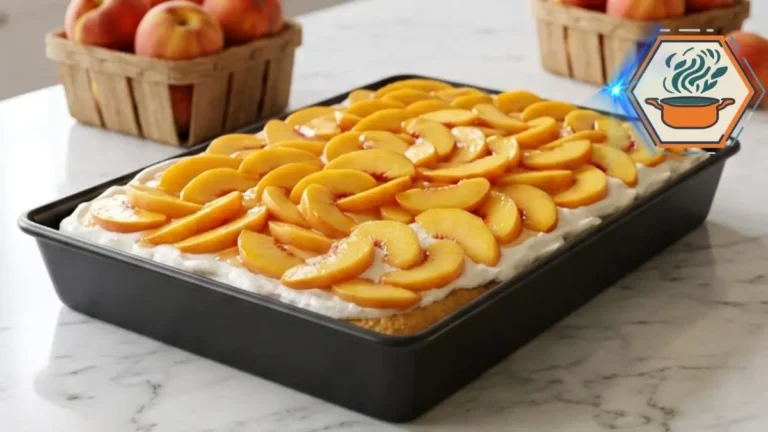
- Arrange the peach slices over the cream in loose, slightly overlapping rows.
- Warm the peach preserves and 2 tablespoons water over low heat until smooth. Remove from the heat and allow the glaze to cool until it is no longer hot.
- Lightly brush the cooled glaze over the peaches. Avoid pouring it directly over the whipped cream.
- Refrigerate for at least 2 hours before slicing. Serve well chilled.
Notes
- Butter should be soft, not melted.
- Room-temperature eggs and milk combine more readily with the butter mixture.
- Keep the heavy cream cold until whipping.
- The cake must be completely cool before adding whipped cream.
- Dry the peaches before decorating. Excess juice can soften the cream.
- Do not put hot peach glaze onto the whipped cream.
- For clean squares, chill thoroughly and wipe the knife between cuts.
- Keep the finished cake refrigerated at 40°F (4°C) or below.
- FDA guidance says perishables should not remain at room temperature longer than two hours, or one hour when temperatures are above 90°F/32°C.
- For the visual shown in the article, do not add a crust. The bottom layer is the vanilla sheet cake itself. Adding graham crackers or another crust would create a different dessert.
- Prep Time: 25 minutes
- Time: 2 hours chilling + approximately 60–90 minutes cooling
- Cook Time: 25–30 minutes
- Category: Dessert
- Method: Baking
- Cuisine: American-inspired
Why You’ll Love This Peaches and Cream Cake
A good sheet cake should be easy to serve. This one is designed around that idea.
You bake one vanilla cake in a 9×13-inch pan. There are no layers to split and no complicated frosting work. Once the cake is cold, you spread the whipped cream directly over it and arrange peach wedges across the surface.
The finished dessert has three clear layers:
- A soft, golden vanilla cake
- A generous layer of vanilla whipped cream
- Fresh or canned peach slices with a glossy preserve glaze
The chilling time helps those layers settle. It also makes the dessert particularly refreshing in summer.
This is a good choice for a barbecue, family gathering, birthday, picnic meal at home, or Sunday dessert. Since it can be assembled ahead of time, you do not need to finish decorating it just before serving.
If you enjoy learning how fruit behaves in baked desserts, our guide to using pineapple in baking also covers useful ideas for managing moisture when fruit meets cake.
Ingredients You’ll Need
For the vanilla cake:
- 2 cups all-purpose flour, about 240 g
- 2 teaspoons baking powder
- ½ teaspoon fine salt
- ¾ cup unsalted butter, softened, about 170 g
- 1¼ cups granulated sugar, about 250 g
- 3 large eggs, preferably at room temperature
- 2 teaspoons vanilla extract
- ¾ cup whole milk, preferably at room temperature
For the cream layer:
- 2 cups cold heavy whipping cream
- ½ cup powdered sugar
- 1 teaspoon vanilla extract
For the peach topping:
- 4 cups sliced peaches
- ½ cup peach preserves
- 2 tablespoons water
You will also need a little butter or nonstick baking spray for the pan and parchment paper for easier removal.
Why Ingredient Temperature Matters
One small detail can change the cake considerably: the cake ingredients should not all be ice-cold.
The butter needs to be soft enough to cream with the sugar. It should give slightly when pressed but should not look oily or melted.
Take the eggs and milk from the refrigerator around 20 to 30 minutes before mixing. Ingredients that are closer in temperature combine more readily with the creamed butter.
The heavy cream is the exception.
Keep that very cold until you are ready to whip it.
A cold bowl can also help when your kitchen is warm. Put your mixing bowl and beaters in the refrigerator for about 10 minutes before whipping the cream.
Fresh Peaches or Canned Peaches?
Both work.
Fresh peaches
Choose peaches that smell fragrant and yield slightly when gently pressed. Avoid fruit that is extremely soft or bruised because it may release too much liquid over the cream.
Wash and dry the peaches. Cut them into thin wedges, around ¼ inch thick.
You can leave the skin on. It adds color and helps the slices hold their shape. Peel them if you prefer a softer finish.
The USDA notes that unripe peaches can continue ripening at room temperature and that ripe peaches can then be refrigerated.
Canned peaches
Canned peaches make this recipe possible outside peach season.
Drain them thoroughly in a colander. Then place the slices on clean paper towels and gently blot the tops.
Do not skip this step.
Extra syrup can seep into the whipped cream. That can create a watery surface and make the layers less defined when you cut the cake.
For the closest appearance to the photographed cake, use peach halves or slices that you can cut into attractive, fairly thick wedges.
How to Make Peaches & Cream Sheet Cake
1. Prepare the pan and oven
Preheat the oven to 350°F (175°C).
Lightly grease a 9×13-inch baking pan. A sturdy light-colored aluminum pan works particularly well for an evenly baked cake. If you need one, this 9×13-inch baking pan I recommend is a practical option for sheet cakes and everyday baking. Line the bottom with parchment paper, leaving enough parchment on two sides to help lift the cake if you plan to remove it from the pan.
Lightly grease the parchment as well.
Do not use a larger sheet pan. A larger pan will produce a much thinner cake and will not give you the thick golden base shown in this recipe.
2. Mix the dry ingredients
Add the flour, baking powder, and salt to a medium bowl.
Whisk for about 20 seconds.
This spreads the baking powder and salt through the flour before they meet the wet ingredients.
Set the bowl aside.
3. Cream the butter and sugar
Put the softened butter and granulated sugar in a large mixing bowl.
Beat with an electric mixer at medium speed for 3 to 4 minutes. A reliable electric hand mixer makes this step easier and can also be used later to whip the cream to firm peaks.
Do not stop as soon as the ingredients are combined.
The mixture should become noticeably paler and fluffier. This stage incorporates tiny pockets of air into the butter, which helps produce a lighter cake.
Scrape the sides and bottom of the bowl once or twice.
4. Add the eggs and vanilla
Add the eggs one at a time.
Beat after each addition until it disappears into the butter mixture before adding the next egg.
Scrape the bowl again.
Mix in 2 teaspoons vanilla.
If the mixture looks slightly curdled after adding the eggs, do not panic. It usually comes together once the flour is added.
5. Add flour and milk
Turn the mixer to low.
Add about one-third of the flour mixture.
Mix briefly.
Pour in half of the milk.
Add another third of the flour, followed by the remaining milk. Finish with the last of the flour.
Mix only until you can no longer see dry streaks.
Do not keep beating the batter once the flour is incorporated.
Overmixing encourages gluten development and can make the cake firmer and less tender.
Give the batter one final fold with a silicone spatula, scraping along the bottom of the bowl.
Bake the Vanilla Cake
Transfer the batter to the prepared pan.
Use an offset spatula or the back of a spoon to spread it into an even layer, paying attention to the corners.
Bake at 350°F for approximately 25 to 30 minutes.
Start checking around 24 to 25 minutes because ovens vary.
The cake is ready when:
- The surface is lightly golden
- The center springs back after a gentle touch
- A toothpick inserted near the center comes out clean or with a few moist crumbs
- The center no longer looks wet
Avoid baking until the cake becomes dark brown. A dry cake base will feel much heavier after refrigeration.
Set the pan on a wire rack.
Now comes one of the most important parts of the entire recipe:
Cool the cake completely.
Do not put whipped cream on a warm cake.
Even mild residual heat can soften the cream and turn your neat white layer into a loose topping.
Allow at least 1 to 1½ hours, depending on the temperature of your kitchen.
Make Thick Vanilla Whipped Cream
When the cake is completely cold, make the topping.
Pour 2 cups cold heavy whipping cream into a cold mixing bowl.
Add:
- ½ cup powdered sugar
- 1 teaspoon vanilla extract
Start beating at medium speed. Once the cream begins to thicken, increase to medium-high.
Watch it closely.
For this cake, you want firm peaks that remain smooth. When you lift the beaters, the peak should hold its shape rather than immediately folding over.
Stop once you reach that point.
If you continue beating far beyond firm peaks, the cream can become grainy and eventually begin turning into butter.
The generous quantity of cream is intentional. The photographed style depends on a visibly thick white layer rather than a thin coating of frosting.
Assemble the Peach Cake
Make sure the cake is completely cool.
Spread the whipped cream across the surface.
Use an offset spatula to create an even layer approximately ¾ inch thick. It does not need to look perfectly polished. A few natural marks make the cake look homemade.
Now arrange the peach wedges.
Start at one corner and place them in loose, overlapping rows. Let some slices face different directions rather than creating an overly precise pattern.
The goal is a full peach topping where almost every serving gets several slices.
For another fruit-based dessert technique, see our guide to making strawberry puree.
Make the Glossy Peach Glaze
Place ½ cup peach preserves and 2 tablespoons water in a small saucepan.
Warm over low heat while stirring until the preserves loosen into a smooth glaze.
You can also heat them briefly in a microwave-safe bowl.
If the preserves contain large pieces of fruit, press the warm mixture through a fine-mesh strainer for a smoother finish.
Now allow the glaze to cool.
It can be slightly warm, but it must not be hot when it touches the peaches and cream.
Using a silicone pastry brush, lightly brush the glaze over the exposed peach slices. Soft silicone bristles make it easier to coat the fruit without disturbing the whipped cream underneath.
Do not pour the glaze over the whole cake.
A thin coating is enough to give the fruit that glossy, jewel-like finish while keeping the white cream visible.
Chill Before Cutting
Cover the pan without letting plastic wrap press against the fruit.
Refrigerate the finished cake for at least 2 hours.
This is not simply waiting time. Chilling firms the whipped cream and makes the cake much easier to portion.
Because this dessert contains whipped dairy cream, it should remain refrigerated. USDA food-safety guidance advises keeping perishable foods refrigerated promptly, with a refrigerator at 40°F or below.
How to Get Clean, Beautiful Squares
A chilled cake is much easier to cut than one that has just been assembled.
Use a long, sharp knife.
For cleaner slices:
- Chill the cake thoroughly.
- Dip the knife into hot water.
- Wipe it dry.
- Make one straight cut.
- Clean the blade between cuts.
- Repeat for each row.
Do not saw aggressively through the peaches. A clean downward motion helps keep the cream in place.
For generous dessert portions, cut the cake into 12 squares. For parties, cut it into 15 or 18 smaller portions.
Common Mistakes to Avoid
Frosting a warm cake
This is the biggest problem to avoid. The whipped cream needs a completely cold base.
Using wet peaches
Fresh peach juice or canned peach syrup can thin the cream. Pat the slices gently with paper towels before decorating.
Overmixing the cake batter
Once flour meets liquid, mix only as much as necessary. This keeps the crumb tender.
Overwhipping the cream
Firm is good. Grainy is not.
Stop as soon as the cream can hold its shape.
Applying hot preserves
Hot glaze and cold whipped cream do not work well together. Let the glaze cool before brushing it onto the fruit.
Skipping the chilling time
The cake may taste good immediately, but the layers will be much harder to cut neatly.
Give it the full two hours.
Can You Make This Cake Ahead?
Yes. In fact, this is one dessert that benefits from advance preparation.
You can bake the vanilla cake one day ahead. Let it cool completely, cover the pan well, and keep the unfrosted cake at room temperature overnight if your kitchen is cool.
Add the whipped cream, peaches, and glaze on the day you plan to serve it.
You can also assemble the entire dessert several hours before serving and keep it refrigerated.
That makes it particularly useful when you are preparing several dishes for a gathering.
How to Store Peaches & Cream Sheet Cake
Once the whipped cream is added, keep the cake refrigerated.
Cover the pan or transfer individual squares to an airtight container. For best texture and appearance, I recommend eating the assembled cake within 2 to 3 days.
The cake itself may remain pleasant longer, but the peaches gradually release moisture and the whipped topping can lose some of its fresh texture.
Keep the cake chilled until close to serving time. USDA guidance says perishable foods should generally be refrigerated within two hours, or within one hour when temperatures exceed 90°F.
This matters if you serve the cake at an outdoor summer gathering.
Easy Variations
The basic recipe leaves room for a few simple changes.
For a slightly warmer flavor, add ¼ teaspoon almond extract to the cake batter. Use it sparingly because almond extract can quickly overpower peaches.
You can also scatter a few fresh raspberries or blueberries among the peach slices for added color.
For extra crunch, add toasted sliced almonds immediately before serving.
If you want a sweeter finish, use slightly more peach glaze. Keep the coating thin enough that the whipped cream remains the main creamy element.
And if you enjoy simple homemade cakes, our 3-ingredient banana bread guide is another useful option for easy baking.
What to Serve With Peach Sheet Cake
This cake does not need much beside it.
The whipped cream is already rich, so heavy sauces or extra frosting can distract from the peaches.
Try serving it with:
- Hot coffee
- Iced coffee
- Unsweetened iced tea
- Cold milk
- Fresh berries
- Extra peach slices
A small mint sprig can add a fresh green accent when serving individual squares, just like the simple presentation in the finished cake.
Why This Recipe Works
The recipe succeeds because each layer has a separate role.
The vanilla sheet cake is substantial enough to hold the fruit but soft enough to eat cold.
The whipped cream brings moisture and a light dairy flavor without the density of buttercream.
The peaches add freshness, natural sweetness, color, and a softer texture.
Finally, the peach preserve glaze connects the fresh fruit to the cake. It strengthens the peach flavor and gives the top a polished appearance.
Similar peach sheet cakes commonly combine a cake base with whipped topping and peaches, although methods vary widely in the type of cake and treatment of the fruit.
Frequently Asked Questions
Can I use canned peaches for Peaches & Cream Sheet Cake?
Yes. Drain them very well and blot them gently with paper towels before putting them over the whipped cream. Too much syrup can make the topping watery.
Can I use frozen peaches?
Fresh or canned peaches are better for the appearance of this recipe. Frozen peaches tend to soften and release liquid as they thaw. If frozen peaches are your only option, thaw and drain them thoroughly first.
Do I need to peel fresh peaches?
No. Peach skin is edible, and leaving it on gives the finished cake more color. You can peel the peaches if you prefer their texture without skin.
Why did my whipped cream become runny?
The cream may have been too warm, underwhipped, or exposed to moisture from the peaches. Start with very cold heavy cream and dry the peach slices before assembly.
Can I frost the cake while it is still slightly warm?
No. Wait until the cake has cooled completely. Warm cake can melt the whipped cream.
How long does peach sheet cake need to chill?
Give the assembled cake at least 2 hours in the refrigerator. This firms the cream and makes cleaner slices possible.
Can I prepare it the night before?
Yes. For the freshest-looking peaches, I prefer baking the cake the night before and adding the cream and fruit the next day. You can also assemble it the night before and keep it well covered in the refrigerator.
How do I keep peaches from making the cake watery?
Use ripe but firm peaches. Pat sliced fresh peaches lightly with paper towels. Drain canned peaches thoroughly. Most importantly, never transfer canned peaches directly from their syrup onto the cream.
What size pan should I use?
Use a 9×13-inch baking pan for the thick cake layer pictured here. Changing the pan size changes both the cake thickness and baking time.
Does Peaches & Cream Sheet Cake need refrigeration?
Yes. Once you add fresh whipped cream, keep the dessert refrigerated at 40°F (4°C) or below.
A Summer Cake Worth Waiting For
The hardest part of making this Peaches & Cream Sheet Cake may be waiting for it to chill.
Once you cut the first square, you see exactly why that time matters. There is a golden vanilla base on the bottom, a tall white cloud of whipped cream in the middle, and glossy peach wedges across the top.
The first bite is soft and creamy. Then comes the juicy peach.
It feels like the sort of cake that belongs in the center of a summer table, still sitting in its baking pan while everyone quietly decides whether there is room for one more square.
And usually, there is.