
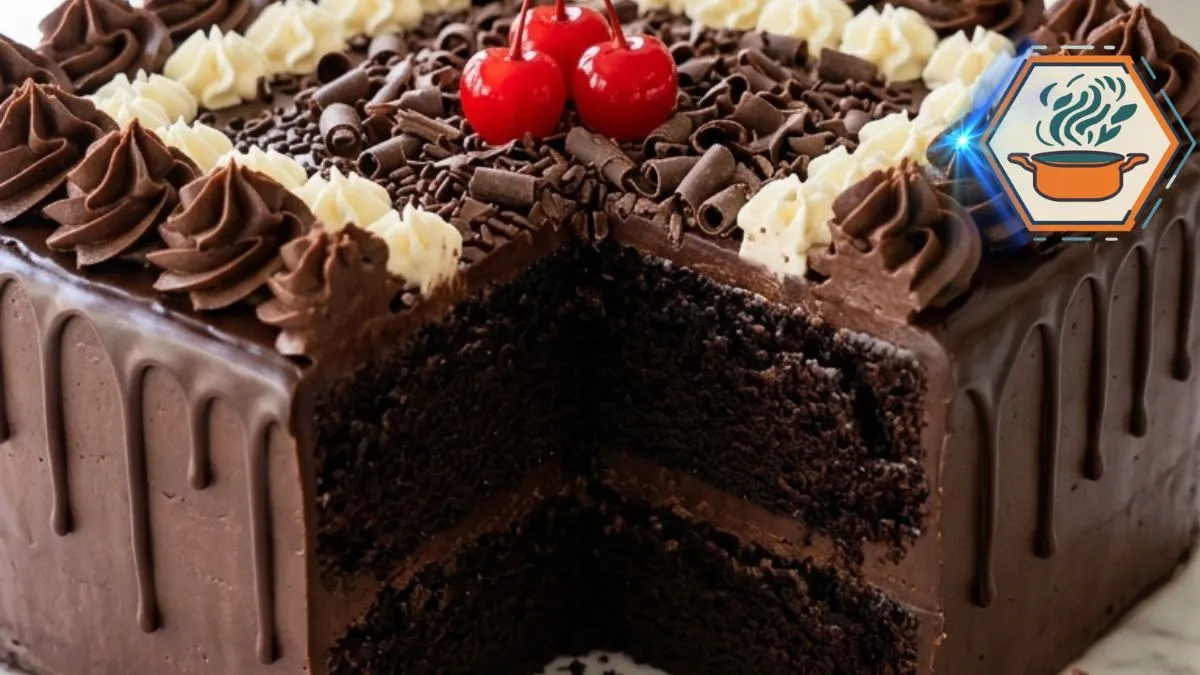
There is always a moment at a celebration when everyone notices the cake. Conversations slow down. Someone reaches for a phone. Children suddenly appear near the table. This Double Chocolate Celebration Cake was made for exactly that moment. It has soft chocolate layers, a rich ganache filling, piped chocolate and vanilla cream, chocolate curls, and bright red cherries in the center.
The dramatic finish may look like something from a bakery window, but the method is very approachable at home. The secret is not one unusual ingredient. It is getting several small details right: measuring the flour correctly, using hot coffee, letting the layers cool fully, bringing the ganache to the right consistency, and chilling the piping creams before decorating. These details make the difference between a cake that merely tastes good and one that slices beautifully.
Chocolate cake formulas often combine cocoa, buttermilk, oil, and coffee. The combination has a practical purpose. Oil helps a chocolate cake remain tender, while buttermilk contributes moisture and acidity. Coffee can deepen the perception of chocolate without necessarily making the finished cake taste strongly of coffee. Similar combinations appear in established chocolate layer-cake formulas. For more home-baking ideas, you can also visit Recipes Mind—and within the site, readers who enjoy fruit-and-chocolate desserts may like the strawberry-filled chocolate cake guide.
Affiliate disclosure: As an Amazon Associate I earn from qualifying purchases. This article may contain affiliate links to kitchen tools I find useful for preparing this recipe.
JUMP TO
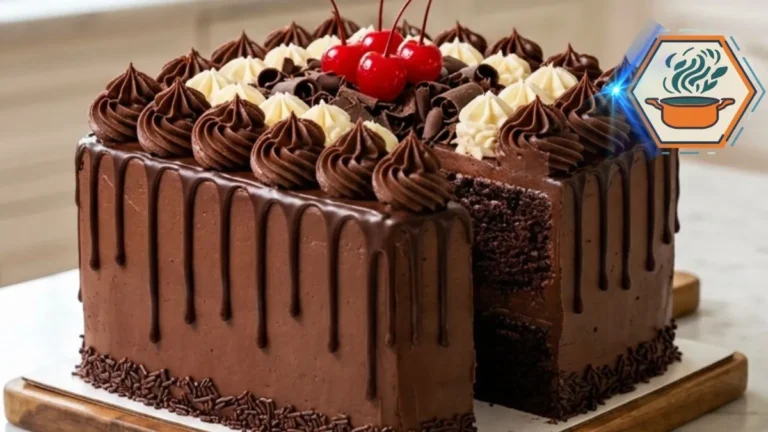
Double Chocolate Celebration Cake
A tall, moist chocolate celebration cake made with two square chocolate layers, rich semisweet chocolate ganache, vanilla cream rosettes, chocolate curls, sprinkles, and three glossy red cherries. Perfect for birthdays, family gatherings, and special occasions.
- Total Time: About 2 hours 48 minutes
- Yield: 12 servings
Ingredients
Chocolate Cake
- 2 cups (240 g) all-purpose flour
- ¾ cup (about 65–75 g) unsweetened natural cocoa powder
- 1¾ cups (350 g) granulated sugar
- 2 teaspoons baking soda
- 1 teaspoon baking powder
- ½ teaspoon fine salt
- 3 large eggs, room temperature
- 1 cup (240 ml) buttermilk, room temperature
- ½ cup (120 ml) neutral vegetable oil
- 2 teaspoons pure vanilla extract
- ¾ cup (180 ml) hot brewed coffee
Chocolate Ganache
- 12 oz (340 g) semisweet chocolate, finely chopped
- 1½ cups (360 ml) heavy cream
- 2 tablespoons (28 g) unsalted butter
Vanilla Cream
- 8 oz (225 g) full-fat block cream cheese, softened
- ½ cup (60 g) powdered sugar, sifted
- 1 cup (240 ml) cold heavy whipping cream
- 1 teaspoon pure vanilla extract
Decoration
- ½ cup chocolate sprinkles
- ¼ cup shaved dark chocolate or chocolate curls
- 3 fresh or candied red cherries with stems
- Reserved thick chocolate ganache for piping
Instructions
- Prepare the pans. Preheat the oven to 350°F (175°C). Lightly grease two 9-inch square cake pans. Line the bottoms with parchment paper and lightly grease the parchment.
- Combine the dry ingredients. Whisk the flour, cocoa powder, sugar, baking soda, baking powder, and salt in a large bowl. Break up any cocoa lumps.
- Combine the wet ingredients. In another bowl, whisk the eggs, buttermilk, vegetable oil, and vanilla until evenly combined.
- Make the batter. Add the wet mixture to the dry ingredients. Mix gently until almost combined. Slowly pour in the hot coffee while mixing. The finished batter will be fairly thin; this is expected.
- Bake. Divide the batter evenly between the two prepared pans. Bake for 28–33 minutes, or until a toothpick inserted near the center comes out without wet batter. A few moist crumbs are fine.
- Cool completely. Leave the cakes in their pans for 10–15 minutes. Turn them onto wire racks, remove the parchment, and cool completely before frosting.
- Prepare the ganache. Put the chopped semisweet chocolate in a heat-safe bowl. Heat 1½ cups heavy cream until steaming but not vigorously boiling. Pour it over the chocolate and leave undisturbed for 2 minutes.
- Finish the ganache. Stir slowly from the center outward until smooth. Add the butter and stir until glossy. Allow the ganache to cool until thick and spreadable. Reserve enough thick ganache for the dark chocolate rosettes.
- Prepare the vanilla cream. Beat the cream cheese, powdered sugar, and vanilla until smooth. Gradually add the cold whipping cream. Whip until firm enough to hold defined piping ridges. Do not continue beating unnecessarily once firm peaks form.
- Level and fill. If necessary, level the completely cooled cakes with a serrated knife. Place the first layer on a cake board. Spread an even, generous layer of thick chocolate ganache over it.
- Stack the cake. Position the second layer on top. Check that the square corners align.
- Crumb coat. Cover the cake with a thin layer of chocolate ganache/frosting to trap crumbs. Refrigerate for about 15–20 minutes.
- Apply the final coating. Cover the top and sides with another smooth layer of chocolate frosting. For a drip finish, use slightly more fluid ganache and test one drip on the back before decorating the visible sides.
- Pipe the decorations. Using a large star tip, pipe large dark chocolate rosettes around the outside border. Pipe smaller vanilla cream swirls inside the chocolate border.
- Finish the center. Add chocolate curls or finely shaved dark chocolate. Add chocolate sprinkles and place three glossy red cherries with stems in the center.
- Chill and serve. Refrigerate briefly to stabilize the decorations. Before serving, allow the cake to lose some of its refrigerator chill so the chocolate cake and ganache have a softer texture. Slice with a clean, sharp knife.
Notes
- Do not add extra flour because the batter looks thin. A relatively fluid batter is expected after adding the coffee.
- Use natural unsweetened cocoa powder for the formula as written.
- The cake layers must be completely cool before assembly.
- If the ganache runs down the cake too quickly, it is too warm.
- If the ganache is too firm to spread, allow it to soften at room temperature.
- Cold heavy cream is important for stable vanilla piping.
- If either piping mixture loses definition, chill it for 10–15 minutes before continuing.
- Test the chocolate drip on the back of the cake first.
- Store the finished cake covered in the refrigerator because the decoration contains cream cheese and whipped cream.
- For cleaner slices, warm a sharp knife, dry it, cut, and clean it between portions.
- Prep Time: 45 minutes
- Additional Cooling/Chilling Time: 1 hour 30 minutes
- Cook Time: 28–33 minutes
- Category: Dessert
- Method: Baking
- Cuisine: American
Why This Double Chocolate Celebration Cake Works
Imagine cutting through that first corner.
The knife passes through a soft coating of chocolate, then through two dark cake layers separated by a thick chocolate filling. On top are deep chocolate rosettes, pale vanilla swirls, curls of chocolate, and glossy cherries.
The cake gets its character from several contrasting textures.
You have a moist chocolate crumb. Then there is silky semisweet chocolate ganache. The cream cheese mixture adds a lighter, slightly tangy note. Chocolate shavings add texture, while the cherries provide color and a fresh visual contrast.
Hot coffee is especially useful here. Cocoa already provides the main chocolate character, so the coffee is supporting it rather than turning the recipe into a coffee cake. This coffee-and-cocoa pairing is also found in well-established chocolate layer cake recipes.
Buttermilk has another job. Its acidity works well in a batter containing baking soda. It also contributes to a tender texture.
Finally, vegetable oil is used instead of relying entirely on butter. Because oil remains liquid at room temperature, the crumb stays pleasantly soft after the cake has cooled.
Ingredients You Will Need
For the chocolate cake layers:
- 2 cups (about 240 g) all-purpose flour
- ¾ cup (about 65–75 g) unsweetened cocoa powder
- 1¾ cups (350 g) granulated sugar
- 2 teaspoons baking soda
- 1 teaspoon baking powder
- ½ teaspoon fine salt
- 3 large eggs, at room temperature
- 1 cup (240 ml) buttermilk, at room temperature
- ½ cup (120 ml) neutral vegetable oil
- 2 teaspoons pure vanilla extract
- ¾ cup (180 ml) hot freshly brewed coffee
For the chocolate ganache and frosting:
- 12 oz (340 g) good-quality semisweet chocolate, finely chopped
- 1½ cups (360 ml) heavy cream
- 2 tablespoons (28 g) unsalted butter
For the vanilla cream piping:
- 8 oz (225 g) full-fat block cream cheese, softened but not warm
- ½ cup (60 g) powdered sugar, sifted
- 1 cup (240 ml) cold heavy whipping cream
- 1 teaspoon vanilla extract
For decorating:
- ½ cup chocolate sprinkles
- ¼ cup finely shaved dark chocolate or chocolate curls
- 3 fresh or candied red cherries with stems
- Extra chocolate ganache for the dark rosettes
Choose Your Cocoa Carefully
Use unsweetened cocoa rather than sweetened drinking chocolate.
For the most predictable rise with this particular baking-soda-based formula, natural unsweetened cocoa is the safer choice. Dutch-process and natural cocoa do not always behave identically in recipes because their acidity differs.
Also measure cocoa carefully. Too much can make a cake dry. For the most repeatable results, I prefer using a digital kitchen scale for the flour, cocoa, chocolate, and divided cake batter.
Equipment
You do not need professional bakery equipment, but a few tools make the job much easier:
- Two 9-inch square cake pans are ideal for keeping the layers even and recreating the tall geometric shape of this cake. If you bake layer cakes often, a sturdy set of square pans can make portioning and stacking much easier.
- Parchment paper
- Two large mixing bowls
- Whisk
- Silicone spatula
- Wire cooling rack
- Offset spatula
- Piping bags
- Large open-star piping tip
- Cake board or flat serving plate
- Digital kitchen scale, preferably
- Serrated knife
The square pans matter if you want the distinctive geometric appearance shown in this cake.
How to Make the Chocolate Cake Layers
Preheat your oven to 350°F (175°C).
Grease two 9-inch square pans lightly. Cut parchment to fit the bottoms and place it inside each pan. Grease the parchment very lightly as well.
Do not skip this preparation. A moist chocolate cake can stick easily.
In a large bowl, whisk together the flour, cocoa powder, sugar, baking soda, baking powder, and salt.
Break up every visible cocoa lump.
In another bowl, whisk the eggs, buttermilk, vegetable oil, and vanilla until combined.
Pour the wet ingredients into the dry mixture. Mix gently until most of the dry streaks disappear.
Now add the hot coffee gradually.
At first, the batter may look much thinner than a traditional butter cake batter. That is normal. Do not add extra flour.
Mix only until smooth.
Overmixing after the flour has been hydrated can work against the tender texture you want.
Divide the batter evenly between your prepared pans. A kitchen scale is useful here because equal amounts of batter produce layers of similar height.
Bake for approximately 28–33 minutes.
Start checking around 28 minutes because ovens vary.
Insert a thin skewer or toothpick near the center. You want it to emerge without wet batter. A few moist crumbs are fine.
Do not keep baking simply because you expect the tester to be perfectly dry. Overbaking is one of the easiest ways to lose the moist texture we worked to create.
Cool the cakes in their pans for about 10–15 minutes. Carefully turn them onto a wire rack and remove the parchment.
Then leave them alone.
They must be completely cool before frosting.
How to Make Silky Chocolate Ganache
While the cakes cool, finely chop the semisweet chocolate and place it in a heat-safe bowl.
Heat 1½ cups of heavy cream in a saucepan until it is steaming and hot around the edges. It should not be aggressively boiling.
Pour the hot cream over the chocolate.
Do not immediately start stirring.
Wait about two minutes. This gives the heat time to soften the chocolate evenly.
Begin stirring slowly from the center. Gradually work outward until the mixture becomes dark, smooth, and glossy.
Add the butter and stir until incorporated.
This basic technique of pouring hot cream over chocolate and allowing it to sit before stirring is also used by experienced baking sources such as King Arthur Baking.
Now comes an important detail that the short version of this recipe can easily overlook:
Hot ganache cannot be used as thick cake frosting.
Let it cool until it reaches a spreadable consistency.
Depending on your kitchen temperature, this may take some time. You can refrigerate it briefly, checking and stirring regularly.
If it becomes too firm, allow it to stand at room temperature.
You need two textures from the chocolate mixture: a spreadable consistency for filling and covering the cake, and a firmer consistency for those sharply defined chocolate rosettes.
Make the Vanilla Cream
Place the softened cream cheese, powdered sugar, and vanilla in a chilled mixing bowl.
Beat just until smooth.
Pour in the cold heavy whipping cream gradually while beating.
Continue whipping until the mixture forms firm peaks and can hold the ridges made by a piping tip.
Stop once it is stable.
Overbeating can cause problems with cream-based frostings.
If the cream feels too soft for clean piping, refrigerate it for 10–15 minutes before trying again.
This small chilling step is important if you want the pale rosettes to resemble the defined decorations on the finished cake.
Assemble the Cake
Place your first completely cooled square layer onto a cake board or serving plate.
If the cake has formed a noticeable dome, carefully level it with a serrated knife. A flat foundation makes the final cake much easier to decorate.
Spread a generous layer of thick chocolate ganache across the first cake. A small offset spatula makes it much easier to push the ganache into the corners without tearing the soft crumb.
Keep the filling reasonably even, especially near the corners.
Position the second layer directly over it.
Look at the cake from every side before pressing down. Square cakes make poor alignment particularly noticeable.
Apply a thin first coating of chocolate frosting to trap loose crumbs.
Chill the cake for about 15–20 minutes.
Then apply the final chocolate coating over the top and sides. Smooth it with an offset spatula.
For the chocolate drip effect, use ganache that flows slowly rather than running like warm syrup. Test one drip on the back of the cake first. If it races to the bottom, the ganache is too warm.
Recreate the Celebration-Cake Decoration
This is where the cake gets its signature appearance.
Transfer the firmer chocolate frosting to a piping bag fitted with a large star piping tip. A wide star tip gives the chocolate rosettes their deep, defined ridges and makes it easier to reproduce the border shown on this cake.
Pipe large dark chocolate rosettes around the outside edge of the square cake. Keep their size and spacing as consistent as possible.
Fill another piping bag with the vanilla cream.
Pipe smaller pale swirls inside the chocolate border. The alternating dark and light piping creates the strong geometric look that makes this cake so striking.
Scatter shaved dark chocolate and small chocolate curls through the center.
Add a restrained amount of chocolate sprinkles rather than covering every visible surface.
Finally, place three glossy red cherries in the center, preferably with their stems attached.
The red cherries against the brown and ivory frosting become the focal point.
For another decorative cake idea using chocolate and fruit, see Recipes Mind’s strawberry-filled chocolate cake article.
The Small Details That Make a Big Difference
This cake is not difficult, but timing matters.
The most useful rules are:
- Bring the eggs and buttermilk close to room temperature before mixing.
- Keep the whipping cream cold.
- Never frost warm cake layers.
- Let ganache thicken before filling the cake.
- Chill soft frosting before piping.
- Use a crumb coat before the final chocolate layer.
- Test the chocolate drip before decorating the visible sides.
- Chill the assembled cake before making the final cut.
- Use a clean, sharp knife for neat slices.
One more detail matters when serving.
A cake containing cream cheese frosting should be kept refrigerated rather than treated like an ordinary unfrosted cake; USDA food-safety guidance distinguishes cakes with cream cheese frosting or cream fillings from ordinary baked cakes in its refrigeration guidance.
How to Get Clean Cake Slices
After decorating, refrigerate the finished cake briefly so the layers and frosting become stable.
When you are ready to serve, let it sit at room temperature for a short period so the chocolate frosting begins to soften.
Use a long, sharp knife.
Warm the blade under hot water, dry it completely, then make the cut. Clean and warm it again between slices.
King Arthur Baking likewise recommends warming the knife for cleaner cuts through chocolate glaze.
That extra minute of work makes the cross-section much prettier.
Common Mistakes to Avoid
My cake is dry.
The most likely causes are excess flour, excess cocoa, or overbaking. Weigh the flour when possible and begin checking before the maximum baking time.
My ganache is running off the cake.
It is probably too warm. Let it cool and thicken.
My ganache became too hard.
Allow it to soften gradually at room temperature.
My cream rosettes collapse.
Your cream may be too warm or insufficiently whipped. Chill the mixture and piping bag briefly.
My layers slide sideways.
The filling may be too soft. Chill it until it can support the weight of the upper layer.
My frosting contains crumbs.
Use a thin crumb coat first, refrigerate the cake, then add the final coating.
My cake has a large dome.
Check your oven temperature and avoid overfilling the pans. If necessary, level cooled layers before assembly.
Make It Ahead
A celebration cake becomes much easier when you divide the work.
Bake the chocolate layers first. Once completely cool, wrap them well so they do not dry out.
The ganache can also be prepared ahead and brought back to a workable consistency before assembly.
Decorate the cake after the layers are cold and stable.
This approach means you are not trying to bake, cool, fill, frost, and decorate a tall cake while guests are arriving.
Frequently Asked Questions
What makes a chocolate cake moist?
Fat, liquid, correct flour measurement, and careful baking all matter. In this recipe, vegetable oil and buttermilk contribute to the soft texture. Avoid overbaking.
Why add coffee to chocolate cake?
Coffee supports the roasted notes already present in cocoa and can make the chocolate taste deeper. Similar chocolate cake formulas pair hot coffee with cocoa and buttermilk.
Will this cake taste like coffee?
Not strongly. Chocolate remains the dominant flavor. If you are especially sensitive to coffee flavor, use a mild brew rather than espresso.
Can I make Double Chocolate Celebration Cake ahead of time?
Yes. In fact, separating baking and decorating into different sessions can make assembly easier. Cool and wrap the cake layers well before storing them.
Why does ganache need to cool before frosting?
Freshly made ganache is fluid. Cooling allows the chocolate and cream mixture to thicken until it can stay on the sides of the cake and hold decorative shapes.
How do I get defined chocolate rosettes?
Use cool, thick frosting and a large star tip. If the ridges disappear immediately after piping, refrigerate the frosting for about 10–15 minutes and test again.
How should I store this cake?
Because this version includes a cream cheese and whipped-cream decoration, store the finished cake covered in the refrigerator. For the best eating texture, allow an individual serving to lose some of its refrigerator chill before eating rather than serving the chocolate layers ice-cold. USDA guidance specifically treats cream-cheese-frosted or cream-filled cakes differently from ordinary baked cakes for refrigeration purposes.
A Cake Worth Gathering Around
The best part of this Double Chocolate Celebration Cake happens after all the decorating is finished.
The ganache has settled. The rosettes are holding their sharp ridges. Three cherries sit brightly against the chocolate curls. Then the first slice comes away and reveals those dark, soft layers and thick chocolate filling.
It looks elaborate, yet every part comes from a manageable technique.
Bake the layers carefully. Let them cool. Give the ganache time to reach the right texture. Keep the piping cream cold. Decorate patiently.
That is how a bowl of cocoa, flour, chocolate, cream, and a few cherries becomes the cake everyone was waiting to cut.