
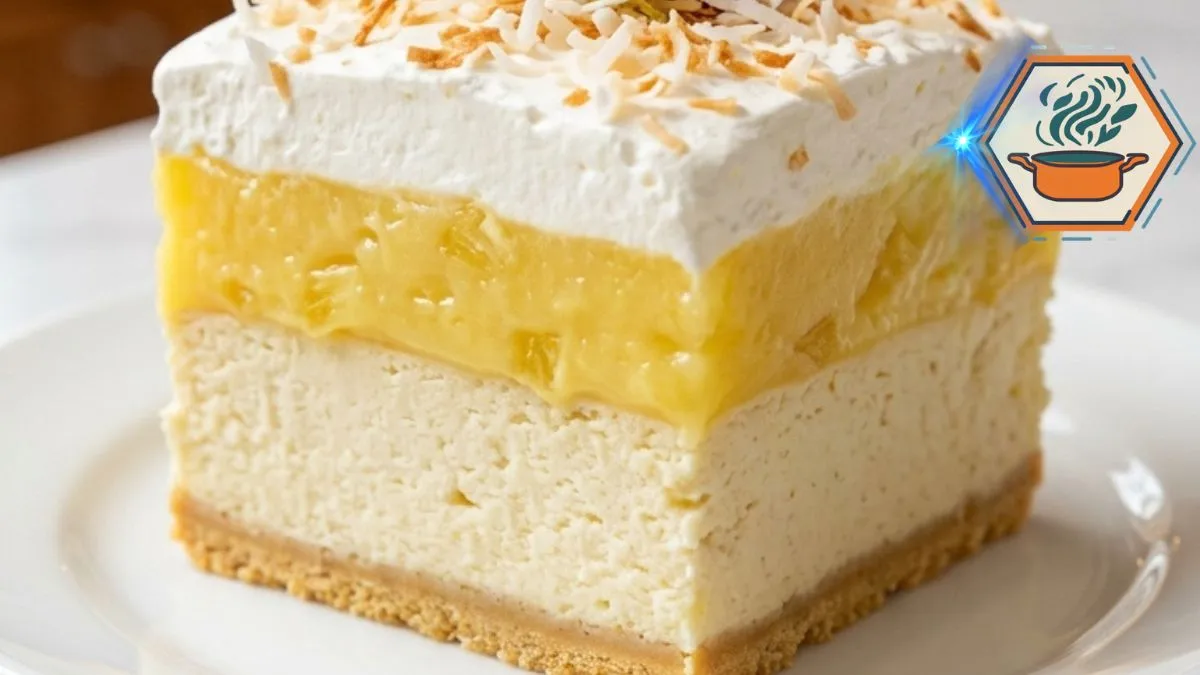
The first spoonful of Coconut Pineapple Banana Pudding Lush feels like several familiar desserts meeting in one cold, creamy square. There is a firm vanilla wafer crust at the bottom. Above it comes a soft banana cheesecake layer, fresh banana, pineapple vanilla pudding, coconut, and a cloud of whipped topping. Each layer has its own texture, yet they come together after several hours in the refrigerator.
Banana pudding has a long history in American home cooking and has become especially connected with Southern food traditions. Its familiar combination of bananas, creamy pudding, and wafers makes a natural starting point for this tropical variation. For readers interested in food safety when preparing chilled desserts, the USDA food safety guidance recommends keeping the refrigerator at 40°F (4°C) or below and refrigerating perishable foods promptly.
This version adds crushed pineapple and toasted coconut while keeping the easy, make-ahead character people love about banana pudding. Because cream cheese, milk, and whipped topping are refrigerated ingredients, the finished dessert should stay cold. The FDA food storage guidance also advises following the two-hour rule for foods that require refrigeration.
What makes this recipe special is not simply the tropical flavor. It is the contrast. The base is compact and buttery. The cheesecake layer is smooth. Banana adds fresh fruit flavor. Pineapple gives the pudding a bright note. Toasted coconut adds a light chew and nutty aroma. The white whipped topping finishes the dessert with the clean layered appearance shown in our inspiration.
And there is no oven required for the assembled dessert.
JUMP TO
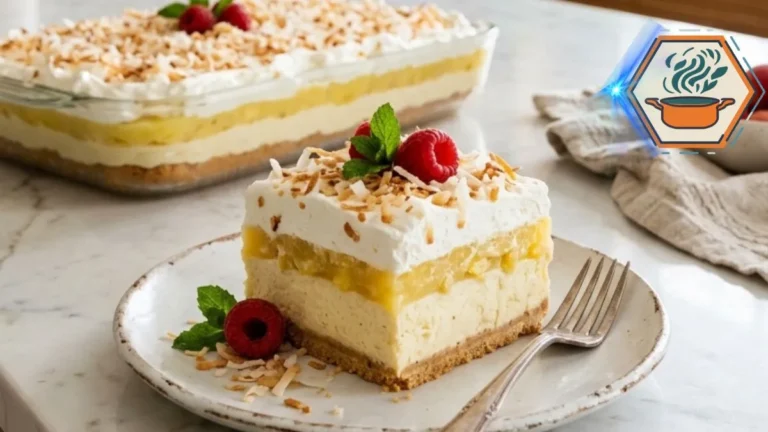
Coconut Pineapple Banana Pudding Lush
A creamy no-bake Coconut Pineapple Banana Pudding Lush with a firm vanilla wafer crust, banana cheesecake, fresh bananas, pineapple vanilla pudding, toasted coconut, and fluffy whipped topping.
- Total Time: 6 hours 30 minutes
- Yield: 15 servings
Ingredients
Vanilla Wafer Crust
2 1/2 cups finely crushed vanilla wafers
1/2 cup (113 g) unsalted butter, melted
1/8 teaspoon fine salt
2 tablespoons finely chopped sweetened shredded coconut, optional
Banana Cheesecake Layer
16 oz (454 g) full-fat block cream cheese, softened
1 cup (120 g) powdered sugar
1 teaspoon vanilla extract
2 medium ripe bananas, mashed
8 oz (225 g) whipped topping, thawed
Fresh Banana Layer
2 medium ripe but firm bananas, sliced into 1/4-inch rounds
Tropical Pudding Layer
2 boxes (3.4 oz/96 g each) instant vanilla pudding mix
3 cups (710 ml) cold whole milk
1 cup crushed pineapple, thoroughly drained
1 cup toasted sweetened shredded coconut, divided
Top Layer
8 oz (225 g) whipped topping, thawed
Optional Garnish
Fresh banana slices
Well-drained pineapple chunks
Toasted shredded coconut
Crushed vanilla wafers
Maraschino cherries, drained and patted dry
Fresh mint leaves
Instructions
1. Combine the finely crushed vanilla wafers, melted butter, salt, and optional finely chopped coconut. Stir until the crumbs are evenly moistened.
2. Transfer to a 9×13-inch baking dish. Press the crumbs very firmly into an even layer using the flat bottom of a measuring cup.
3. Refrigerate the crust for 20–30 minutes.
4. Beat the softened cream cheese until completely smooth. Gradually beat in the powdered sugar, then mix in the vanilla extract.
5. Add 2 mashed bananas and mix just until combined.
6. Gently fold in 8 oz of thawed whipped topping. Spread the banana cheesecake mixture evenly over the chilled crust.
7. Arrange 2 sliced bananas in an even layer over the cheesecake filling.
8. In a separate bowl, whisk both packages of instant vanilla pudding mix with 3 cups of cold whole milk until thickened.
9. Gently fold the thoroughly drained crushed pineapple and 1/2 cup toasted coconut into the pudding.
10. Spoon the pineapple pudding over the banana layer. Spread gently into an even layer without disturbing the filling underneath.
11. Spread the remaining 8 oz whipped topping evenly over the pudding.
12. Sprinkle with some of the remaining toasted coconut.
13. Cover and refrigerate for at least 6 hours. Overnight chilling gives the dessert a firmer texture and cleaner slices.
14. Just before serving, garnish with fresh banana slices, well-drained pineapple, toasted coconut, crushed vanilla wafers, maraschino cherries, and fresh mint if desired.
15. Slice with a clean, sharp knife and serve well chilled.
Notes
Drain the pineapple thoroughly. Excess juice can make the pudding layer too loose.
Use full-fat block cream cheese for the most stable cheesecake layer.
Use instant vanilla pudding mix, not cook-and-serve pudding.
The recipe requires 16 oz of whipped topping in total: 8 oz for the banana cheesecake layer and 8 oz for the top.
If the vanilla wafer crust still feels dry and does not hold together when firmly squeezed, add 1 additional tablespoon of melted butter. Wafer brands vary.
Press the crust firmly with the flat bottom of a measuring cup. This is important for clean slices.
Use cold whole milk when preparing the pudding.
Add decorative banana slices shortly before serving because cut bananas naturally brown over time.
Pat pineapple chunks and maraschino cherries dry before using them as garnish.
Chill for at least 6 hours. Overnight is preferable when clean, defined layers are important.
Keep the finished dessert refrigerated at 40°F (4°C) or below.
- Prep Time: 30 minutes
- Cook Time: 0 minutes
- Category: Dessert
- Method: No-bake
- Cuisine: American / Southern-Inspired
- Diet: Vegetarian
What Is Coconut Pineapple Banana Pudding Lush?
Coconut Pineapple Banana Pudding Lush is a chilled layered dessert made in a 9×13-inch dish.
You may also see desserts in this family described as dessert lush, pudding lush, layered pudding dessert, dessert lasagna, or no-bake pudding dessert. The names differ, but the basic idea is similar: several contrasting creamy and crumbly layers are chilled together and cut into squares.
Our version combines elements of classic banana pudding and tropical pineapple-coconut desserts.
The layers are:
- A compact vanilla wafer crust
- Creamy banana cheesecake filling
- Fresh banana slices
- Thick pineapple vanilla pudding
- Toasted coconut
- Whipped topping
- Pineapple, coconut, wafer crumbs, cherries, banana, and mint for decoration
The result is rich, so you do not need an enormous portion. A 9×13-inch pan can make about 12 generous squares or 15 smaller portions.
It is a useful recipe for summer gatherings because the dessert is served cold. It also works well for Easter, Mother’s Day, birthdays, family gatherings, picnics, and potlucks where refrigeration is available.
Why This Coconut Pineapple Banana Pudding Lush Works
Layered no-bake desserts look simple. The difficult part is controlling moisture.
Pineapple contains a lot of liquid. Bananas soften as they sit. Pudding needs the right milk-to-mix ratio. A crumb crust can fall apart if it is too dry. Cream cheese can form lumps if it is too cold.
Those small details matter.
This recipe deals with each one separately.
The pineapple is thoroughly drained. Excess juice can loosen the pudding and make clean squares difficult.
The cream cheese is softened before mixing. This produces a much smoother cheesecake layer.
The crust is firmly compressed. Simply scattering buttered crumbs into the pan will not give the same result.
The bananas are placed away from the crust. This helps protect the crumb base from fruit moisture.
The dessert gets a full chilling period. Six hours is the minimum. Overnight chilling gives the layers more time to firm.
This is also why you should resist cutting it after only an hour or two. It may taste good, but it will not have the neat layered appearance we want.
If you enjoy fruit-based desserts, our guide to what strawberry puree is made of explains another useful way fruit can be incorporated into desserts.
Ingredients You Will Need
For the Vanilla Wafer Crust
- 2½ cups finely crushed vanilla wafers, about 250–275 g depending on the brand
- ½ cup (113 g) unsalted butter, melted
- 2 tablespoons sweetened shredded coconut, finely chopped, optional
- ⅛ teaspoon fine salt
The salt is a small addition, but it balances the sweetness of the wafers and filling.
The optional coconut adds another tropical note. Keep it finely chopped so the base remains compact.
For the Banana Cheesecake Layer
- 16 oz (454 g) full-fat block cream cheese, softened
- 1 cup (120 g) powdered sugar
- 1 teaspoon vanilla extract
- 2 medium ripe bananas, mashed
- 8 oz (about 225 g) thawed whipped topping
Use bananas that are ripe and flavorful but not watery or heavily overripe.
For the most stable filling, choose block cream cheese rather than whipped cream cheese.
For the Fresh Banana Layer
- 2 medium bananas, sliced into approximately ¼-inch rounds
This is one detail missing from the original method.
Mashed banana flavors the cheesecake. Sliced banana gives the finished dessert the recognizable fruit pieces associated with banana pudding.
For the Tropical Pudding Layer
- 2 boxes (3.4 oz/96 g each) instant vanilla pudding mix
- 3 cups (710 ml) cold whole milk
- 1 cup crushed pineapple, very well drained
- 1 cup toasted sweetened shredded coconut, divided
Use instant vanilla pudding rather than cook-and-serve pudding unless you intentionally reformulate the recipe.
Cold whole milk gives the layer a rich texture.
For the Top Layer
- 8 oz (about 225 g) thawed whipped topping
This additional tub needs to be listed separately. The original recipe mentions remaining whipped topping at the finishing stage even though its ingredient list provides only the 8 oz used in the cheesecake layer.
For a clear and repeatable recipe, you need 16 oz total whipped topping:
- 8 oz for the cheesecake layer
- 8 oz for the top
Optional Decoration
- Fresh banana slices
- Small pineapple chunks, well drained
- Toasted shredded coconut
- Crushed vanilla wafers
- Maraschino cherries, drained and patted dry
- Fresh mint leaves
- Whipped cream rosettes
Add the most moisture-sensitive decorations shortly before serving.
Equipment
You do not need specialized baking equipment.
Have ready:
- 9×13-inch baking dish
- Large mixing bowl
- Medium mixing bowl
- Electric hand mixer or stand mixer
- Whisk
- Rubber spatula
- Measuring cups and spoons
- Fine-mesh strainer
- Flat-bottomed measuring cup or drinking glass
- Offset spatula, if available
- Sharp knife for slicing
A glass baking dish is particularly useful because you can see the layers from the side.
Before You Start: Three Details That Matter
1. Drain the pineapple more than you think you need to
Place the crushed pineapple in a fine-mesh strainer.
Let it drain for several minutes. Then press gently with the back of a spoon to remove more juice.
Do not crush it aggressively until completely dry. You still want tender pineapple pieces.
The goal is simply to stop free liquid from entering the pudding.
After draining, measure the 1 cup used in the recipe.
2. Soften the cream cheese properly
The cream cheese should be soft enough to beat smoothly but should not be warm or melted.
Cutting the blocks into cubes helps them soften more evenly.
Because this is a perishable dairy product, do not leave it sitting at room temperature for extended periods. USDA guidance states that perishable foods should generally be refrigerated within two hours, or within one hour when temperatures are above 90°F/32°C.
3. Toast and cool the coconut first
Toasting gives coconut more aroma and a slightly crisp texture.
Place it in a dry skillet over low to medium-low heat. Stir frequently until portions of the coconut become lightly golden.
Transfer it immediately to a plate.
Let it cool completely before adding it to cold pudding.
Watch it closely. Coconut can change from pale to deeply browned quickly.
How to Make Coconut Pineapple Banana Pudding Lush
Step 1: Prepare the vanilla wafer crumbs
Crush the vanilla wafers into fine crumbs.
A food processor gives the most even result. If you do not have one, put the wafers in a sturdy food-storage bag and crush them with a rolling pin.
Fine crumbs are important. Large pieces create gaps and make the base more likely to crumble when sliced.
Measure 2½ cups after crushing.
Step 2: Make the crust
Place the wafer crumbs in a bowl.
Add:
- Melted butter
- Fine salt
- Optional finely chopped coconut
Stir until every crumb looks evenly moistened.
The mixture should resemble damp sand and hold together when pressed between your fingers.
If your particular wafers are unusually dry and the mixture refuses to hold when firmly squeezed, mix in 1 additional tablespoon of melted butter. Do not automatically add it. Brands differ in fat content and crumb texture.
Transfer the mixture to a 9×13-inch dish.
Spread it evenly.
Now press it down firmly.
Use the flat bottom of a measuring cup or glass. Work across the whole surface, including the corners.
This pressure is one of the secrets to a crust that stays beneath the filling rather than turning into loose crumbs.
Refrigerate for at least 20–30 minutes.
For an entirely no-bake dessert, stop there. A baked crumb crust would be firmer, but it would change the no-bake character of this recipe.
Step 3: Beat the cream cheese
Place the softened cream cheese in a large bowl.
Beat for about 1–2 minutes, or until smooth.
Do this before adding powdered sugar.
It is much easier to remove cream cheese lumps now than after all the other ingredients have been added.
Add the powdered sugar gradually.
Beat until creamy.
Add the vanilla and mix briefly.
Step 4: Add the mashed banana
Mash two ripe bananas until mostly smooth.
A few tiny pieces are fine.
Add the mashed bananas to the cream cheese mixture.
Mix on low speed only until evenly incorporated.
The filling should now be creamy and noticeably banana flavored.
Step 5: Fold in the whipped topping
Add 8 oz of thawed whipped topping.
Do not aggressively beat it into the filling.
Use a rubber spatula and fold gently until the mixture is uniform.
This keeps more air in the filling and gives the cheesecake layer its lighter texture.
Spread it over the chilled crust.
An offset spatula works well here.
Do not press hard enough to disturb the crumbs beneath it.
Step 6: Add the fresh banana layer
Slice two bananas into approximately ¼-inch rounds.
Arrange them in a single layer over the banana cheesecake mixture.
You do not need to overlap every piece.
This creates visible and recognizable pieces of banana inside the dessert while keeping them away from the crumb crust.
If you love working with bananas in desserts, see our banana flavor boost guide for more ideas about getting stronger banana flavor without simply adding excessive fruit.
Step 7: Make the vanilla pudding
Pour 3 cups of very cold whole milk into a clean bowl.
Add both packages of instant vanilla pudding mix.
Whisk according to the package style until the mixture begins to thicken, usually around 2 minutes for many instant mixes.
Notice that two standard pudding boxes may normally call for more milk when prepared individually according to their packages. Here, the reduced amount of milk is intentional. We need a thicker filling that can support clean dessert squares.
Let the pudding stand briefly until noticeably thick.
Do not substitute warm milk.
Step 8: Add pineapple and coconut
Make certain the crushed pineapple has been thoroughly drained.
Fold 1 cup drained crushed pineapple into the thick pudding.
Add ½ cup of the toasted coconut.
Fold gently.
Do not add reserved pineapple juice.
The finished mixture should remain thick enough to sit on a spatula rather than run like a sauce.
Step 9: Build the pineapple pudding layer
Spoon the pineapple pudding over the bananas.
Start with small spoonfuls distributed across the surface. This is easier than dropping all the pudding into the center and trying to push it outward.
Gently spread it into an even layer.
The visual goal is distinct horizontal sections rather than mixed fillings.
Step 10: Add the whipped topping
Spread the second 8-oz container of whipped topping over the pudding.
Use gentle strokes.
For the cleanest finish, spread from the center toward the edges.
You should now have the main appearance of the finished Coconut Pineapple Banana Pudding Lush: golden crust, pale banana cheesecake, yellow pineapple-vanilla pudding, and a generous white topping.
Sprinkle some of the remaining toasted coconut over the surface.
Step 11: Chill for at Least Six Hours
Cover the dish without pressing plastic wrap directly into the topping.
Refrigerate for at least 6 hours.
Overnight is even better for structure.
This is not dead time.
While the dessert rests, the filling becomes colder and firmer. The crust settles. The flavors come together. The dessert also becomes much easier to cut.
Trying to rush this stage is one of the easiest ways to turn beautiful layers into a soft scoop rather than a square.
Step 12: Decorate Just Before Serving
For the look shown in our inspiration, keep the main surface white and airy.
Then add controlled amounts of:
- Toasted coconut
- Crushed vanilla wafers
- Small pineapple pieces
- Fresh banana slices
- Maraschino cherries
- Fresh mint
Pat cherries and pineapple dry before they touch the whipped topping.
Add fresh banana slices as close to serving time as practical. Bananas naturally darken after being cut.
Do not cover the entire top with decorations. Leaving plenty of white topping visible gives the dessert a cleaner appearance.
How to Get the Vanilla Wafer Crust Right
The crust deserves extra attention because it supports everything above it.
Three factors matter: crumb size, butter distribution, and pressure.
Your crumbs should be fine and fairly uniform.
Your melted butter should coat them evenly.
Finally, compact the crumbs firmly.
A common mistake is using fingertips alone. Fingers tend to create hills, gaps, and uneven pressure. The flat bottom of a measuring cup produces a much more uniform base.
The added pinch of salt also matters for flavor. This dessert contains pudding mix, sweet wafers, powdered sugar, fruit, coconut, and whipped topping. A small amount of salt keeps the base from tasting one-dimensional.
The Pineapple Rule: Less Liquid, Better Layers
One of the biggest risks in this recipe is wet pineapple.
Crushed pineapple brings both fruit and juice. That juice tastes wonderful, but it does not belong in this particular pudding layer.
Too much can make the filling soft.
This matters even more after six hours in the refrigerator because moisture continues moving between the layers.
Use a strainer and give the fruit enough time to drain.
Save the pineapple juice for another recipe rather than pouring it into the dessert.
Choosing the Best Bananas
You want ripe bananas, but there is a difference between ripe and overripe.
For the mashed banana cheesecake layer, bananas with yellow skins and some brown speckles work well. They have developed good sweetness and banana aroma.
For the sliced layer and decoration, choose slightly firmer ripe bananas.
They hold their shape better.
Very soft bananas are excellent for recipes such as our 3-ingredient banana bread guide, but they are less attractive as visible slices in a chilled layered dessert.
Why Whole Milk Is the Better Choice Here
Whole milk contributes richness while allowing instant pudding to set.
More important is the amount.
This recipe uses 3 cups for two 3.4-ounce boxes because we want the pudding thicker than a pudding meant to be eaten from a bowl.
That extra body matters once pineapple is folded in.
Avoid changing both the type and amount of milk on your first attempt. Different milk alternatives can set differently with instant pudding mixes.
Make-Ahead Instructions
This dessert is designed for advance preparation.
A practical schedule is:
- Day before serving: make the crust and all main layers.
- Cover and refrigerate overnight.
- Day of serving: add the final banana, pineapple, cherry, wafer, and mint decorations shortly before presentation.
This gives you the benefits of overnight chilling without sacrificing the fresh appearance of the garnishes.
It is particularly useful when you are preparing several dishes for a gathering.
How to Cut Clean Squares
A layered lush should show its layers.
For cleaner cuts, start with a fully chilled dessert.
Use a long, sharp knife.
Make one straight downward cut rather than sawing repeatedly through the filling.
Then wipe the blade clean.
Repeat for each cut.
For very neat presentation, a thin serving spatula can help lift each portion without damaging the crust.
Do not expect a no-bake crumb crust to behave exactly like a baked pie crust. It will remain more tender.
How to Store Coconut Pineapple Banana Pudding Lush
Keep the dessert covered and refrigerated at 40°F (4°C) or below. Both USDA and FDA guidance stress prompt refrigeration for perishable foods.
For best appearance and texture, this dessert is at its strongest during the first couple of days. Fresh bananas gradually soften and darken, wafer crumbs absorb moisture, and decorated fruit loses its freshly cut appearance.
Do not leave the pan sitting on a warm picnic or buffet table for hours. USDA guidance says perishable food should not remain unrefrigerated for more than two hours, reduced to one hour when the temperature is above 90°F (32°C).
Serve what you need and return the rest to the refrigerator promptly.
Can You Freeze It?
Freezing is not my first choice for this dessert.
The problem is quality rather than convenience.
Bananas can become softer after freezing and thawing. Creamy pudding layers can also change texture. Whipped topping itself handles freezing better than some dairy fillings, but the entire layered combination may not return to its original consistency.
For the creamy, distinct layers pictured here, refrigeration is the better choice.
Easy Flavor Variations
Once you have made the original version successfully, there are several simple ways to change it.
More coconut flavor: Add a little extra toasted coconut to the garnish rather than adding much more inside the pudding.
More pineapple: Use extra well-drained pineapple as a garnish. Avoid increasing the pineapple substantially inside the pudding unless you adjust for its added moisture.
More wafer crunch: Reserve extra vanilla wafer crumbs and sprinkle them on individual portions immediately before serving.
Individual desserts: Assemble the same components in clear cups. This is useful for parties and removes the need to cut squares.
Strawberry tropical version: Add fresh strawberry pieces at serving time. Our guide to making fruit puree can also help when planning fruit-based dessert toppings, though a wet puree should be served alongside this lush rather than mixed into its layers.
Common Mistakes to Avoid
Not draining the pineapple enough.
This can produce loose pudding and watery layers.
Using warm milk.
Instant pudding should be prepared with cold milk according to the needs of this recipe.
Starting with cold, hard cream cheese.
It can leave small lumps throughout the filling.
Using only 8 oz of whipped topping for the whole recipe.
You need 8 oz inside the banana cheesecake filling and another 8 oz for the top.
Adding decoration too early.
Banana slices brown. Wafer crumbs soften. Pineapple can release moisture.
Skipping the full chill.
Give the dessert at least six hours.
Leaving large wafer pieces in the crust.
Fine crumbs make a more stable base.
Barely pressing the crust.
Compression is essential for a sliceable crumb base.
Pouring pineapple juice into the pudding.
It can make the filling much softer than intended.
Overmixing the whipped topping.
Fold it gently into the cheesecake mixture.
What to Serve With It
This dessert is already rich, fruity, and creamy, so it works best after a relatively simple meal.
It can be served at:
- Summer cookouts
- Easter gatherings
- Mother’s Day meals
- Family reunions
- Birthday parties
- Potlucks
- Picnics with proper refrigeration
- Holiday dessert tables
Coffee is a simple pairing because its bitterness contrasts with the sweet pudding.
For a larger dessert table, consider pairing it with something that has a different texture rather than another pudding. A crisp cookie works particularly well. Our guide to the secret to crunchy cookies can help you build that contrast.
Frequently Asked Questions
What is Coconut Pineapple Banana Pudding Lush made of?
It is a layered no-bake dessert with a vanilla wafer crust, banana cream cheese filling, fresh bananas, vanilla pudding, crushed pineapple, toasted coconut, and whipped topping.
Do I have to drain crushed pineapple for banana pudding?
For this recipe, yes.
Drain it thoroughly before folding it into the pudding. Excess pineapple juice can thin the filling and make the dessert harder to slice.
How do you keep bananas from turning brown in banana pudding?
The bananas inside the dessert are protected somewhat by the surrounding creamy layers. For the garnish, slice fresh banana immediately before serving rather than several hours in advance.
Can I make Coconut Pineapple Banana Pudding Lush the night before?
Yes. In fact, overnight refrigeration works very well for the main dessert because it gives the layers plenty of time to become cold and firm.
Wait until close to serving before adding fresh banana slices and the final crunchy wafer crumbs.
Why is my pudding lush runny?
Common causes include:
- Pineapple that was not drained well
- Too much milk
- Incorrect pudding mix
- Insufficient chilling
- Warm ingredients
- Changing the pudding or milk without accounting for differences in setting
Follow the specified 3 cups of cold whole milk for two 3.4-ounce boxes of instant pudding in this recipe.
Why does my vanilla wafer crust fall apart?
The crumbs may be too coarse, the butter may not be evenly distributed, or the crust may not have been pressed firmly enough.
The crumb mixture should hold together when squeezed.
If it remains completely dry after adding the specified butter, add another tablespoon of melted butter and test it again.
Can I use fresh whipped cream instead of whipped topping?
You can make variations, but plain whipped cream is not a direct structural substitute in every chilled dessert. Commercial whipped topping contains stabilizing ingredients that help it maintain its texture for longer periods; a recent banana-pudding recipe from Delish likewise notes the structural advantage of stabilized whipped topping in that style of dessert.
If appearance and clean layers are the priority, use the whipped topping specified for your first attempt.
Can I use banana pudding mix instead of vanilla?
Yes, but it will make the banana flavor considerably stronger.
Vanilla pudding gives pineapple, coconut, and fresh banana more room to stand out.
How long does the dessert need to chill?
At least 6 hours.
For the neatest layers, prepare it the evening before and refrigerate overnight.
Can I make it without coconut?
Yes.
Leave the coconut out of both the crust and pudding. The dessert will become more like a pineapple-banana pudding lush, but the basic method still works.
What is the best way to decorate it?
Use toasted coconut and a small amount of crushed wafer across the white topping. Then add fresh banana slices, drained pineapple pieces, cherries, and mint shortly before serving.
This keeps the decoration fresh while maintaining the creamy layered appearance.
Final Kitchen Notes
The secret to a successful Coconut Pineapple Banana Pudding Lush is not adding more ingredients. It is controlling each layer.
Drain the pineapple thoroughly. Start with smooth, softened cream cheese. Use cold milk for the instant pudding. Crush the wafers finely. Press the crust firmly. Keep the fresh banana away from the crumb base. Fold rather than aggressively beat the whipped topping. Most importantly, give the finished dessert enough time in the refrigerator.
When you finally cut into it, you should see distinct layers: a compact golden vanilla wafer crust, a thick creamy banana cheesecake section, fresh banana, a yellow pineapple-vanilla pudding layer, and a fluffy white topping finished with toasted coconut and fresh tropical garnishes.
That combination gives this dessert its appeal. It looks celebratory, but the method is approachable. It can be assembled well before guests arrive, and there is no need to turn on the oven.
For more approachable desserts and cooking guides, visit RecipesMind.